We may earn money from the companies or products mentioned in this post.
Around the beginning of October we got a Wedding Announcement for my friend and old college roommate. It was one of the most unique announcements/invites I’ve ever seen. With an I spy game scattered around it, and a link to a website that had more information on the reception.
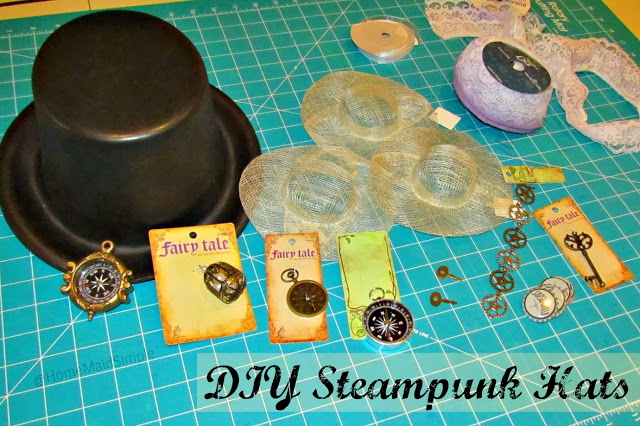
Steampunk. The theme was steampunk, and they were asking all their guests to come dressed up. Oh I was so excited! Mark has been getting into Anime shows that feature some Steampunk the last few years, and I love any reason to make something crafty. So we headed to Hobby Lobby and picked up a couple supplies.

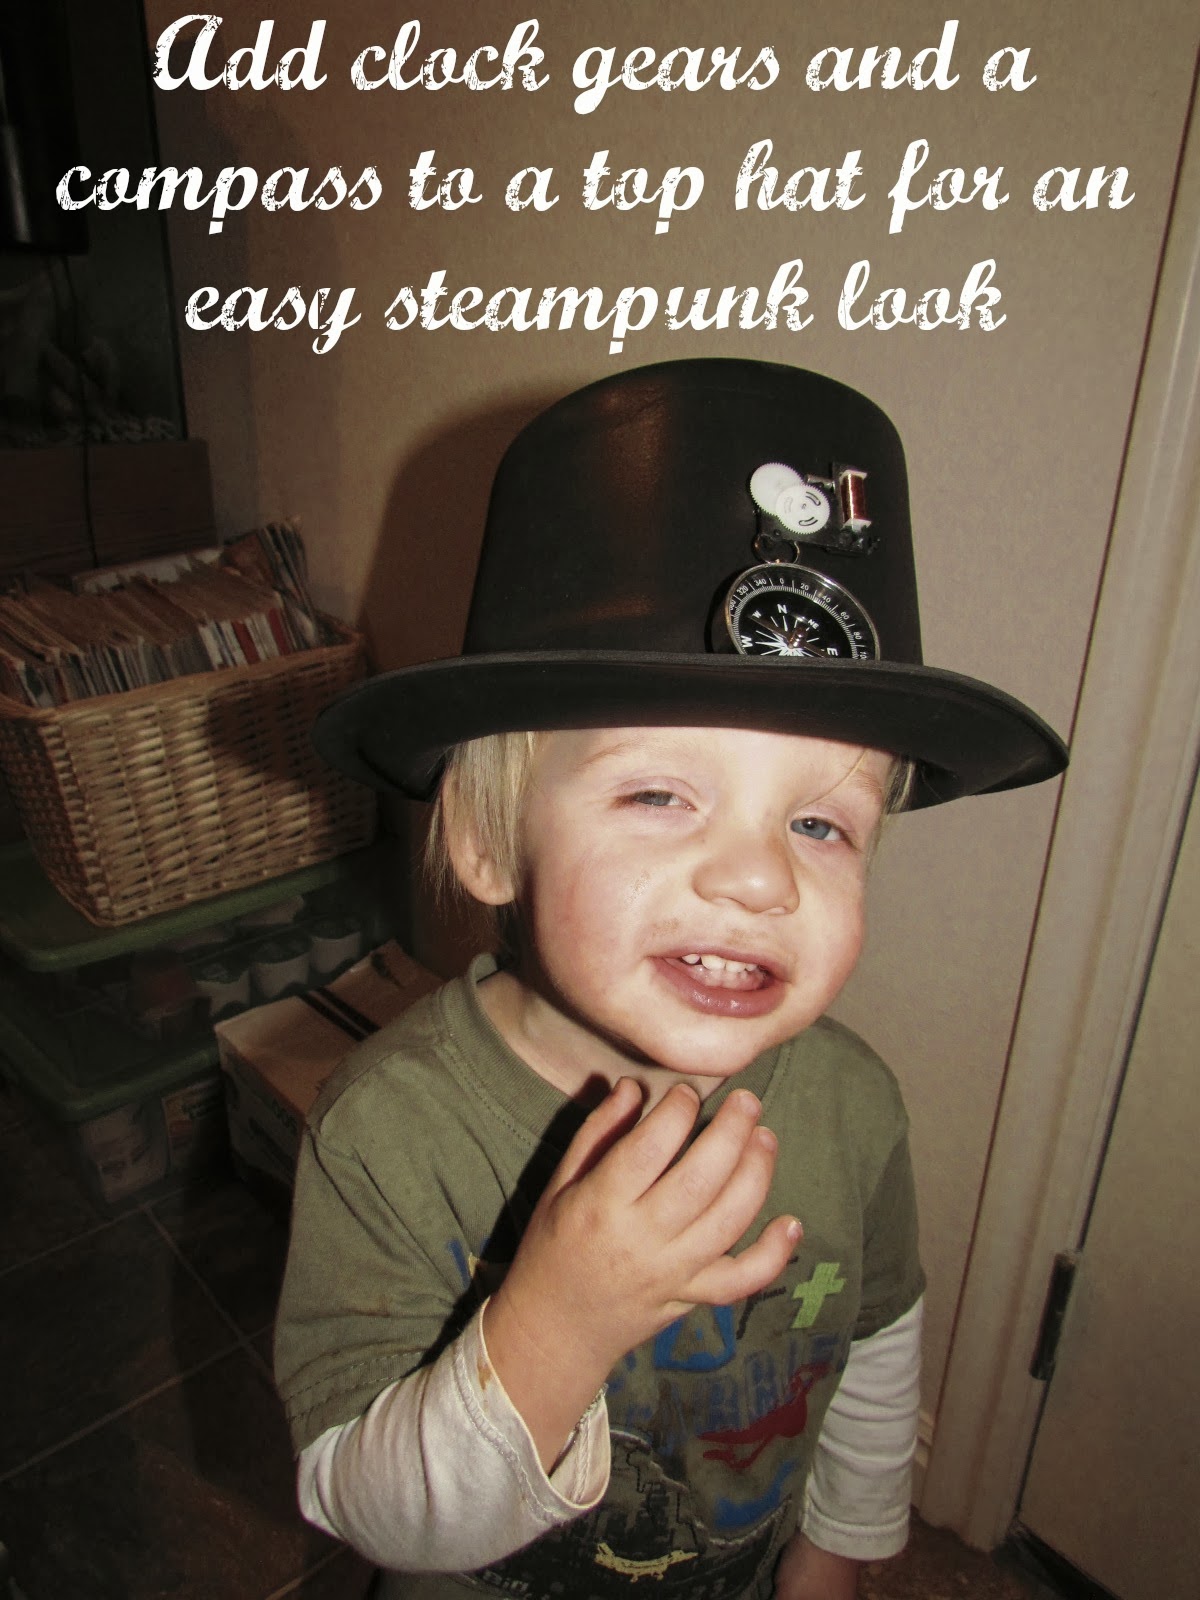
Top hats, girly hats, gears, clocks, keys and compasses. I wasn’t entirely sure what the final product was going to look like, so I played around with some different set ups, before making it permanent. The top hat for Prince L was definitely going to be the easiest to put together, so I started there.
I had an old clock that the kids had ripped the hands off of. It had a cool frame, so I had tossed it into my craft bucket (finally glad I held onto some junk). I pulled the clock out, opened up the back, and took out the whole gear works. A few of the gears started falling off though, so I had to super glue them in, but it didn’t really need to work.
Once I had the gears set into the hat, I added a compass dangling from the gears. Later, and not pictured, Mark had the brilliant idea to add some ribbon around the rim of the hat. We used some 3 inch gold/brown ribbon that really brought this piece together.
Now it was onto the girls hats. We picked up some Princess style dresses from the local thrift store, in hopes they would mostly fit into the steampunk theme. I used the colors of the dresses to create a more tailored theme for the hats.
After a lot of pinterest browsing I knew I needed to start the hats with some fabric flowers. There are a lot of tutorials out there on how to make these flowers, I used this one from Just Another Hang Up.
Hot glue the flowers onto your hat, and then add the different components you would like. This is how ours turned out
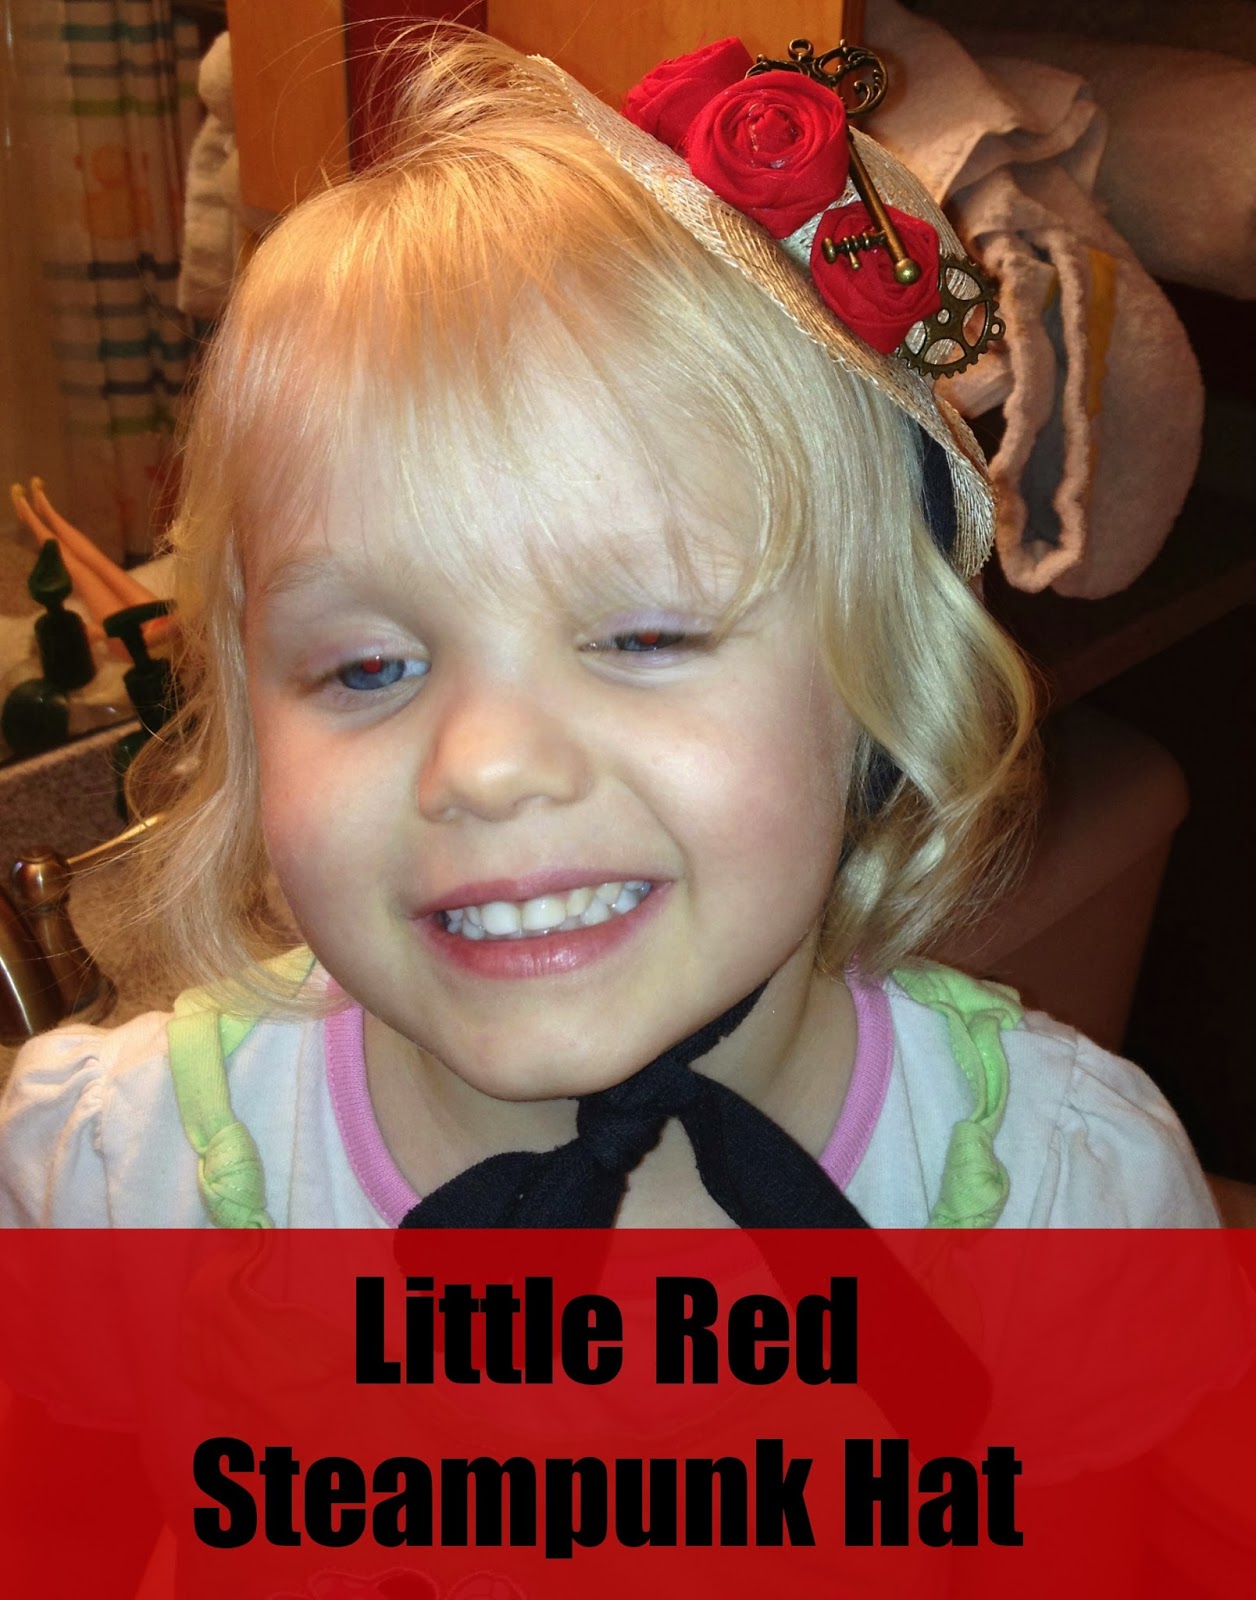
– Red Riding Hood: red flowers, key to grandma’s house and some gears.
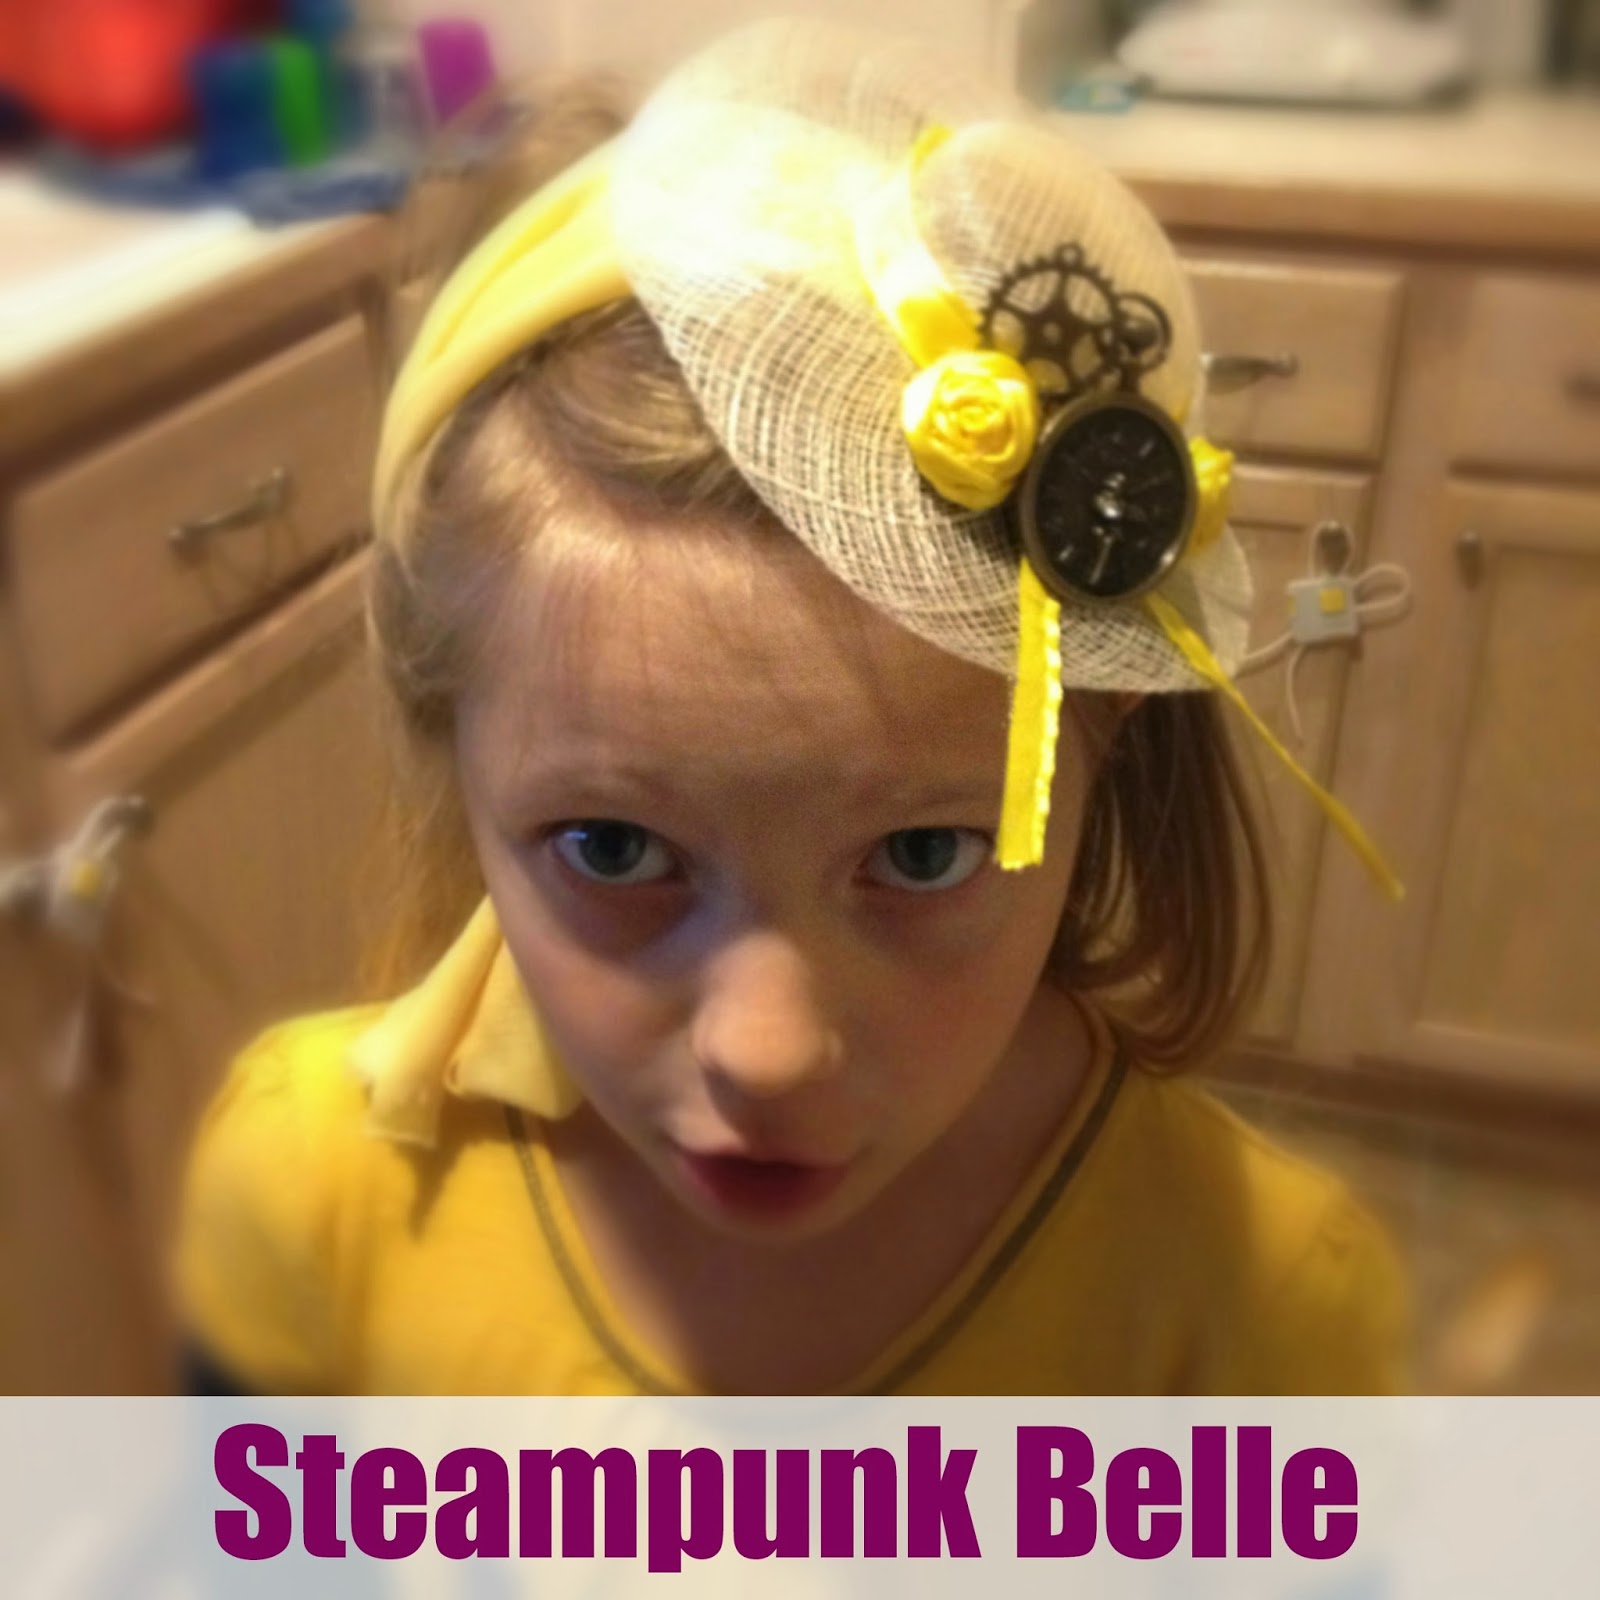
– Belle: yellow flowers, clock, and gears.

– Tiana: green flowers, a metal frog, and gears.
Once all the components were glued on, I added the ribbon to fit around the heads. This I also just hot glued onto the edges of the hat. The holes in the hat helped get the glue onto both sides of the hat, so it really stuck well.
Finally I had to come up with something for me to wear. I had the clock face left from that broken clock, but it had no hands. I remedied that by using some model plane paint (something we just had laying around the house). I removed the gear casing to add some ribbon, and then placed the gear casing back on to hold the ribbon in place.
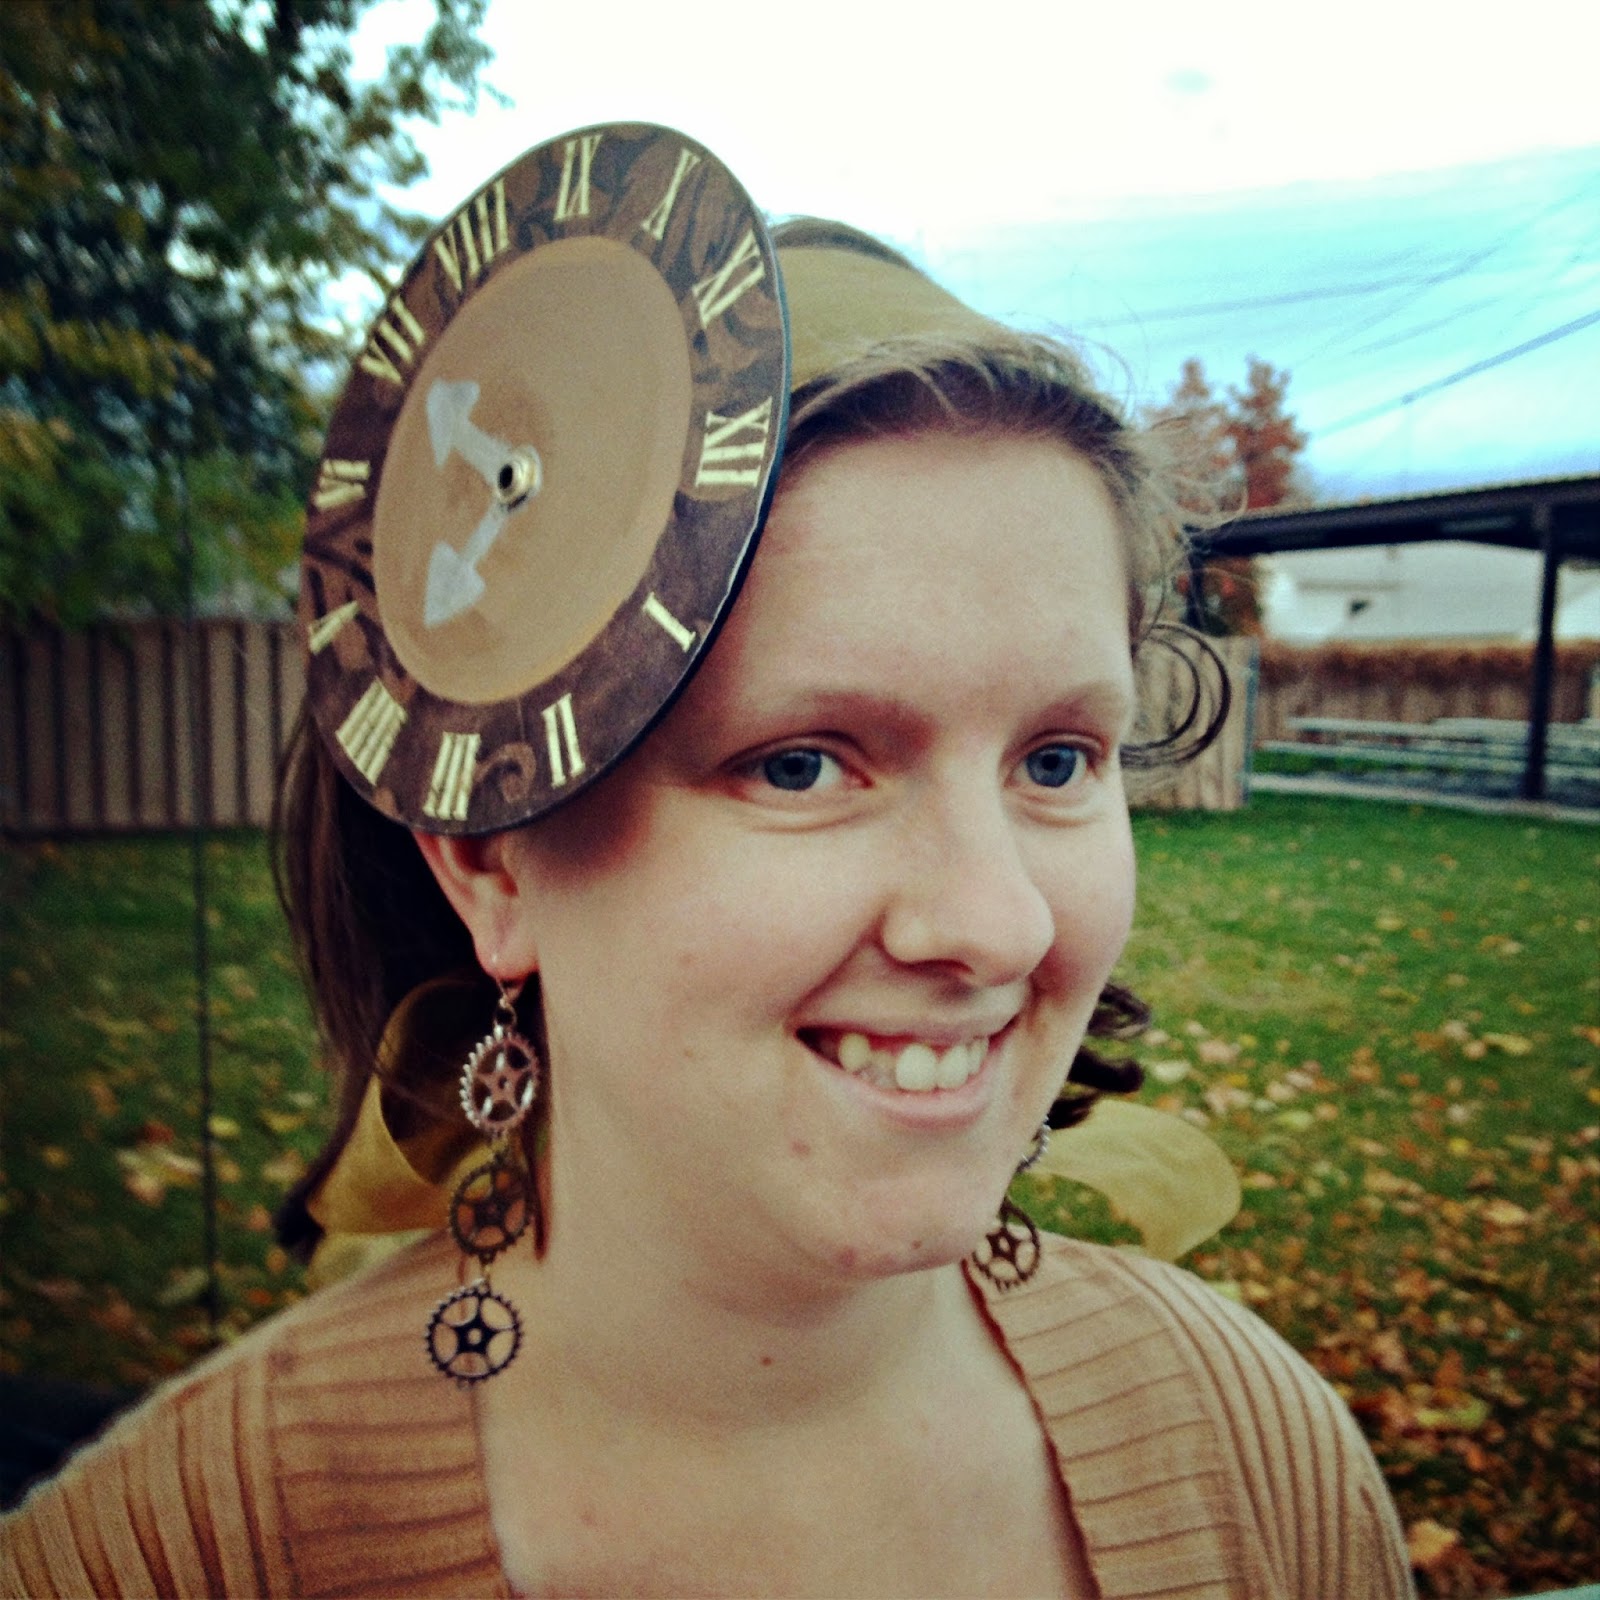
This my friends, is my new favorite dress up! Check out my earrings too! Those were extremely easy to make as well. While at Hobby Lobby I picked up some earring clips, and the string of gears. A little pliers work to unhook the gears, and re-hook them to the earring clip, and voila – new earrings! Your welcome.
So yes obviously, this was also our Halloween Costumes, but we had a fun time at the wedding reception and seeing all the other Steampunk outfits. Congrats ChaRlie on your wedding!!
Have you ever been to a themed wedding?
linked up to these Great Parties!
Leave a Reply