We may earn money from the companies or products mentioned in this post.

I’ll try and break down into easy steps for you – but please leave a comment or email if you have any questions.
Measure – You’ll want to start by doing a lot of measuring. First measure the height of your window, and how far you want the shade to reach down. Then you’ll want to unroll the current shade and measure the width. Next you’ll pick out your fabric and measure. Give yourself a 1 1/2 inch seam allowance on the sides, and a few inches on the bottom.
Cut – Cut out your fabric. Next you’ll want to roll your shade onto a cutting mat on the floor. Anchor the roller so it doesn’t get in your way while you do this. Measure from the very top of the shade down to where you want the shade to end, and then give yourself another 1-2 inches (just for good measure).
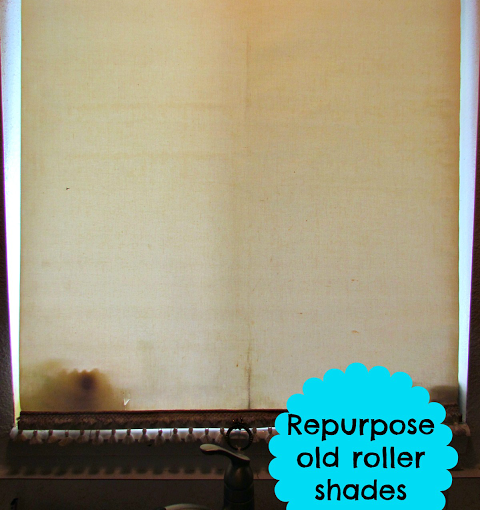
DO NOT do what I do, and just cut off the bottom. First make sure you’re shade is straight both up and down and side to side. Then go ahead and cut off any extra of the current shade (my shade reached almost to the kitchen floor. I didn’t need that much, and I wanted to get rid of the smooshed bug).

Iron, Fold, Pin, Hem – Go ahead and leave the old shade for a bit now. Take your piece of fabric and measure out the seam allowance. Fold at the 1 1/2 inch mark, and iron it down. This will create an easy line to follow for a finished hem. After ironing the seam, unfold it. Now you will fold the edge back in, but just so it lies on the ironed crease. Fold over again, and you have a nice finished edge. You only need to do this on the 2 sides and the bottom. The top can be left a raw edge. Pin the folds as you go. In the corners, turn the bottom edge in at a 45 degree angle to get a more clean and professional look – just make sure the pin goes through both edges to hold it in place.

Now you’re ready to hem it up. You’ll be sewing blindly. Just make sure you know where your 3/4 edge is on your machine, and you’ll be good to go. For my Husqvarna Viking, that put my fabric right on the edge of the presser foot.

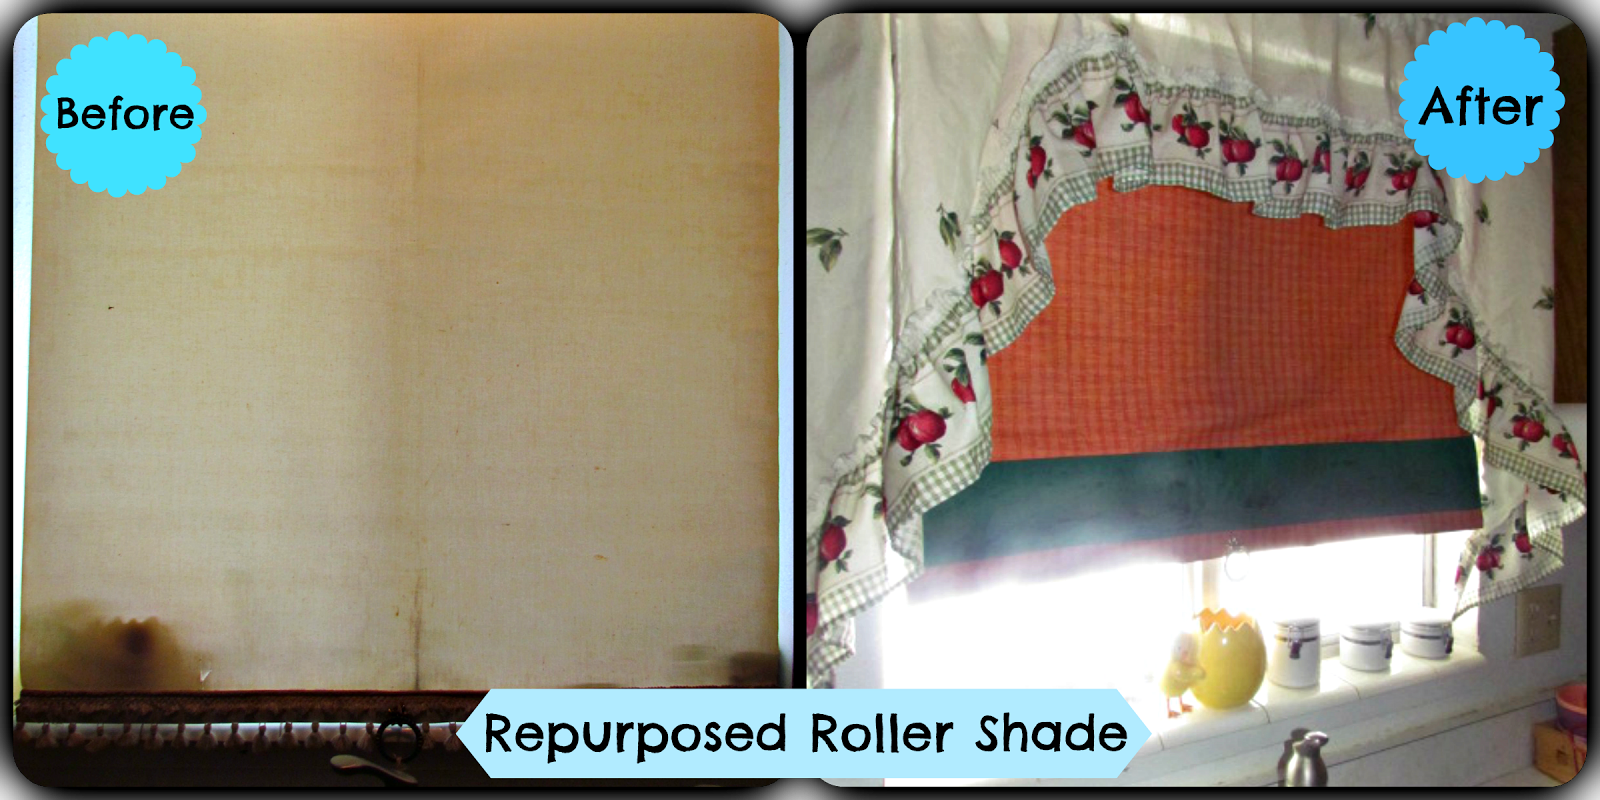
Position Fabric and Glue it on – You are almost done! With your roller anchored still, position your fabric on to the front of the shade (you would hate to hang it up, and realize you put the pretty fabric on the wrong side, wouldn’t you?).
The side edges will go right up against the side of the old shade. Only the bottom will fold under to the other side. Once you have the fabric positioned, make sure it’s laying out flat. You’ll see why a little further down…

Start with the top edge and using fabric glue, glue the edge down. Let it dry before moving down the rest of the shade. If you want, and I think if I ever do this again I will do this, use a sponge brush and smear fabric glue across the rest of the old shade. Lay down your new fabric and press flat. Let dry.
Or do what I did do, and just glue the edges…
Once the front if completely dry, flip your shade over, and turn the bottom edge over. Glue down.


Leave a Reply