Tag: how to

  • How to Start a Hobby

    How to Start a Hobby

    How to Start a Hobby

    Picking up hobbies always seems to be easier when you’re a child. When you’re in school there are so many different clubs and groups you can join to expand your interests and learn new things. However, once you’re an adult getting into a new hobby requires a bit more work.

    Hobbies are a great way to make friends, expand your knowledge and take a little time for yourself. Even though it might take a bit more time and energy to get into a new hobby, it’s definitely worth it.

    Start With Smaller Hobbies

    If you’re looking into different hobbies, go with something smaller first. Take the focus away from watching TV or sitting in front of the computer for hours. For example, you can go for walks around your neighborhood or volunteer once a week at an animal shelter. Do something that gets you away from your usual habits and gets you into your hobbies.

    Expand Your Knowledge

    Just because you’re done with your formal education doesn’t mean you have to stop learning. Many fun and exciting hobbies stem from wanting to learn new things. If you’re interested in learning new things, educational apps can be a perfect way to get started — and at no cost. Looking into classes at your local community college can also be a good place to start.

    Expand Your Knowledge
    image source

    Try Something You Wouldn’t Normally

    For many of us, venturing out of our comfort zone is a little too scary to try. However, exploring new options could lead to something you really enjoy — and you would never know you liked it if you hadn’t gone outside your comfort zone.

    Remember Your Past

    While it’s good to try new things, there’s nothing wrong with digging into your past and remembering the things you enjoyed as a child. There’s a good chance you will still enjoy the things you liked when you were younger. For example, if you were a fan of playing pretend when you were younger, joining a theater group could be good hobby for you to try.

    Start Collections

    Collecting can be an excellent and fulfilling hobby for most people. Whether you’re interested in stamps – which have become a classic pastime for a reason – action figures, comics or even antique teacups, there’s certainly something for you. Be sure to start with some research so you know what you’re getting into.

    Get Creative

    You are never too old to learn an instrument or start drawing. You can take some lessons to help learn the basics or simply try to teach yourself to the best of your abilities. Writing can also be a good way to express yourself and vent any negative emotions you may be feeling. The great thing about creative hobbies is you can express yourself in a healthy way.

    Get Creative: join a local theatrical group
    image source

    Work With Your Hands

    If you’re interested in doing more physical work, many hobbies can be suited for that. Making models — airplanes, cars, whatever you’re interested in — can keep you busy for hours and leave you with wonderful designs.

    Check Out the Community Center

    Your local taxes go toward supporting your area’s community center, so you might as well take advantage of the options they provide. There are usually a wide variety of classes you can sign up for at low cost, such as yoga, knitting or swimming. Reach out to your community center to find out how you can get started.
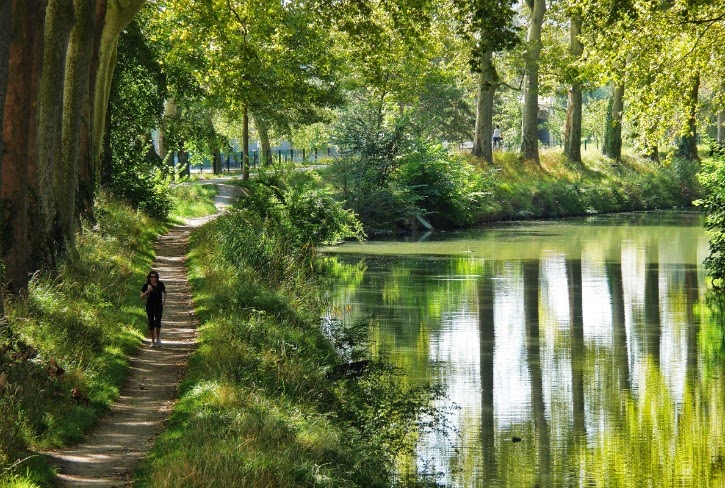
    Get Outside

    There’s nothing quite like enjoying the great outdoors, and many hobbies take that into account. Running or marathoning are good options, but make sure you work your way to the intense races. Geocaching combines the thrill from exploring and the exercise from hiking for an exciting hobby that can literally keep you on your toes.

    Get Outside
    image source

    Picking up new hobbies leads to some great experiences. You can meet people with similar interests and you’re keeping yourself busy and active.

    Kate Wilson is an outdoor lifestyle blogger who loves helping others live greener and happier lives.  For more, follow her on Twitter @kateowilson or check out her blog, This Wild Lifestyle.

     
  • How to keep cool in this Heat

    How to keep cool in this Heat

    How’s the weather where you’re at?  Are you melting yet?  I feel like I don’t need to do any kind of exercise in this heat, and I’ll still burn up enough to lose the baby weight. 
    We had some storm clouds roll in this morning, and I thought for sure we’d get some rain, and cool air. No such luck. It was cooler, than the past few days, but no rain.
    We wake up, and almost immediately turn on our swamp cooler, and fans. It would be nice if we could hold off until the afternoon, but I don’t think we’d make it. We’d be like slugs sliming our way around the house.
    Here’s a few tips to keep cool
    – ceiling fans! If you have some, use them. They will help circulate the air.
    – blinds and curtains. First thing in the morning, open the windows on the west side of your house to let in some cool air. Just make sure they’re closed and covered by noon, to avoid letting the heat in. At night open some windows to let the cool air circulate. Having curtains to block out the sun will also help block out the heat. They actually sell some curtains that have a reflecting back to push the heat away from your house.
    – Drink lots of water. Stay hydrated! 
    – Try to avoid doing laundry during the day. The washer and dryer create more heat as they run. I did a day of laundry earlier this week, and even with my ceiling fan our basement was just burning up. Now I try to get a load done in the morning, and then run one at night before I go to bed.
    – Take a cool shower. I can’t believe I’m advication cold showers, but this summer has taught me they can be quite refreshing.
    – Smoothies! I love smoothies, and they just offer such a refreshing cool summer drink.
    – If all else fails, head out of the house, and find a public building with A/C. Just hang out, and enjoy the cool air.
    I hope you are all staying cool this summer. If you have any other tips on how to stay cool, I’d love to hear them in the comments!
  • How to Pit Cherries without a Cherry Pitter

    How to Pit Cherries without a Cherry Pitter

    Happy 4th of July everyone!  It is cherry season, and I’m making a cherry pie today for our BBQ.

    Over the weekend, I went to my mom’s to help pit and can some cherries. She has a cherry pitter, but doesn’t like it. According to her, you still have to check every cherry to make sure the pit came out, and it ends up squishing the cherries more.  A neighbor recommended the following way to pit cherries.

    Youl will need:
    – a plastic straw
    – towels
    – 2 bowls

    Place the straw on top of the cherry where the stem entered it. Holding the straw over a bowl push the straw through the cherry, and watch the pit fall out. Place the cherry in a separate bowl, and continue with the rest. Sometimes the pit will just move to the side, so you may have to dig with the straw a bit, but for the most part it comes right out.
    You’ll want the towels because this does get messy. I suggest standing so your arms are above the bowls, as this will keep the cherry juice from dripping down your arms.

    
  • How to Upcycle Receiving Blankets into a Quilt

    How to Upcycle Receiving Blankets into a Quilt

    Don’t throw those old receiving blankets out just yet. So your kid outgrew these special blankets, but now you can turn them into an heirloom to grow with your kid. Upcycle receiving blanket into a quilt that your child will love to snuggle with. This post contains affiliate links and I will be compensated when you click on and purchase through them. 
    Upcycle receiving blankets into a quilt. It becomes an heirloom your child will love forever. After having 3 girls, I started accumulating pink receiving blankets. My kids grew out of them very quickly, and with Rosalina we mainly used them as burp rags instead.  For quite some time now they’ve been sitting in a closet, taking up precious space. 
     
    I was thrilled when I saw Heather from Handmade Haven had turned her receiving blankets into a baby quilt! A novel idea, I thought, and then they still sat around my house, just no longer in a closet. I finally decided the receiving blankets had to be taken care of before they were all lost.  It was time to do a little upcycling!
     

    Upcycle Receiving Blankets into a Toddler’s Quilt

    To start out, cut up your receiving blankets.  This can be done easily by folding them in half, and then cutting 2-inch strips.

    Online Quilting Class

    Next, cut through the fold so each 2-inch strip is now 2, 2-inch strips. 
     
    Now you have fun designing your quilt! Don’t worry if some pieces are longer than others you can either trim them down now or after they are sewn together. 
    If you desired you could cut your strips down further to make separate blocks, but let’s face it, I’ve got 3 kids running around, I could only keep those scissors out safely for so long.
     
    Once you’ve got your quilt designed, it’s time to start sewing! Make sure you have plenty of bobbin thread and spool thread.  Using a 1/2 inch seam start at one side of the quilt and begin sewing the strips together.
     
    Once you have it sewn, trim any edges, and dangling thread.  Iron out the seams so they lay flat going the same direction.
     
    Cut out the quilt backing – make it about 3 inches larger than your finished top.
     
    Roll out the quilt batting, and then take your new quilt top and lay it on top.  Cut the batting so it is the same size as the quilt.
     
    Lay out your quilt back, wrong side up. Lay the quilt top and batting on top with the quilt side facing up.  A simple cotton fabric works best for the backing since this is all sewn on the machine.
     
    Fold the backing over so it touches the edge of your quilt top, and then again a second time over the quilt top’s edge. Iron the edge down, then pin all three layers.
     
    Using a coordinating thread color, sew around the edge to finish your quilt. If you use fleece, remember it’s bulky, and it will “shed” into your machine. Take the time between edges to clean out your bobbin case.
     
    TIP: Most machines come with a cleaning brush, but if yours is missing like mine, a soft paint brush does the trick as well.
     
    You can make your quilt any size, I chose toddler bed size, but if you have more receiving blankets than me, you could make it bigger!