Tag: master bedroom

  • Refreshed Dresser with Trinca-Ferro

    Refreshed Dresser with Trinca-Ferro

    I received product for review. All opinions are my own. 

    When we moved to North Dakota, we had gotten rid of all our furniture. Besides our beds, we had nothing. With how frequently moves happen, it’s usually how we go. There were a few pieces that stuck around for a couple moves, but even those are long gone. One of Mark’s coworkers was kind enough to provide us with some dressers. 

    I fell in love, and knew it would be one of those permanent pieces no matter how often we move. this is an older piece that’s been built well to withstand time. It also gives off a bit of simple elegance that I’m always trying to achieve in our home…or at least in my personal space. 
    wooden knobs make the piece feel unfinished
    There was one aspect of this dresser though I did not like – the knobs. I’d debated painting them, but trying to match the drawers would have been too much of a gamble, and I really didn’t want to repaint the whole thing. I like the light blue quite a bit. 
    Trinca-Ferro Mirror Glass Knobs
    Until I had the perfect fix, I decided to leave it alone. No rush meant I could get exactly what I wanted – and that’s just what I did this weekend!  I found Trinca-Ferro in my inbox one day, promoting their Mirror Glass Knobs, and I knew that’s what my dresser needed. The mirror glass really pulls off the old bu stylish look I love.
    I love how such a simple change like the hardware can make a huge impact. While no one besides myself is going to get to enjoy the beauty of my dresser, it’s going to help change how I look at other furniture updates around here. See, we moved again to Indiana this time…and we got rid of all our furniture again – except of course this dresser, because, you know
    How do you refresh your space?

    Follow Trinca-Ferro


  • Dream Vanity Mood Board

    Dream Vanity Mood Board

    *this post contains affiliate links. Thanks for supporting Home Maid Simple!*
     
    Design has been on my mind lately! Last week I had a decorator from Bassett Furniture come in and help me get ideas for our front room that we do everything in. It was so much fun just chatting design with another adult woman, that I started looking around my house at other things I’ve wanted to update, or redesign. 
     
    One area has always been my side of our bedroom. Though I love the nightstand look, I’d really love to have a vanity. I hate that word though, makes me feel a little vain…ah who am I kidding. I think everyone needs a nice special place for their things. There I go getting off track again. Anyways, I got to thinking, and then talking to a nice lady over at One Kings Lane, and decided to make a mood board of my dream vanity. 


    I started by checking out the vanity, or dressing table makeover, I pinned a year ago, that still gets frequent repins. The light from the window gives a nice comforting feel to me. I felt the overall simplicity of this design is what I liked best, but looking at it again now, I feel it’s a bit too cluttered….though I’m not sure cluttered is really the word I’m going for here. What do you think? 
     
    dressing table makeover
     
    There are some key aspects of this vanity however, that I do still really like. They are probably why I pinned it in the first place. I like the white desk, and straight lines. Stool – perfect for not spending too much time being vain, but padded so still comfy. Lamp a must, and the wonderful natural light from the window. 
     
    So how am I going to accomplish this in my dream board? I have to take into account where this would actually be able to go in my room. No sense in dreaming something if it can’t actually ever happen. Since I would not be able to put my vanity in front of window, the next best option is a wall mirror.
    One Kings Lane Pinesdale Mirror
    I absolutely love oval mirrors. They frame your face nicely while eliminating background noise. The gold in this particular mirror spoke to me, and feels like it would just help capture the sunlight from the patio door across the room, giving me the natural light we all love and need. 
     
    Now that we’ve got our mirror and focal point for my vanity, it’s time to dream up the rest!  
    One Kings Lane Vanity Dream board
     
    Don’t you just love it?! I could spend all day browsing the sales at One Kings Lane. You can find a match for just about anything there. Here’s what I added to my Vanity Board. 


    What would be on your dream vanity mood board?If you’re new to One Kings Lane, you can get a $15 credit just for signing up! I used my credit to buy some cute storage bins for Prince L’s room a few years ago, and still love them!

    Enjoyed this post? You may also like

    Refinish a dresser with 1 simple change

  • Peek Into Our Master Suite Remodel

    Peek Into Our Master Suite Remodel

    *This is not a sponsored post. However it does contain some affiliate links. When clicking on some of these links and purchasing through the site, you are supporting Home Maid Simple. Thank you*

    If you’ve been following along for awhile now, you are probably aware of the Master Suite remodel we have undertaken. It began as a simple bathroom remodel, but as with most remodels, it escalated into the whole Master Suite. Today I thought I would take you on a little tour, and share some of the really classy designs we’ve got going on.

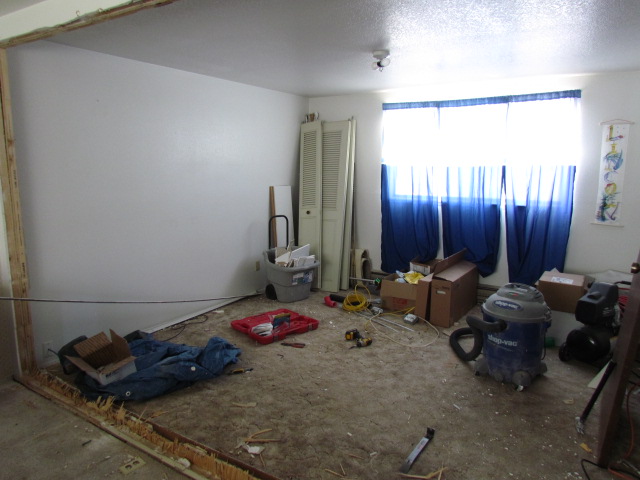
    To celebrate my birthday on Tuesday, I took charge of knocking out the wall between our bedroom and the extra room to create the large master suite, and allow us access to a closet again.  Our original closet has become the shower…I’ll show you that down a bit further.

    So down came the wall.  One thing we were not expecting was sheets of plywood between the two sides of the wall. Since this is a manufactured home though, it does make sense.  While I did this, Mark spent his time in the attic rewiring the lights. We now have one light switch controlling the 2 sides of the room. Coupled with the 2 large windows, I am really in love with the light in this space.

    Let’s take a look around now, at just how awesome this space is going to be.

    It’s a little hard to see in this photo but the bathroom entry is not the doorway you see, but rather just on the other side of it, where the piece of sheet rock is leaning up against (have to keep the kids off the shower floor until the mud sets).  It will not be your average sized doorway at 24″, but when working in older homes, you do what you have to. We actually debated leaving the entry in the hallway, and making the other side linen storage, but decided a Jack and Jill entry was our preferred style.
    The door into our bedroom will be walled up, and we’ll keep entry into the Master Suite on the extra rooms side.
    Can you picture a nice little sitting area under that window? I sure can!

    Let’s move onto the bathroom shall we?

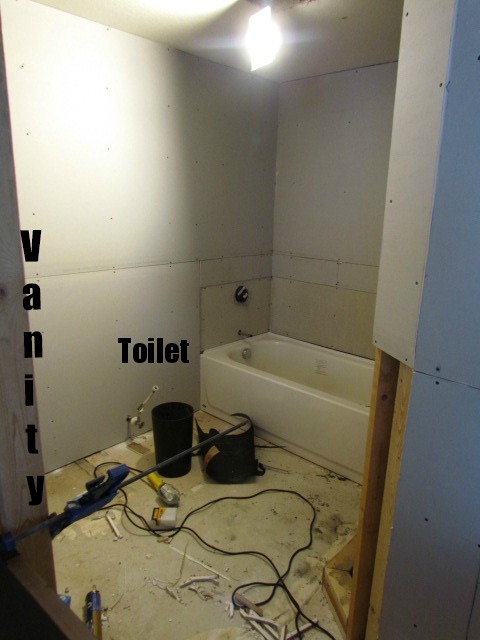
    This photo is from between the 2 entryways into the bathroom. You get kind of angled feel first walking in, but there is so much space once inside, it will really be beautiful. Of course the toilet and vanity are still waiting on the floor to be added, but you can see the general idea. The vanity will be on the wall facing the bath, affording a more room like design instead of everything in a row. 
    We’ll be putting the original toilet back in, but the vanity was too outdated, and falling apart. So we of course visited our favorite home design store, IKEA, and purchased this vanity
    LILLÅNGEN/TÄLLEVIKEN Sink cabinet with 2 doors IKEA Can be used as a shelf for a soap dish and toothbrush mug, thanks to the shape of the edge.
    image courtesy of IKEA
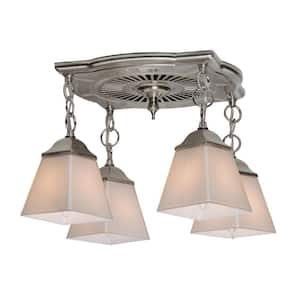
    For better lighting and ventilation, we decided to upgrade those as well with this fancy (and seriously I swoon every time I think about getting this light installed!) hanging light and vent combination from Home Depot
    Hunter Montesino Decorative Brushed Nickel 70 CFM Exhaust Bath Fan with Light
    image courtesy of Home Depot
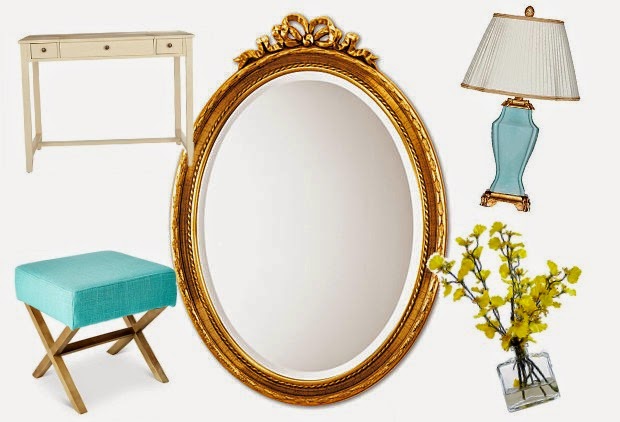
    It’s a lot of white, I admit, but I think bathroom fixtures should mostly be white, and then add the color in the walls, and accessories. For example, I went out and purchased us some new blue and yellow Martha Stewart bath towels from Macey’s (I may have jumped the gun a little), and some beautiful soap from Layla and Grace
    Let’s head back for one last look at our current DIY project, the walk in shower. 
    This area you are looking at, use to be the closet for our bedroom. It is obviously now turning into a walk in shower. A plus for any home!  Mark can take his showers, and I can relax in my bathtub. A win for all involved. It has been exciting learning how to put a shower together, but I am really mostly excited for the shower fixtures to go in!  As a Friends of Pfister Blogger, I received this Kenzo Raincan Shower Head and handheld shower to put into our new shower. I am just itching to get them installed, but there’s still the floor and walls to get finished up first. 
    image courtesy of Pfister

    Have you ever Remodeled a bathroom? 

    What do you think of our design?

    *This post contains affiliate links. All thoughts and opinions are my own. Thank you for supporting Home Maid Simple