Tag: kids in the kitchen

  • Make Lunch fun with FunBites + a Giveaway

    Make Lunch fun with FunBites + a Giveaway

    Welcome to our FunBites Giveaway!
    FunBites makes mealtime fun for kids, especially when they’re trying new foods and are picky eaters! We’ve used our FunBites to cut a variety of sandwiches and bread, cheese, melons, pineapple, apples, peaches, bananas, avocado, squash, potatoes, ham, turkey, chicken patties, these 13 Hallloween recipes and more. I love that the cutter is easy to use, and safe for kids because it doesn’t have sharp parts. 

    It’s also dishwasher safe, although we prefer to hand wash ours with the kids sippy cups. FunBites cutters are available in a variety of colors and shapes: Squares, Trianges, Hearts, and now for a limited time Minion Goggle! The winner will receive one FunBites cutter of their style choice and color. Enter using the form below and good luck!
    Disclosure: Practical Parenting Ideas and participating bloggers are not responsible for prize fulfillment. Giveaway is not affiliated or associated with Facebook or any other social media platform.
  • My First Cooking Show: Ep 2 Sugar Cookies

    My First Cooking Show: Ep 2 Sugar Cookies

    My First Cooking Show. Come bake up some Sugar Cookies with your host Venice. #Kidsinthekitchen

    Back in November we found the awesome Northpole aisle at Walmart, and while picking up some other items there, I just had to get the Bake Like an Elf set for Venice. I debated saving it for Christmas, but thought it would be a lot more fun for her to bake with it before Christmas and share those goodies with all of you. 


    Enjoy!
  • 20 minutes to a Clean Kitchen

    20 minutes to a Clean Kitchen

    This epic mess has been compensated by Collective Bias, Inc. and its advertiser. All opinions are mine alone. #EurekaPower #CollectiveBias
    20 minutes to a clean home with #EurekaPower #ad
    I really like getting to know my readers, and I do hope you like getting to know me too! Otherwise, you wouldn’t be here right? So a few things you really should know about me – I LOVE cooking and baking. I LOVE spending time with my kids. I really like putting the two together. Unfortunately that usually causes something I don’t like. Cleaning. Who does though right? I like to have things clean, but try hard to do it quickly and effectively. That way I have more time to do the things I love. 
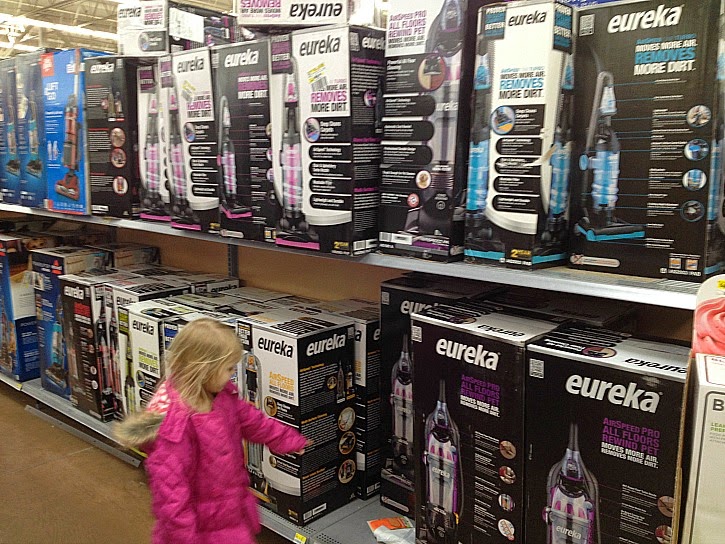
    When we moved my beloved 
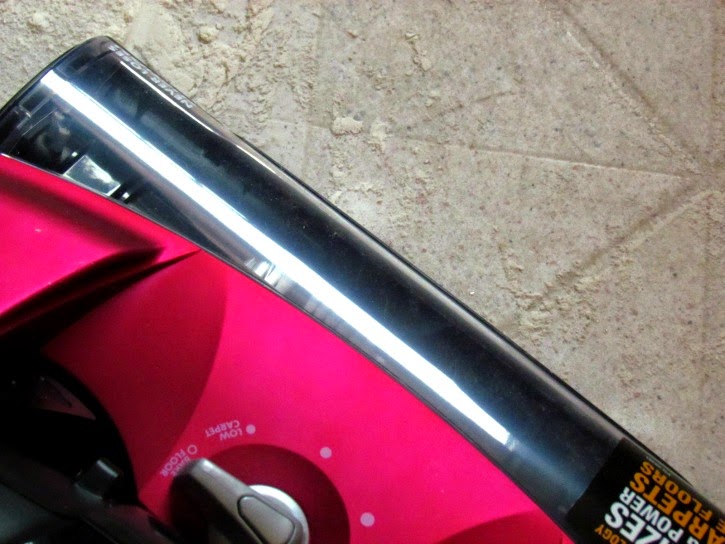
Eureka Vacuum was not packed carefully. That was OK though, because what did I find at Walmart? A newer upgraded Eureka on Rollback of course. I seriously won’t buy any other vacuum at this point – I’m a Eureka girl through and through because the quality and price can not be matched in my opinion.
    Find Eureka Suction Seal 2.0 on rollback at Walmart #EurekaPower #ad


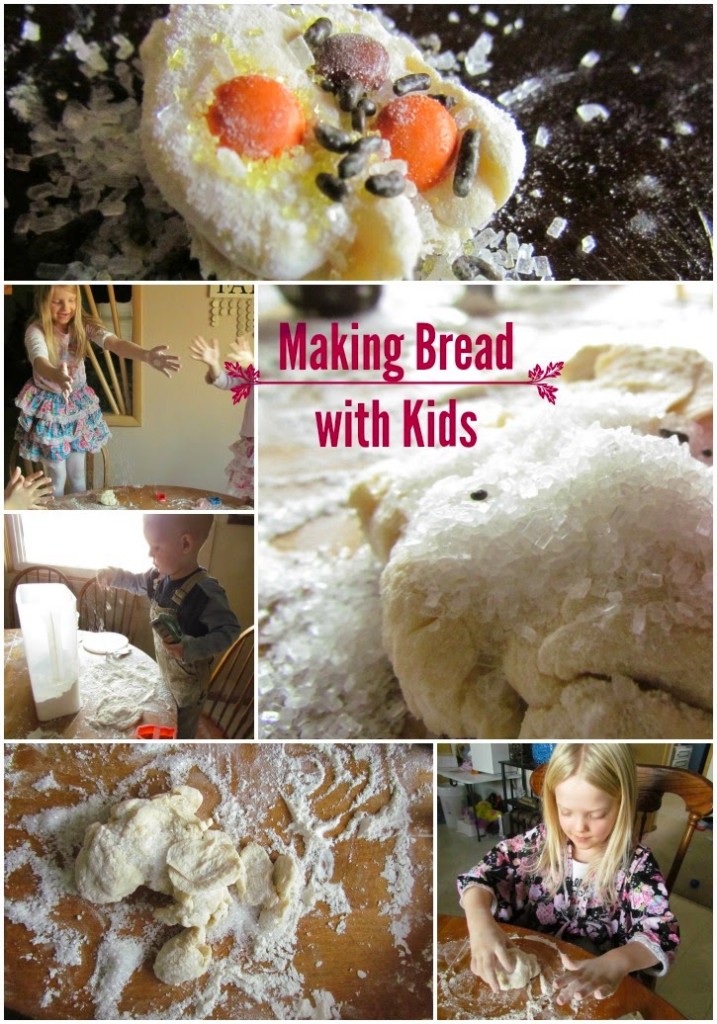
    So this one day, I decide we’re going to make bread. Not only that, we’re going to make bread like my mom made bread! She was the queen of entertaining lots of kids in the kitchen. How she kept her sanity, I will never know, since she did not own a eureka to clean up our messes. Perhaps my siblings and I were a little less indulgent in the mess making though?
    Make bread with the kids #EurekaPower #ad
    I remember my mom giving us all a bowl of flour, a handful of dough, and chocolate chips to decorate our dough creations with. I recall adding pepperoni at times too. When I decided to do this with my kids over the weekend, it was mostly because I did not feel good, and I needed them to be entertained. I of course didn’t have any chocolate chips on hand, so grabbed them some items from the baking cupboard – reeses pieces, sprinkles, and jimmies. 
    Messes happen, clean them up with #EurekaPower #ad
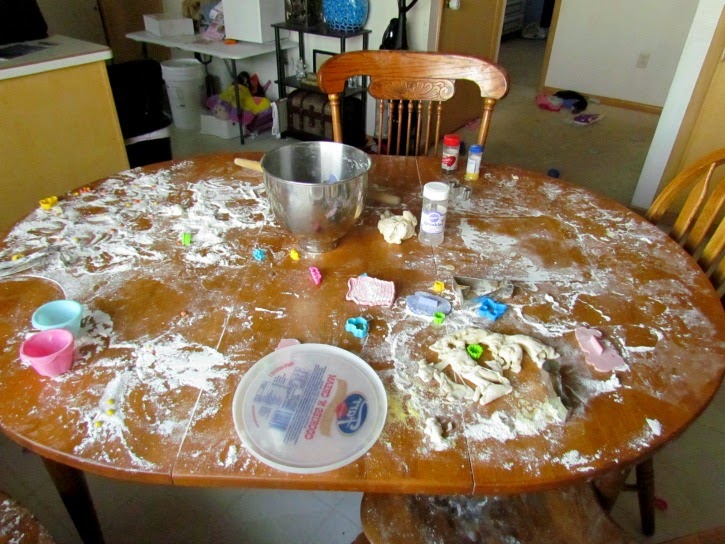
    See I even thought I was doing good giving them a tiny portion of chocolate to either work into their dough, or eat as they saw fit. My kids though, they just went WILD! I may have forgot to take the bucket of flour off the table while grabbing the other treats though – in which case I can only blame myself for what occurred next. 
    Messes happen. Clean them with #EurekaPower #ad
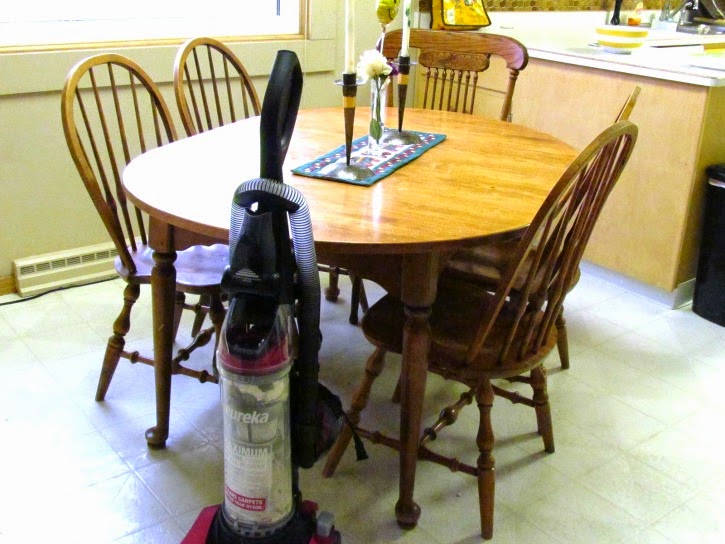
    Truly a sight to make any homemaker with a pounding headache cry. In the past, I probably would have. This time I didn’t, because I had my brand new weapon! The Eureka Suction Seal 2.0. Once I put the kids bread creations in the oven, I began clean up, and let me tell you – 20 minutes total to get this disaster zone back to spic and span! Let me show what I did.
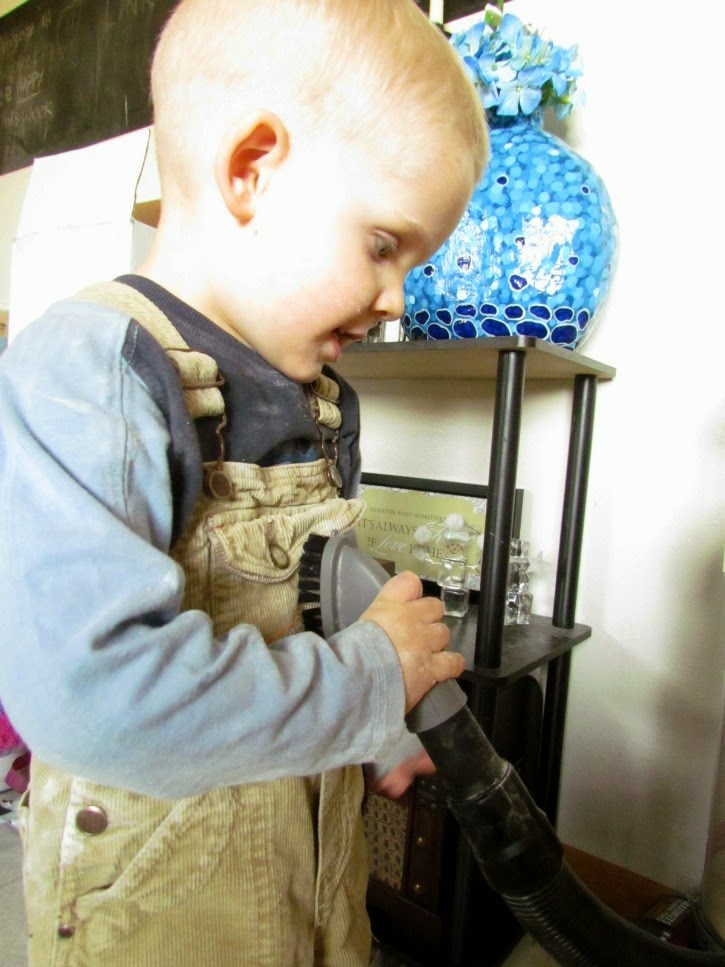
    First – Do NOT, and I repeat, DO NOT let those kids leave the kitchen yet! They are covered in flour, and if you turn your back for a minute they may make it all the way into your bed where they will leave more traces of flour. Grab your Eureka turn the dial from floor to tools, add the brush attachment (not the upholstery attachment..unless the uh, previous scenario happened…). Now line your kids up and give them a “hose” down. 
    #EurekaPower on board tools can clean anything! #ad
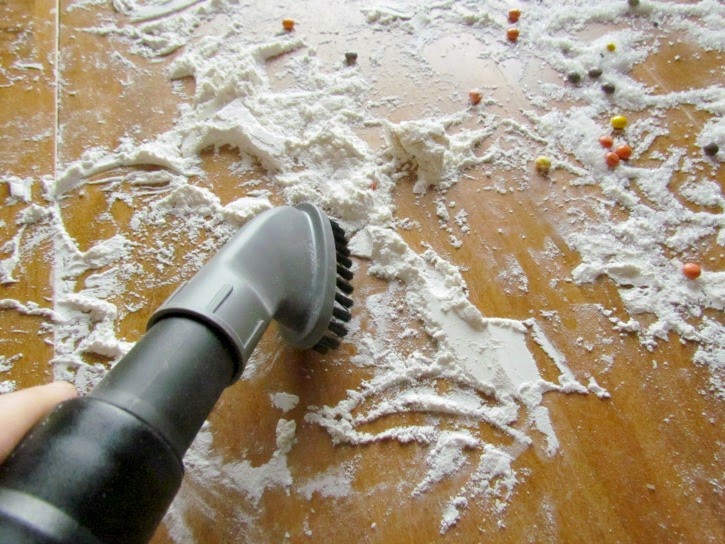
    Phew, you can now safely send the kids out of the room. Unless you’d like to teach them to clean – I will warn you though, that can often lead to a bigger mess when it involves flour and candy. Now that we’ve got the kids entertained elsewhere, keep the tools going, and head to the table. You can continue to use the brush attachment. I prefer to because the bristles help penetrate the cracks where the leaf’s of my table attach. 
    Vacuum the table for a quick clean up in the kitchen #EurekaPower #ad
    When I clean I like to start at the top and work my way down. From the table top, I move onto the chairs. Again the hose attachment does wonders on the chairs, getting around all the bars, and even down the legs of the chairs and table. 
    Finally, onto the floor! A quick switch from tools to floor, turn the floor brush back on, and we’re almost done!  I love love love the suction seal on this vacuum – they ensure that the flour is being completely picked up, and not just scattered around the floor. If there’s one thing I hate more than cleaning, it’s cleaning only to find I missed spots all over because my tools didn’t do their job. I don’t have to worry about that with the Eureka. When it cleans, it really is clean. 
    Eureka Suction Seal 2.0 picks up all the dirt! #EurekaPower #ad
    Once you’re finished vacuuming the floor, you’re almost done! The last step is so simple though! Just grab a damp towel and wipe over the table and chairs. You know you’d never use a wet towel on flour before, but with how well you’ve just cleaned up with you vacuum, a slightly damp towel gives your kitchen the finishing touch to be sparkling clean. 
    20 minutes to a clean kitchen! #EurekaPower #ad
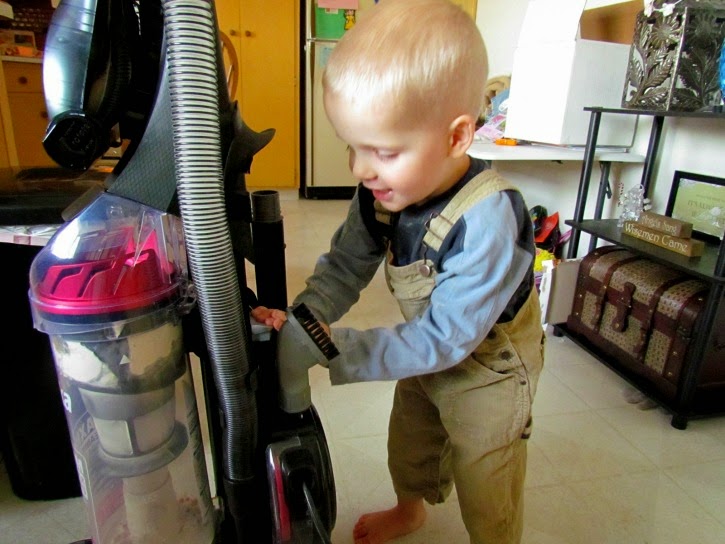
    Don’t forget to put your vacuum away. I may later regret it, but for the time being I’m really enjoying just how fascinated Little Prince is with the vacuum rewind. I think it may be one of the best additions to a vacuum I’ve ever seen! No more crazy tangled cord messes. 
    Retractable cord makes putting the vacuum away easy and fun! #EurekaPower #ad

    Have an Epic Mess?  

    Tell me about it below, then watch this video to see how easy it is to clean up!

  • My First Cooking Show: Mini Pizzas

    My First Cooking Show: Mini Pizzas

    *This post is sponsored. Compensation has been received for this post. Regardless, all thought and opinions are my own*
    I’ve realized lately that I’m becoming less and less intentional in my life, and more and more caught up in a whirlwind. I guess that’s to be expected when you move suddenly, and start going back to school as well. There comes a time though, when you have to put off the excuses, and get back to really living. 
    So that is what I’m trying to do. I know I’ve mentioned it frequently, but we like to have a pizza night every Friday. It’s one time we can count on the whole family being together, and enjoying food that everyone likes! Pizza is incredibly versatile. From your regular crusts, to cauliflower crust, red sauce or white, to all the different toppings to choose from, there is a pizza that fits everyone. 

    Although we (er I..) enjoy purchasing pizza because it means less time and mess in the kitchen, we all really love homemade pizza. The time it would take to make the dough, and let the yeast soak and rise though, meant that when Friday snuck up on me, we were definitely ordering out, or grabbing a frozen pizza. 
    At least that’s how it use to be (and mostly has been since we moved). Then I was introduced to Fleischmann’s Pizza Crust Yeast! Pizza night juts got easier, and more intentional! With the Pizza Crust Yeast there is no need to let it rise. Dinner can be done in 30 minutes! It also makes it easier to involve the kids in the whole process, because it is quick. 
    After our fun night of pizza making, Princess V and I decided she should host her own cooking show. So, I present to you Princess V in “My First Cooking Show”. Cooking pizza at home has become so easy now that she can do it all by herself (well minus the oven, because parents should always help when cooking in the oven or on the stove)

    For more tips and tricks on making your own pizza fun, check out Fleischmann’s Yeast resource center.  After making your own Mini Pizzas, let the kids have fun making some creepy mini pizzas.

    Back to being intentional – instead of just having a family pizza night, I’m going to start really being present during our family pizza nights (and every other night as well). I joined a group of like minded women as well to help keep me accountable and live more intentionally. I’m starting with my kids, by spending more time with them, doing what they want to do.

  • One Pot Chicken and Vegetable Bake

    One Pot Chicken and Vegetable Bake

    *I received product for review. All opinions and photos are my own. Some links may be an affiliate. You do not have to purchase through this link, but when you do it helps support Home Maid Simple. Thank you!*


    Doesn’t that look delicious?  I had a lot of fun coming up with this simple dish.  The ingredients reminded me of shepherds pie, but different enough it’s more what I imagine a farmer would be eating. 
    I have been horrible at meal planning this year. Thank goodness that wasn’t one of my resolutions right?  I was trying to go with something quick and easy last Saturday. I succeeded with both quick and easy prep time, but I forgot to thaw the chicken, so cook time took a lot longer than expected, which resulted in PB&J sandwiches for dinner that night. The chicken and vegetable’s made a great “leftover” lunch on Sunday though. 
    One of the fun things about this dish, was because of it’s ease to put together, I was able to recruit some help in the kitchen from Princess V. She had a rough day and needed some special time with just mom and her attention.  Before we tossed everything in the baking dish, we decided to try out my new Salt and Pepper Grinder from Ozeri. I have never owned a grinder, but I recall how fun they were as kid to twist. 
    The Ozeri Duo Ultra Salt and Pepper Mill and Grinder fits exactly what I needed. So many recipes call for salt and pepper to taste, with no measurement. So I tend to be pouring it into my hand and pinching some into my dish, and then dumping what was in my hand into the garbage.  What a waste! I mean I realize a tiny bit of salt or pepper in the garbage isn’t that big a deal, but I still hated doing that.  With the Ozeri Duo Ultra, I’m able to give it a twist or two, and feel confident that there isn’t too much salt or pepper.

    Princess V had a lot of fun pouring the salt into the mill. It was pretty easy too! The top pops straight off, and the bottom cover converts into a funnel for the top to keep the salt and pepper separated while pouring them in.

    Once we had the salt and pepper in, I let Princess V toss in the rest of the ingredients and then give a couple twists – we may have ended up with a little extra salt, and not as much pepper – of the grinder over the top. I hope you enjoy this easy farmers meal as much as we did.

    Download and Print this Recipe Card (3×5)
  • Kids In the Kitchen: Apple Pie French Toast #FoodieFriday

    Kids In the Kitchen: Apple Pie French Toast #FoodieFriday

    A few weeks ago I told you how I have the kids separated to help with each meal during the day. In that post I told you how I let Princess V smell the spices and pick some out to make Venice’s Chicken.  Today I’m excited to share an extremely easy, but very tasty French Toast recipe.

    I created the Apple Pie French Toast one day when I realized too late we were out of cinnamon. I started going through the spice cupboard (yes I have a cupboard dedicated to spices), to see what in the world I could substitute, because of course I already had most of the mixture whipped up. It needed something!  I’ve tried a few different spices, but this recipe is by far my favorite on French Toast!

    Of course here I’ll show you just how easy it is to get kids involved in the kitchen as well. Above you see my breakfast helper, Princess C flipping pancakes. A few pointers before you let your 5 year old near the stove

    • Talk to them about how hot the pan will be. Make sure they are aware of where their hands are at all times on the spatula so they don’t get too close to the hot stove.
    • If a slice of bread flops off the spatula onto the counter, or stove top, or half on half off, don’t let your child adjust it. 
    • Parental supervision should be used at all time when cooking with kids in the kitchen
     

    Apple Pie French Toast

    Ingredients
    6-8 slices whole wheat bread
    2 eggs
    1/2 cup milk
    1 tsp vanilla extract
    1/2 tsp sugar
    1 tsp Apple Pie Spice*
     
    Directions
    In a shallow pan (we use our round cake pans), mix eggs and milk together until eggs are broken and well mixed with the milk. Add vanilla and stir some more. Last add the sugar and Apple Pie Spice. Stir some more, until the sugar and spice are mixed in. The spice will mostly stick to the top of the liquid, that is just fine. 
     
    Heat a griddle, or frying pan to medium heat. Depending on your pan, you can use some Pam spray, or melt a little butter on the pan to help avoid the toast from sticking. 
     
    Dip a slice of bread in the egg mixture, and turn coating both sides. Place on the hot griddle, and repeat with the rest of the bread until the griddle is filled. Cook approximately 3-5 minutes per side, or until bread is nicely browned and toasted on both sides. 
     
    Enjoy with a little butter and maple syrup for a nice treat.
     
    *Some spice substitutions we’ve tried and enjoyed are cinnamon, allspice, or pumpkin pie spice. Have fun mixing up your french toast!


    ~FEATURES~
    We tend to hit a breakfast rut pretty frequently around here. Check out these fun and delicious breakfast recipes from last week’s party.
     
    Click for Recipe for Gluten Free Strawberry Sage Muffins
    Strawberry Sage Muffins
    What a combination of flavors. These muffins look like the perfect morning treat. 
     
    Sausage & Corn Bread Pudding #Southern #classic #sausage #corn #breadpudding
    Sausage and Corn Bread Pudding
    I’ve never seen bread pudding as a breakfast before, but this combination of corn bread and sausage has me sold!
     
    pancake
    2 Ingredient Pancakes
    Now this is a kid friendly, easy to make breakfast recipe. Plus, it’s Gluten Free!
     

    Welcome to Foodie Friday!
    Please stop by and say Hi to my cohost Diane at Simple Living and Eating.Link up any Food Related posts below, then browse around, and enjoy getting some wonderful meal ideas around the web!
    *By linking up you give us permission to share images as features on our blogs (always linking back to you of course!). We also pin many of your recipes. You can follow my Foodie Friday pinterest board, where I pin all the features, and my personal favorites each week.


  • Getting kids to eat and enjoy Vegetables

    Getting kids to eat and enjoy Vegetables

    I received product to review. All fresh produce, cute kids who enjoy vegetables, and opinions are my own. This post contains affiliate links, that help maintain this site. 
     I love gardening!  Fresh produce picked straight from the ground in your own backyard is something special.   My kids don’t particularly enjoy vegetables, but having them see the growing process has really helped encourage them to try more. Rosalina has been my biggest garden helper, but this morning I got all three princesses out helping me pick peas, then shell them – all before breakfast.
     
     
    This morning we picked about 1 lb of peas, and still have around 3-4 lbs still growing. Venice does not like vegetables at all. I mean I’m talking it’s pulling teeth to get her to eat any kind of vegetable. So this morning when she shelled her first pea and I asked if she would like to try it, I was taken back when she did!  Imagine my surprise when she then told me she liked it. I knew there was something special about homegrown produce. 


    Peas are good in so many things – by themselves, in a salad, on top of spaghetti (you should totally read Muskrat, Muskrat, Eat Your Peas!), cooked as a side. Plus they are wonderfully good for you.I ran into a problem though. Since I’ve never had such a large garden, I got a little overexcited, and planted my whole packet of peas. I’ve now got at least 20 – maybe more – pea plants growing with peas galore. As much as I would love to just sit out there and eat peas all day, I do want them to last. So although today’s pound of peas will be kept nicely in the fridge for daytime snacking by all, the next 4+ pounds I pick will need to be frozen. The great thing about frozen peas, is that they will stay fresh for up to a year. I found some easy instructions to freeze peas over at Out Standing in the Garden.

    Although I don’t need to weigh the peas before freezing, I was curious about how much I picked. I loved having the new MIRA Glass Platform Digital Kitchen Scale to do this on. There is a tare function that came in nicely to get an accurate weight. Not only that, but you can also weigh in grams, pounds, and ounces.  The scale is small in size, but in the kitchen that’s exactly what you need!  I haven’t had a problem storing it out of the way, while still having quick and easy access to it.

    I know I’ll be using the scale a lot in the future as I can and preserve more garden produce. The rhubarb is next on our list!  I can use the scale to measure exact amount of the fruits, and then freeze them in proportions for one pie. So handy!

    In the meantime though, I’m going to have the kids help me pick the rhubarb and then we’ll try dipping it in sugar. What kid doesn’t dream of dipping their fruit/veggies in sugar?  Try this Rhubarb Fool. We’ll continue our gardening adventure, and I’ll keep you updated on how the kids eating habits change. For now though, I am seeing more interest in food, and a little more bravery in trying something new.

    How do you get your kids to enjoy Vegetables?

  • Venice’s Chicken #FoodieFriday

    Venice’s Chicken #FoodieFriday


    Hosted at Home Maid Simple and Simple Living and Eating

    In an effort to spend more time with my kids one on one, and to hopefully get them eating better, I assigned the 3 older kids a meal they must help prepare. Princess C was given breakfast since she is usually the first one awake. Princess R helps me with lunch, because sandwiches are easy for an independent 3 year old to handle. Last Princess V as the oldest, and most picky child, is helping me make our dinners. 
    Wednesday night I knew I wanted breaded chicken, but I decided to let Princess V choose the spices. We grabbed our spice turn and began smelling the spices, until she had a combination of smells she enjoyed.  Enjoy this very tasty chicken made by a 6 year old chef in training!

    Venice’s Chicken

    Ingredients
    1 cup flour
    1/2 tsp Rosemary
    1/2 tsp Basil
    1/4 tsp Garlic Salt
    Dash of Pepper
    1 cup Milk
    5 boneless, skinless Chicken tender strips
    2 TBS Olive Oil
    Directions
    1. Heat the oil in a large skillet.
    2. Mix the flour and spices in a medium sized bowl. Pour the milk into a second medium sized bowl. 
    3. One at a time, dredge the chicken strips through the milk, and then the flour mixture. 
    4. Fry in the heated skillet 10-15 minutes, or until no longer pink inside. Turning once for an even browning. 
    5. Serve with green beans, and home made bread.

    ~FEATURES~

    Prosciuto, Melon and Herbed Provolone
    From Soliloquy of Food and Such
    A fancy twist to eating Melon – I’m excited to try this light appetizer at my next get together. 


    Corn Salad with Goat Cheese
    Corn Salad and Goat Cheese
    From Prudent Living
    I’ve never tried Goat Cheese, but now I really want to!


    Strawberry Apricot Swirl Ice Cream by Jazzy Gourmet
    Strawberry Apricot Swirl Ice Cream
    From Jazzy Gourmet
    I vow to buy an ice cream maker this summer! Fresh fruit really makes a summer treat.


    document.write(‘