Tag: canning

  • Everything You Need for Home Canned Pears

    Everything You Need for Home Canned Pears

     
    It’s time to store some fruit for the winter. OK, we’re in the 21st century, but if you’ve never canned anything before, I think you’re missing out. Canned pears are one of my utmost favorite home canned products. This post contains affiliate links and I will be compensated if you click on and make a purchase through them. 
     
    The first time I canned pears on my own was 6 years ago when I ordered 40lbs of Pears from The Pear Guy through our church. I was very excited to be preserving so much fruit for my kids to enjoy just as I did at their age. I had NEVER canned on my own before and was very nervous about it. 
    I still get nervous before starting a canning project, but I’ve done it so often now, it’s just about diving right in. 
     

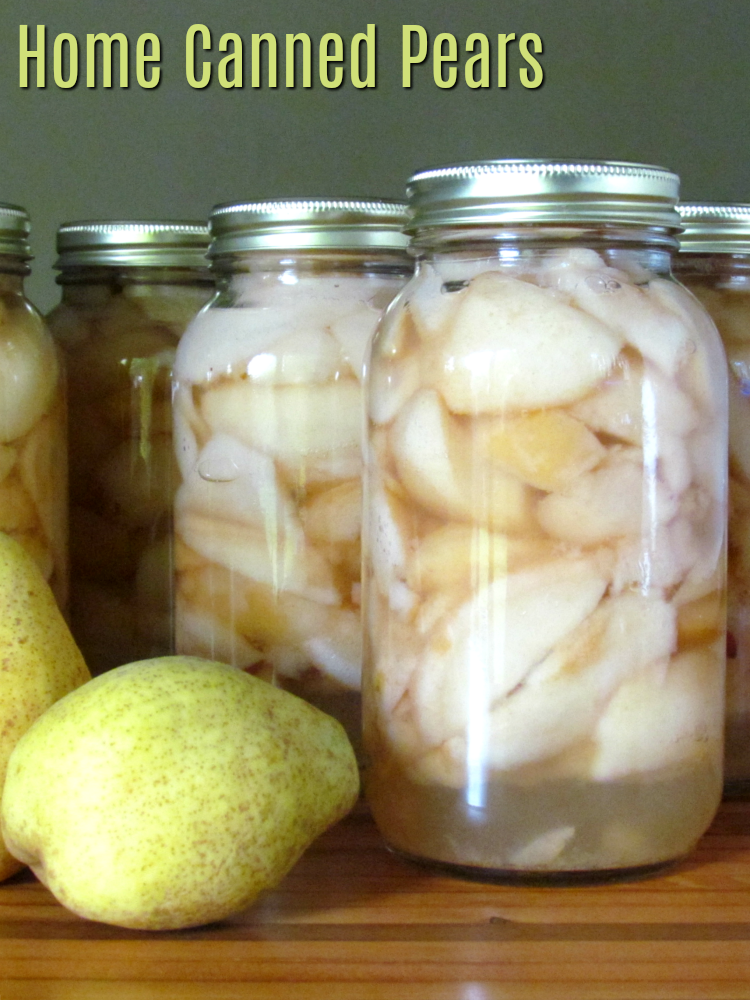
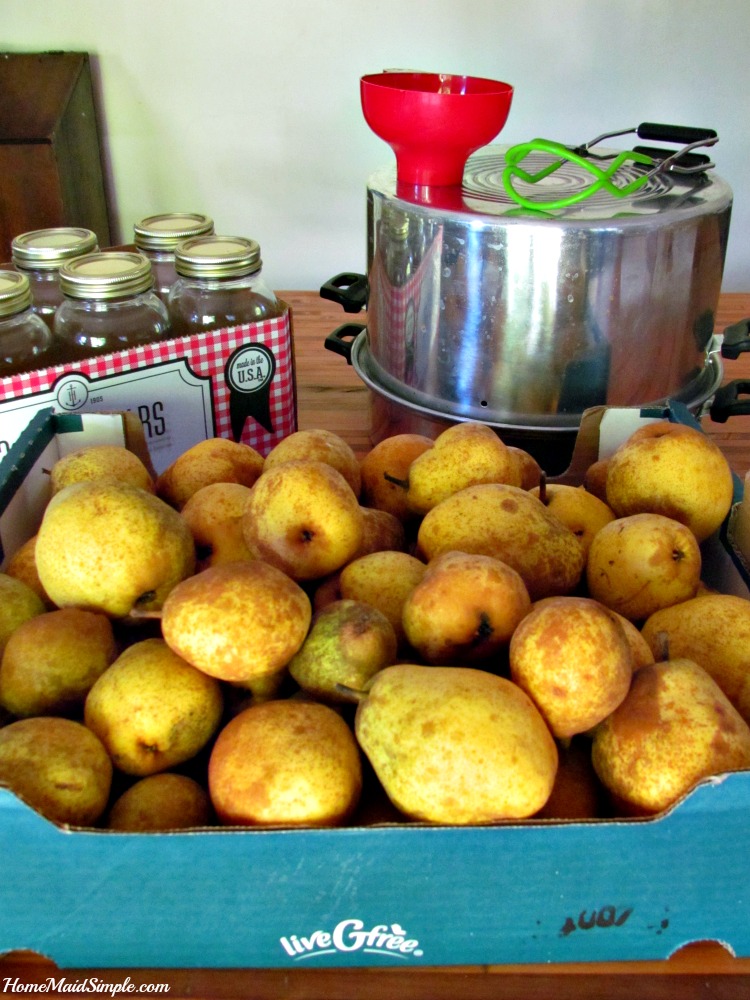
    Home Canned Pears Tips

    Before starting you’ll want to gather your equipment. If you’re first starting out, it may seem kind of pricey, and not worth the effort, but most of these things you only have to buy once. 
    • 40lbs Pears
    • 7-8 Quart canning jars and lids
    • paring knife
    • water bath canner
    • Jar lifter
    • wide mouth funnel
    • sugar
    • water


    Once you have everything ready, you’ll want to prepare your syrup. I like to use a light syrup because quite frankly I have a sweet tooth. However, you can also can the pears in fruit juice. If you choose the juice method I would stick with 100% Pear Juice.  

    For this many pears, I make a double batch of syrup. Heat 18cups water and 4 1/2 cups sugar on the stove. Depending on your pot, you may need to do this in 2 batches. 

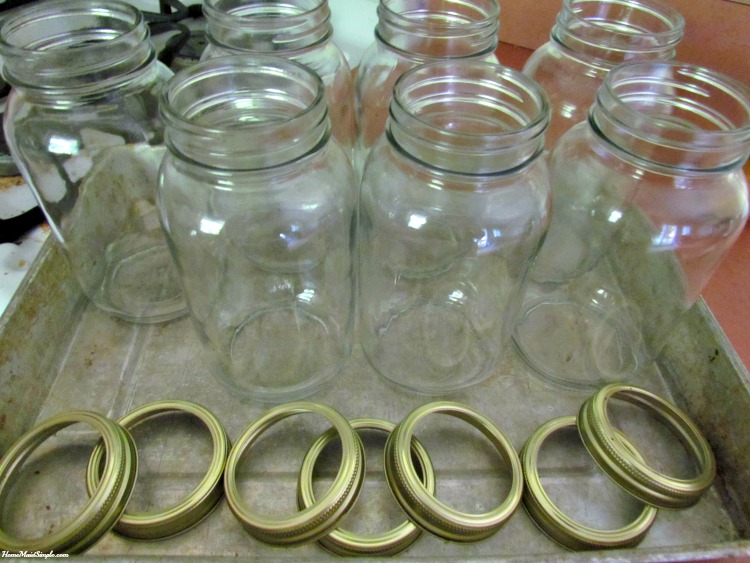
    While the syrup is heating, go ahead and prepare the jars. You’ll want them washed and sanitized. To sanitize my jars, I prefer using the oven. Set it to 250 F. Place the jars and rings – not the rubber lids – in a pan and set in the oven. They need at least 20 minutes in the oven, but you can leave them longer as you prepare the fruit. 

    For home canned pears, sanitize jars and rings in the oven at 250 F for 20 minutes.  

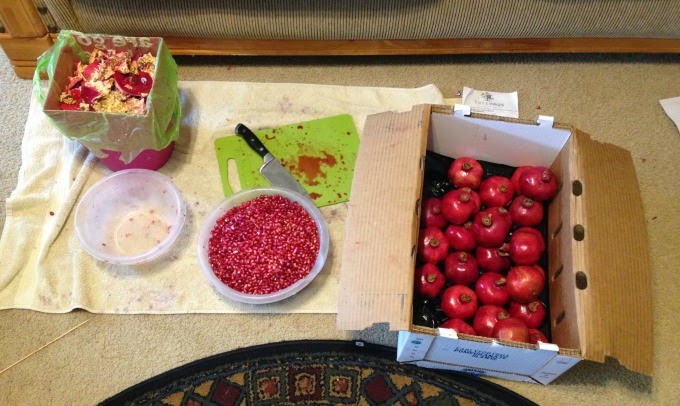
    The prep work is done, and it’s time to get started on the pears. You’ll want to wash, peel, and core your fruit. My favorite way to get the most fruit, is by blanching the pears in boiling water for about 30seconds to 1 minute, then dipping them in an ice bath. The peels come off fairly easily at this point with a paring knife. The downside is that the pears get a bit more soft from the boiling water. So you can always just take a knife and peel and core your pears as if you were going to eat them right then. 

    Once the pears are peeled, and sliced place them in a bowl with some lemon juice to avoid browning. Pick Your Own has some more tips on keeping the fruit from browning while preparing the rest of the fruit. This is the point where it’s also nice to have someone helping. The more hands, the less time the fruit it sitting out and turning brown.  

    Now I dry pack my pears, but you can also hot pack them which is the recommended way.  To dry pack – also known as raw pack – you stuff the cold pears into the hot jars. Once they are full pour in your syrup leaving about a 1/2 inch at the top. Slide a butter knife down the side of the jar and press on the pears to release any trapped air. I’ve always done it this way and never had any issues with spoilage.

    Boil a small pot of water for your canning lids. Once the pears and syrup are in the jar, wipe off the rims with a clean damp cloth. Then you’ll dip the lid into the hot water before placing on the jar. Screw on the rings, finger tight, and prepare to process them. 

    Canned Pears packed in quart should be processed in a water bath canner for 25 minutes. When done, remove the jars from the canner with your nifty jar grabber, and place on a towel to cool. You may start hearing popping sounds – this is the sweet sweet sound of each jar sealing. Give them a day to cool, then press on the lids. If they did not seal there will be a little bubble you can press on. Any unsealed jars should be immediately placed in the fridge and used over the next few days. 

    Correctly sealed jars can be placed in your pantry or food storage and should be used over the next year.  

    Home Canned Pears
    Yields 7
    Enjoy the crisp flavor of pears all year with this easy to follow recipe for canned pears.
    Write a review
    Print
    Ingredients
    1. 40lbs Pears
    2. 18 cups Water
    3. 4 1/2 cups Sugar
    4. 8 quart jars and lids
    5. water bath canner
    Instructions
    1. Preheat oven to 250F.
    2. Place jars and rings (not lids) on a pan, and sanitize in oven for 20 minutes.
    3. Combine water and sugar in a pan over medium heat to dissolve sugar. Turn heat to low and let simmer while you prepare the pears.
    4. Wash, peel, and core pears.
    5. Stuff pears into hot jars. Pour hot syrup over pears, leaving 1/2 inch from the jar rim.
    6. Wipe rims with a clean damp cloth.
    7. Dip lids into boiling water, and then place on jars.
    8. Screw rings on to finger tightness.
    9. Process in a water bath canner for 25 minutes.
    10. Remove to a towel, and let cool for 24 hours.
    11. Store sealed jars in a cool dark place. Unsealed jars should be eaten withint the next few days.
    Home Maid Simple https://www.homemaidsimple.com/

    kids love home canned pears!

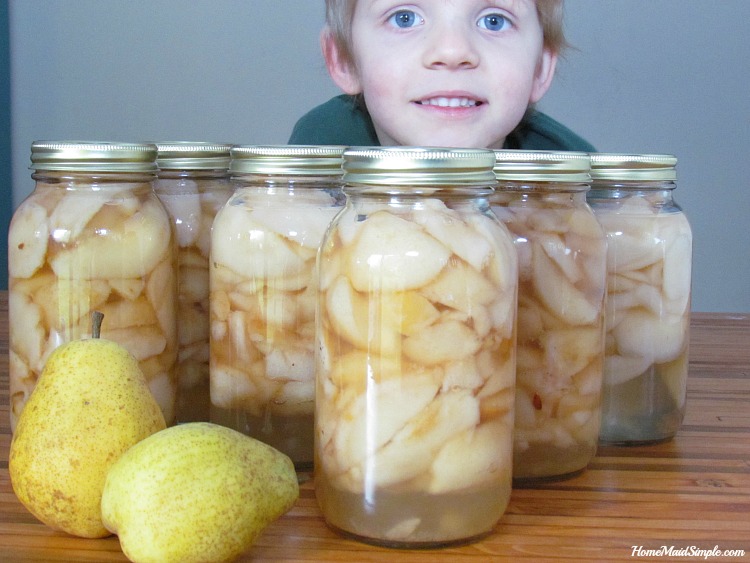
    Kids love these! While they will keep for a year in the pantry, my kids usually have them gone within 2 months. 

  • Home Canned Grape Juice

    Home Canned Grape Juice

     Fall is here, and it’s my favorite time of the year to start putting up produce. Canning fruits are one of the easiest ways to save produce to eat throughout the year. This home canned grape juice is fabulous with a little club soda. This post contains affiliate links and I will be compensated if you click on and purchase through them.

    Home Canned Grape Juice

     
    I had a lot of fun doing this, though it was quite surprising at just how little juice came from all those grapes.  I have a new appreciation for the cost of store-bought juice. Let’s jump right into this tutorial. If you have any questions just leave them in the comment section!
      
    Step 1:  Wash and de-vine your grapes.
     
    Step 2:  I suggest using a Steam Juicer
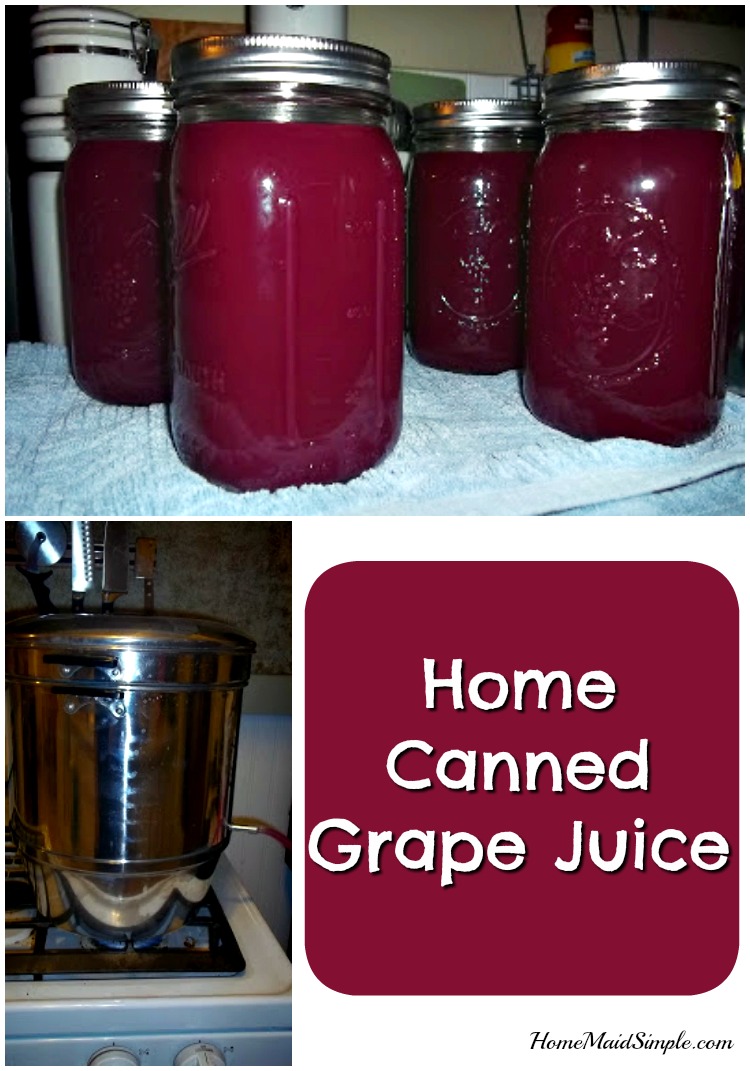
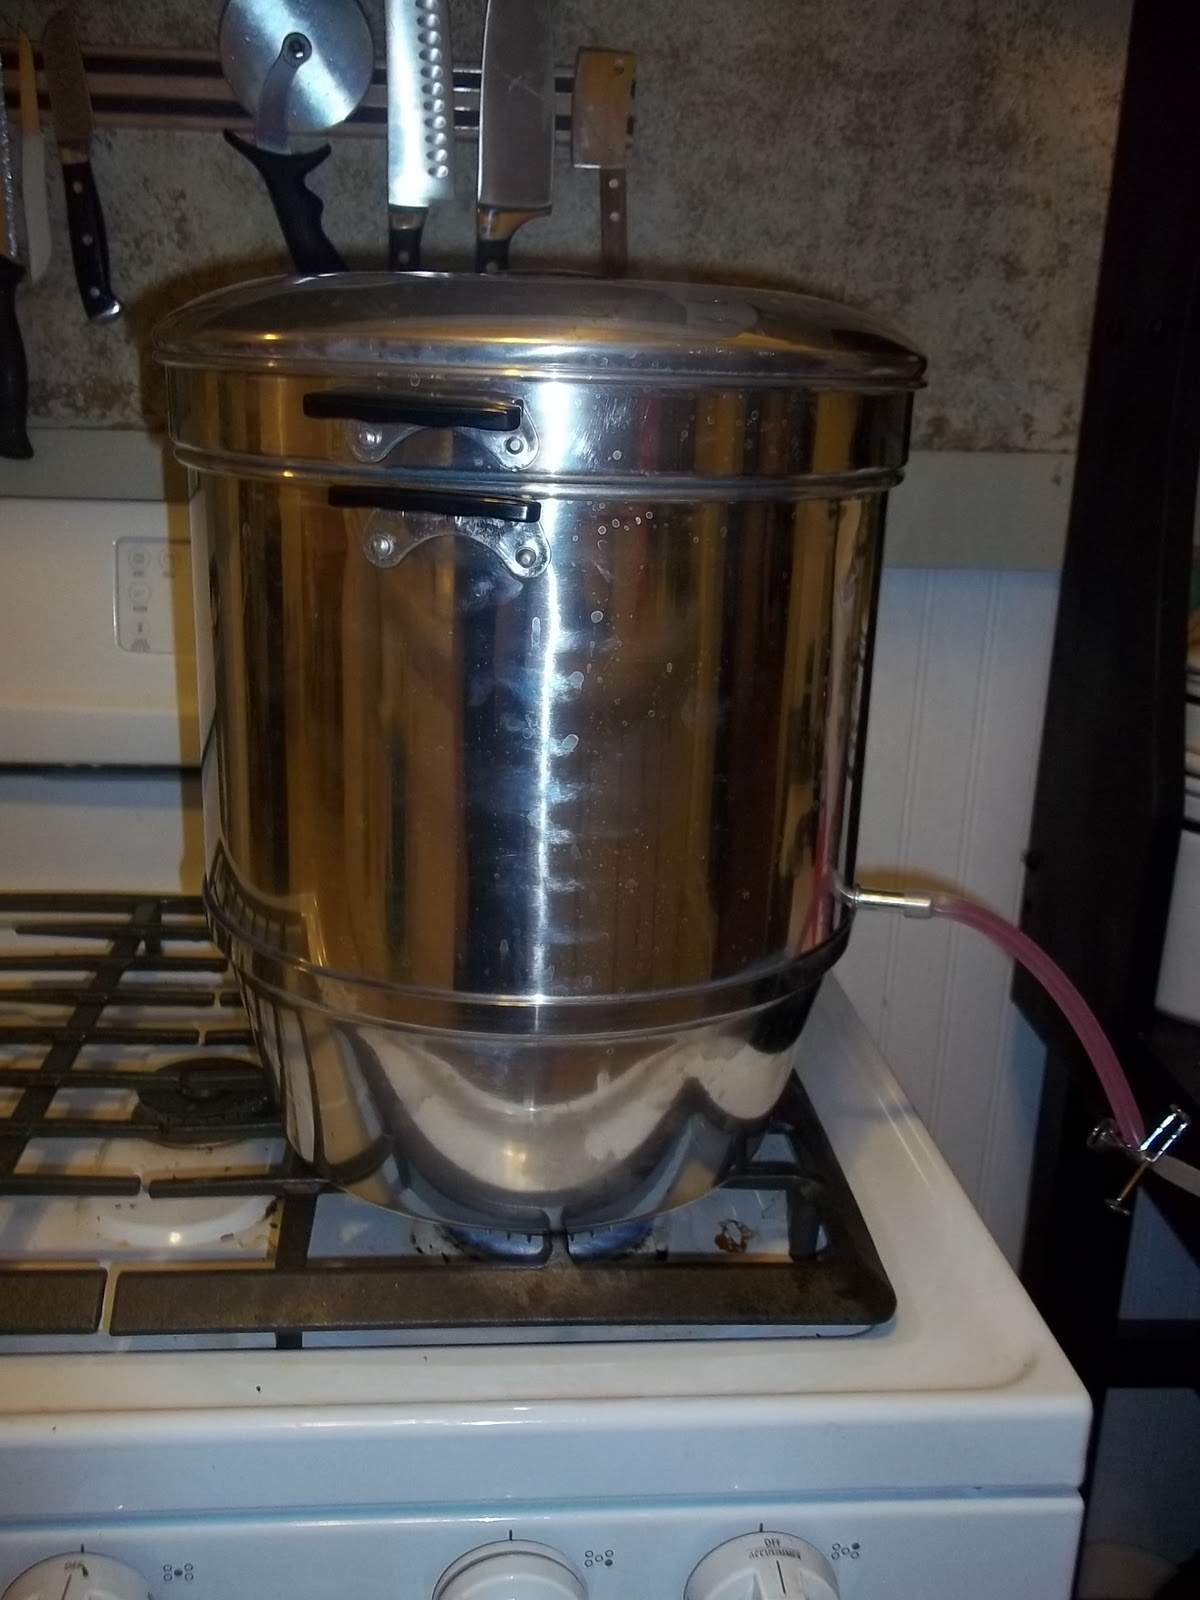
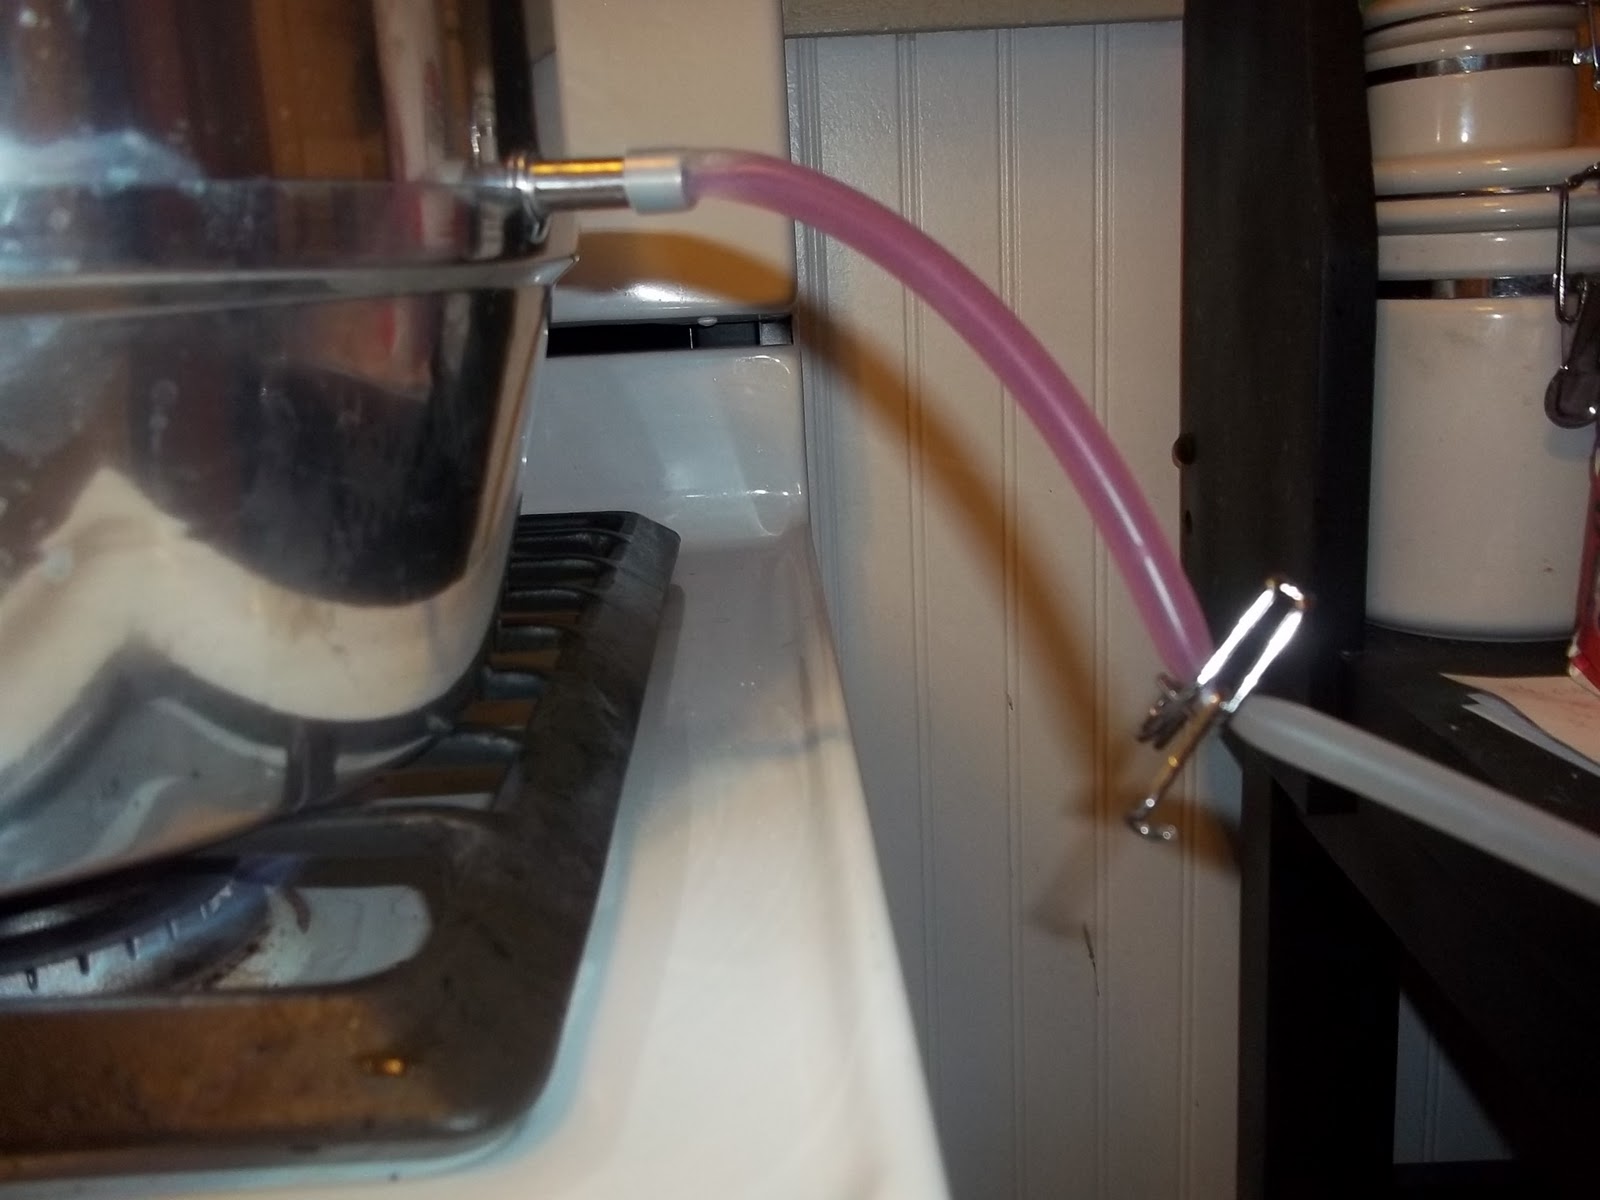
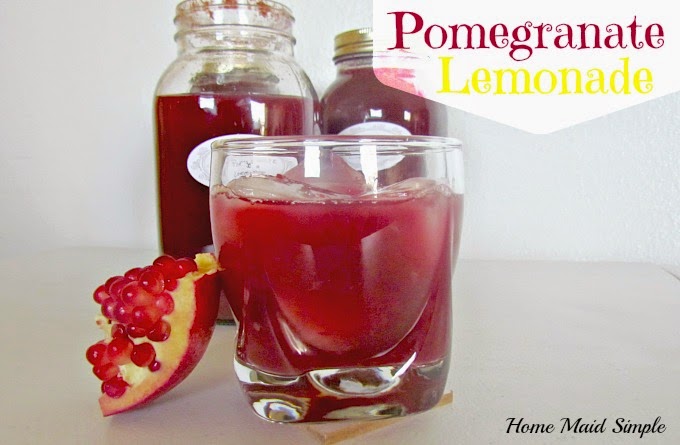
. If you don’t have one, go out and buy one, or borrow one. They are a time saver!!! Follow the directions for your juicer.  If you do not or cannot get a juicer, or you feel like being adventurous, there is a step by step guide HERE for straining the juice from your grapes. I added a little under 1 cup sugar per 3quarts grapes. So I dumped one of my bowls of grapes in, poured on some sugar, then the rest of the grapes, followed by more sugar.
    Step 3: While the grapes are juicing, sterilize your jars. Some people do this in a dishwasher, I did my pear jars in a sink of hot water. BUT I found a new way! You can sterilize the jars and rings in your oven. Do not sterilize the lids with the rubber seal this way. Turn the oven on to 225 degrees Fahrenheit. Place jars and rings on cookie sheets. I used two separate sheets and put the lids and rings on the bottom shelf, and the jars above so there was more room.
     
     
    Step 4: Carefully remove hot jars from the oven and fill with hot juice.
     
     
    Step 5: Process Jars. My mom is so sweet! She was supposed to bring me her water bath canner, and when she showed up she had bought me my very own steam canner instead. So I steam canned my grape juice! There are some differing opinions on how safe steam canning is compared to water-bath canning. Here is my 2 cents – If it were unsafe, you wouldn’t be able to buy steam canners. The fact that the jars sealed tells me no bacteria should be able to get inside. Plus, from my own experience, I think my jars of grape juice came out just as hot or hotter and stayed hotter longer than my jars of pears did in the water bath. 
     
    So have at it! Make some grape juice!  Out of my 6-7 quarts of grapes, I was able to get 4 1/2 quarts of grape juice.  The 1/2 quart I put in the fridge and drank with my breakfast this morning! It was oh so good!  A little on the strong side, so when we do open the other jars, I will either dilute with some water, or club soda depending on who will be enjoying it.  The club soda is a favorite during the holidays.
     
    *Post originally share October 2011. 


  • Cherry Jelly

    Cherry Jelly

    In honor of Utah’s Pioneer Day, I wanted to share this extremely SIMPLE recipe for Cherry Jelly with you today. If you’ve never heard of Pioneer Day, it’s a good bet you don’t live in Utah and you’re not a Mormon. I happen to be both but have only ever celebrated since moving back to Utah. We have parades, races, and fireworks. It’s like a second 4th of July here. This post contains affiliate links that will compensate me when you click through and make a purchase. 
    Home Canned Cherry Jelly. Spread it on toast, or pour it over your Sunday Roast. However you serve it, you'll love having this stocked in your pantry.
     
    Why? Because we’re celebrating our ancestry. A large part of Mormon history and the history of Utah are the pioneers who crossed the plains in covered wagons and handcarts. It was a hard and arduous journey, but one they did in pursuit of religious freedom.
     
    #canning #selfreliance

    What does Pioneer Day have to do with Cherry Jelly you ask? Well, the majority of my ancestors came across the plains, some losing their lives before they ever got to Utah, while many made the full trek. They were hard workers and self-reliant. In honor of them, this past month I’ve spent a lot of time at my mom’s picking, pitting, juicing and canning tart cherries. It’s hard work! But so very rewarding in the end. 

    I may not face the same trials as my ancestors crossing the plains, but I can learn from their hard work and resilience how to be a better person, and provide nutritious food for my family.

    #canning #selfreliance

    Cherry Jelly


    Cherry Jelly
    Write a review
    Print
    Ingredients
    1. 4 cups Cherry Juice
    2. 3 cups Sugar
    Instructions
    1. Bring the cherry juice to a rolling boil.
    2. Add Sugar. Bring back to a rolling boil, and time 5 minutes.
    3. Turn down to medium/low heat and simmer.
    4. To test if jelly is done, dip a metal spoon into the jelly, and let it slide off. When the jelly drips off the spoon in one drip, it’s ready to can.
    5. This can take 25-30 minutes, but don’t let it burn!
    6. Ladle the jelly into sanitized pint sized canning jars.
    7. Spoon off the foam, wipe down the rims, and can.
    To can
    1. Boil a small pan of water, and dip the canning lids and rings in for a few seconds.
    2. Use tongs and place on jars filled with jelly.
    3. Tighten rings and let sit.
    4. Leave on your counter until you hear popping noises. This is the jars sealing themselves.
    5. No need to water bath your jelly!!
    Home Maid Simple https://www.homemaidsimple.com/


  • Strawberry Jam and Strawberry Curd

    Strawberry Jam and Strawberry Curd

     
    When someone posts on facebook that Walmart has Strawberries for 88cents I don’t waste any time in heading out and grabbing some. Our store is notorious for running out of things fast, especially when it’s on such a great sale. 

    Once I had the kids out the door to school, I headed over to grab some Strawberries, more canning lids, and sugar – because we were out of sugar. I knew before I even picked up my families favorite fruit what we’d be using them for. 2 lbs for jam, 2 lbs for curd and 2lbs for the kids to snack on.  
     
    Whenever I start canning things I feel like I channel my mom. I can’t remember not having some sort of canned goods in our pantry, and the last couple of years we spent a lot of time doing our canning together. It’s one of the many skills I’m glad my mom taught me how to do. 
     
    Strawberry Jam
    You’ll never buy store bought again, when you make this Strawberry Jam
    Write a review
    Print
    Ingredients
    1. 2lbs Strawberries, hulled and halved
    2. 2tsp lemon zest
    3. 3 TBS Lemon Juice
    4. 4 cups Sugar
    5. 6 jelly jars, lids and rings – cleaned and sterilized
    Instructions
    1. Combine the Sugar, zest and Juice in a medium sauce pan.
    2. Cook over low heat for about 10 minutes, or until the sugar is dissolved.
    3. Add strawberries, and continue to cook over low for about 20 minutes or until they start to release juice.
    4. Stir.
    5. Boil slowly until you get a gel state. Fill 6 jelly jars (or 1/2 pint).
    6. To seal the jars –
    7. After filling your sterilized jars, wipe down the rims.
    8. Dip the lids in boiling water, and then place on jar.
    9. Twist ring to finger tight.
    10. Process in a water bath for 10 minutes.
    11. Set on a towel on your counter, and listen for the lids to pop. S
    12. tore in pantry for up to 2 years (but you’ll use it up sooner!)
    Notes
    1. You can tell it’s thick enough by putting a plate in the freezer for a couple minutes, and then putting some jam on it. If it gels up, you’re good! If it’s still runny, keep boiling.
    Home Maid Simple https://www.homemaidsimple.com/
     
     
    Strawberry Curd
    Layer in cake, top over vanilla ice cream, or eat Strawberry Curd by the spoonful.
    Write a review
    Print
    Ingredients
    1. Strawberry Curd
    2. 2lbs Strawberries, hulled and halved
    3. 1 cup sugar
    4. 1 stick unsalted butter
    5. 4 large eggs, beaten
    6. 4 jelly jars, lids and rings – cleaned and sterilized
    Instructions
    1. Place strawberries and 4 TBS water in a medium saucepan over medium heat.
    2. Bring to a boil, then simmer for 5 minutes, until strawberries are soft.
    3. Place a mesh sieve over the top half of a double boiler.
    4. Using a slotted spoon, move the strawberries to the sieve.
    5. Push the pulp through the sieve the best you can.
    6. Once it’s through, add the remaining pulp to the pan as well.
    7. Place over bottom boiler filled with water.
    8. Simmer over medium heat.
    9. Add sugar, eggs and butter. Stir constantly until the butter melts, about 10 minutes.
    10. Turn the heat up, and continue stirring for another 10 minutes.
    11. Turn off the heat, stir once more, then pour into your jars.
    12. To seal – follow the same steps for jam. Process for 10 minutes in a water bath.
    13. Store in the fridge for up to 2 months.
    Notes
    1. If you don’t have a double boiler, you can improvise with 2 pans stacked on top of each other.
    Home Maid Simple https://www.homemaidsimple.com/


  • Pomegranate Lemonade Recipe

    Pomegranate Lemonade Recipe

    Holidays are upon us! Have Pomegranate Lemonade on hand to add to a little sparkling beverage and you’ll always have a delicious special drink to share.
    Pomegranate Lemonade Recipe

    One night, while I’m putting the kids to bed, Mark receives a phone call. When I come out, he tells me someone is coming by with some pomegranates. Cool, I say. I love Pomegranates! But why, who gets rid of Pomegranates?

    “Oh they said they bought too many, and don’t want them to go to waste”

    Sounds good to me. Though I’m not sure how anyone can buy too many pomegranates. They’re like a once MAYBE twice special fall/winter treat I allow myself. So I wait up. Expecting them to come by with maybe 4-5 pomegranates. Maybe they weren’t expecting the hard work that comes with eating this delicious fruit?

    Opening Pomegranates

    What I was not expecting were 2 1/2 boxes full with approximately 100 pomegranates! Seriously? I was most definitely in my own kind of fruit heaven. I spent the next 2 weeks…yes 2 weeks. Peeling this precious fruit and pulling out the little arils.

    Boxes of Pomegranates

    I tell you what, though, the work involved was completely worth it in the end. I have 2 quarts of frozen arils in my freezer – perfect for salads, parfaits, and adding color to other dishes – 6 pints Pomegranate Jelly, and then I took the rest and juiced them (which is no easy task without a juicer!), and made 3 quarts of Pomegranate Lemonade.

    Can your own Pomegranate Lemonade Recipe


    Pomegranate Lemonade
    Enjoy a delicious glass of Pomegranate Lemonade
    Write a review
    Print
    Ingredients
    1. 2.5 Liters Fresh Pomegranate Juice
    2. 2 cups fresh squeezed lemons
    3. 1 1/2 cups sugar (more or less to taste)
    Instructions
    1. Combine the Pomegranate Juice, Lemon Juice and sugar in a pot. Bring to a boil, and simmer until sugar is all dissolved.
    2. Depending on how sweet your pomegranate juice is, and how tart the lemons are you can add less sugar. My pomegranates were more tart, and lacking in the sweet flavor.
    3. Pour hot juice into sanitized quart canning jar.
    4. Dip lids in boiling water for a few seconds, then place on top of jars. Secure with jar rings.
    5. Process in a water bath for 20 minutes. Let cool, and listen for a “pop” that will signify the lid is sealed.
    6. When ready to serve, pour over a cup of ice and let chill. To make it fancy, mix with sprite or similar soft drink. Great for holiday gatherings.
    Notes
    1. Sealed juice will last up to 1 year.
    Home Maid Simple https://www.homemaidsimple.com/

    Love this recipe for Pomegranate Lemonade? Try this one for Pomegranate Stuffing

  • Polish Plum Butter

    Polish Plum Butter

     
    We headed to Nana and Opah’s house this weekend, and the first thing I noticed when we walked in was the abundance of plums. They were everywhere. Buckets, bowls – you could hardly see their table due to the plums. Throughout the weekend, my mom had neighbors stop by, and she’d send them back home with a bucket. By the time we left Sunday, there was one bowl left, so we took a bag full with us.  What to do with all these plums? My mom mentioned seeing a recipe for plum cake so I started looking into that when I came across Polish Plum Butter or Powidla Sliwkowe. 
     
    After my peach honey, I knew I needed to try polish plum butter. What I love about this recipe, is it uses very few ingredients…as in exactly 2 ingredients. That’s it. Plums and Sugar.  There are some recipes I came across that use a few more, but really you don’t have to, the plum becomes extremely sweet when cooked down, and thickens itself very nicely as well. 
     
     
    As I started chopping up my plums, I realized this would make a nice substitution to the plum sauce I use when making Plum Pork. Can you guess what I’m making for dinner tonight? Mmmhmm. 
     
    At one point I wished I had an immersion blender, but made do with my regular blender. It just means I’ve got a few more dishes in the sink (which by the way is having plumbing issues…blah).  I hope you enjoy this as much as I am. You can use it on bread, meat, or as the Polish like it, in Hunters Stew. 
    Polish Plum Butter or Powidla Sliwkowe
    Write a review
    Print
    Ingredients
    1. 2 lbs plums, any variety
    2. 1/4 cup vanilla sugar
    Instructions
    1. Slice and pit plums.
    2. Place the sliced plums in a medium to large pot, and heat over medium/low heat for 30 minutes, stirring occasionally.
    3. Add the sugar and continue heating for another 30 minutes.
    4. Keep an eye on it, and stir frequently to keep it from sticking and burning to the bottom of the pan.
    5. Remove from heat and blend to make a more smooth butter.
    6. Place plum butter back in pan and heat for another 20-30 minutes, stirring frequently.
    7. Once the “butter” sticks to the spoon, it’s ready to either can or freeze.
    Notes
    1. You can skip the blending, but you’ll have good sized chunks of the plum peel. I prefer mine a little more smooth.
    2. I used my 8 oz Ball Freezer cups, and filled three, then put a small gravy pitcher in the fridge for immediate use.
    Home Maid Simple https://www.homemaidsimple.com/


    This post is part of Simple Living and Eating’s Food of the World Party. Browse different dishes from Poland on the linky below. Next month we’re visiting Malaysia!
     
    May also be linked up  to these FUN PARTIES!


    [inlinkz_linkup id=309255 mode=1]

  • Raspberry Rhubarb Jam #FoodieFriday

    Raspberry Rhubarb Jam #FoodieFriday

    About a month ago Jade Louise Designs posted this stunning photo and recipe for Raspberry Rhubarb Jam. Sounded absolutely delicious, and since I had a huge bush of rhubarb growing in my backyard I knew I had to try it out. I made a couple alterations though using some of my freeze dried raspberries. Since I was missing the juice I would have had from fresh berries, I added a little cranberry juice in as well.

    Raspberry Rhubarb Jam
    adapted from Jade Louise Designs
    Ingredients
    4 cups freeze dried Raspberries
    4 cups rhubarb, chopped
    1/2 cup 100% Cranberry Juice
    5 TBS Pectin
    1 tsp butter
    2 TBS Lemon Juice
    4 1/2 cups Sugar
    Directions
    Prep jars for canning.
    In a large saucepan combine all the ingredients minus the sugar. Heat it to a boil, while constantly stirring. Add the sugar, and return to a boil. Boil for 1 minute, and remove from heat. 
    Pour the jam into prepared jars, add lids and process for 30 minutes.  Let cool. Make sure the jars have sealed. If not keep in the fridge, and use within a month. 
    ~FEATURES~

    It’s back to school time and I NEED ideas for my kids lunch, and I’m sure some of you could use some too. Last week we had two posts shared with school lunch ideas to mix it up a little and make lunch fun. Don’t forget notes reminding them to have a great day!
    Now with the kids back in school I can enjoy a little more fancy lunch for myself again, instead of pb&j’s or mac and cheese. These hit the spot for me!
    I love Salmon, but have a hard time getting the kids and Mark to eat it. If I start young with Prince L and Princess R with a favorite like Mac and Cheese, I might win some of them over yet!
    I’m not a big Watermelon fan, but this sounds amazing, and refreshing, with more of a sweet taste than tangy.  I can already picture sitting on the patio sipping this while the kids playing quietly at my feet.  Hey I can dream!
    Foodie Friday happens every Thursday night here at Home Maid Simple and Simple Living and Eating.
    This is a FOOD party. Please only link up food related posts – recipes, tips, tricks, and health related topics. All other posts will be deleted. 
  • Dill Pickles #FoodieFriday

    Dill Pickles #FoodieFriday


    Cohosted by Diane at Simple Living and Eating. 

    Welcome back to Foodie Friday. A big thank you to Tammy for guest posting a recipe last week. We had so much fun at my mom’s family reunion. Hiking at Arches National Park, Swimming in Moab, and bidding pennies against each other for random stuff at the penny auction.
    Taking the time away from technology and reconnecting with family has been so beneficial for myself! I’m like a new person. Even with – fingers crossed – a move looming overheard, I buckled down and made some pickles yesterday. It was surprisingly one of the easiest foods I’ve ever made and canned.

    What really made these pickles easy was that I had picked up a packet of Ball’s Kosher Pickle mix. It had been a few years ago that I saw it on sale, and then on clearance (I love double sales, with no coupons!). So I picked it up, thinking I would one day make our own pickles. And then it sat in my canning stuff for awhile. Finally this year, I had the harvest of cucumbers needed to make my own. Remember my zucchini overload, well here come the cucumbers!
    There’s a few zucchini over on the right side, but the rest are cucumbers, and they are still growing outside!  I made 5 Quarts of pickles, and only used about 1/2 of what you see here. 
    Ingredients
    6-7 lbs cucumbers. You can use any Cucumbers, not just the pickling kind (just don’t try and eat pickling cucumbers un-pickled, not so good). I planted Burpless #26 Hybrid Cucumbers this year, and let me tell you, these cukes are amazing! So very very good. 
    1, 5oz packet Ball Pickle Mix
    6 cups water
    2 1/2 cups distilled white vinegar
    5 quart mason jars
    5 canning lids and rings
    Directions
    Slice your cucumbers in your preferred pickled form. Since my cucumbers were so long, I just sliced them into rounds. Set aside in a large bowl. 
    Mix water, vinegar, and seasoning in a pan on the stove. Heat to boiling. 
    Pour hot liquid over the pickles, and let cool to room temperature. 
    Canning
    While the liquid is cooling, wash your quart jars (or pint if you so choose). Once the cucumbers have cooled, ladle them into your jars. Fill up to the first rim, and then pour in the liquid. Using a table knife, slide it down inside the sides of the jar to remove any air bubbles. Use a clean towel to wipe any spilled liquid off the rims. 
    Heat a small pan of water on the stove to boiling. Dip the canning lids into the water for a few seconds and then place on the jars.  Tighten the rings to “finger tight”. Meaning not too tight, but just until you can’t easily tighten it anymore. 
    Now it’s time to process them. I have been using a steam canner, though I’ve been told it’s not as good or accurate as a water bath. The time spent in the canner however is I have found equivalent.  Process jars according to your canner’s directions, for 25 minutes. (this will also depend on your altitude. The back of the Ball pickling mix has a guide to help you get the best time for your area).
    Remove, and let them sit over night to seal.  Check the lids to make sure they have “popped” and then store for up to a year.

    ~FEATURES~
    Biggest Loser Oatmeal Pancakes Three Ways - A healthy and protein packed breakfast. Click through to watch the video recipe.
    Biggest Loser Oatmeal Pancakes 3 ways
    from Club Narwhal
    Go watch Amy’s video of making these. It is very well done, and I can’t seem to stop watching long enough to go make these. I love the use of oatmeal in these. 


    Menudo Filipino
    from Kocina De Pinay
    It looks like a lot of ingredients, but this dish is easily assembled. 


    Curried Popcorn: A Pinch of Glitter
    Curried Popcorn
    from A Pinch of Glitter
    Not your ordinary movie popcorn, but I think the curry is going to be a hit!


    Now it’s your turn!
    Link up to 3 new recipes
    Please don’t share the same recipe each week, we want to see something new.
    Hop around and find some new inspiration
    FOOD RELATED POSTS ONLY! All others will be deleted. This is a food hop. 

  • Preserving Zucchini #FoodieFriday

    Preserving Zucchini #FoodieFriday

    I don’t have a recipe for you today, because I have been busy busy busy in the garden trying to preserve everything I grew this year.  What you see in the above picture, that’s just the first crop of Zucchini. Since those were picked, I have twice more picked around the same amount. It’s safe to say, we’ll be eating A LOT of zucchini for the next little while.

    It was a bit ironic last night I was cooking up some Rice-A-Roni for dinner. My plan was to saute some zucchini on the side and fry up some chicken with it as well. When I started reading the directions to cook the rice, I noticed it had a chicken and rice recipe on the box – and under that recipe the add in option of zucchini. So instead of 3 separate pan, I used 1 and cooked everything together. It was pretty good too.

    Back on topic here – did you grow a garden this year?  Did you plant Zucchini?  If you did, and it was like me, your first time growing zucchini, you are probably also swimming in zucchini. My first two crops I took to my moms house.  Our last crop, picked yesterday, I took care of all on my own.

    Preserving Zucchini
    If you’d like to preserve your zucchini the best way to do that, is in the freezer. 
    What you’ll need
    Zucchini
    quart sized freezer bags
    food processor with grating attachment OR a cheese grater
    a spoon
    Process
    Begin by washing all the zucchini. Cut off the ends, and throw them away. 
    If you are using a food processor (and I strongly urge you to, even if it means borrowing one from a neighbor), you’ll want to slice the zucchini in half lengthwise, and scoop out all the seeds. Then use the food processor to shred the zucchini.
    Fill each qt bag with 3-4 cups of shredded zucchini. Most recipes call for at most 4 cups, so you will now have the perfect portion in each bag for baking. 
    If you choose to use a cheese grater (not my ideal, but I did it last night and it does work), cut your zucchini into spears, like you would a cucumber. Don’t worry about the seeds. Then go to town grating. This method does take much longer. 
    I did not shred all my zucchini, because it isn’t just for baking. Here are some other ways and meal ideas you can use that zucchini for.
    sliced and quartered – perfect for stir fry, and sauteing. 
    Sliced into rounds – these could be breaded and fried
    Cut into spears – also great for stir fry
    Sliced in half lengthwise, and hollowed – great for stuffing. Similar to this Bacon Stuffed Squash
    Check out my freezer – I HAD to eat all the rest of our ice cream so I could fit in the zucchini. Can you believe Mark said I didn’t have to eat the ice cream..he thought I could just throw it away. shaking my head in unbelief!
    Preserve zucchini in qt bags for the perfect portion
    The top shelf is filled to the back with zucchini, with only one bag of chicken taking up some space. The door is also stuffed with bags of zucchini and rhubarb.
    ~FEATURES~
    Check out all these different ways you could use Zucchini!
    zucchini tart from callmepmc.com #callmepmc #tart #vegetables
    Fresh Zucchini Tart
    If you like quiche, you’ll probably enjoy this tart. Just try it!

    Carrot Zucchini Bars with Cream Cheese Frosting
    zucchini is the perfect healthy ingredient to add to baked goods! This recipe doubles the nutrition with the carrots.

    Trim Healthy Tuesday: Summer Stir Fry (E)
    Summer Stir-fry
    by far my favorite way to eat zucchini. 
    Head on over to Diane at Simple Living and Eating for another great recipe and more features!

  • Getting kids to eat and enjoy Vegetables

    Getting kids to eat and enjoy Vegetables

    I received product to review. All fresh produce, cute kids who enjoy vegetables, and opinions are my own. This post contains affiliate links, that help maintain this site. 
     I love gardening!  Fresh produce picked straight from the ground in your own backyard is something special.   My kids don’t particularly enjoy vegetables, but having them see the growing process has really helped encourage them to try more. Rosalina has been my biggest garden helper, but this morning I got all three princesses out helping me pick peas, then shell them – all before breakfast.
     
     
    This morning we picked about 1 lb of peas, and still have around 3-4 lbs still growing. Venice does not like vegetables at all. I mean I’m talking it’s pulling teeth to get her to eat any kind of vegetable. So this morning when she shelled her first pea and I asked if she would like to try it, I was taken back when she did!  Imagine my surprise when she then told me she liked it. I knew there was something special about homegrown produce. 


    Peas are good in so many things – by themselves, in a salad, on top of spaghetti (you should totally read Muskrat, Muskrat, Eat Your Peas!), cooked as a side. Plus they are wonderfully good for you.I ran into a problem though. Since I’ve never had such a large garden, I got a little overexcited, and planted my whole packet of peas. I’ve now got at least 20 – maybe more – pea plants growing with peas galore. As much as I would love to just sit out there and eat peas all day, I do want them to last. So although today’s pound of peas will be kept nicely in the fridge for daytime snacking by all, the next 4+ pounds I pick will need to be frozen. The great thing about frozen peas, is that they will stay fresh for up to a year. I found some easy instructions to freeze peas over at Out Standing in the Garden.

    Although I don’t need to weigh the peas before freezing, I was curious about how much I picked. I loved having the new MIRA Glass Platform Digital Kitchen Scale to do this on. There is a tare function that came in nicely to get an accurate weight. Not only that, but you can also weigh in grams, pounds, and ounces.  The scale is small in size, but in the kitchen that’s exactly what you need!  I haven’t had a problem storing it out of the way, while still having quick and easy access to it.

    I know I’ll be using the scale a lot in the future as I can and preserve more garden produce. The rhubarb is next on our list!  I can use the scale to measure exact amount of the fruits, and then freeze them in proportions for one pie. So handy!

    In the meantime though, I’m going to have the kids help me pick the rhubarb and then we’ll try dipping it in sugar. What kid doesn’t dream of dipping their fruit/veggies in sugar?  Try this Rhubarb Fool. We’ll continue our gardening adventure, and I’ll keep you updated on how the kids eating habits change. For now though, I am seeing more interest in food, and a little more bravery in trying something new.

    How do you get your kids to enjoy Vegetables?