Tag: diy

  • Upcycling an Old Fence Into a Hat Rack

    Upcycling an Old Fence Into a Hat Rack

    Any little boy will love this hat rack upcycled from an old fence. I received product for review. All opinions are my own. This post may contain affiliate links and I will be compensated if you click on and make a purchase through them. 

    Upcycle an old fence into a hat rack. ad Lincoln has started amassing a bit of a hat collection. Around the time Harold was born, my Dad sent him a coon skin hat after a trip to the Davy Crockett Museum. On our family vacation to Illinois we picked him up a stovepipe hat at Lincoln’s home in Springfield. Then of course he has his ball caps, robot head, and Astronaut Helmet. 

    Related: Teaching Kids to Reach for the Stars

    After spending a lot of time trying to organize and clean up his room, it was apparent that he needed a hat rack! I proposed the idea to Mark, who is my go to awesome build anything hubby. 

    Upcycle an old fence into a hat rack. ad With the idea and plan in mind, I then picked some fancy looking hooks from Abodent. Abodent specializes in vintage style hooks and knobs, and while based in Bristol, they ship internationally! The Porch Coat Hook was exactly what I had envisioned. Hats, dress ups, coats, and medals will all look nice hanging from these hooks. 

    Check out the Cupboard knobs and Coat Hooks from Abodent.

    While I was looking for the hardware, Mark got to work on the actual hat rack. We’ve been collecting old fencing from neighbors and family over the past year or so (our dining room table is all old fencing!), so we had all the wood we needed on hand.

    The fence top and old nail holes give this hat rack a vintage style that matches the vintage style hooks. 

    Upcycle an old fence into a hat rack. ad Lincoln and I spent a bit of one on one time whitewashing the hat rack. While it dried, we headed to the hardware store for some hanging supplies. Finally, we got this little project hung up, and put to use. Eventually, I see LEGO creations, and maybe a trophy or two gracing that top shelf. I’m sure the hats will change over the years, but this is a timeless piece that will last a lifetime.

    Upcycle an old fence into a hat rack. ad  


  • DIY Snowman Blocks

    DIY Snowman Blocks

    These Snowman Blocks were made possible by Dixie Belle Paints. All opinions are my own. 

    Simple and quick to make, these Snowman Blocks add the perfect decor to your front porch during the winter season. Especially if you’re lacking in the actual snow. 

    DIY Snowman Blocks add the perfect touch to your porch decor.

    I actually made these Snowman blocks five years ago with a friend, but after many moves and different weather extremes, they were looking a little sad. Actually, they were more than sad, they were downright pathetic looking. Most of the buttons had fallen off, and the white paint was no longer a pretty white. 

    Sad Snowman Blocks needed an update with Dixie Belle Paints. ad

    Awe, poor snowman family! I almost didn’t pull these guys out this year, but then I got Dixie Belle Paints and decided to give them a nice update. Well, if I’m being totally honest, I personally didn’t update them. My eye for detail is not always the bet on objects like these. I can add buttons and sew up hats and scarfs, but painting details…not my strongest skill set. So I enlisted Mark’s help.

    Spruce up your winter decor with Dixie Belle Paints. ad

    DIY Wooden Snowman Blocks

    • 4×4 wooden blocks, varying sizes
    • Dixie Belle Paints
    • Santa Hats
    • Plaid Fabric
    • Paintbrush

    To make your snowman blocks we found it handy to already have the Santa hats attached to the snowman. To do this, all you need to do is hot glue around the top of each block, and press on the hat. However, you can also save this step for last. It just made a nice grip for holding the snowman up while painting on various sides. 

    Paint your wooden blocks with white Dixie Belle Paint. This fantastic paint has a fast dry time so that by the time we finished our last block, our first block was dry and ready for the details. Continue adding details with various Dixie Belle Paint colors, to create your snowmen. Each of our snowmen is sporting a fun face, 3 buttons, and 2 gloved hands. Our middle snowman got lucky and received some pockets. 

    Once the Snowmen are painted, cut strips of your plaid fabric to tie around the blocks as scarves. It’s the finishing touch that takes the snowman family from cute decor to a whimsical addition to your home. 

    DIY wooden Snowman Blocks add whimsical fun to your winter porch with Dixie Belle Paints.ad

  • Ultimate Valentines Day Round-Up

    Ultimate Valentines Day Round-Up

    Are you still looking for the perfect Valentines gift? Recipes, crafts, printables, parties and more can be found on this Round-Up from some of my favorites bloggers around the web!

    Love is in the air! Valentine’s Day is around the corner and the Social Fabric Community has put together the Ultimate Valentine’s Day Round-Up to help you prepare for the season of love. From tutorials to crafts to delicious recipes, we have something for everyone. We dare you not to fall in love with these ideas!

    Ultimate Valentines Day Round Up


    Craft/DIY/Tutorial

    Epsom Salt Candles from A Day In Motherhood

    Friendly lentine Candy Jar – Creative Ramblings

    Valentine Felt Envelopes – Good Morning Loretta

    Valentine’s Day Candy Filled Mason Jar – Savvy Saving Couple

    Valentine’s Day Love Bug Craft – Maryland Momma’s Rambles

    Last-Minute Quick, Cute Cut-Out Cards – Our Daily Craft

    DIY Heart Shaped Massage Bars – Thriftanista in the City

    Valentine Memo Chalkboard – Southern Couture

    Valentine’s Day Chalkboard Decoration – Pretty in Pigment

    Flower Vase Craft – Polka Dotted Blue Jay

    No-Sew Ribbon Embellished Cocktail Napkins – Atta Girl Says

    Macaroni Art Lace Hearts – ABCs and Garden Peas

    Cupid’s Arrow Valentine’s Day Favors – Home. Made. Interest.

    Hand Lettered Valentine Notecards – One Artsy Mama

    Instagram Magnetic Bookmarks – Happy Go Lucky Blog

    Birdseed Heart Valentines – Made with Happy

    Valentine’s Day Burlap Wreath – The Farm Girl Gabs

    Cute Flower Valentines for Kids – Jaime

    DIY Valentine Flower Corsage – Suburban Wife, City Life

    DIY Valentine’s Snowglobes – Woods of Bell Trees

    Valentine Envelop Chair Backers – 2Paws Designs

    Reversible Valentine’s Day/St. Patrick’s Day Banner – Fearlessly Creative Mammas

    Mini Bubblegum Machine Valentines – Bubbly Nature Creations

    DIY Button Heart Picture Collage – Our Piece of Earth

    Kids’ Valentine’s Day Gift with FREE Printable – A Cowboy’s Life

    Easy Mesh and Ribbon Valentine’s Day Wreath – My Pinterventures

    Snickerdoodle Sugar Scrub Recipe – Sunny Sweet Days

    Valentine’s Day Verse on Burlap – Life with Captain Fussybuckets

    12 Days of Romance Scavenger Hunt – The Mama Zone

    Candy Kiss Ring – So TIPical Me

    Valentine’s Day Hand Print Craft – As Cute as a Bug’s Ear

    How to Make a Valentine’s Day Ribbon Banner – Aprons and Stilletos

    Date Night with a Romantic Treasure Hunt – The TipToe Fairy

    Chalkboard Gift Box – Organized Island

    Easy Valentines Felt Pillow Cover – Creative Southern Home

    Polar Fleece Ruffle Heart Wreath – Joy’s Life

    Making A Valentine’s Day Rag Wreath with Fabric Scraps – Third Stop on the Right

    Washi Tape Bubble Valentines – Moneywise Moms

    Homemade Candles in 5 Easy Steps – Lemon Peony

    DIY Felt Ornaments for Valentine’s Day – 3 Little Greenwoods

    Butterfly Valentine’s Day Craft – Sarah in the Suburbs

    Epsom Salt DIY Valentine Candles – A Day in the Motherhood

    I “DOVE” You Printable with Candy – Newlywed Survival

    Rainbow Heart PomPom Garland – Cupcake Wishes & Birthday Wishes

    Valentine’s Day Printed Burlap Subway – Occasionally Crafty

    Pom Pom Cupcakes Valentine Craft – Cute as a Fox

    Valentine’s Wooden Door Hanger – We Got the Funk

    Hearts Aplenty: Valentine’s Day DIY Decor – Woman in Real Life

    Love Letters Simple Valentine’s Day Craft – Craving Some Creativity

    Valentine’s Day Coffee Cup Sleeve – Cynchronicity

    How to Make a Great Loves Print – My Sweet Sanity

    Cross Stitch Heart Pillow – Cutesy Crafts

    Free Valentine’s Day Cards Kids Can Make – Happy and Blessed Home

    Recipes

    Valentines Cupcake Toppers

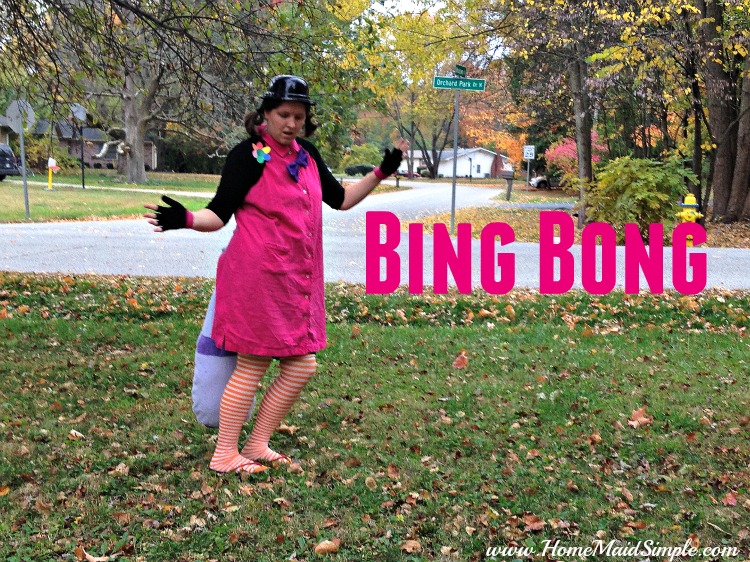
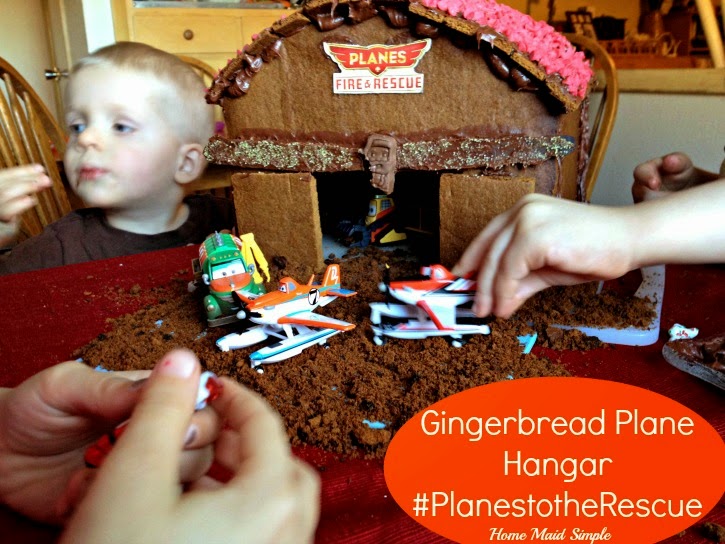
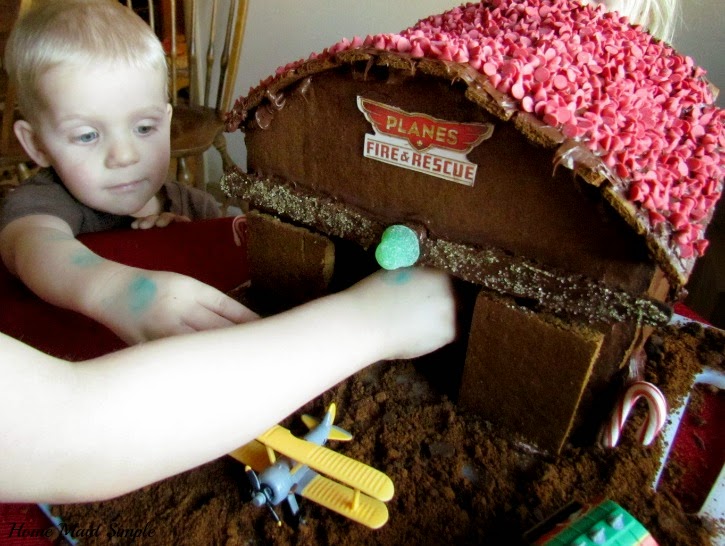
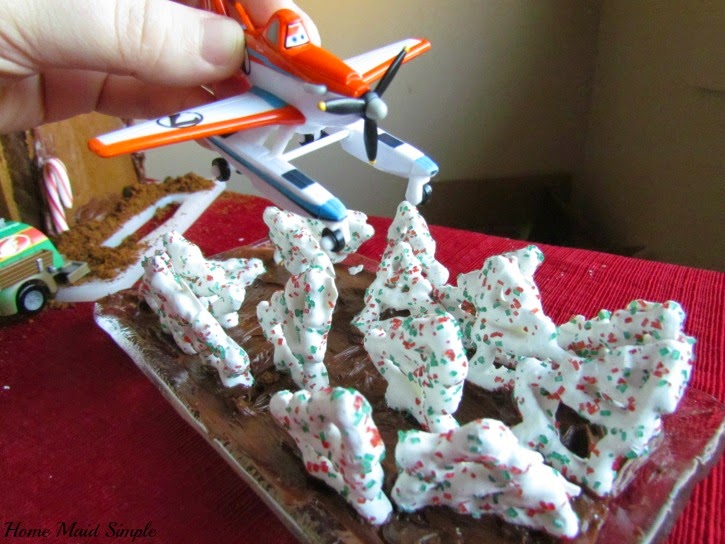
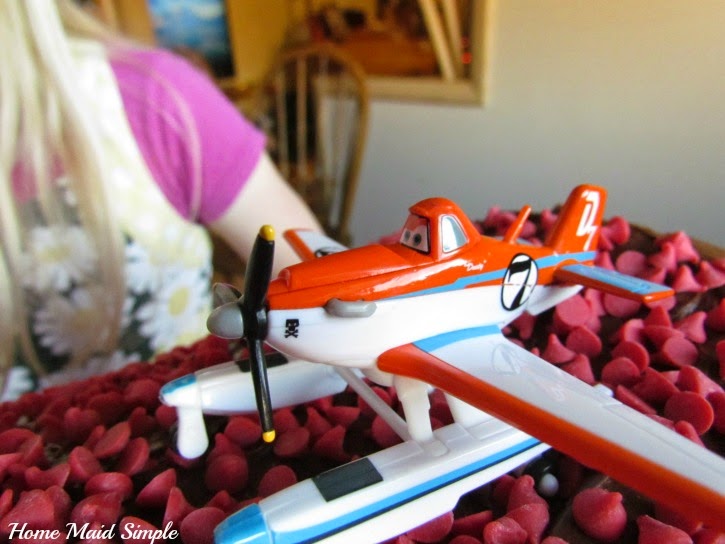
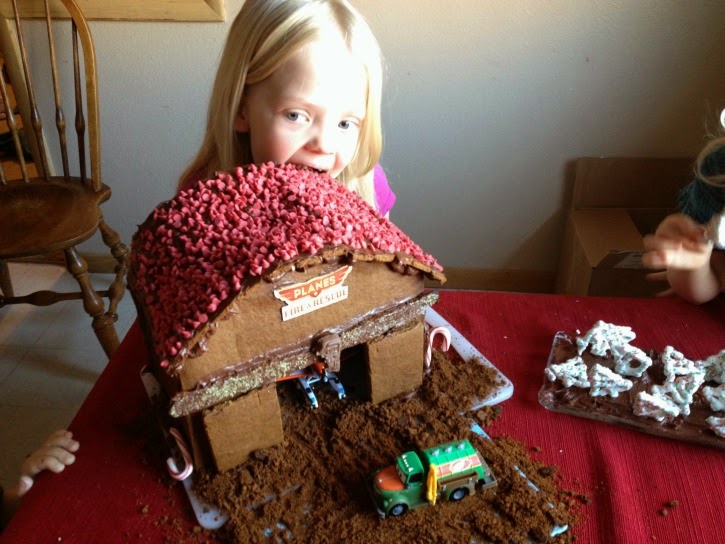
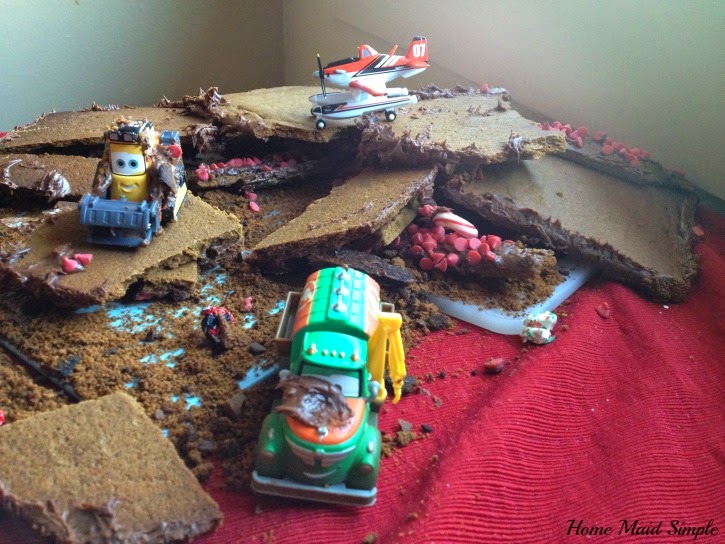
    Valentine Cupcakes – Home Maid Simple

    Valentine’s Day Cakes – Charleston Crafted

    Red Velvet Pudding Cups – Mostly Homemade Mom

    Blood Orange Panna Cotta – Mooshu Jenne

    Candy Cane Chocolate Hearts – Drugstore Divas

    Cranberry Bliss Bars – Swanky Recipes

    Valentine Rice Crispy Treats – Midwestern Moms

    Chocolate Valentine Sandies – Cindy’s Recipes and Writings

    M&M’s® Red Velvet Brownies – Julie is Coco and Cocoa

    Nutella Filled Conversation Hearts – A Million Moments

    Conversation Hearts Martini – JVKOM Chronicles

    Valentine’s Day S’mores Dip – Our Mini Family

    M&M’s® Red Velvet Blondies – The NYC Talon

    Valentine’s Day Cheesecake Brownies – West of the Loop

    Red Velvet Cheesecakes – Houseful of Nicholes

    Chocolate Kiss Valentine’s Day Cookies – Moscato Mom

    Chocolate and Candy Valentine Popcorn – Made by a Princess

    Easy Valentine’s Peppermint Chocolate Chip Cookies – Janine Huldie

    Strawberry Ice Cream Recipe – Scrappy Geek

    Coeur a la Creme with Raspberry Sauce – Graceful Order

    Love Dipped Wafers – Sparkles to Sprinkles

    Valentine’s Day Bento Lunch – Diana Rambles

    “Blackened” Seafood Medley for a Low-Calorie Valentine’s Dinner – Broken TeePee

    Sweet Salty Fudge – Foody Schmoody Blog

    Valentine’s Day Covered Pretzels – Texas Type A Mom

    Valentine’s Popcorn – Mommy’s Bundle

    The Easiest Valentine’s Day Fudge Recipe – Young at Heart Mommy

    Valentine’s Day Butter Cookies – Ilona’s Passion

    Valentine’s Day Blondies – Saving You Dinero

    Super Healthy Pomegranate-Cranberry-Almond Smoothie – Easy Cooking with Molly

    Brownie Cut-outs – Tramplingrose

    Puppy Valentine’s Day Cookies – Staying Close to Home

    Valentine OREO Brownie Bar Recipe – As Mom Sees It

    Strawberry-Vanilla Ice Cream Pie – Johanny’s Kitchen

    Strawberry Filled Chocolate Cake – Hezzi-D’s Books and Cooks

    Chocolate Raspberry Truffles – Food Lovin Family

    Honey Bee My Valentine Cakes – I Don’t Have Time for That

    Red Velvet Valentine’s Day Parfaits – Living a Sunshine Life

    Homemade Strawberry Syrup – Day by Day in Our World

    Cranberry Hootycreek Cookies – Momma DJane

    Red Velvet Donuts – Frugal Family Tree

    Strawberry Mocha Granola – Strength & Sunshine

    Red Velvet Mini Cupcakes with Cream Cheese Frosting – Tales of a Ranting Ginger

    Chocolate Shot Glasses – The Bewitchin’ Kitchen

    Chocolate Pretzel Kisses – Just 2 Sisters

    Valentine’s Candy Bark – Life with the Crust cut off

    Chocolate Kiss Shooter! – Housewives of Frederick County

    Super Simple Valentine’s Day Candy Hearts – My Real Food Family

    Easy Strawberry Crinkle Cookies – Meatloaf & Melodrama

    3 Ingredient Strawberry Brownies – Fun Things to Do in Central Mass

    Nutella Baked Brie – Basil and Bubbly

    Easy Cupid Crinkles – Creative Southern Home

    Valentine’s Day Edible Tic Tac Toe Game – A Frugal Friend

    Valentine’s Day Ombre Sweet Treat – Tastefully Frugal

    Party

    How to Throw a Budget Friendly Valentine’s Day Party – Amber Nicole Blogs

    Valentine’s Day Party for Tweens – Soiree Event Design

    Love is in the Air Valentine Table – Not Just a Mommy

    Valentine’s Day Tea Party – The Peanuts Gang

    Printables

    Valentines Scavenger at Mom on the Side  

    Easy Valentine’s Printables – I am the Maven®

    Printable Valentine’s Day Lunch Box Notes and Coupons – Gluesticks Blog

    “I Love You Like” Valentine’s Free Printable – C’mon Get Crafty

    4 Free Valentine’s Day Coloring Pages – Saving More than Me

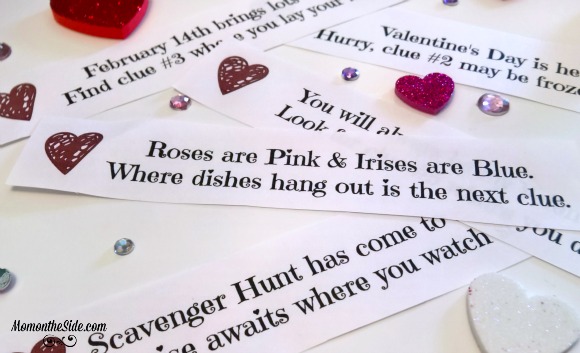
    Valentine’s Day Scavenger Hunt Clues – Mom on the Side

    Valentine Gift for Kids {Free Printable} – Fun on a Dime

    Crayon Valentines Printable – Mom’s Messy Miracles

    Tic Tac Toe XOXO Valentine with Free Printable – Housewife Eclectic

    Valentine’s Day Activities for Kids – Simple Living Mama

    2 Free Printable Valentines (Owls) – Altamonte Family

    Love is in the Air Valentine Card – Making of a Mom

    Matchstick Valentine Free Printable – Frenchie

    Valentine’s Day Lunch Box Notes & Jokes – Coupons are Great

    I “Wheelie” Like You Car Valentine Printable – Artsy Momma

    Round-Up

    Valentine’s Day Guide – The Ranting Latina!

    24 Frugal Valentine’s Ideas – Real: The Kitchen and Beyond

    7 Gift Ideas for Valentine’s Day – Downshifting PRO

    5 Perfect Valentine’s Day Gifts for Bloggers – That Chic Mom

    Top 5 Romantic Restaurants to Eat at in East Greenwhich, Rhode Island – Mama Luvs Books

    Other

    War Room Movie Night – A Beautiful Exchange

    Pairing Chocolate with Wine & Spirits – In Good Taste

    Valentine’s Day Make-up Tutorial – Glam Hungry Mom

    Valentine’s Day Dinner at Home – Natasha Byrd

    Can you feel the love tonight with all these great Valentine’s Day inspired activities?
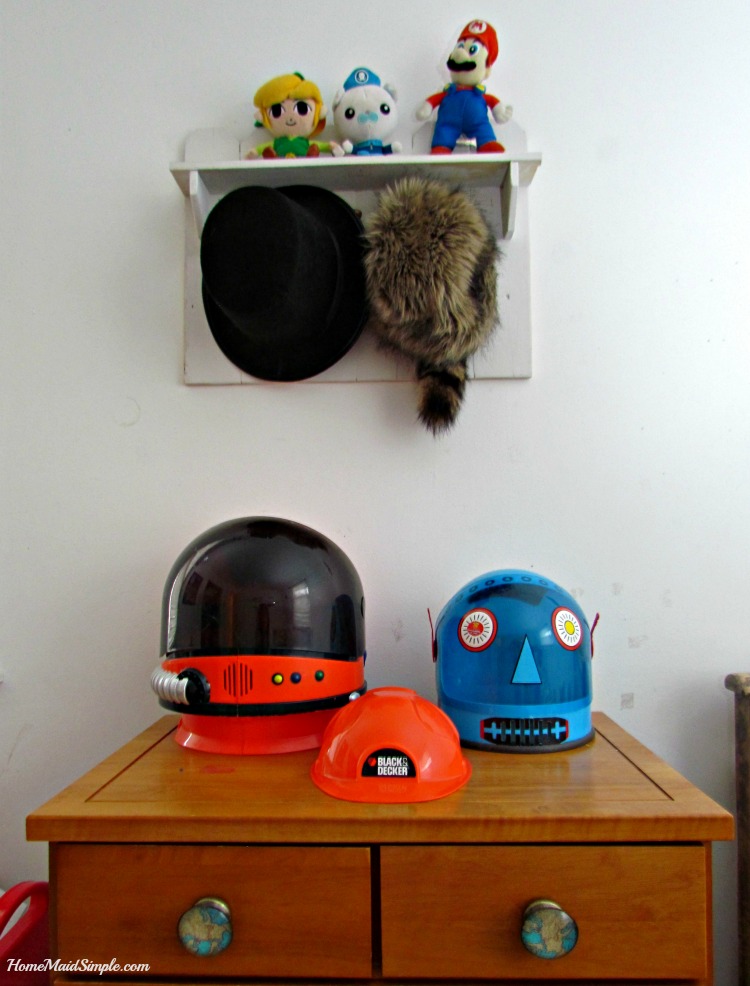
  • DIY Inside Out Family Costume

    DIY Inside Out Family Costume

    Fill your emotional buckets with this awesome and easy DIY Inside Out Family Costume. This post contains affiliate links and I will receive compensation when you click through and make a purchase. 

    Last weekend our church had their annual Trunk Or Treat. It was a lot of fun being that we’re in a new place again, which means new people to hang out with, and we could really show our stuff. About a month ago we decided that this year we’d try for a family themed costume again, and went with Inside Out.

    It’s the only movie we saw in theaters this year, and with our girls growing up into little adults, and dealing with all kind of emotions, it was the perfect one to see! We had one problem though – there are only 5 emotions, and there are 6 of us. Feeling a bit spunky, I volunteered myself to dress as Bing Bong – Riley’s imaginary friend for those who haven’t seen the movie yet.

    Guess what! Turns out besides a chili cook off, cornbread contest, and dessert contest – they also had a costume contest. I bet you see where this is going right? Mark entered the chili contest – no win. I entered the dessert contest – no win. We were automatically entered in the costume contest, and we WON. The kids emotions were all JOY when our names were read.

    Joy’s Costume

    Blue Hairspray – Target
    Yellow Summerdress – Goodwill


    Sadness’ Costume

    Blue Hairspray – Target
    Glasses – knocked out the lenses and spray painted blue – Party City
    Oversized Blue sweatshirt – Goodwill
    Blue Jeans and Sneakers – Closet


    DIY Inside Out: Disgust Costume  

    Disgust’s Costume

    Green Hairspray – Target
    Oversized Green nightgown – sewn into a skater style dress – Goodwill
    Pink scarf – Goodwill
    Green belt – Goodwill
    Pink Shoes – Goodwill


    Anger’s Costume

    Red Hairspray – Party City
    White shirt – closet
    Red tie – homemade


    Fear’s Costume

    White shirt – closet
    Sweater Vest – Goodwill
    Purple Tie – homemade


     Bing Bong’s Costume

    Bowler Hat – borrowed from a friend
    Pink Dress – Goodwill
    Purple Tie – homemade
    Black Bolero – closet
    Finger Gloves – Fingerless gloves
    Paper Flower
    Purple Tail – home sewn and held on with a large safety pin
    Orange Leggings – Amazon 


    There you have it! It took me a good month to assemble all the pieces. I made MANY trips to the Goodwill, and even checked out a couple different locations. The kids were thrilled and I had a blast – even if I was making ties I’ve never made before 2 hours before the party. 
     
     
    What are you dressing up as this year? Have you seen Inside Out yet?

      Be the hit of all costume parties with this DIY Inside Out Family Costume! The perfect Halloween party costume.


  • Family Friendly DIY Halloween Costumes

    Family Friendly DIY Halloween Costumes

    Make it a DIY Halloween year with these fun and family friendly costumes for everyone. This post contains affiliate links and I will be compensated if you click on and make a purchase through them.

    Every year when I start browsing Halloween Costumes, I’m reminded just how non-family friendly a lot of these pop-up Halloween costume places are. From the sexy women’s costumes to some gruesome and terrifying outfits, I find I just don’t enjoy browsing through them all for kid and family friendly costumes. 
     
    I no longer shop Halloween stores but instead browse the thrift stores and our own closets for our DIY Halloween costumes. It’s helped pull the family together in a fun search for that perfect piece that will turn into a winning costume at every party. 
     
    Aren’t these all so fun!! One of my fondest – yet oddest – costumes as a kid was dressing up as a shower. I’m sure my parents thought I had gone crazy…but then again, maybe it was their idea for keeping things cheap? I digress though – check out the tutorials, and tips for making these fun Family Friendly Halloween costumes by following the links!
     

    DIY Halloween Costumes 

    DIY Inside Out Characters – from Home Maid Simple
     
    DIY Planet Halloween Costumes – from delineate your dwelling
     
    Campfire Costume (and more!) – from kitchen fun with my 3 sons
     
    Guess Who Characters – from costume works
     
    Star Wars Fighter Ship – from Kate’s creative space
     
    The Man in the Yellow Hat and Curious George – from The Chirping Moms
     
    DIY Teenage Mutant Ninja Turtle – from Crafts by Courtney
     
     
    What are your kids dressing up as this year? Let me know if you plan on using any of these fun ideas!


  • One Room Challenge: Frame Your Own Canvas DIY

    One Room Challenge: Frame Your Own Canvas DIY

    In this easy tutorial you’ll learn how to stretch your own canvas print over a frame so you can hang a bit of yourself on the wall. 


    When I started imagining what to hang over our couch, I knew it needed to be something besides a family picture. I wanted something new and fresh, that we hadn’t hung up before. I figured we’d probably check out the thrift stores and see what we could find. 
     
    But then I did something else – I started browsing my old college art folder. I’ve got a number of really cool pieces I had forgotten about, like the hanging skeleton, and Alexander Graham Bell – but it was my abstract black and white that caught my eye. Rolled up in the bottom I knew it was the piece I was looking for. 
     
    I even got a pretty good grade on it! I mean 19/20 for someone who had never gone beyond middle school art class must mean the art gene didn’t completely skip me over right?
     
     
    The big question I had to ask myself at this point though, was why didn’t we frame it in class? I had no idea what I was doing here, so reached out to a couple art friends – all who also had never actually stretched canvas before. Feeling a bit better about that I headed to Pinterest where I learned of these nifty things called Stretcher Bars.  
     
     
    I made a couple phone calls and found Hobby Lobby sold them in all different sizes, but you can also get them on Amazon. If it hadn’t been for pinterest, I would have attempted to build my own wooden frame, and also would have gone about it completely wrong!
     
    See for canvas, apparently you don’t want the canvas to lay directly on the frame. These premade stretcher bars are slightly raised right on the ends to keep the rest of your painting off the boards. Plus, no need to figure out those corner angles because it’s all done for you. 
     
    First things first here now! You need a painted canvas! If you don’t have one laying around from an old college class….please tell me if you do!….then go buy some canvas and paint it! It will be a lot of fun! 
     
    Next, measure your painting. Buy your stretcher bars in the right sizes. My painting is 4 feet by 23 inches. So I picked up 2 48″ stretcher bars and 2 23″ bars. Insert the stretcher bars together at the corners, and VOILA! You’ve just build your frame!
     
     
    To stretch your canvas now, you’ll lay your painting upside down. Place your frame on top of the painting, lining it up as best you can to the edges of the actual picture. Hopefully you’ve got a good 3-4 inches to overlap over your frame. 
     
    After the painting, this next part is my favorite! It’s time to pull out the Staple Gun! Following the numbers below staple each side in succession. So 1 staple in side 1. Then side 2, 3, and 4. Then go back to side 1. It will take awhile, but that’s how you get a nice smooth and straight stretched canvas. Depending on how large your canvas is, 2 sets of hands can be very helpful here. 
     
     
    Wasn’t that exciting? Slowly but surely this Everything Room is getting put together! With a nice piece of personal art – that finally grew on Mark – we have a bit of a color pallete to help guide the rest of the room. 
     
     
    Join me again next week to see which piano we decide to keep, and how it will affect the room arrangement!
     
    Linking up with Calling it Home for the One Room Challenge! 
  • DIY Oil Change Date Night + Printable Notecards!

    DIY Oil Change Date Night + Printable Notecards!

    This shop has been compensated by Collective Bias, Inc. and its advertiser. All opinions are mine alone. #DIYOilChange #CollectiveBias
    Looking for a really fun date night that will have your man smiling the whole time? What would any guy like more on date night than to do something they enjoy? Last week that’s exactly what we did! I’ve decided it’s high time I learn some more handy skills around the house – like how to change my cars oil. 
    DIY Oil Change for Date Night! #DIYOilChange ad #cbias

    I told Mark I wanted to learn how to change the oil, I could tell he was pretty stoked with the idea. When I came out wearing his shirt and my holey jeans, he was definitely a happy man.

    First was a stop at Walmart to pick up everything we needed – namely Pennzoil Platinum Full synthetic motor oil! Along with the new oil we also grabbed an oil catcher, oil filter, and air filter. According to Mark the air filter should be changed with every other oil filter.

    Pennzoil at Walmart #DIYOilChange ad #cbias
    Be sure to check what weight and grade oil your car needs. I would have had no idea to even check that if it weren’t for Mark!  You can check your cars manual, or possibly on the oil cap like mine was. Thankfully Walmart has this cool device to find exactly what oil filter you need for your car too. 
    So let’s get started! Now that I know how to change my cars oil, I’m ready to teach you. 
    What you need for a #DIYOilChange
    *Please use standard safety procedures when changing your oil. You should always refer to your own car’s manual before changing your oil.*
    DIY Oil Change
    You will need:
    Pennzoil Platinum Full synthetic motor oil – it’s high quality oil is designed to fully protect my car’s engine!
    Oil catcher
    Car Jack
    Car Jack Stand
    Oil filter
    Allen Wrench
    Oil Filter Wrench
    First things first is to get the car lifted. I learned that my awesome car has built in reinforced areas on the frame specifically for jacking up the car. How cool is that?! OK maybe that’s standard on most vehicles these days, I thought it was nifty. Don’t forget to block the back tires for an added safety measure!

    Car Jack for #DIYOilChange ad #cbias
    Once you have both sides lifted on their jacks, it’s time to move to the oil changing part. Before you head under the car, you want to get some air flow going in the oil pan. This I knew, because it’s like emptying any other can of liquid – good airflow means a steady stream, bad airflow and the liquid galumps out this way and that – similar to your laundry detergent bottles.
    Locate oil cap for good air flow #DIYOilChange ad #cbias
    Unscrew the oil cap, and pull the dipstick out to allow extra air flow. Now it’s time to head under the car! When I first scooted myself underneath I looked at Mark and said 

    “this makes me really anxious being under the car”

    To which he responded

    “Good. It should!”

    So I felt completely capable at this point knowing I was normal to be anxious. At this point you need to locate the oil pan, and the screw bolt holding the oil in. For this part you need the Allen Wrench fitted with the right size bolt, and the oil catcher. A great reason to do this for date night, is your date can hand you the tools as you need them, so you’re not sliding in and out a bunch. 
    DIY Oil Change for Date night! #DIYOilChange ad #cbias
    Here’s a little more inside look to this picture 
    • Anxiety
    • I totally got this!
    • Ahh! The wind picked up! note to self and everyone else – don’t do it on a windy day!
    • There goes the oil! My hand’s dripping, probably should hold that over the pan until I get a rag. 
    Totally fun right! Mark was having a blast watching my facial expressions and snapping these photos for me. At this point I knew I was totally glad I put on HIS tee-shirt and my holey jeans. He loves when I wear his clothes, and I didn’t care that I was getting dirty. 
    Once the oil is all out, replace the bolt! You don’t want to put your new oil in, and have it all spill out the bottom!
    Change the Oil filter with your #DIYOilChange ad #cbias
    For the oil filter you’ll use that REALLY BIG WRENCH, and unscrew the whole filter. It’s pretty close to the oil pan, and just hanging down, so you shouldn’t have too hard a time finding it. There will be oil in it, so keep that oil catcher nearby, and then go ahead and put the filter inside the catcher as well. Rub some oil on the new filter, and screw it on. Here’s some key points for the oil filter change:
    • Make sure you get the old rubber washer off with the old filter. You don’t want it doubled up!
    • Rub oil on the new filter’s washer before replacing. 
    • Screw new filter on just hand tight. 
    • Make sure you’re screwing it on straight and not crossing threads. 
    A second pair of hands and eyes was great to have. Mark enjoyed checking my work, and felt impressed with how tight I was able to get that filter back on. 
    Once you’ve finished up under the car, go ahead and take the car off the jacks. Please remember safety first! Lift the car up with the jack, remove the car stands, and lower the car down. 
    Now we’re ready to add our new oil! Pennzoil Platinum Full Synthetic Motor Oil keeps my cars pistons cleaner than 40% of the toughest industry standard. It’s also great for fuel economy, allowing us to drive an extra 550 miles a year vs driving with a dirty engine. Plus with Pennzoil Platinum full synthetic motor oil we get a 10 year/300,000 mile Lubrication Limited Warranty!
    To replace oil, put a funnel in the oil intake hole – so not the technical term here guys! – and pour in your oil. Check your cars owner manual to see how much oil your car needs. Ours took a full 5 qts. 
    Pennzoil Platinum Full Synthetic Motor Oil #DIYOilChange ad #cbias
    Replace the oil cap, push the dipstick back in, and feel accomplished. WAIT! We’re not quite done. To make sure you’ve got enough oil in, and you did it properly, run the motor for a minute or two to push the oil through the engine. Turn off the car and check the dipstick. To do this you pull it out, clean it off, and dip it back in. You’re now good to go if the oil is in the right area on your dipstick. 
    Correct Oil Level #DIYOilChange ad #cbias
    WELL DONE! You’ve now changed your oil. To make it even simpler, I’ve created these printable note cards for you! Print, cut, attach a ring, and you can change your oil anytime all on your own. 

    Check out these 5 great tips from Eric The Car Guy!

    BONUS: If you’re ready to change the air filter, it’s so simple! There are 4 screws holding the air filter in. Unscrew those, remove the old filter, and put in your new one. Now you’re really rocking it!
    Air Filter Change #DIYOilChange ad #cbias
    Do you know how to change your car’s oil? Make it a Date Night and tell me all about it! Check out more tips and tricks for a #DIYOilChange

  • Outdoor Patio Set Redo – Creating a Work Zone near my kids

    Outdoor Patio Set Redo – Creating a Work Zone near my kids

    When we decided to rent this house before actually seeing it in person, one of the biggest sale points for me was the fenced in backyard and attached deck. The vision was real – a workplace outdoors where I could enjoy the sounds of nature and let the kids play in a safe area that wouldn’t make my heart pump with anxiety.

     
    We moved in on July 1st, and I started looking for a good patio set. We happened across a yard sale one saturday and found this 2 seater set for only $18. I had to double check with the owner that I wasn’t reading the price upside down and he really wanted $81. Nope $18 was correct! There was no way I could leave this behind, it was perfect!
     

    The first step in redoing this set was picking out colors. The whole family came with me to our trusty Walmart, and together we picked out a nice Dark Purple spray paint. There’s an excess of bugs around these parts, so we wanted a fun color, but not one that would attract the bees. After the purple was chosen, I found this pretty damask upholstery fabric on sale too! There was just enough left for our seats. 


    While the paint dried on the chairs and table frame, we got to work on the seat cushions. The original seats were so old, there was no salvageable parts. I picked up precut wood rounds from Menards, and the padding from Walmart.

    How to Reupholster patio seats. 

    What you need:
    Wood Rounds
    1-2inch foam padding
    fabric
    hot glue
    staple gun with staples

    Use the wood rounds to trace a circle on the foam padding. Using a razor blade, or sharp knife, carefully cut around the padding. Lay the padding on back side of fabric. I used a permanent marker to measure straight out and leave dots around the seat. I gave myself a good 2 inches extra fabric to attach to the underside.
    Connect the dots, then cut our the fabric. Place padding on the center of fabric, then wood round on top of the padding. At this point it is great to have a second pair of hands helping out. Really push down on the wood as you pull the fabric around, and attach in place with the hot glue. Now the fabric is attached, give it a second go around with the staple gun. Between the two, bugs and inclement weather should be kept out of the seat.

     
    I now have a fantastic colorful work zone outside! It’s also going to be a great place to relax with friends while the kids run around outside. If you’re ever in the area and want to join me on the patio, come on by!
     
     
    When I’m not using the table, I’ve found the kids enjoying it too. This week they were building bubble castles. My vision has come to life, and is now updated to see many many family memories being made around it. 
     
    Do you have an outdoor space to enjoy?
  • DIY Gingerbread Planes Hangar

    DIY Gingerbread Planes Hangar

    This shop has been compensated by Collective Bias, Inc. and its advertiser. All opinions are mine alone. #PlanesToTheRescue #CollectiveBias
     
     
    Have you made a gingerbread house yet? Why not mix it up and build a Planes Hangar instead! Are your kids home for the Christmas break? Are they driving you nuts? Yeah mine too. Don’t get me wrong, we’re having lots of fun, but without the regular routine, I’ve heard probably a million times in the last 2 days – 
     
    • I’m bored! 
    • We have nothing to do. 
    • You won’t let us do anything!
    Well, we had to remedy that asap! Really though children, you have a room full of toys and dress ups, I’m sure you can find something to do – am I right?! Earlier last week, I was walking the aisles of Walmart since it’s too cold to go outside, and I found the Planes Fire and Rescue toys on Rollback! Woot Woot! I know the kids are going to get new toys on Christmas, but that’s not until Thursday and we needed something to break up the monotony of days spent indoors. 
     
     
    My lightbulb dinged, so I grabbed a couple of the Planes:Fire and Rescue Character Assortment die cast set ($4.97 each!). I thought how fun would it be to make our own hangar – it’s like a doll house but for planes!I get home and I’m pulling out the cardboard to make this cool vision in my head, when in walks Mark and says something like “Why don’t you make it out of gingerbread?”.
     
     
    I knew I married this guy for a reason. So I put my cardboard away and started making the gingerbread – which soon became apparent I was terrible at! Seriously, ya’ll my ideas were failing left and right, and my beautiful vision was dimming. That’s when Mark stepped in and I stepped back with the camera, and the vision in my head became a reality plus some!
    We didn’t want the kids to know what we were doing, so we sent them to the other room and turned on the Disney Planes Movie. 


    First you’ll want to make some gingerbread. We doubled this recipe from Food Network. Follow the recipe up until rolling it out. Before you roll the dough, split it into three portions. Roll out on the back of 3 cookie sheets, or if you have a cookie sheet without a lip use it like normal. Bake according to directions. When it comes out of the oven, you’ll want to start cutting your shapes while it’s still hot! Otherwise it will harden and be impossible to cut. 
     
     
    Sheet 1 you will cut it in half width ways. Then round the tops. Measure the sides to make sure they are an even length all around. On one side cut out the doorway for your planes. Cut the cut out in half to attach as doors to the opening.
     

    Sheet 2 you will just cut in half, and trim the edges to be the same height as your front and back pieces. These will be your side walls.
     
     
    Sheet 3 is your roof tiles. Trim the edges, then cut in strips width ways. Let all the pieces dry sufficiently, about an hour or 2. Save all the trimmings, and crush finely for ground covering to complete the scene. 
     
     
    While Mark was busy with the gingerbread making and assembly I cut out the Planes: Fire and Rescue logo from the packaging. It made quite the nice little touch to our finished hangar. 


    Once the pieces are sufficiently cooled, it’s time to start assembling. We’re big chocolate lovers, so we decided to go with some good old chocolate frosting for glue. Any type of frosting will work, though royal icing will stick the best, we just used a creamy frosting. Watch this quick slide show of the assembly process.


    The final touch before presenting this to the kids was the gumdrop propeller. Mark saved one edge from the sheets of gingerbread and carved it into a propeller. We added some frosting, sprinkles, and a gumdrop nose.

     
    Finally it was done. My vision of awesome was complete! So although I am most definitely NOT an engineer, Mark saved the day and made the kids some of the happiest ones around. 


    Presenting the kids with their Gingerbread Plane Hangar with the new Disney Planes toys was a blast, and the exact kind of break we needed. They had fun flying Dusty over the chocolate pretzel forest, landing him on the roof, and attempting to eat the roof.


    Need a last minute Christmas gift? Also on Rollback at Walmart are: 
     
    • Disney Planes Flight to the Finish Speedway
    • Disney Planes Fire & Rescue Die-Cast Vehicles, 3-Pack
    • Disney Planes Fire & Rescue Deluxe Talking Vehicle Assortment
    • Disney Planes Character Assortment die-cast set
    By the end of the day our Plane Hangar didn’t look too much like a hangar anymore. The gumdrop propeller had been replaced with a half eaten Santa, and the roof “caught fire” and collapsed on the poor characters. It’s all good though, because the Disney Planes are all pretty tough!


    If you’re looking for some last minute fun before Christmas, and haven’t made gingerbread houses yet, I suggest you mix it up and try the Gingerbread Hangar instead.

    What will you be doing to entertain kids this week? Share with me your holiday plans!
     
     
  • Be your own Florist with Bloominous

    Be your own Florist with Bloominous

    *This post is sponsored. Compensation was received. All opinions are 100% my own*

    When I was in high school I had dreams of being a florist, and owning my own little flower shop. Arranging flowers to make homes a little brighter would have been a dream job. One day I might still open that shop. In the meantime though, I came across Bloominous, an online DIY flower shop. 

    I’ve never heard of anything like it before. With Bloominous you order the kits you want, from boutonnieres to center pieces – then the kit is shipped overnight and you get to put them all together yourself.

    Bloominous has different kits to make any event, from weddings to holiday parties to even a simple table centerpiece, special! Each kit is curated to fit in with current trends from Eco Chic to Enchanted Elegance.

    I think the next party I throw will need to have these Succulent Favors (and at only $5 each, that’s a steal!) from the Eco Chic collection. I can see them complimenting a holiday table as mini Christmas “trees” that the guests can then take home.

    I feel like Bloominous just made my dream of floral arranging come a little closer. Maybe I don’t need to own a little shop. But having the tools to just arrange flowers for my home and events would be so much fun.

    Connect with Bloominous