Tag: food storage

  • Getting Kids to eat Oatmeal with Thrive Snackies + Snackies Box Giveaway

    Getting Kids to eat Oatmeal with Thrive Snackies + Snackies Box Giveaway

    This is a sponsored post. I received Thrive product in exchange for my honest thoughts. 

    Food storage. It’s something I believe strongly in. Over the last 6 months, I’ve been chatting with one of my dearest friends, Laura, about her new business, selling Thrive Life. She and I really get each other. We live on a limited budget and have often needed the blessings that come from storing food. Through job loss and moves across the country, our food storage has made sure we don’t go hungry. 

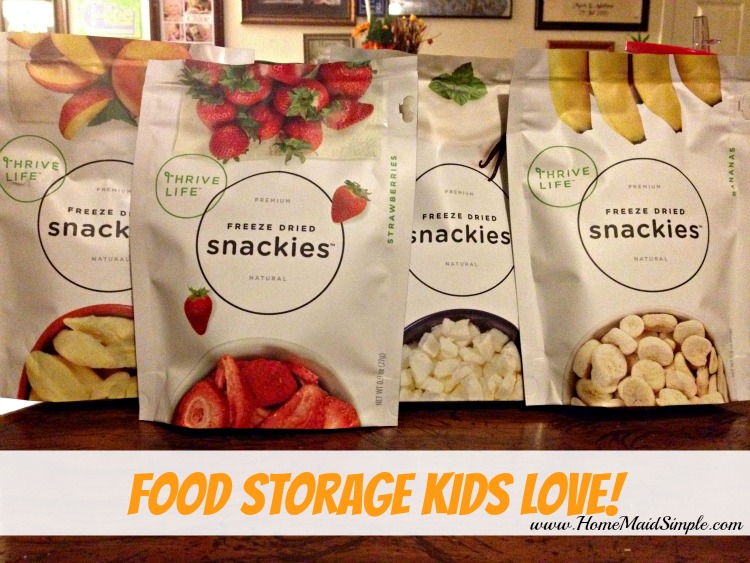
    I kept telling Laura that I needed to resupply our food storage from our latest move. Mainly our 72-hour kits that we ate up in the 3-day drive from North Dakota to Indiana. Being an awesome friend, Laura suggested I try the Snackies

    Thrive Life Snackies

    When our box arrived in the mail, the kids got a little overly excited. “SNACKIES! Mom, you got us Snackies!!!?” Sure did kids! Only not the cool Snackeez 2 in 1 cups they thought it was. When we opened the box there were a few sighs of disappointment, but then they tried the snacks and all was well in the world again. 

    They ate the Peach slices one day after school, but the rest we decided to save for a family breakfast of oatmeal. See one of the best cheap meals we can have when going through a financial hardship is oatmeal. I’ve never been able to get my kids to eat it unless it’s the flavored overly sugared ones. So I whipped up some Creamy Wheat from our food storage one morning and opened up all the Snackies. Yogurt bites, strawberries, raspberries, bananas and a little sweet treat with chocolate chips. 

    Thrive Life Snackies makes Oatmeal more appealing to kids

    The kids actually ate without complaint. There were some interesting combinations going on, but they did eat! Was it their favorite breakfast ever? No. When it comes to living frugally, though, we can’t always have our favorites. Now that I know my kids will eat oatmeal, especially with Thrive Snackies mixed in, I can add both the oatmeal and the Snackies to our long term food storage with peace of mind.

    The Snackies come in all varieties, including veggies! I can’t get the kids to just snack on the veggies yet, but I plan on putting them in our car emergency kit. If we ever find ourselves stranded on the side of the road, we’ll have something to nourish us until help arrives. 


    Interested in learning more about Thrive?

    About Thrive Life

    Host a Party

    Become a Consultant

    Current Specials

    Win a box of Thrive Snackies

    Are you ready to WIN Snackies for your Food Storage? One lucky reader will receive a box of Snackies from Laura! 

    Open to US 18+ 

    Giveaway ends 1/31/16

    a Rafflecopter giveaway

  • Be #CartonSmart this Holiday Season

    Be #CartonSmart this Holiday Season

    This is a Sponsored post written by me on behalf of Carton Smart. All opinions are 100% mine.

    #CartonSmart Thanksgiving Stuffing

    What’s on your Thanksgiving table? 

    Green Bean Casseole, Sweet Potatoes, Cranberry Jelly, Stuffing,Turkey, Pie

    What’s really in those ingredients though?

    Preservatives. sweeteners, flavoring, dyes. Things that aren’t really that great for our bodies, and make us crave more. 

    This Thanksgiving, I’m trying to simplify our meal, and enjoy more natural preservative free foods, while also cutting back on our waste. The holidays are big cooking and bakeing seasons for people all over the country, and in turn it adds a lot of waste to our landfills.  I was pretty excited to find Pacific Foods Tetra Pak cartons.

     photo d1d52bb8-c150-4f19-9a7c-b8c9ab3c8df3_zpsac6b75dd.jpg

    Have you ever opened a can, and then placed the leftovers in the fridge in the can? I have, and the taste after is awful! The Tetra Pak cartons are resealable, and because it’s a carton instead of a can, they won’t leak metal flavoring into the food.

     photo 795e421d-1ec8-414e-b1b8-dde8f5f23ded_zps62983f0a.jpg

    Become Carton Smart this Thanksgiving and exchange your cans for cartons.  Just look at all these reasons on why you should make the switch.

     photo 1898ca76-3272-4baf-a8df-07abf60e15e3_zps1bf425e9.jpg

    When you read the list of ingredients on Pacific Foods cartons you’ll find a complete list of foods you know. For example in this Cranberry Sauce you will find cranberries, cane sugar, and water.  For more of a boost, it is also all organic!

     photo 62adf36b-e1dc-4d93-98c1-aa80d97a468d_zps600d562e.jpg

    I hope that with these few exchanges to our regular feast, we will all still have energy after eating, and not go into a food coma.   Follow #CartonSmart on Pinterest for more ideas on how to be simplify your meals this holiday season..

    Tweet @CartonSmart to share how you plan on being #CartonSmart this Holiday Season!

    Check back later for how I used the Pumpkin Puree and Chicken Stock in some traditional Thanksgiving dishes. You’re going to love them!!


    Visit Sponsor's Site

  • Raspberry Rhubarb Jam #FoodieFriday

    Raspberry Rhubarb Jam #FoodieFriday

    About a month ago Jade Louise Designs posted this stunning photo and recipe for Raspberry Rhubarb Jam. Sounded absolutely delicious, and since I had a huge bush of rhubarb growing in my backyard I knew I had to try it out. I made a couple alterations though using some of my freeze dried raspberries. Since I was missing the juice I would have had from fresh berries, I added a little cranberry juice in as well.

    Raspberry Rhubarb Jam
    adapted from Jade Louise Designs
    Ingredients
    4 cups freeze dried Raspberries
    4 cups rhubarb, chopped
    1/2 cup 100% Cranberry Juice
    5 TBS Pectin
    1 tsp butter
    2 TBS Lemon Juice
    4 1/2 cups Sugar
    Directions
    Prep jars for canning.
    In a large saucepan combine all the ingredients minus the sugar. Heat it to a boil, while constantly stirring. Add the sugar, and return to a boil. Boil for 1 minute, and remove from heat. 
    Pour the jam into prepared jars, add lids and process for 30 minutes.  Let cool. Make sure the jars have sealed. If not keep in the fridge, and use within a month. 
    ~FEATURES~

    It’s back to school time and I NEED ideas for my kids lunch, and I’m sure some of you could use some too. Last week we had two posts shared with school lunch ideas to mix it up a little and make lunch fun. Don’t forget notes reminding them to have a great day!
    Now with the kids back in school I can enjoy a little more fancy lunch for myself again, instead of pb&j’s or mac and cheese. These hit the spot for me!
    I love Salmon, but have a hard time getting the kids and Mark to eat it. If I start young with Prince L and Princess R with a favorite like Mac and Cheese, I might win some of them over yet!
    I’m not a big Watermelon fan, but this sounds amazing, and refreshing, with more of a sweet taste than tangy.  I can already picture sitting on the patio sipping this while the kids playing quietly at my feet.  Hey I can dream!
    Foodie Friday happens every Thursday night here at Home Maid Simple and Simple Living and Eating.
    This is a FOOD party. Please only link up food related posts – recipes, tips, tricks, and health related topics. All other posts will be deleted. 
  • Powdered Milk and a Cheap Menu

    One item I love keeping around the house is powdered milk. I use it mostly when making bread, but sometimes I like to keep a pitcher of it in the fridge as well.  Growing up I had a friend whose family always drank powdered milk. I personally don’t care for the taste of it, but I have found other ways to use it that save our budget.

    Milk prices seem to keep going up, and at close to $4/gallon here, it can really add up when you’re trying to stick to a budget. It gets even more expensive when you have 3 little kids who love drinking milk day.  I use the powdered milk in just about all my baking now. It doesn’t effect the taste, or consistency of the dish, and it’s a lot cheaper than using your good milk. I’ve also started using the powder milk when making the girls mac and cheese. Then there are days like today where we ran out of milk, and I haven’t had a chance to make it to the store; the powdered milk is a good substitute for the kids breakfast cereal too. 
    Just look at this price comparison
    1 #10 can of Non-Fat Dry Milk – Cost $14-16 (pending on brand)
    1 gallon of milk – $4 (approximate)
    1 #10 can of Powdered Milk can make approximately 10 gallons of milk.  So that’s $14-$16 for 10 gallons
    10 gallons of Milk will cost $40. 
    Double take – will you pay $40 for 10 gallons, or $16?  That’s over a 50% savings!!!

    EDIT: This all depends on the brand. This comparison was using Peggy Layton Brand. The brand I currently use, Rainy Day Foods, only makes 5 gallons, but also only costs $13. Do your homework, and check the brands servings per container to get the most for your money.
    If you’re looking to save some money, and make your milk last longer, I would seriously look into buying powdered milk.  
    ~~~~~~~~~~~~~~~~~~~~~~~~~~~~~~~~~~~~~~~~~~~~~~~~~~~~~~~~~~~~~
    It’s the last week of the month! That means grocery budget is spent, and we’re cutting corners, and being creative in our menus. We’ll be eating lots of beans this week – at least until Friday.
    Monday – Potato Casserole and Salad
    Tuesday – Bean and Cheese Enchilada casserole
    Wednesday – Chili
    Thursday – Leftovers
    Friday – Dinner at my parents
    Saturday – Mark’s Birthday: I’m taking him back to our first date at a Japanese Restaurant.
    Sunday – Dinner at my parents
    I’m linking this up to Organizing Junkie’s Menu Plan Monday
  • Canned Apple Pie Filling {Foodie Friday}

    Canned Apple Pie Filling {Foodie Friday}

    BWS tips button
    Hosted at
    and
     Canned Apple Pie Filling
    makes 5qts


    8-9 cups peeled and chopped Apples (Or you can slice them. However you like them in a pie).
    5 cups water
    1/2 cup corn starch
    1 cup +1TBS vanilla sugar
    1 cup brown sugar
    6 whole cloves, crushed (I just pinch them between my fingers. Or about 1/2tsp crushed cloves)
    2 1/2 TBS Apple Pie Spice – you can always add more or less for your own taste
     
    In a large pot, boil the apples and water until the apples are slightly tender.  Add the rest of the ingredients.  Keep on medium heat until pie filling is thickened.
     
    While the filling is thickening, sanitize your jars, rings and lids. Once the jars are ready and the filling is where you want it, fill the jars. I filled to the bottom of the first ring, where the jars begin to taper. Wipe the rims and place the lids on. Screw on the rings and you are ready to process them.
     
    Process in a water bath or steam canner* for 25-30 minutes.  Remove the jar and let cool. I just use a pot holder, but they do sell jar lifters.  Check to make sure they have sealed, and store in your pantry. If they didn’t seal, store in your fridge, and use within 2-3 days. 
    *I used a steam canner, but they are not recommended by the USDA. 
     
    ~This weeks Features~
     
    Home Made Alfredo Sauce
     
    “Twice-Baked” Faux-tatoes
     
    Berry Dutch Baby
    

    document.write(‘

  • Menu Plan Monday

    I think I’m ready to start planning meals again. We’ve honestly been really scrounging lately, coming up with whatever I could. Our house has not sold yet, which means we’re paying a mortgage and rent on a teachers salary. It’s doable, and because we’ve done what we could to get out of debt, it’s been possible.  I’ve learned a lot though! I can now make my own tortillas, baking a loaf of bread each morning has become routine, and beans are becoming more accepted by my kids. We’ve delved into our food storage. I am so glad we have stored food for these tough times.

    Monday – home made tortillas with beans and cheese
    Tuesday – Chili and cornbread
    Wednesday – Fried Zucchini and Rice
    Thursday – Pulled Chicken sandwiches
    Friday – lasagna rolls
    Saturday – leftovers