Tag: organize

  • Spring Clean your Closet

    Spring Clean your Closet

    Spring is here, and in this home it means spring cleaning of all kinds! Today I want to talk about spring cleaning your closet.

    I’ve been slowly working my way through Marie Kondo’s The life-changing Magic of Tidying UpOne of the key messages I’ve taken from it, is that things we own should spark joy. If it doesn’t bring us joy, and it doesn’t serve a useful purpose, we should get rid of it!

    I decided the best place for me to start applying this would be my closet. It wasn’t quite spring, but the weather around here has been pretty nice. So the windows came open, and I started pulling all my clothes out and stacking them on the bed. Unlike a lot of people I know, I don’t really own a lot of clothes already, but the ones I do own were not sparking joy. Very little joy was sparked when opening my drawers actually. 

    Awesome tips to help spring clean your closet.

    Spring Clean Your Closet

    Wash everything. 

    Start by washing everything! The worst thing to do when spring cleaning anything is doing it in shifts. You don’t want to go through your clothes and then add items back in that you haven’t had a chance to go through. I know it’s easy to say you’ll just do it as you wash them, but I’ve been there, done that. It doesn’t work nearly as effectively. 

    Pull it all out. 

    Once everything is clean, pull it all out! Lay it on your bed, couch, middle of the floor – as long as it’s clean – so you can see it all. Go ahead and grab your shoes as well! You know you’ve got some you don’t really love. 

    One at a time. 

    Don’t worry about sorting the clothes into tops, bottoms, dresses, jackets, socks, etc. Just dive right in! Pick up one item. Hold it up. Inspect every inch of it. Try it on if you need. Then ask – does this spark joy? Does it make you feel like you, the real you when you wear it? Does it fit? Are you holding on to it for memory sake, or because maybe one day it might fit again? 

    Separate.

    After asking yourself all these questions, you have one last question to make. Do I keep it, or get rid of it? Then separate it into it’s respective pile. Have a box or bag handy so the “get rid of” pile, as we call it here, can be taken out as soon as you are done. The more it hangs around the house, the more likely you’ll have a hard time really letting go of it. 

    Clean out your closet with ThredUP

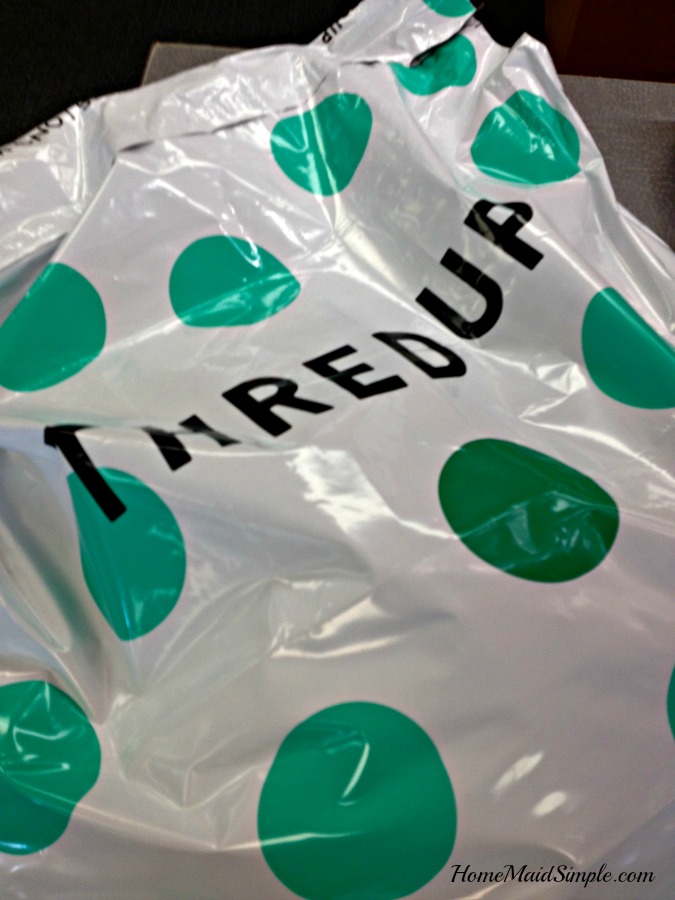
    I had ordered a Clean-Out Bag from ThredUP, so once I was done I nicely folded my clothes, placed them inside the bag, and sent them off to ThredUP. Out of about 20 items I sent, they were able to resell 4. Not too shabby, and I knew that would probably be the case. What I love is that the rest of the clothes I sent will be given to textile recycling companies so nothing will end up in landfills. 

    Try ThredUP on me! Sign up and get an automatic $10 to spend! It will also give me $10 to spend, so you know, help a girl that’s lacking in cute clothes out. 

    Now that your closet is cleaned out, you can buy a few new pieces that DO spark joy! What will you buy? Are you inspired by the flowers in bloom, or does you closet contain more neutrals?


    This post is part of a blog hop from Blogs & Business: Moms Who Do It All. Check out some of the other awesome blogs participating:

    Daily Momtivity | The Art of Better Blogging | The Jessie K | Fighting for Fitness | Building Butterflies | Forty by Forty Fitness | A Kreative Whim | Women Winning Online | Hometown Betty | Champagne and Cheerios | B is for Bookworm | Aileen Cooks | A Cotton Kandi Life | Beyond Mommying | Home Maid Simple | Tot Tot Goose | Thrifty Guardian | Diary of a New Mommy | Mrs and Momma | Blue Eyed Babies | The Little Tourist | From Designer to Diapers | Mommy, Memories and Mouse Ears | Redmond Kids | Cheer and Cherry

  • Tips for an Inexpensive Kids Bedroom

    Tips for an Inexpensive Kids Bedroom

    Grab these quick actionable tips for an inexpensive kids bedroom. This post contains affiliate links and I will be compensated if you click through and make a purchase. 

    Hey everyone, I’m Steph from Crafting in the Rain, and I think it’s so fun that Adelina has asked me here to share my girls’ room with you! 


    I almost feel like I should give you a couple of disclosures before I jump in here.  What I’m going to show you is not a high end, designer bedroom shopped from a catalog.  It’s also not a knock-off, DIY, cheaper version of previously mentioned $$ bedroom.  I have my fair share of complaints about the room even…(eventually we want to scrape ceilings, replace carpet and baseboards, paint everything, and I wish it was bigger)  


    BUT, I feel like this can be a very useful post because I’m going to show you how we are using the space the best we can, and with cheap or free storage solutions that anyone should be able to come up with.  Additionally, these pics were all taken with my phone because by the time I thought about getting out my real camera, the girls had come home from school and it didn’t look quite as good anymore 😉

    Ok, here we go.


    Storage solution 1: Boxes, boxes, boxes

    In the girls’ room we have boxes from Ikea, magazine file boxes, random cardboard boxes that have been decorated with colored Duck Tape, shoe boxes, and a few plastic boxes. When possible, use boxes with lids so they can be stacked. 

    What they hold: small toys, craft supplies, “treasures,” school papers, jewelry

    Storage solution 2: Wall mounted bookshelves

    Use as much vertical space as possible in a small room (I’d like larger shelves here soon) I made these bookshelves a few years ago when I first started blogging, so the pictures aren’t great, but here’s where I posted about them. The bunk was also against this wall, so the placement isn’t ideal now.

    What they hold: Books that the girls are currently reading, journals.


    Storage solution 3: Bookcase 

    There are two bookcases in the room…one at the end of the bed, and one turned on its side under the wall shelves.  At the end of the bed, most of the before mentioned boxes hang out. The sideways one has 3 baskets in it that hold the majority of the girls’ books.  The baskets keep the books more contained than just trying to line them up next to each other.

    What they hold: Boxes, books

    Storage solution 4: Use under bed space

    Remember having to clean your room as a kid, and you’d get busted for just shoving stuff under your bed?  I say set your kids up for success and use that space!  There are several options too…you can build your own wood boxes with wheels, buy plastic under-bed tubs, or take cardboard boxes and cut them down shorter so they fit!

    What they hold: Littlest Pet Shop, Barbies, houses and cars that go with them.

    And in case you’re interested, here is the tutorial for the ruffle curtains.

    So thanks for having me Adelina!  I hope I’ve given you all some good suggestions for taming kids’ rooms. What are your tips for keeping kids’ rooms organized?


  • Giveaway with Thirty-one

    Giveaway with Thirty-one

    I have been looking forward to this week all month long!  It’s Organizing the Kids Bedroom week!  I’ve been struggling myself to get the kids room organized to a point where the kids and I both can easily pick up and put away everything without taking a full 24 hours to do it.  The kids are overwhelmed, I’m overwhelmed – and that leads to just mess on top of mess.

    So I decided to reach out to some of my favorite bloggers when it comes to home decor, organization, and just some good tips. I hope you enjoy all the posts this week, and find something that will work for you!  I’ll update this list all week with links to the new posts.
    We kicked the week off today with a guest post from my friend Rachael.  She is sharing today on how Thirty-One products have helped organize her life. Rachael wants to help you get organized and relaxed, so she is kindly offering up this awesome Keep It Caddy in black floral stuffed with bath lotions, shower gels, and a $15 gift card to Mary Kay redeemable through her.
    Enter to win on the Rafflecopter!
    Open to US residents only 18+
    Winner will be notified by email and have 48 hours to respond before a new winner is chosen.
  • Organizing Chaos with Thirty One

    Organizing Chaos with Thirty One

    WOW!  What an honor to be doing a guest post for Home Maid Simple!  Adelina asked me to do a post about home organization, using Thirty-one products.  
    A little about me, My name is Rachael.  I am a Thirty-one Independent Senior Consultant.  I have been with the company for over a year and it was one of the best choices I made.  I am married and have 4 boys here on earth.  I am an advocate for pregnancy and infant loss awareness since I lost a baby boy and my only daughter in 2009.  They were both born still in consecutive pregnancies.  Through their loss I have become a stronger woman and I strive to break the silence among the PAIL community to let other women know they aren’t alone. 
    One of the things I love to do is help women pick up their lives after a loss, and one of the best ways to do that is bringing organization into their homes.  Giving them something they can control when they feel like they have lost it control over everything.  Of course it is not just the bereaved who need organization in their lives!  We all do!  Organization is such a beautiful thing!  It makes life easier, makes the chaos at home a little less crazy in the busy lives we live today.  
    Who doesn’t love a well organized home?  How many times have you looked at that play room or the kid’s closet or under their beds and thought to yourself “I sure wish I had a way to make that look pretty.  It’s such an eyesore!”  Trust me in a house full of boys I have uttered that same thought more times than I can count!  I mean I love my children dearly, but organization is NOT their strong point!  So I set out to get my home together.  One room at a time.  
    One of my favorite Thirty-one products for home organization is the Your Way Cube.  And now you can even get a lid for it!  That makes it even more awesome!  It comes in several patterns and you can personalize them too. They fit perfectly inside the Ikea cube shelves. We also have a slightly smaller version of the Your Way Cube called the Your Way Cube Jr.  It also has an available lid.  This is great for smaller spaces, smaller toys that you always seem to step on in the middle of the night on your way to the bathroom in the dark….. 
    There is also the Your Way Rectangle.  I organized my entire DVD/BluRay collection using these.  And they too have lids available now!  Having the lids on them is so great because I don’t have to dust them!  Score! Less housework for me, which means more time for my kids! 🙂  Adelina here…isn’t that brilliant! I wish we had done that before packing them into cd sleeves.
    There are SO many great products in super cute prints that Thirty-one has to offer!  Whether you want to organize your pantry, your home office, your play room, laundry room etc.  I can help you find a solution and bring beautiful organization into your life!  I promise once you tame the chaos that disorganization brings into your home, you will see a difference in your day to day.  I have kids who are on the Autism spectrum and while they do not do well at organizing, they do thrive when they are in an organized environment. And you will LOVE the power that you feel when you take that room back!  If you have any questions please feel free to reach out to me through my Thirty-one website.  
    ———————————————————————————————————–
    Isn’t Rachael amazing? I honestly look up to her so much. With all the trials and heartache she has had to endure, Rachael focuses on helping others. We held a Thirty-one party on facebook that was a ton of fun! You can go check it out and read through the different posts for more ideas. We learned all about home and car organization. Follow this link if you’d like to help me earn some free products!! 

    As part of this series on Children’s Rooms and Organizing, Rachael is sponsoring our giveaway this week! Thank you so much Rachael. 
  • Dreaming of Kids Rooms

    Dreaming of Kids Rooms

    I decided to start my new year off with a room makeover for the kids. I haven’t actually tackled anything in there yet, but it is the first home project I’ll be doing this year. It seems every time we move, we have to completely revamp our toy storage and organization system.

    I’ve spent a lot of time just staring at the girls room, and trying to figure out what I can do to make it work for all of us. The kids get so overwhelmed when it’s time to clean up, because in order to get something out, they usually have to pull out every toy to find what they want.

    I have some idea of how the room is going to look when I am done, but that’s just

    Just a quick sketch of the layout I’m planning. 
    I’ve been browsing online for more ideas of room setups, and toy storage.  Here’s a couple I’m going to try and recreate. 
    I love this Stuffed Animals on Velcro idea!  I found it on Pinterest, and haven’t been able to find a direct source for it (if this is your photo, please let me know!) If I put a strip above each mattress the kids can sleep with their stuffed animals, and keep them off the floor. It will make bed making easier too. 
    On my sketch the doll house is sitting right inside the door to the room. I found this doll storage again on pinterest (no credit again), to hang over the door. Giving them quick and easy access to play with and pick them up. 
    I’ve had this lazy suzan shelf on my pinterest board for awhile now. I think the girls would really love having this in their reading area. The cork board provides a place to hang all their art, and school projects. 
    In my email early this week, I got these fun tips from (affiliate) Zulily that I also loved. Tip #1 is my biggest need! Easy access of the most used toys!  
    I can’t wait to get started in the girls room!  Of course we’ll have to go through all the toys and clothes first, and get rid of any old/broken/unused items first, then we’ll have fun putting the room back together. 
    What are your tips for kids rooms?
  • Cut the Clutter and Enjoy more Family Time {Think About It}

    Cut the Clutter and Enjoy more Family Time {Think About It}

    There has been so much going on in our lives right now. Between just being a Mom, and trying to really put more into this blog, as well as remodeling the bathroom, and other life stresses, I found myself getting completely overwhelmed. 
     I found my stress came out towards the house. I was tired of picking the same thing up over and over and over again. I was tired of feeling like the only one who cared to have a clean house.  So I stopped cleaning beyond the absolute necessary chores. 
    So then one day, I was talking to my mom, and she told me something she’s often said before 
    Less is More.
    Yes Mom, I know, but so many things have an emotional attachment to them. I often have a harder time getting rid of items then the kids because I remember what we were doing when we got them. And as before when she’s given me this simple advice, I pushed it aside, thinking I couldn’t do it. I’d be the mean mom taking their toys away, the mean wife tossing things away and saying no to more “stuff”.
    And then a day or two after I talked to my mom I came across this post – 
    Why I Took My Kids Toys Away from Living Well, Spending Less.

    This time, my moms advice came back to my mind, and I knew I needed to make the change. We needed to get rid of a lot of the “stuff” cluttering up our house. Not just for my sanity, but to bring our family back to true happiness. We’ve spent too many days crying over toys, not finding that special toy in the mess, and tears and tantrums because “It’s too hard to clean up Mom!”

    Before I made my plan of action, I presented the idea to Mark. We believe in team parenting, so I wanted to make sure he was on board, and felt good about what I was about to do as well.  We gave it a day to think about, and then presented our plan of action to the kids. 
    Hey Kids, Mom and Dad were thinking, we have too many toys.
    Noooooooooo! Don’t take our toys away!!!
    We’re not taking your toys away! Calm down and listen please.
    And then we did it. We involved our kids in the process to make room in our life for more family activities, instead of more toys. 
    The Idea:  Earn money by selling toys at a yard sale.  Use the money for a pre-chosen family activity.
    The Plan of Attack:  We told the kids they didn’t have to sell any of their toys, but if they did we could earn money for something we can’t normally afford to do. Mom and Dad wouldn’t make them sell anything, but we would encourage them to minimize and choose only a few favorites to keep. 
    We began with the stuffed animals. 2 large bins of stuffed animals stuck in storage, with more hanging around the toy room was a bit much. We involved the kids, and had a stuffed animal sorting party. Mark and I pushed to get each Princesses pile down to  5 stuffed toys. We ended with 1 full bin to sell (and a very happy Mama!). Now every night as we clean up the toys as a family, some may get tossed into our yard sale pile as the Princesses realize they don’t ever play with it. 
    The Goal: Bowling! Frequently we hear requests to take the kids bowling. Bowling can get expensive, and exhaustive with all the kids – but we know they enjoy it, and it will bring us closer as a family. It will be affordable as well.  For me though, I will enjoy more time with the kids playing, instead of cleaning up their crazy messes as they try to find that 1 toy hidden in the depths of the toy box.

    Think About It!

    Are you being overrun with clutter?  
    It might not be an insane amount of toys (my kids really don’t have that many), but if it’s enough that tantrums are a daily occurrence, and you feel overwhelmed just looking at them – then you probably have too many for your space and your kids. 
    The tantrums truly tell us something. It’s kind of like a hidden message.  To me “Mom it’s too hard to clean up” really was saying “Mom, I have too many toys, and I’ve just as overwhelmed by them as you are”


  • Menu Planning with Kids

    Yesterday I cooked up some Chicken Cordon Bleu for dinner. Sunday is always my favorite night to cook, since I have the time, and Mark home to help with the kids.
    Normally I will let the girls help me cook, unless I’m handling raw meat and sharp knifes.  That was the case last night.  Princess C really wanted to help though. Since I hadn’t made our menu plan for the week yet, I told her she could help by picking a dinner. I handed her a couple of my Taste of Home magazines, and stopped cooking to look at her selections.  Princess V later joined us as well.
    I really enjoy having my kids in the kitchen with me, and I think they enjoy it too.

    Monday – chicken curry
    Tuesday – three cheese ravioli
    Wednesday – chicken and egg hash
    Thursday – crockpot beef tacos
    Friday – gumbo in bread bowls
    Saturday – leftovers
    Sunday – roast and potatoes


  • Cupcakes and Sisters {Menu Plan}

    Wednesday night, my sister and I took a trip to the store for some last minute Thanksgiving items. It was nice to spend some time with just her, so we decided to make the trip extra special, and went to a little Cupcake Bakery.  It was one of the cutest little places I’ve been to in a long time.

    My sister knows me uber well, and knew that I love cupcakes. I’m not a big television watcher, but one show I make sure to record each week is Cupcake Wars. It just so happens that the bakery we went to, had been on Cupcake Wars earlier this year, and I remembered them!  Cravings – Alisha’s Cupcakes, was in the Teenage Mutant Ninja Turtle episode, where they had to turn pizza into cupcakes.

    No I didn’t try a pizza cupcake.  I enjoyed a Salted Caramel Cupcake, and my sister tried her Snickerdoodle Cupcake. They were both very yummy!  She had also made some fudge and was offering it as a free sample.  Along with the yummy cupcakes, Alisha has created a fun atmostphere for eating them. She has couches, and tables and chairs, even a little corner for kids. None of the furniture matched, but it all gave off the same feel, fun. Just perfect for enjoying a girls night with my sister.

    I had hoped to take my Princesses back before we left town, but it just didn’t fit into our schedule. So over Christmas vacation, we’ll definitely be visiting Alisha again.  She actually just opened her store front a few weeks ago. So if you live in the Utah County Area, you should go visit her on Main Street in Pleasant Grove.

    Did I mention, I got to meet Alisha too? Yep she was the only one there baking and serving cupcakes when my sister and I stopped by.  She is a lot of fun, and extremely friendly. I kind of felt like I was meeting a rock star.  I’ll definitely be tuning in when she makes her 2nd appearance (voted a fan favorite!) on Cupcake Wars.  This was my first trip to a Cupcake Bakery, but it won’t be my last.

    Have you been to a Cupcake Bakery? 
     
    Now, what to eat this week? We left all the leftovers at my parents, so no more Thanksgiving food for us.
     
    Monday – Bean and Cheese Taquitos
    Tuesday – Macaroni and Cheese
    Wednesday – Chili
    Thursday – Caprese Chicken
    Saturday – Leftovers
    Sunday – Lasagna
  • Menu Plan Monday

    Menu Plan Monday

     
    Monday – Crock Pot Chili
     
    Tuesday – Steamed Zucchini and Rice
     
    Wednesday – White Pizza
     
     
    Friday – Tacos and Burritos
     
    Saturday – leftovers
  • A Potpourri of Repurposing and Organizing Ideas {Guest Post}

    A Potpourri of Repurposing and Organizing Ideas {Guest Post}

    He who was seated on the throne said, “ Behold, I am *making all things new!”
    Revelation 21:5
    **Remember, O Lord, thy tender mercies and thy loving kindness; for they have been ever of old.
    Psalm 25:6

    I’m delighted to be offering this Guest Post on Adelina’s blog, as she is in the midst of moving this
    week!  I have moved MANY times and I know how stressful it can be –  My offering for today will be a
    potpourri of ‘do-over’ ideas for you –  ;-}

    I have learned through the years to ‘make Beauty from Ashes,’ so to speak, and I thought I’d share
    just some of my many Repurposed Items and ‘creative storage’ ideas.  Perhaps some of these may be
    helpful to those of you who are on tight budgets or in tight spaces – as I know all too well… I have
    been ‘repurposing’ items all my life – long before it became ‘fashionable’ to do so and I enjoy reusing
    ‘usable’ items, often making them more beautiful.

    So – there are times when I just have to acknowledge my Dutch Heritage…  Being very frugal,
    resourceful and drinking coffee all day are a few things I do that come from my ‘Dutch genes.’
    *smile*  Therefore, I have many empty coffee cans for which I continue to find ‘good use’ –

    My first project today is a ‘repurposed’ coffee can – decorated with scraps – and turned into a Gift
    Container for some yummy Christmas Cookies or candies.

    To cover the can, I stamped ‘sheet music’ in brown on parchment paper, inking the edges and then
    stamping snowy flourishes in silver in various places. (These don’t show up in the photos – sorry.)  I
    used the (www.PaperCraftingWorld.com) Bell .svg file – a scrap of red, one of ‘marbleized’ silver, two
    of plain silver and a snippet of silver ribbon to make the ‘Silver Bells,’ which I adhered to the red
    grosgrain ribbon wrapped around the can.

    I made a Recipe Card/Gift Tag for the top with a Circle Card file (I don’t know from whence I got it…)
    – topped it with a Scalloped Circle ‘wreath’ I made from the same file.  I punched ‘notes’ from silver
    scraps, placing them on the wreath.  I used the flourishes that were cut from the Bells under a red
    flower plucked from a red hydrangea stem, enhanced with a red, flower-gem center and silver
    ‘Scribbles’ paint.

    Another enjoyable passion of mine is ‘burning candles’ – for their relaxing scent, as I ‘burn mine at
    both ends!’  Therefore, I have several of these empty glass jars at any given time…

    These harvest-themed .svg files are from
    The pumpkins were cut with my Cricut/SCAL2
    and then embossed on my Cuttlebug. The
    pumpkin atop is for the recipe and a note –


    These Christmas .svg files are from
    After cutting the pieces with my
    Cricut/SCAL2, I embossed them in my
    Cuttlebug and then adhered them to the jar.
    Both jars are ready for holiday Goodies!

    I’ve found many ways to reuse baking sheets – These are old ones that I spray painted, used
    discontinued wallpaper for the backgrounds and then .svg files as decorative elements, further
    decorated with gems, flowers (from the Dollar Store) and magnets for memos.

    I also use some cookie sheets and pizza trays that I picked up at the Dollar Store while working on
    scrapbooking pages or other projects.  Arrange elements on them with magnets until you have the
    whole page designed and decided upon.  Then you can secure them to the pages with adhesives.

    I have turned simple lunch sacks into
    Mini-Albums to keep memories –
    turning this – into these –  They include
    many pages for photos and pockets
    for memorabilia –

    As far as organizing my crafty supplies, I’ve repurposed things for this, also.  Here are just a few of
    my ‘bright ideas.’

    I got the box at Michaels, cut my
    ‘business/blog name’ on my Cricut
    and adhered it to the front of the lid.
    For the dividers, I cut pizza and cereal
    boxes to fit, covered them with cream
    parchment paper and punched tabs.
    Some days it’s filled with cards I’ve
    made, some days it’s not – Time to
    make more!

    I covered empty soup cans with the
    corresponding color to my Timeless Twine
    spools.  I put my baker’s twine in a Sugar Jar,
    of the ‘restaurant style,’ that I picked up at
    the Dollar Store.

    I made a cutting board lap desk from a
    postal box covered with Kraft paper.
    It’s lightweight, portable and I’ve found
    it to be quite handy for years.

    I saw a post recently about using knobs attached to wooden dowel pieces with Velcro added to hold pieces of felt to use for ink blending…  I looked around and decided to attach the felted ‘furniture leg pads’ that I
    had in a drawer to wine corks and lids that I’d been saving – FREE!  I also use makeup sponges for blending
    inks –

    Another idea for corks and lids:  glue them together and glue on the little foam shapes to make simple stamping fun – for you or for children!

    Jars and food containers can also be reused as ‘serviceable,’ too – I use many of them to hold laces, ribbons, chipboard shapes, buttons, pins, any decorative elements –

    I use all manner of food containers for
    various crafting implements –  Here are
    vegetable containers in which my felt
    marking pens fit perfectly and stack
    nicely on the ‘box shelf’ which is their
    home –

    I keep track of all of the Punches I have in a $1  Kraft-page journal book I got at Michaels – I punch on cream paper and adhere in this book for a quick reference as to what I have while ‘projecting.’

    I will leave you with another ‘make-over-magic’ project I made this week – turning a lowly, plain Dollar
    Store mini clipboard into a sunny gift for one of my Dear Friends…!  The .svg file is from
    www.PaperCraftingWorld.com    I used Mod Podge to adhere all of the papers and gems and protect
    and preserve it while in use – The mini-pads come in several colors and I look forward to making a
    rainbow of these to have for quick gifts –

    I hope that some of this has been helpful to you!  I’d love to have you come by MY blog
    (http://aneleganttouch-lynden.blogspot.com) and see what I ‘cook up’ each week – adding ‘An
    Elegant Touch…’ to all that I do!  If you have some great repurposing or organizational ideas, I’d love
    to hear them, too –  Have a Lovely Day wherever you are and Thank You from Adelina and me for
    stopping by and sharing part of your day with us!  *smile*

    About the author

    My Photo
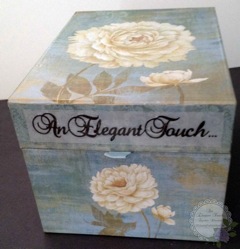
I am a mature, educated, creative woman – a Mother of two grown children – a Gramama of two precious grandchildren – a proud Blue Star Mother of a Marine Captain – a daughter of the King of Kings – a woman looking for her place in the world in the winter of her life…sharing what I do and who I am – with You – adding  ‘An Elegant Touch…’ to all that I do…


    Lynden Blossom

    ~ ~ ~ ~ ~ ~ ~ ~ ~ ~ ~ ~ ~ ~ ~ ~ ~ ~ ~ ~ ~ ~ ~ ~ ~
    Thank You Lynden for sharing these wonderful tips and tricks with us! Your papercrafting is a delight to see, and I hope I can use some of these ideas around my new home!