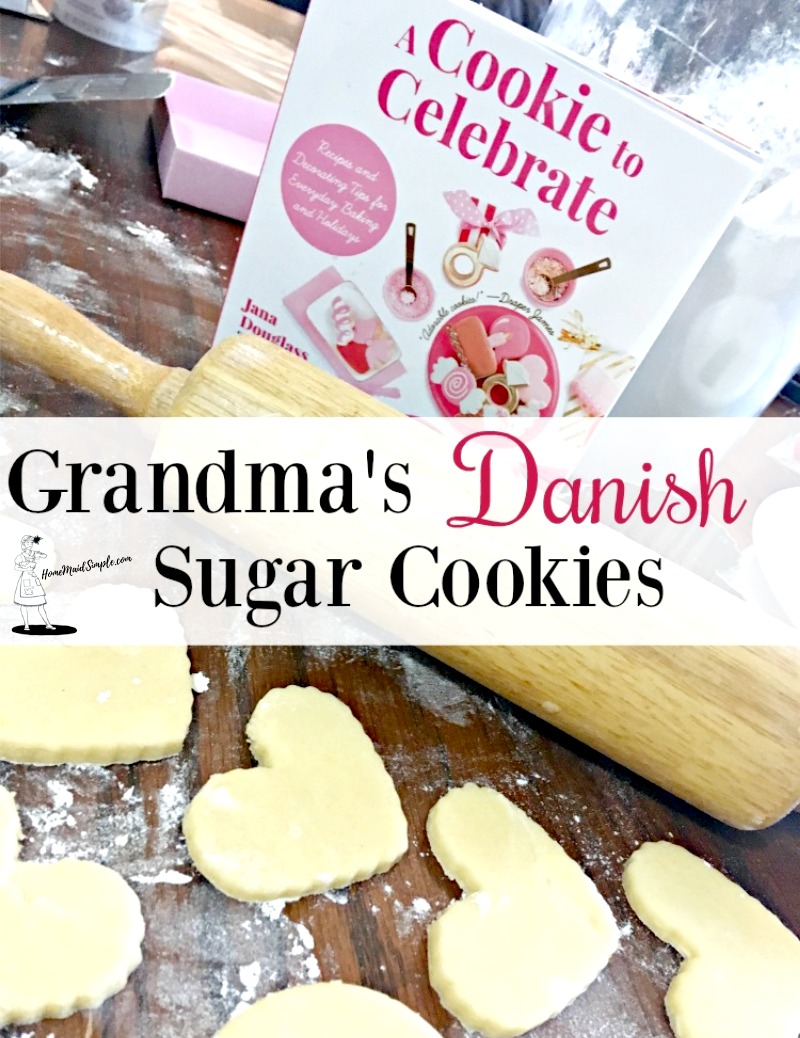
I received a copy of A Cookie to Celebrate by Jana Douglass for review. All opinions are my own. Grandma’s Danish Sugar Cookies is a family recipe passed down the generations.
Family recipes. We cherish those meals passed down from generation to generation. The secret sauce, special ingredient, and particular ways to handle the food were written with love for a family that has continued to grow.
Unfortunately, I don’t have very many of these recipes. My grandmothers were both fantastic cooks, but recipes were not written down and shared too often.
So a little over a year ago, my childhood BFF reached out and asked for my mom’s sugar cookies recipe. She claimed them to be the best she’s ever had, and wanted to make them with her children for the holidays. Not remembering the days of cookie baking myself, I didn’t have the recipe.
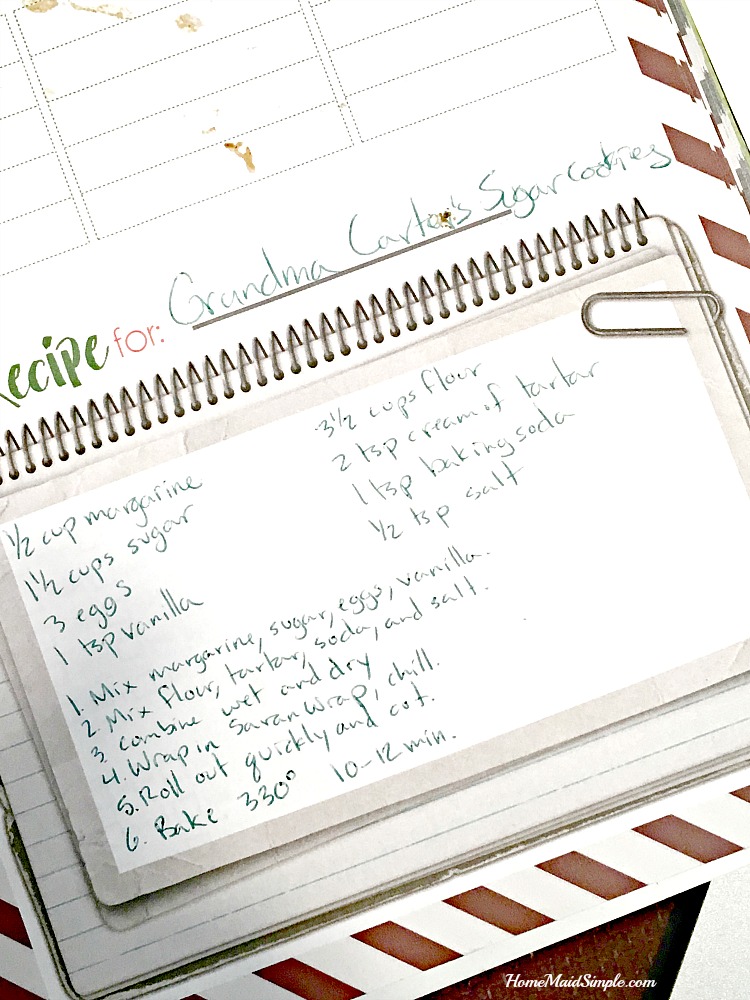
A quick call (just kidding, calls with my mom are never quick) and I had the recipe written down along with it’s history. The sugar cookie recipe my mom always used came from her grandmother, my great grandmother and was for Danish Sugar Cookies. I had no idea, but it’s only made these cookies even sweeter.
My friend received the recipe, made them with her kids, and let me know they were just like she remembered. I was glad I could help bring those good memories back into her family.
It took me a year, but I finally decided it was high time I make these cookies. Even if sugar cookies aren’t my favorite, I would still have fun making and then decorating them.
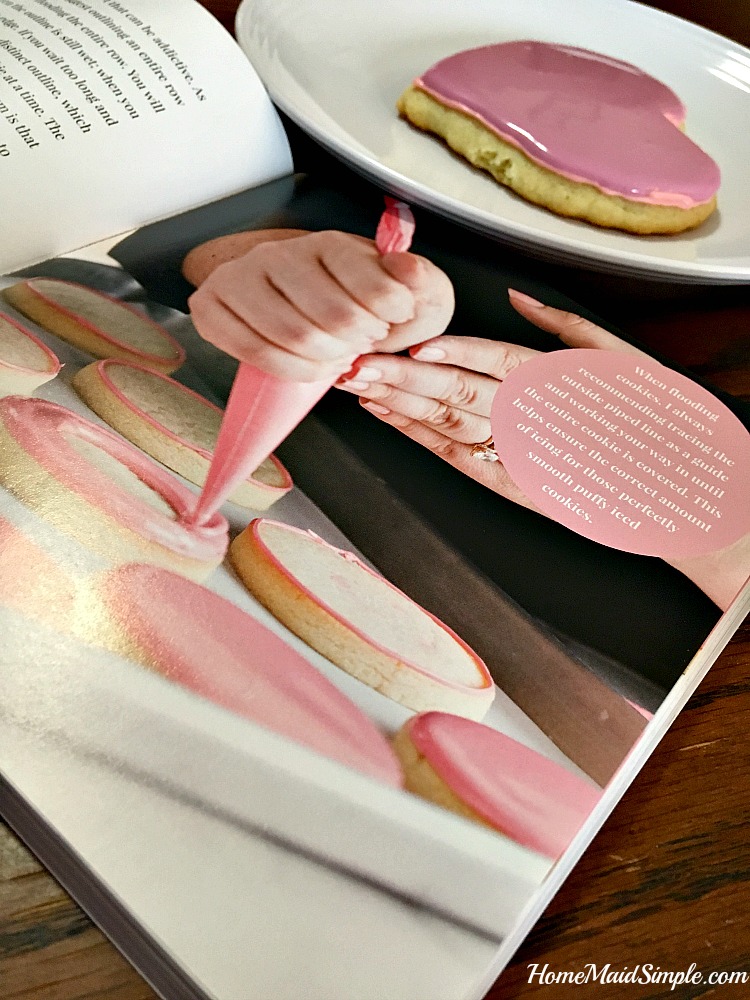
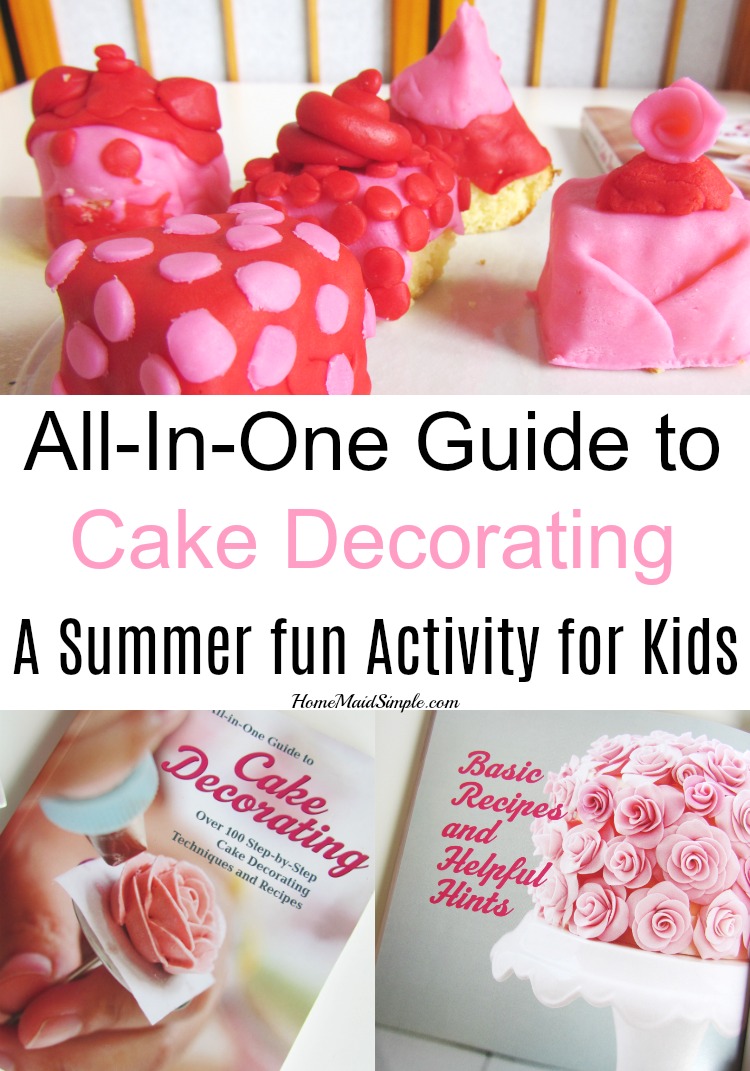
Thanks to A Cookie To Celebrate by Jana Douglass, I felt confident in my ability to decorate these cookies. They deserved to look as special as their history, and it helped me learn a new skill!
If you’ve wanted to learn cookie decorating, but feel overwhelmed with online tips and How-to’s I would highly suggest Jana’s book. It’s straight forward, funny, and feels like your best friend is walking you through each step.

| Servings |
|
- 1 cup butter unsalted
- 1 1/2 cups sugar
- 3 eggs
- 1 tsp vanilla
- 3 1/2 cups flour
- 2 tsp cream of tartar
- 1 tsp baking soda
- 1/2 tsp salt
Ingredients
|
|
- In a small bowl combine butter, sugar, eggs, and vanilla.
- In a separate bowl combine flour, cream of tartar, baking soda, and salt.
- Mix the wet and dry ingredients together. The dough gets stiff, so you’ll have to use your hands to fully mix it.
- Divide the dough in two. Wrap each section in saran wrap and chill for at least 1 hour, but up to 1 week.
- Preheat the oven to 330°. Grease cookie sheets.
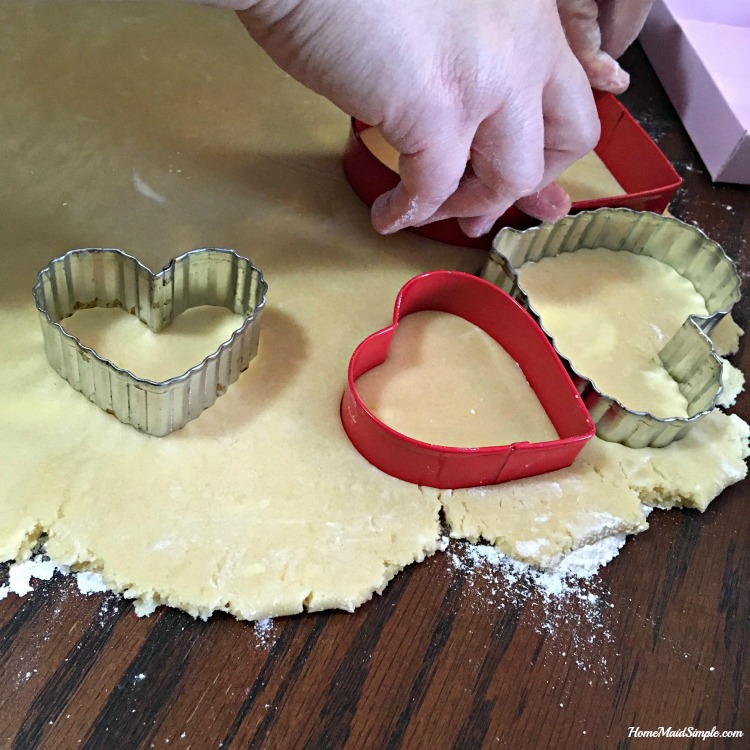
- Roll the dough out on a lightly floured surface to 1/8-1/4 inch thick. Cut with cookies cutters.
- Bake for 10-12 minutes.
| Servings |
|
- 1 cup butter unsalted
- 1 1/2 cups sugar
- 3 eggs
- 1 tsp vanilla
- 3 1/2 cups flour
- 2 tsp cream of tartar
- 1 tsp baking soda
- 1/2 tsp salt
Ingredients
|
|
- In a small bowl combine butter, sugar, eggs, and vanilla.
- In a separate bowl combine flour, cream of tartar, baking soda, and salt.
- Mix the wet and dry ingredients together. The dough gets stiff, so you’ll have to use your hands to fully mix it.
- Divide the dough in two. Wrap each section in saran wrap and chill for at least 1 hour, but up to 1 week.
- Preheat the oven to 330°. Grease cookie sheets.
- Roll the dough out on a lightly floured surface to 1/8-1/4 inch thick. Cut with cookies cutters.
- Bake for 10-12 minutes.