Category: Desserts

  • Strawberry Mango Popsicles

    Strawberry Mango Popsicles

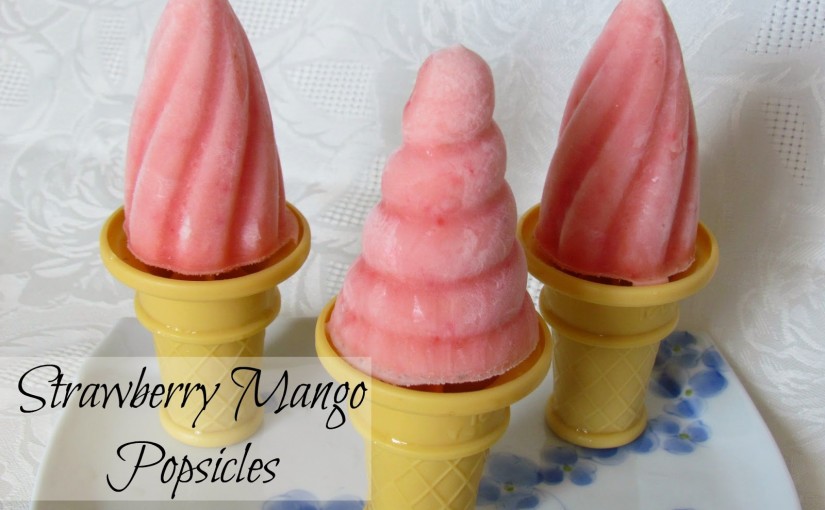
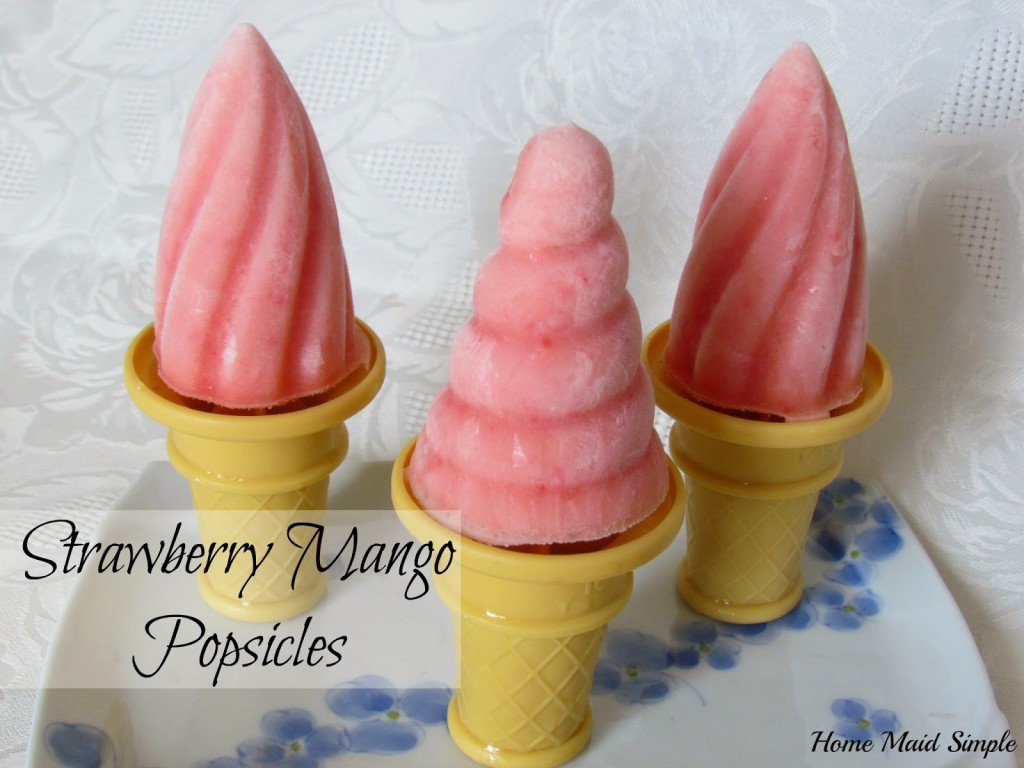
    Cool down this summer with Strawberry Mango Popsicles. Without added sweetener they are a treat both kids and Mom adore.
     
    Mmm, Summer is almost here, can you feel it? This week is my birthday, so I decided to do a little bit more of what I want to do and a little less of what I need to do. It’s a little present to myself. 
     
    It pretty much all involves cooking of some sort or another, and a little home organizing. What can I say, those are the things that really make up what I enjoy doing. Though I’d rather organize someone else’s home, mine really needs it with the end of school year papers that need sorted and stored (the special ones only). I’ve got piles of items to take to the thrift store, and an idea for rearranging my whole bedroom. 

     
    I’ve been seeing popsicles popping up around my foodie friends blogs, but these Double Berry Popsicles from The Grant Life, really made up my mind I needed to make some.  So I did. 
     
    Strawberry Mango Popsicles
    Mango, Strawberry and a little sweetener if you like whip up to make these perfect summertime treats
    Write a review
    Print
    Ingredients
    1. 1 mango, cut into chunks
    2. 1 cup plain yogurt
    3. 3 strawberries, quartered
    4. 1/2 cup Welch’s Strawberry Breeze
    Instructions
    1. Begin by blending the mango alone on a low speed.
    2. Once it is finely chopped, add the yogurt and puree – I use my smoothie button on my blender.
    3. When you can no longer see chunks of mango, add the strawberries and juice.
    4. Blend until smooth.
    5. Pour the mix into popsicle molds, and freeze overnight.
    6. Pass out to the kid and win best mom ever award.
    Home Maid Simple https://www.homemaidsimple.com/
    There are a bit on the tart side, but I really wanted to avoid any extra sugars. If you prefer them more sweet, you can try adding a little honey. My kids devoured them without, though, and for my kids that’s a big deal!


  • Raspberry Marbled Mini Cheesecakes #Moms4JNJConsumer #ad

    Raspberry Marbled Mini Cheesecakes #Moms4JNJConsumer #ad

    This post is part of the HEALTHY ESSENTIALS® 2014 program by Johnson & Johnson Consumer Companies, Inc. and The Motherhood, who sent me a box of products and compensated me for my time. Opinions, experiences and photos shared here are all my own, and I hope you enjoy them.
     
    Whether it’s for Valentines, a date night at home, or just because you need a little indulgence without the guilt, you’ll love these Raspberry Marbled Mini Cheesecakes. 

    We are 2 days away from Valentines Day!!  Do you have any plans?  Are you ready to really impress your special someone?
     
    HEALTHY ESSENTIALS® has everything you need to make your day perfect, including special savings. From getting ready in the morning, to sharing time together after the kids are in bed. 
     
    My friend recently wrote a great post about taking the time to look good for our husband. If there is one day of the year we ought to take that time it is Valentines!  Neutrogena Cosmetics can help add that extra touch to heighten your features this V-day. Get a printable coupon for $1 off any NEUTROGENA® Cosmetics product at HealthyEssentials.com.
     
    What I’m really excited about though is the Splenda No-Calorie Sweetener. Splenda can be used anywhere sugar is used with equal portions, but without all the calories. That is 678 calories less than sugar on a cup to cup basis. Now you can enjoy these Raspberry Marbled Mini Cheesecakes with your spouse (and kids!) without worrying too much about your waistline.
     
    FYI – I may have scoured my county for a mini cheesecake pan solely so I could create this recipe for you guys. It was the only one I could find and was the absolute last one in Williams & Sonoma! I love you that much. You’re welcome. Now go bake these!
     
     
    Raspberry Marbled Mini Cheesecake
    Enjoy your favorite cheesecake with less calories thanks to SPLENDA in this Raspberry Marbled Cheesecake
    Write a review
    Print
    Crust
    1. 1/2 cup unsalted butter, softened
    2. 3/4 cup Splenda
    3. 1/2 cup light brown sugar
    4. 1 tsp vanilla
    5. 1 cup flour
    6. 3/4 cup Cocoa Powder
    7. 1/2 tsp baking soda
    8. 1/4 tsp salt
    9. 1/4 cup milk
    Cheesecake
    1. 2 pkgs Philadelpia Original Cream Cheese
    2. 3/4 cup Splenda
    3. 2 tsp Lemon Juice
    4. 1 egg, whipped
    5. 6 tsp raspberry preserves
    Instructions
    1. Preheat oven to 350 F.
    2. Mix butter, Splenda, sugar, and vanilla until well mixed.
    3. In a small bowl combine flour, cocoa, baking soda and salt.
    4. Slowly add the flour to the butter mixture. Mix well.
    5. Add milk and combine.
    6. Separate and roll into 6 balls about 2 inches in diameter.
    7. Press into the bottom of your mini cheesecake mold. If you don’t have a mini cheesecake mold, leave the dough combined as one, and press into a 9inch spring form pan.
    8. Bake for 12 minutes.
    9. The cookies puff up a bit, so when you take them out of the oven, use the back of a spoon to push them down a bit.
    10. Let cool.
    11. Turn oven down to 300 F.
    12. Meanwhile, mix cream cheese, Splenda, and Lemon Juice.
    13. Slowly mix in the egg.
    14. Scoop 1/2 cup cheesecake mix on top of the cookie crusts.
    15. Whip the raspberry preserves until less jelly like, and more liquid like.
    16. Add one tsp raspberry preserves to the top of each cheesecake. Swirl around with a toothpick to get a marbled look.
    17. Bake in your 300 F oven for 40 minutes.
    18. Let cool, then top with whipped cream and fresh raspberries.
    Adapted from Crust adapted from Cooking Channel TV
    Home Maid Simple https://www.homemaidsimple.com/
     
     
    So Yummy! I may or may not have eaten these Raspberry Marbled Mini Cheesecakes for my breakfast and lunch today….shh.
     

    Get a printable coupon for $1 off any SPLENDA® No Calorie Sweetener product at HealthyEssentials.com. To sweeten the deal Healthy Essentials is offering a 30 minute consultation with a registered dietitian when you buy $10 worth of SPLENDA Sweetener products between now and February 17th. That’s a $75 value! After you’ve indulged in some Raspberry Marbled Mini Cheesecakes, try out Rembrandt’s Deeply White + Peroxide Fresh Mint Toothpaste to freshen up your smile before some snuggling time with that special one – Get a $3 off printable coupon from Healthy Essentials!!

  • Caramelized Pumpkin Cheesecake

    Caramelized Pumpkin Cheesecake

    Caramelized Pumpkin Cheesecake is just what it appear to be! A layer of old fashioned cheesecake, followed by a layer of pumpkin cheesecake, topped off with some brown sugar caramelizing. Family and friends will love it!
     

    Thanksgiving is right around the corner!  Are you so excited?  I am. I just love Thanksgiving. All the food and a day to completely relax with family. I really don’t think there is anything better than that. So, I have had a little fun whipping up some recipes for you to take to your feast.

    This particular cheesecake started out as an idea to combine pecan pie and pumpkin pie into a cheesecake, but it slowly morphed into no pecans and a little caramelizing.

    Caramelized Pumpkin Cheesecake
    Serves 8
    Delicious Cheesecake with a layer of pumpkin and caramelized top
    Write a review
    Print
    Crust
    1. 1 pkg graham crackers
    2. 1 TBS sugar
    3. 3 TBS butter
    Filling
    1. 1 1/2 pkg cream cheese
    2. 1/4 cup pumpkin puree
    3. 3/4 cup sugar
    4. 1 egg
    5. 1/4 cup brown sugar
    Instructions
    1. Preheat oven to 350 F.
    2. For the crust, crush the graham crackers.
    3. Min in the sugar.
    4. Cut in the butter until crumbly.
    5. Place in a 9 inch pie plate and bake for 11 minutes.
    6. Mix the cream cheese, sugar, and egg until well blended.
    7. Divide the batter in half.
    8. Add pumpkin puree to one half of the batter.
    9. Pour the cream cheese batter into the crust.
    10. Swirl the pumpkin batter on top.
    11. Bake for 45 minutes
    12. Let the cheesecake cool for at least 2 hours.
    13. Sprinkle brown sugar on top.
    14. Caramelize the sugar with either a butane torch or a few minutes under the broiler.
    Home Maid Simple https://www.homemaidsimple.com/
     
     What’s you favorite cheesecake flavor?
     
  • Cherry Almond Cheesecake #FoodieFriday

    Cherry Almond Cheesecake #FoodieFriday

    I really want to stop writing this post and go eat more cheesecake, but then you’d all be wondering where the party is. And I think my kids might like dinner at some point tonight as well, so I’ll finish this up, and then you can bet I’ll be watching some sappy show like Robin Hood (BBC television series) while eating another slice of this.

    It all started a month ago when I kept looking at my cherry pie filling, thinking I really ought to use it up. Mmm, cheesecake sounds good. And then I just never made the time for it. Plus, I’ve never made cheesecake from scratch before either. So then Saturday rolls around and my Dad calls and invites us over for Sunday dinner. Great! What can I bring? Anything. OK let’s do that cheesecake.

    Then a search for a recipe ensued. I’m not a fan of sour cream cheesecakes, so I passed all those up, and landed on this one from Taste of Home.  Of course as I go to grab the vanilla extract, I glance at the almond extract and decide what the hey, I love almond extract. So the exchange was made. This is what I brought to my parents….

    I won’t lie to you. It was good! I know you’re wondering, but where’s the cherries? I saw all this fresh fruit at the store, so I bought it, and on the cheesecake it went. My only complaint with this particular cheesecake was it was too deep. Way too deep. I could barely finish my one slice.
    So then I sat and stewed on it all week, and decided I was going to play around with the recipe (IE cut it in half) and see what happens. It’s really hard to cut 3 eggs in half though, so the following is a Home Maid Simple original (inspired from Taste of Home).

    Cherry Almond Cheesecake
    Almonds and Cherries are the perfect pairing with this cheesecake
    Write a review
    Print
    Cook Time
    56 min
    Cook Time
    56 min
    Ingredients
    1. 1 package or 10 Honey Graham Crackers, crushed
    2. 1 1/2 TBS Almonds, crushed/chopped finely
    3. 1 TBS Sugar
    4. 3 TBS butter
    5. 2 packages Philadelphia Cream Cheese, softened
    6. 3/4 cups sugar
    7. 1 1/2 tsp lemon juice
    8. 1 tsp Rodelle Almond Extract
    9. 1 egg, lightly beaten
    10. 500 ML Cherry Pie Filling (or about 17oz)
    Instructions
    1. Preheat over to 350 F.
    2. Combine graham crackers, almonds, and sugar.
    3. Use a pastry cutter or fork to cut the butter in, until evenly mixed and crumbly.
    4. Press into a 9 inch pie plate.
    5. Bake for 11 minutes. Cool on a wire rack.
    6. Leave the oven at 350 for the cheesecake
    7. Beat together cream cheese and sugar until smooth.
    8. Add lemon juice and almond extract.
    9. Lightly beat your egg, and then beat it into the cream cheese mixture.
    10. Pour into your crust, and smooth out the top.
    11. Bake for 45 minutes.
    12. Let the cheesecake cool for 30 or so minutes on a wire rack, and then cool in the fridge for at least 2 hours, or over night.
    13. Top with cherry pie filling, and serve.
    Notes
    1. I used a knife to chop my almonds small, but if you have a food processor it would come in handy for the almonds and graham crackers.
    2. To avoid brown edges you can cover the edge with foil. Or just let it brown, you’ll be covering it in cherries soon enough.
    Home Maid Simple https://www.homemaidsimple.com/


    This recipe is linked up to these Fun Parties!
     
    Welcome back to Foodie Friday at Home Maid Simple and Simple Living and Eating
    We are so excited to see what you’ve been cooking up this week!
    Please remember to only share food related posts. All others will be deleted. Thanks!
     
     
    ~Features from Last Week~
    Zucchini Muffin
    Honey and Zucchini Muffins
     
    Mexican Restaurant White Sauce
    Mexican Restaurant White Sauce
     
    Caprese Bites | Cooking on the Front Burner
    Cheese Bites and other fun Appetizers


  • Peanut Free No-Bake Cookies {Foodie Friday}

    Peanut Free No-Bake Cookies {Foodie Friday}

     
    Head over to Simple Living and Eating with Diane for another Foodie Friday Recipe – then browse and visit all the other recipes linked up.
     
    We absolutely love No-Bakes over here. Mark especially will request them more often than anyone else. I love that they are quick and easy to make, and have a semi-healthy twist with the oats.
     
    Recently we’ve been trying to put weight on Prince L. We were worried he wasn’t gaining as much as he should. Since he isn’t one yet, my sister in law suggested we try Sunflower butter. It packs proteins like peanut butter but is safe for babies and anyone with a peanut allergy. Prince L didn’t much care for it, but Mark thought it was pretty good. So what did I do?  I turned our regular No-Bake recipe into a Peanut Free, with an extra boost of healthy, Cookie.
     
    Peanut Free No Bakes
    Have a nut allergy, but want to enjoy a no-bake cookie? Try these Peanut Free No Bakes.
    Write a review
    Print
    Ingredients
    1. 1/2 cup butter
    2. 1/2 cup milk
    3. 2 cups sugar, separated
    4. 1/4 cup cocoa powder (I use Rodelle Dutch Processed)
    5. 1 tsp Vanilla extract
    6. 1/2 cup Sunflower Butter
    7. 3 1/4 cups Oats
    8. 2 TBS Sunflower nuts
    Instructions
    1. Begin by chopping the sunflower nuts. If you have a food processor use that. I used the side of a large knife to press them down, and then spent a little time chopping them up finely.  Set aside.
    2. In a large saucepan, melt the butter over medium-high heat.
    3. Turn the heat down to medium, and add the milk.
    4. Mix 1 cup sugar and the cocoa powder together.
    5. Add the cocoa, sugar mixture to the saucepan, and add the second cup of sugar.  Stir well.
    6. Bring to a full boil, and then time for 1 minute.
    7. REMOVE the pan from heat.
    8. Stir in the vanilla and Sunflower Butter.  Mix well.
    9. Add the oats and nuts.
    10. Spread some wax/parchment paper on your counter or table.
    11. Using a spoon, or cookie scoop, scoop balls of the mixture onto the wax paper.
    12. Let cool until hardened.
    13. Since we used Sunflower butter, they seem to be a little more sticky on the bottom.
    Home Maid Simple https://www.homemaidsimple.com/


    The Result
    This was my first time trying out the Sunflower butter in a baking recipe. We all enjoyed them. There is a definite sunflowery taste to these cookies, but I also feel a little more satisfied with these. Instead of eating a handful in one sitting, just one of these really hit the spot and let me walk away feeling good. 
    And of course the obvious plus here, is that I can serve these to anyone without worrying about Peanut Allergies!


    ~FEATURES~

    Citrus French Lentil Salad
    The addition of grapefruit juice sounds absolutely delicious to me.
     
    Asparagus, Chorizo, and a Soft Boiled Egg
    You just can’t go wrong with asparagus or a soft yolk. Yummy!
     
    Reese’s Peanut Butter Cup Brownie Bites
    Reese’s Peanut Butter Brownie Bites
    It takes peanut butter cups to a whole new level.
     

    document.write(‘

  • Thin Mint Chocolate Fudgesicle

    Thin Mint Chocolate Fudgesicle

    This week started out so beautiful. All the snow had finally melted, the kids were spending more time outside, and my Girl Scout Thin Mint Cookies arrived by mail (yes, I supported a friend and had them shipped across the states to me!)
     
    Well, after eating box 1 of the Thin Mints and Caramel Delights, mostly by myself (I will not tell you how fast they went….that’s between me and my stomach), I decided maybe I should get a little creative with the last box of Thin Mints. I’ve seen ideas and recipes all over Pinterest for using “leftover” Girl Scout Cookies, that I thought maybe I should hang onto some. Mind you, these were not leftovers, I don’t believe in leftover cookies.  They were just put to a better use.
     
     
    I am at the moment wishing I had saved more of the thin mints. These were absolutely delicious!  I happened to try out a new ingredient with these fudgesicles as well – chocolate extract. Did you know they made chocolate extract? It’s a very new discovery for me, and I’ve already got my head spinning around the things I can create with it! 
    Thin Mint Chocolate Fudgesicle
    Creamy delicious Thin Mint Chocolate Fudgesicles
    Write a review
    Print
    Ingredients
    1. Ingredients
    2. 1 cup Heavy Whipping Cream
    3. 1 cup 2% Milk
    4. 1/2 cup sugar
    5. 2 egg yolks
    6. 1/8 tsp salt
    7. 1 tsp corn starch
    8. 1/3 cup Rodelle Dutch Processed Cocoa powder
    9. 1/2 tsp Rodelle chocolate extract
    10. 5 Thin Mint cookies
    Instructions
    1. In a medium saucepan mix together the Cream, Milk, sugar, eggs, salt and corn starch.
    2. Cook over medium-low heat for about 10 minutes. Whisk every few minutes.
    3. Remove from the heat and add the Cocoa Powder.  Mix well.
    4. Return the pan to medium heat. Cook for another 10 minutes, whisking every few minutes.
    5. At this point if you stick a spoon in and let it drip off, it will look and feel like melted ice cream.
    6. Remove from heat and stir in the chocolate extract.
    7. Cool on the counter for 1-2 hours.
    8. Meanwhile, place your thin mints in a small Ziploc bag. Using a potato masher (or bottom of a cup, or rolling pin), crush the cookies.
    9. You’ll want to use approximately 10 Popsicle molds.  Evenly distribute the crushed cookies into the molds.
    10. Once the chocolate mix has cooled, pour it on top of the crushed cookies.
    11. Using a chopstick (or skewer), slide into the molds to help the chocolate surround the cookies and reach the bottom of the mold.
    12. Add the popsicle handles, and freeze for 3-4 hours.
    13. Once frozen, run the mold under hot water for a few seconds to help loosen it.
    14. Remove from the mold and enjoy!
    Adapted from Shop Cook Make
    Adapted from Shop Cook Make
    Home Maid Simple https://www.homemaidsimple.com/
     
      Kids enjoying Thin Mint Chocolate Fudgesicles
    I kid you not, the Thin Mints permeated the whole fudgesicle so every bite was full of that girl scout cookie goodness. This easily tripled my cookies and made sharing them with the kids not so hard. 
     
    And would you know it, I woke up to it snowing this morning!  Thank goodness it didn’t stick, but it sure is cold here again.
     
     
    Thank you for joining us at Foodie Friday! Make sure you check out my co-host Diane at Simple Living and Eating.

    ~FEATURES~

    I just need to say this – It’s getting too hard to pick features!! You all have so many wonderful looking recipes!  So since Diane and I can’t feature you all, please please go check out the linky, and visit some of the other blogs. You are sure to find something yummy to add to your menu’s!
      
    Family Favorite Pork Chops
    from Wyoming Girl *Turned* Coastie Wife
    Pork is our families choice of meat, so I know these won’t disappoint. Plus they are super simple!
     
    IMG_4786-003
    from A Bright and Beautiful Life
    We run out of Ranch too often in this house! Now I can always have some on hand, because yes it does go with everything.
     
  • Peanut Butter No-Bake Cookies

    Peanut Butter No-Bake Cookies

    Whether it’s the middle of summer, or you just don’t feel like pre-heating your oven, these Peanut Butter No-Bake Cookies are a crowd pleaser every single time. This post contains affiliate links and I will be compensated if you click through and make a purchase.
     
    These are Mark’s absolute favorite cookies! He often asks me if we have any oats so he can whip up a batch.  I once bought a 20lb bucket of quick cooking oats so the answer could always be yes. Now, I just add more oats when the bucket starts to get low.
     
    These were very commonplace in my childhood, and now they get to be a part of my kids’ memories too. Granted, with a recent diagnosis of a nut allergy (both tree nuts and peanuts), Lincoln skips enjoying these with us, but to make it up for it I always make sure to have another treat on hand for him. Or sometimes I’ll even make our Peanut Free No-Bakes just for him.
     
    For other tasty variations, try exchanging the Peanut Butter for your favorite sandwich spread. We love them with Nocciolata, Nutella, Almond Butter, and more! There’s really not a wrong way to eat these cookies. 


    No Bake Cookies
     
     
    Peanut Butter No-Bake Cookies
    When the weather’s too hot to turn on the oven, but you’re craving cookies – make these peanut butter no-bake cookies
    Write a review
    Print
    Ingredients
    1. 1/2 cup Butter
    2. 1/2 cup Milk
    3. 2 cups Sugar, divided
    4. 3 cups Oats, quick cooking
    5. 1/2 cup peanut butter
    6. 1 tsp Vanilla extract
    7. 1/4 cup Cocoa
    8. 1 cup Coconut (optional)
    Instructions
    1. In a large pot, melt the butter.
    2. Once the butter is melted stir in the milk.
    3. In a small bowl, combine cocoa and 1 cup sugar.
    4. Add sugar/cocoa mixture along with the rest of the sugar to the pan with the milk/butter mixture.
    5. Bring to a full rolling boil. Let boil for 1 minute.
    6. Remove from heat.
    7. Stir in the vanilla and peanut butter.
    8. Stir in the oats and coconut.
    9. Drop mixture by spoonful onto wax paper.
    10. Cool and serve.
    Home Maid Simple https://www.homemaidsimple.com/
     
    Enjoy! These go great with a large glass of cool milk. Don’t tell, but I’ve eaten about 4 of these just while typing up this post.


    ~FEATURES~
     
    From Now Things are Cookin’, a perfect bbq side Macaroni Salad
     
     
    Life {Made} Simple shared a soup, good even during the summer – Loaded Potato Soup
    (I know Mark will be wanting this one soon!)
     
    Finally, lighten things up this summer, and cool down with Watermelon-Lavender Sorbet from Farm Flavor
    post update 11/2017