Tag: cleaning

  • Tuesday Tip – Cleaning Microfiber Couches

    Tuesday Tip – Cleaning Microfiber Couches

    How to clean a Microfiber couch, or other microfiber furniture

    Yes I know, it’s Wednesday. I haven’t lost complete track of days yet (or have I? calendars are brilliant inventions!).  I spent Monday and Tuesday morning testing out different cleaners on our Microfiber couch, so I could bring you this post. It took longer than I expected, but I got it done, and I’m here to let you in on some awesome tips!

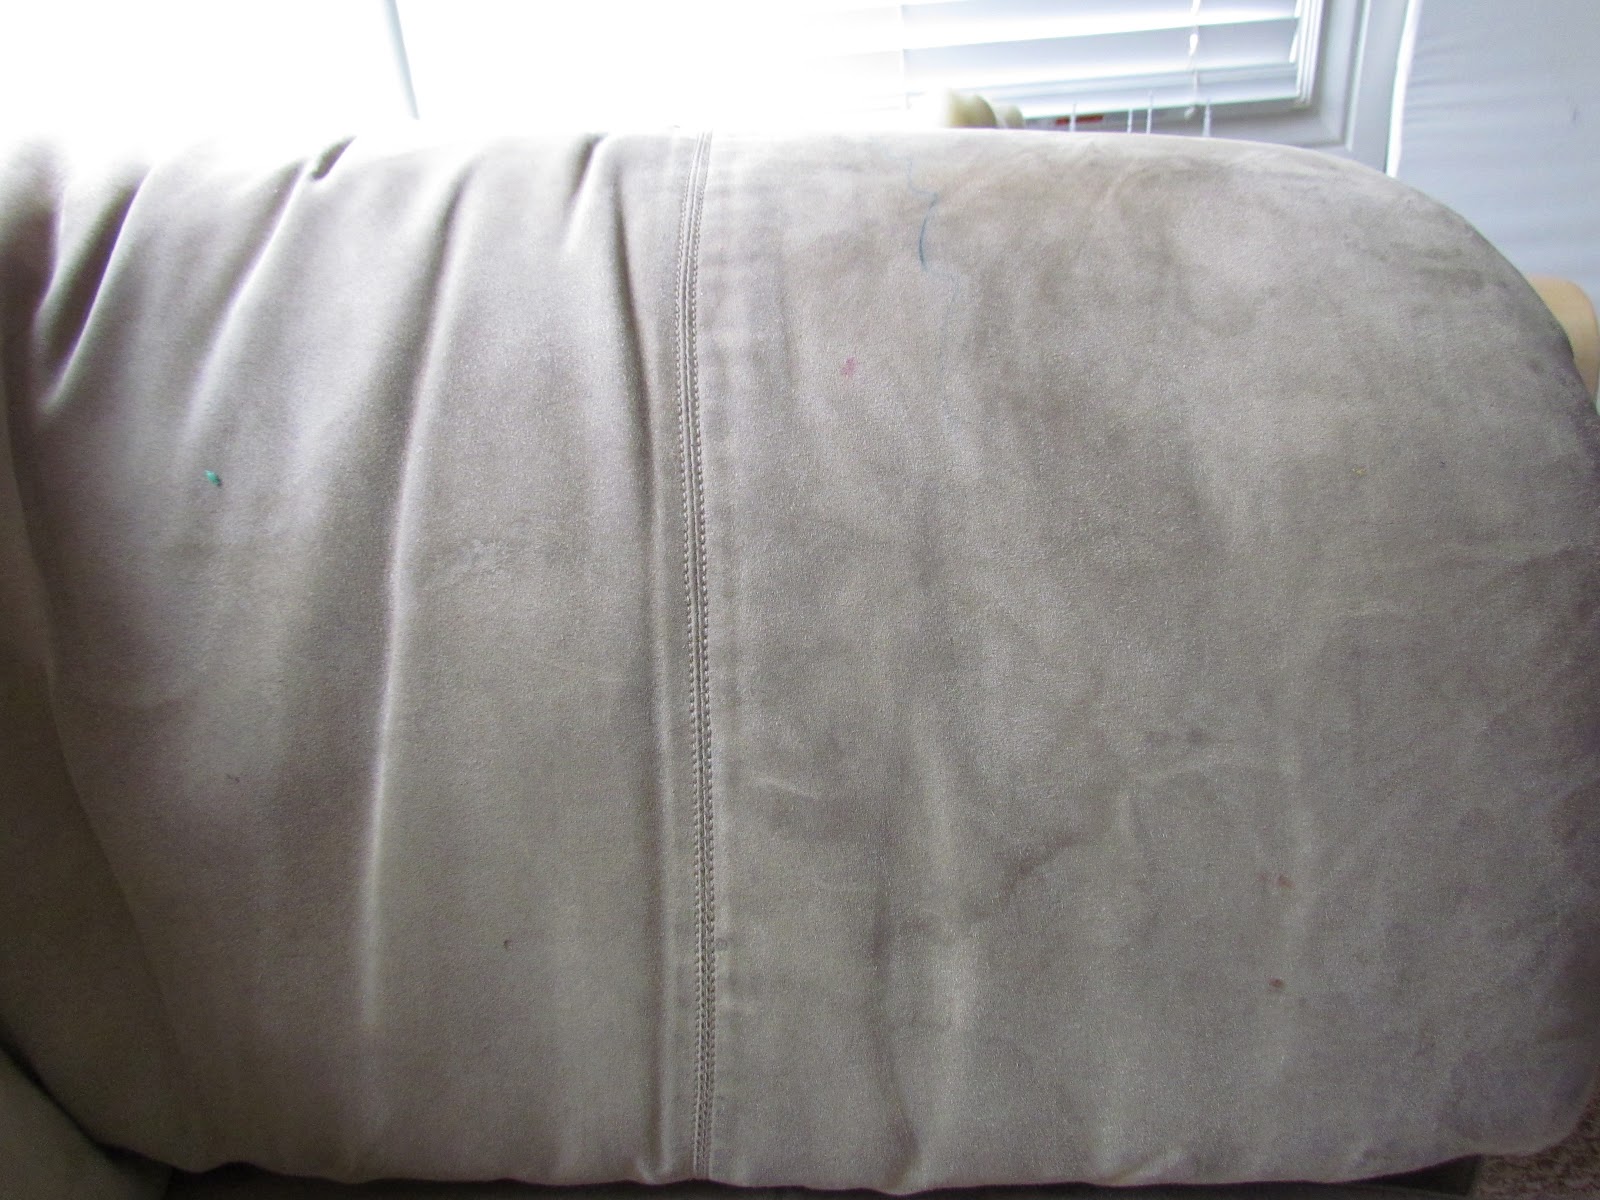
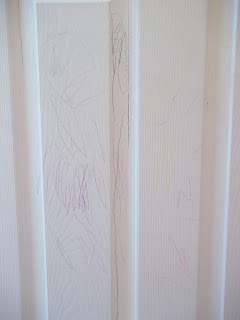
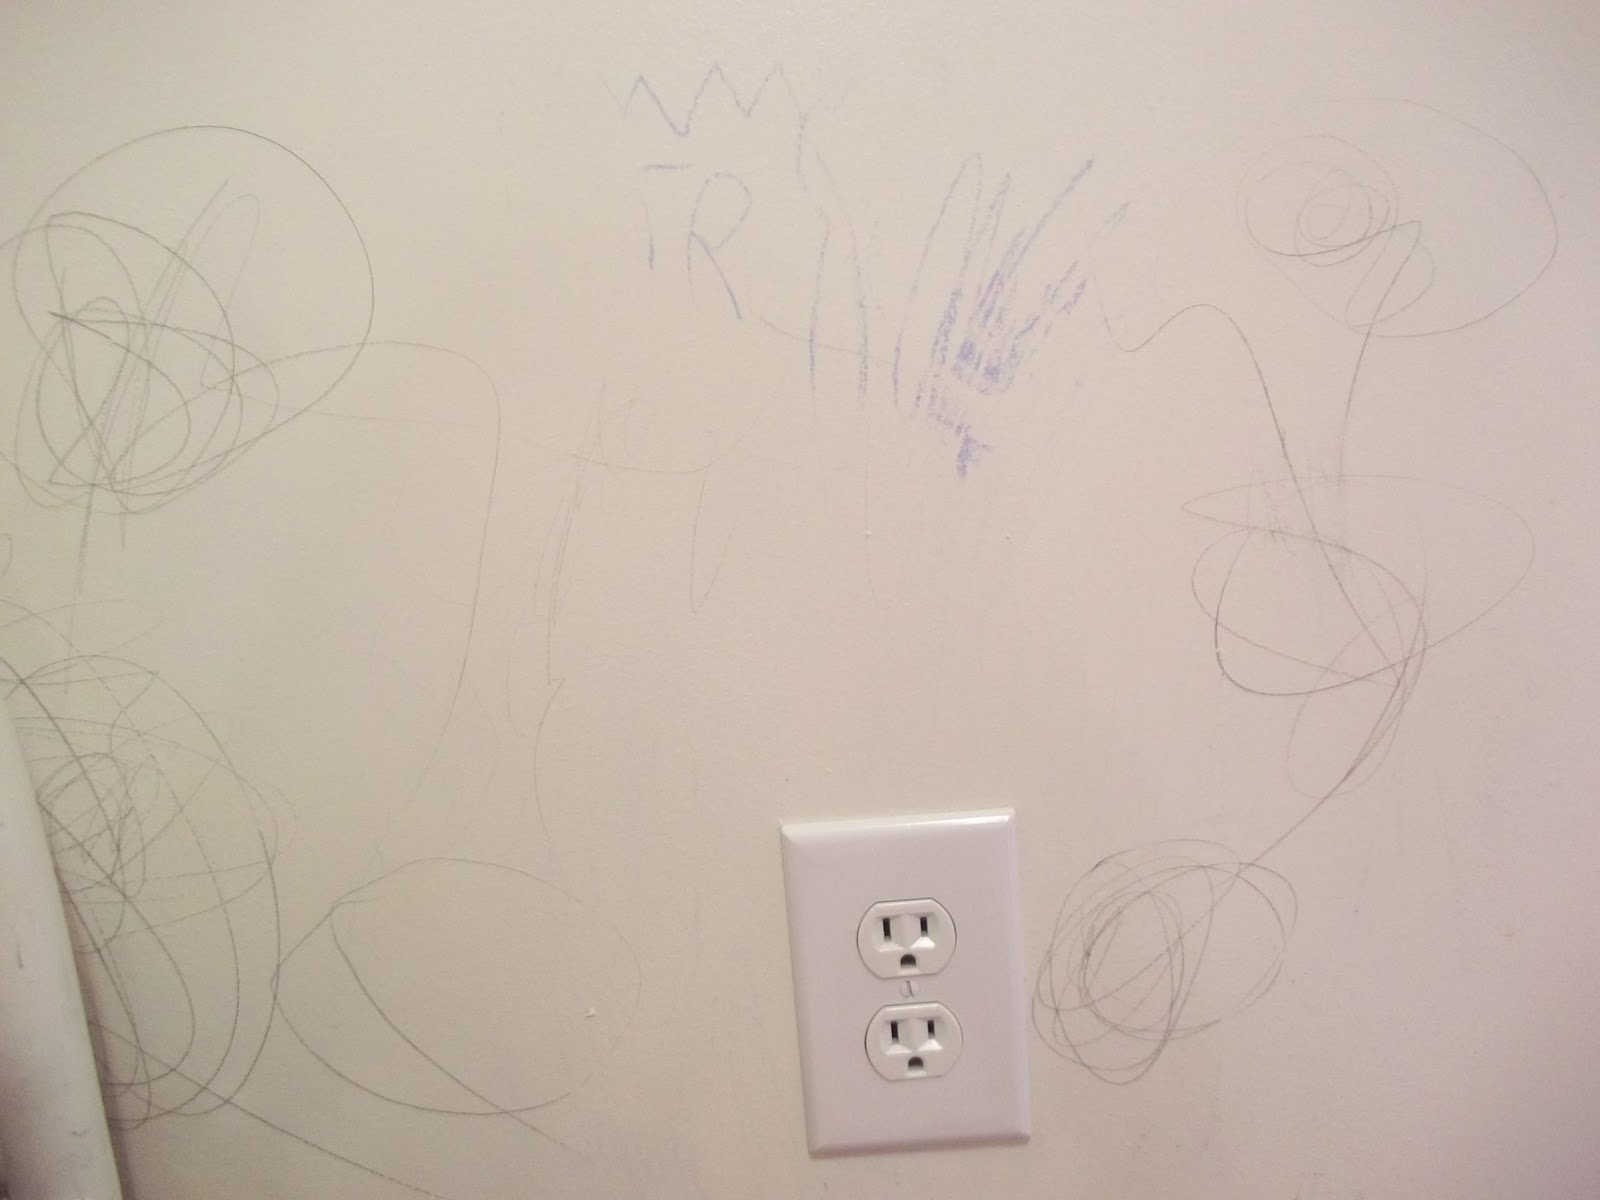
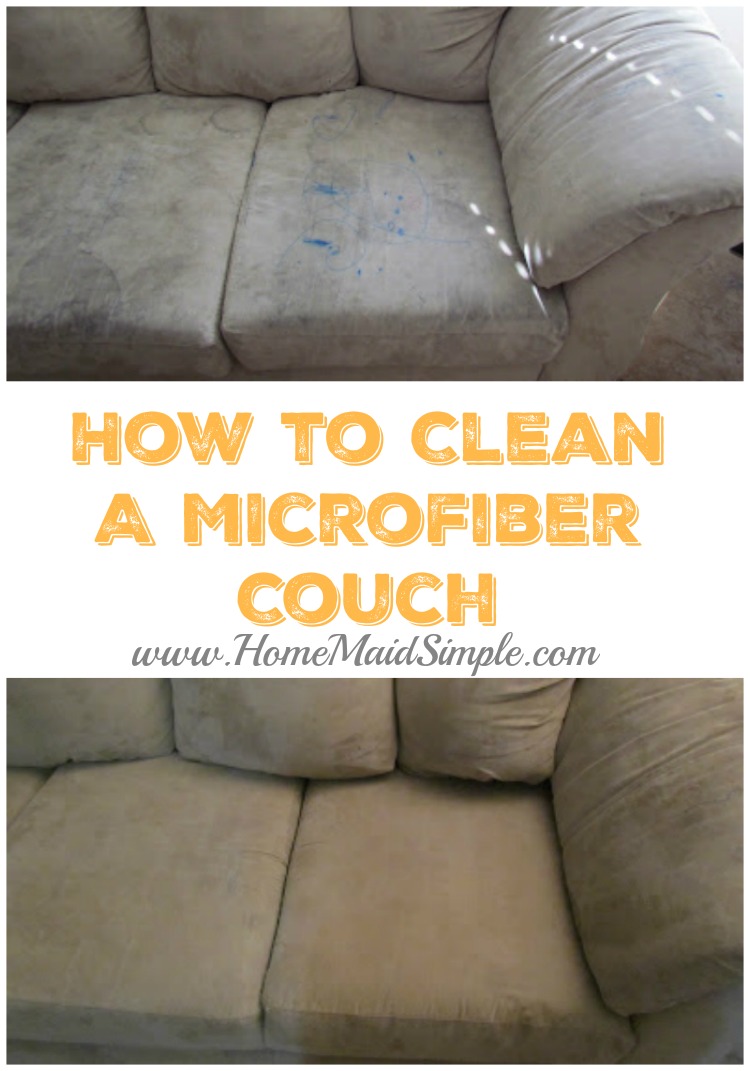
    If your kids are like normal kids, then your furniture probably starts to look something like this before you can even blink

    Pen on Microfiber furniture? No more worries!


    Pen on Microfiber couch? No more worries!
     

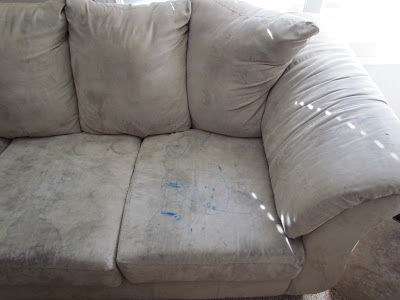
    I can’t even believe looking at these pictures that I actually let it get this bad, and that I would actually have company over sitting on these! ahhh, bad housekeeper over here. Well I finally saw past my kids, and realized what had become of my sitting area. So off to work I went. I started with some cleaners I had in my cupboard.

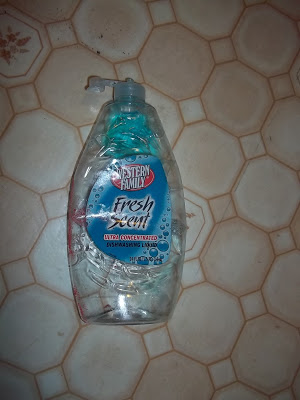
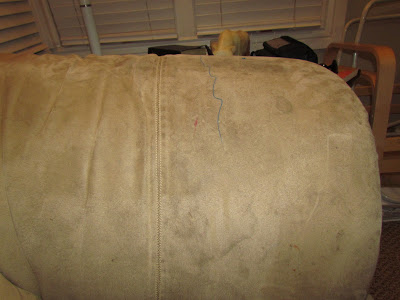
    EcoFresh Deodorizing Cleaner. It didn’t seem to be doing much. So I pulled out my – 1 time purchase from a door to door salesmanOriginal Lavender Advanage The Wonder Cleaner Super Concentrated.  The claim was that it gets grease stains out like magic!  Too bad it doesn’t take pen stains out of microfiber, because that would be a wonder.  Admittedly, it did lighten the pen, it just didn’t come all the way out.
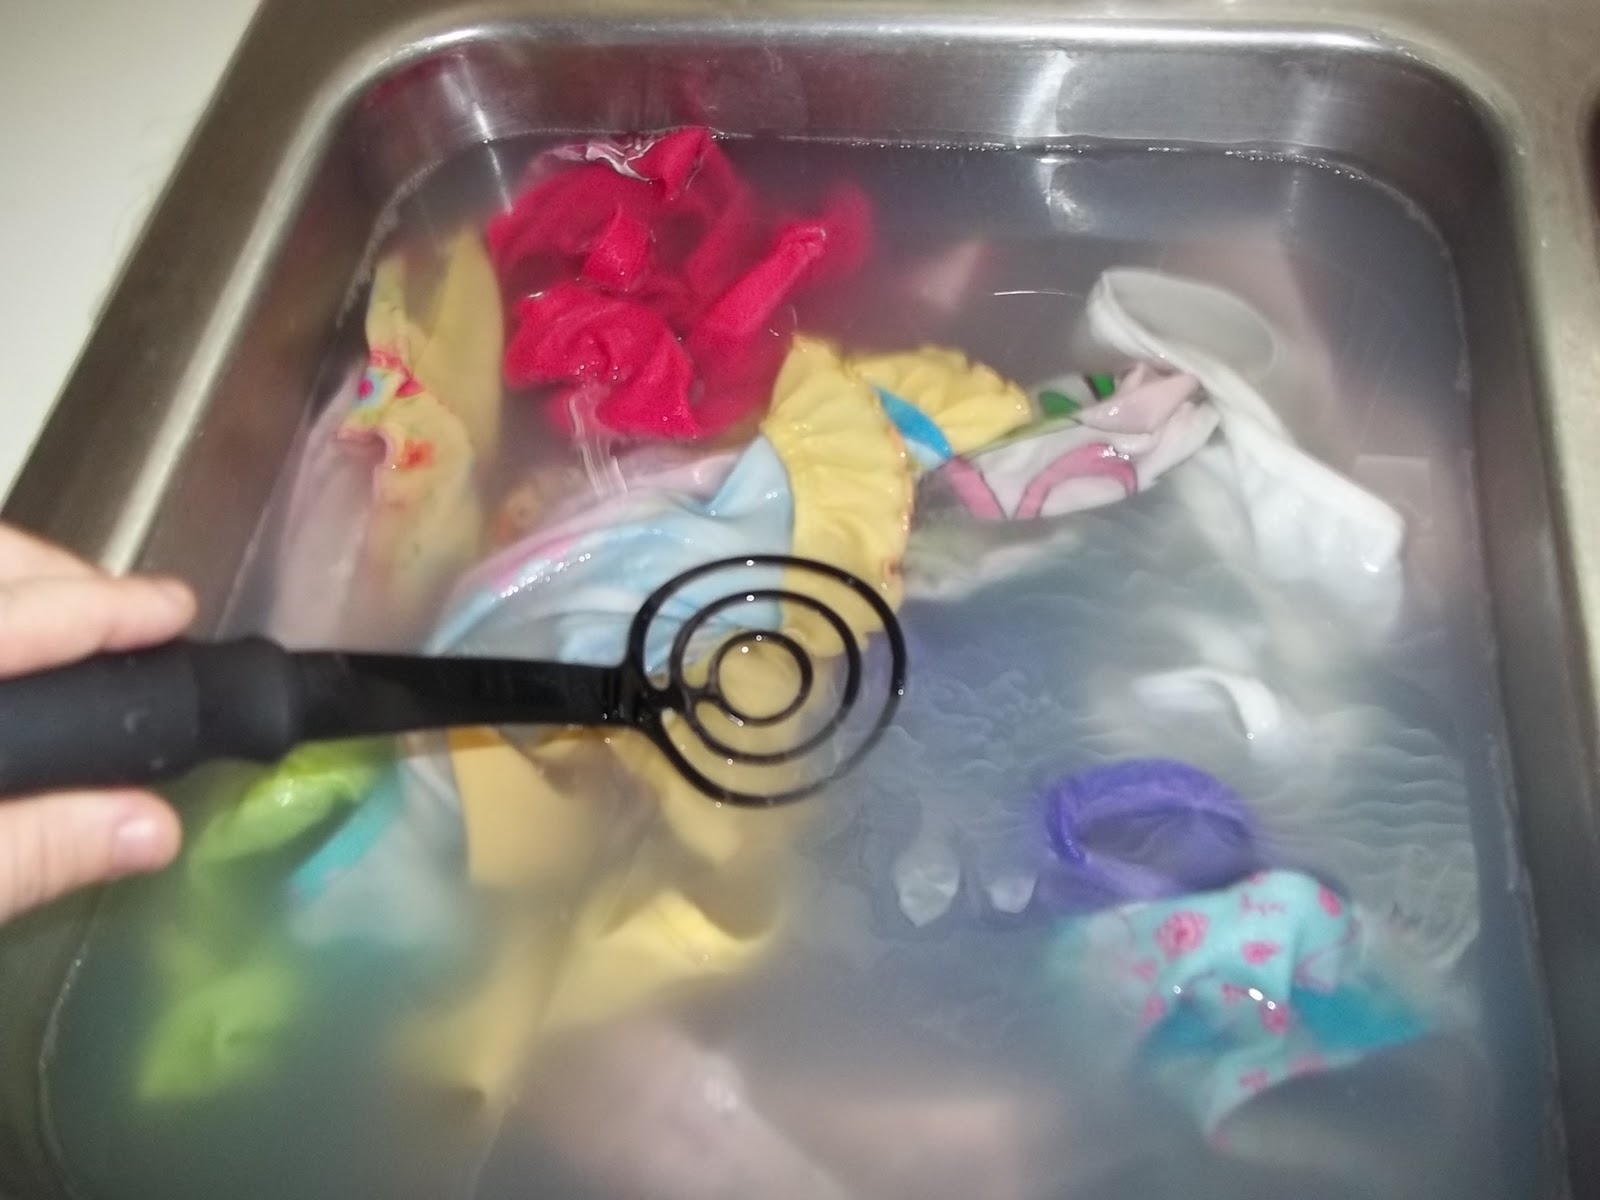
    My next method of attack was removing the covers from the seat cushions. I threw the covers in the wash on Heavy soiled, high spin, warm water.  YES! Ok, again the pen didn’t come out completely, but everything else did, and they look so much better!

    Here is my #1 tip for Microfiber furniture – Buy pieces that have a zipper cover.  I wish the back cushions were removable for the same reason, but I guess I’ll just have to spot clean them.

    After going through the wash here is what my couch now looks like
     
    Isn’t she a beauty? No more dark marks all over it. Absolutely wonderful to sit on! And really the cushion with the pen isn’t nearly as noticeable.
     
    So off to the arm and back cushions I went. I headed to pinterest for ideas.  The one “solution” I saw over and over again was Rubbing Alcohol. You take a white sponge (to avoid discoloration of your couch) and scrub the couch with rubbing alcohol. Again, the alcohol helped lighten the pen marks, but didn’t take them completely away. The rest of the arm looks nicer now though.
     
    #2 Tip when cleaning Microfiber – if you can’t remove the cushions, do not spot treat. You will need to wet the whole cushion to avoid leaving water marks.  It’s more work, but it will be for nothing if you end up with large water marks all over your couch.
     
     
    Good luck and Happy Cleaning!
     
    Have any spring cleaning tips or ideas? I would love to test them out. Please contact me at familyroom2@gmail.com
  • Tuesday Tips – Window Cleaning

    Oh the windows, we all love windows right? I love opening the blinds and letting in some sunshine. What I don’t love is opening the blinds to find finger prints, and smears of who knows what streaking across the glass. Not to mention the same smears on the blinds.
    Maybe you don’t have kids and don’t have quite the same problem I do. But you still get dust sitting on the blinds. 
    Once again, browsing pinterest I found this great idea for cleaning blinds. This tip originated from Robin at Keep Home Simple (so glad I found her blog. I feel like she’s me….but cooler!)  Right back to the cleaning tip.  So Robin mixes equal part vinegar and water, then slips a sock on her hand and cleans the blinds.

    It’s really a brilliant idea. You can use whatever cleaner you like. I personally prefer just some really hot water to help pick the dust off the blinds.  The vinegar is a nice touch to help kill those smears from little kids hands.  The best sock to use would be one you don’t plan on wearing again. You know from that pile of unmatched socks that has been sitting in your laundry room for-e-ver!  I only had little kid socks to work with. Depending on how many blinds you plan on cleaning, and how big your windows are, I don’t suggest using small socks. They get dirty fast, and you’ll spend more time rinsing them out then actually cleaning. But if you have an adult sock, you can probably get a lot more clean at a time (pending on just how dirty you let your blinds get….yes there’s a big arrow pointing above my head right now…). 
    The biggest downside I found to this method, is you can’t easily change sides of the sock like you can with a rag. So you really do have to rinse it out to keep cleaning. Other than that, the blinds are much easier to grab and hold in place while cleaning! I’m even going to add a little my tip here, put a dry sock on your other hand, and you can dry the blinds as you wash them!

    Now on to those dirty windows! By the way, I suggest cleaning the blinds first, or you may accidentally streak dust onto your clean windows from your blinds (yes I found out the hard way).  My personal favorite window cleaner is Windex and Newspapers! Yes Newspapers. Most of us have them sitting in piles, feeling guilty if we throw them out. Newspapers make great window cleaners. They’ll leave your windows streak and FUZZ free. I don’t know about you, but if I use a wash rag I get little fuzzies all over my windows.
    Now here’s the thing. Today when I went to grab my newspapers, I realized I had a lot of brown packing paper. So I decided to give it a try. It’s my new favorite cleaning “rag”.  The packing paper holds up much better than newpaper allowing you to use less of it at a time.

    *While looking for a picture of the packing paper, I came across this article on FunInTheMaking.com with more ways to reuse that packing paper!

  • Tuesday Tip – Cleaning the bathrooms

    Tuesday Tips
    I dread cleaning the bathrooms. I don’t know why, it’s probably one of the quickest rooms in the house to clean. It also has the potential to stay cleaner longer then say the playroom, but I still dread cleaning it.
    Ideally I would give it a thorough cleaning once a week, in reality, it’s a lot less than that.
    So when I came across this article through pinterest, I was ecstatic!

    Yes, I  just said ecstatic in association with cleaning the bathrooms!! 
    I grabbed my notepad, and wrote down the simple step by step instructions and headed to the bathroom.  I’ve never used microfiber towels in my bathroom, or paper towels. In the past I’ve used a myriad of different cleaners for the different surfaces as well.
    Comet for the toilet, tub and sink.
    Windex for the mirror.
    Ammonia for the floor.
    And then of course, tougher grime, I pulled out the tougher cleaners. Needless to say, you could easily get poisoned with the different cleaners I would use in one cleaning session.  According to this professional cleaner, all you need is one. I decided to use a vinegar and water mixture, and was pleased with the results. By following the step by step guide, I think I cut the time I usually spend cleaning the bathroom in half. 

    Now I don’t know about you, but my shower doors get all covered in that white soap and hard water scum. Not even vinegar and water will clean that off! I was pretty sure I’d tried it all, short of replacing the doors, but decided to do one more pinterest search.
    Let me just tell you how desperate I was getting –
    Goo-Be-Gone – works but takes a whole lot of elbow grease and would take 48hours to completely clean (estimated time, but I spent a good afternoon and got maybe a 1/4 to a 1/2 of one door clean)
    Steam Mop – Oh yeah, I even tried steam mopping it off!! I have to laugh at myself for this one, but it was sure worth the try. No it didn’t work.

    But guess what! I found it! The KEY to cleaning your shower doors!

    Lemon Dusting Spray. 
    You’re joking right? That was my first thought when I came across this tip. But hey, I’d just attempted to steam mop it off, why not try the Lemon Duster? I had some, and it wasn’t getting any other use in my house.
    Wow! Mothers, housekeepers, stay at home dads – rejoice! When Mark got home last night, I couldn’t stop talking about the amazingly clear shower doors. I sprayed it on, and left it for about an hour. When I came back, I already saw the difference. It was like soap scum was something I had made up, a fantasy.
    Here’s my little advice and what I learned though.
    – Don’t spray the floor of your shower, it will get very slippery. Perhaps lay a towel down inside to catch any drips.
     – If it dries on, it will look like it cleaned itself and you may think you got out of any scrubbing. Sorry, you’ll see the lemon spray next time you shower. Just get a damp rag and rinse off the doors after you’ve let it work it’s magic.
    – Lastly, textured showered doors clean much better than clear. The clear doors are going to take a little more elbow grease than the textured doors.
    I’m linking up to Learning the Frugal Life. Head over there for more Frugal living tips

  • Tuesday Tip – Crayon on Walls

    Tuesday Tip – Crayon on Walls

    Have you ever stopped and looked around your house, specifically at your walls, and went “WHOA!, what happened there?”  You suddenly find that just about every wall from 2 feet down is covered in crayon.
    Yeah, that happened to me this week. I couldn’t believe I let it go that long. I’m sure I could blame it on the dining room remodel, being pregnant, trying to get kids to actually sleep at night, etc. But in reality, 5 minutes with each wall and I could’ve had them cleaned ages ago. We’ve all got 5 minutes!  Granted, if you’ve let yours go as long as mine, to get it all clean, may take your whole day. That’s the price of procrastination.
    I recently read that WD-40 will remove crayon from walls. I had a can in the cleaning cupboard, so I figured I’d give it a try. The worst possible outcome would be that it did nothing.  To my joy, it actually worked. Sadly, it only takes off crayon; no pen, pencil, marker, or little dirty handprints.

    Nice right! It even wiped off pretty easy. 
     
    This here’s my favorite though
    See if you look right near the top center to the left of the face, you’ll see CTR. CTR stands for Choose The Right. I’m so glad my kids thought to write CTR on the wall, they must be learning something, right?
    As you can see, the crayon came off, the pencil stayed. I also learned that if the crayon is under something else, say like lotion smeared on the wall, the WD-40 will do nothing. Sigh.
     
    If you know of any way to remove pencil, pen and marker, I’d sure love to hear it!

    Leave me a comment with your best wall cleaning tips!

  • Amazing Deal on Vacuum’s


    Have you heard of the deal site The Foundary?  This has probably got to be my new favorite deal site.  All your home essentials with daily deals up to 70% OFF! 
    I recently purchased some really cute tote boxes for the baby’s nursery.  Not only did I get a great deal on these, but I I ordered them Tuesday, and got them today! Talk about fast shipping.  Oh and speaking of shipping, they use standard shipping costs, $5.95 for orders under $75 and $9.95 for orders over $75.

    So let’s get to the point of posting this (besides that I think you should go check them out!).  Today, and for the next 2 days there is a vacuum sale going on! Bissell vacuum’s for way below retail costs, with the same shipping costs I mentioned above. I know we could use a new vacuum and I may go take advantage of this deal.  I’m looking at this refurbished Cleanview II for only $47! Normally this would be $99. For $99 my 6 year old vacuum does just fine. But for $47, well that just might be doable.

     
    Don’t miss this sale!  I’ve seen items sell out fast at the Foundary and I expect this deal will be one to go quickly.  We all need vacuums, and we all need to save money! 
     
    *I was not compensated for this post. I did receive a $20 credit from Klout Perks, but was not required to post about my experience. I only promote products and websites that I think will benefit my readers.
     
  • Tuesday Tips – Cleaning the Vents

    Last night Mark went to the store and bought some new filters for the heater. We’ve lived in this home for 9 months, and hadn’t bothered to check the filters since moving in.  After doing a little research, I find there is a disagreement on how often the furnace filters should be changed.  Some say every month, some every 3 months, and some every 6 months. I personally was thinking that every 6 months is the norm, and so was Mark. This also probably depends on how old your furnace is and how often you use it.  Our plan is to change it every 6 months, but we’ll probably check them every couple of months to make sure they are not clogged.
    Now on to today’s tip. Don’t you hate it when your vents are all covered in dust? I know I do. I like to take the brush attachment on my vaccuum and go over the vents as I vaccuum. This can get pretty tedious every time I vaccuum though, and when the Princesses play with the attachments, I don’t always know where the brush part is.
    Instead of vaccuuming them, use Car Wax! I found this once again by browsing pinterest.  To read a full tutorial on how to clean your vents with car wax, visit Ask Anna. 
    Basically though, you want to wash your vents, let them dry, and then apply the car wax.  Then sit back, relax and enjoy sparkly clean vents!
    I’m linking up to Confessions of a Frugal Mind

  • Kids and Dish Soap

    Kids and Dish Soap

    What happens at your house when you think your kids are being good?  At my house it usually consists of doing something they really shouldn’t.  The opposite is true too. If I think they’re getting in to things, they’re usually just playing with their toys. 
    Here’s a good example.  Earlier this week I had been cleaning up randomly throughout the house, so I was never in one room for very long. I had put a load of dishes in the sink to soak, and then continued picking up every where else. At one point the Princesses, all 3 of them, pulled their chairs over to the sink to play in the water. I didn’t mind, as long as they weren’t making a huge mess. There were no knives in the sink so I knew they couldn’t hurt themselves. After awhile they went back downstairs. I eventually headed that way to take care of some items and finish going through the closet of handed down girls clothes as well. Here’s how it went:

    Me “Why is the floor wet?”
    Princess V “Because our feet our wet. We’re telling the truth!”
    Me “Ok, I’m glad you’re telling the truth, but why are your feet wet?”
    Princess V “It’s the blue soap”
    Me “What blue soap”
    Princess V “You know the blue soap”
    Me “where is the blue soap now?”
    Princess C “I’ll get it!”  She then runs across the toy room to bring me the empty bottle of Liquid Dish Soap.  The bottle that I had recently just opened and started using, that had been pracitically full earlier that morning.

    It was then I noticed the blue streaks down the walls and doors, and the sticky footprints all over the basement vinyl flooring. I was at a loss. I knew right away if I used a wet towel it would just suds and get nothing accomplished. So I grabbed a roll of paper towels and got up as much as I could. It looked pretty clean, so I went over it with a slightly damp towel – bad idea. There was still quite a bit and it got all sudsy. 
    My next idea was to reach out to my mom friends.  One said she would use cat litter to soak it up and then just sweep it up.  Now that I realized was brilliant! Problem is we don’t have cats, and I really didn’t want to pack 3 kids up to go buy some. Instead I used some red craft sand. I should’ve let it soak longer, but it still worked pretty well. Once I got that swept up I went over the whole floor with my steam mop
    It still feels funny to me down there, so later today I will go over it again with the steam mop. 
    So after learning from my mistakes, here’s a quick outline for you incase you ever run into the same sticky, gooey, sudsy mess.
    Cleaning liquid dish soap off vinyl flooring:
    -Pick up as much as you can with DRY paper towels.
    -Use something like cat litter, or craft sand to soak up the rest. Let it sit for 20-30minutes to really soak it up.
    – Go over the floor with a mop
  • Basement Remodel Caused Domestication

    Basement Remodel Caused Domestication

    I just love the way our basement is looking! We got the painting done over the weekend, and then yesterday the old vinyl was pulled up. 

    Sadly, the color is not exactly what we chose. We were going for this color called serenity, but to save a little money, we had the paint guys at Lowe’s try and create the same color in a cheaper bucket of paint. The result, a minty green, instead of calming green/blue. Awe well, the things we learn.

    spot for stacked washer and dryer
    There has been a downside to our basement remodel. I am so excited with how it is looking, but with the many different processes, we had to remove our washer and dryer. Which left us no way to wash clothes last week, or this week. So what did I do? I recalled our ancestors, and I filled the sink with hot soapy water and kids clothes. 
    Using my Pampered Chef Mix and Stir, I felt I got an adequate agitation going on.  So I let them soak, agitated them, soak some more, and agitated more. Then I used the other sink to rinse them. Rinsing was probably the hardest part. “Was I getting all the soap out?” was a constant question in my head. This morning though, after drying all night in the bathroom, I think I must have adequately done it. The clothes smelled nice, and were good and stiff. 
    Thankfully a good friend (whose basement also flooded this summer) saw my plight on facebook, and picked up a load of clothes for me today. I am so very grateful to her, and I’m sure my kids will be too, when they have clean clothes again! 
  • 5 minutes alone, what will your children do?

    5 minutes alone, what will your children do?

    This morning started out pretty nice. Princess V woke me up and then went to read stories to Princess R in her crib. It was really cute. We had a relaxing breakfast and let Mark and Chloe sleep some more. Once Chloe was up and fed, I headed back downstairs to wake up Mark and get dressed. I checked on the Princess’ first to make sure they were playing nice, and not into anything they shouldn’t be. Then down I went. It really doesn’t take that long for me to get dressed, and I talked briefly with Mark before heading back upstairs. I was shocked, awed, and horrified to what I came up to.

    Yes, friends, that is flour. About 3lbs worth of it too, I’m guessing. That was not fun to clean up. I pulled out the vacuum, but of course, the Princess’ also love to play with the attachments, so I had no attachment to get this stuff out. I got as much up as I could, and then remembered my sewing machine attachment. It’s the same attachments for a regular vacuum, but on mini scale. They worked thank goodness, it just took double the time!  I finished up the cleaning, wiping the whole couch down with a damp towel. I really hope it got it all!
    The next question is, what is the consequence? I know Princess V instigated this adventure, since she has tried it before (just caught a lot sooner). And I know she knows she’s not supposed to touch the flour! So what’s a parent to do?
    We emptied her room. Every last toy is out of there! We threw it in garbage bags and hauled them downstairs. She now has to prove to us that she can obey rules, and slowly will she get her toys back. Now don’t think we’re unfair parents. Princess V had had warnings before. Princess C on the other hand, was more a joiner, so her consequence this time, was to sit in her room until the mess was cleaned, and Princess V’s room was emptied.  Princess R is too small to understand fully, so her consequence was being blocked from the “fun room” while mommy was “having fun” cleaning it. She hates being blocked from a room.
  • Tuesday Tip – Cockroaches

    Tuesday Tip – Cockroaches

    Nasty little creatures. Thank heavens we haven’t seen any in our house! We did have a scare a couple weeks ago though. There was a large bug that in the dark looked just like the cockroach above. Hubby was sure it was the biggest cockroach he had ever seen! Turns out, it was just a moth. Yeah laugh it up, but when the moths wings were closed and it’s sitting by the shower drain, you’d think it was a cockroach too!

    Mark’s Mother was in town visiting during this occurrence and she gave me today’s Tuesday Tip!

    To prevent cockroaches, pour bleach down the drains, about once a month. So next time you’re cleaning your bathrooms, just pour a little bleach down those drains. Keep those cockroaches away from your Home!