Tag: cooking

  • The Green Earth Pan from Ozeri

    The Green Earth Pan from Ozeri

    *I received free product in exchange for my honest review. All thoughts are 100% my own.*

    After talking to the people behind Healthy Child Healthy World, I’ve been a little more conscious about what chemicals we are exposing our family to.  It wasn’t until Ozeri contacted me that I hadn’t taken a second thought to all my non-stick cookware.

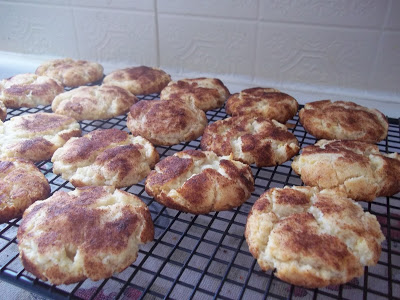
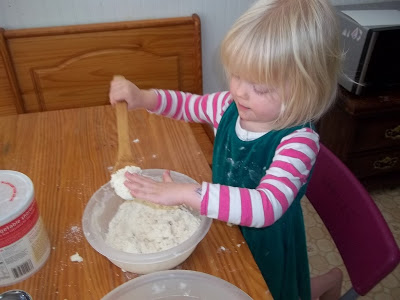
    Who doesn’t  love non-stick pans?  They make cooking, especially with kids, quick and easy. Since I’ve started using my Green Ozeri pan, I had to do a little more research into what exactly is up with PTFE and PFOA.

    Let’s start with the word Teflon. If you cook, you’ve heard of Teflon. Just about anything non-stick is coated in teflon – that’s what makes it non-stick after all.  So what is Teflon?  The chemical name for Teflon is polytetrafluoroethylene aka PTFE.

    As far as I have been able to tell, PTFE itself is pretty safe, unless heated to 500 degrees Fahrenheit.  The real issue from Teflon coated cookware comes from the PFOA or perfluorooctanoic acid which is a chemical used to make Teflon.

    PFOA has been linked to cancer in lab animals and thyroid disease, high cholesterol, and infertility issues in people. The kicker though, is as far as studies have gone PFOA is not actually leaking out of your Teflon coated cookware into your food. However again, if heated at high temps some fumes can be released which may give you flu like symptoms.

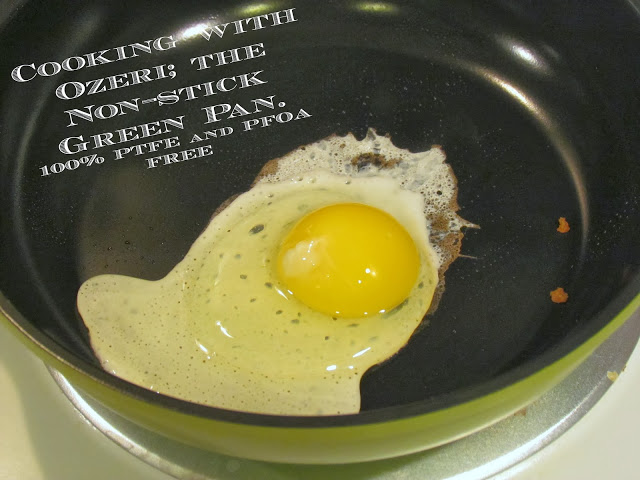
    With all my research, it seems like our cookware is probably safe, but I’m still excited to be using our new Ozeri pan. Unlike Teflon coated pans, Ozeri uses Greblon Ceramic coating from Germany to get a top of the line, but eco-friendly non-stick surface that is completely PTFE and PFOA free.

    I am really in love with my Green (in color too!) Ozeri pan. It truly is a non-stick surface. The company suggests still using a small amount of oil in your pan, to help season it, but you can cut the amount down pretty well. I haven’t used any oil in my pan yet though, and it’s doing just fine. 
    I was also impressed with the depth. Most of my frying pans are pretty shallow, but the Ozeri is almost twice as deep, which helps in cooking for my whole family. 
    Since we still want to protect the coating on the pan, you should not use any metal utensils on the surface or store other pans on top of it. Also keep the heat around medium or lower for a good even heating that doesn’t break down the ceramic coating. 
    To top it all off, the pan is extremely easy to clean as well! You don’t want to put this pan in the dishwasher, but a little soap, water and a quick wipe with a rag and your pan is clean. 
    Chicken Egg Sandwich
    Ingredients
    2 slices Multigrain Bread
    Miracle Whip or Mayo
    lettuce
    tomato, sliced
    breaded chicken
    1 egg
    Directions
    Fry up the chicken until cooked through. While frying, spread some Mayo on one side of each slice of bread. Top one bread with lettuce and tomato as desired. Add the cooked chicken to your sandwich and fry up an egg. I personally love them runny, but Mark likes them cooked through. Enjoy! This sandwich is delicious! If you want a little extra yumminess, add some cheddar cheese to the hot chicken (I didn’t have any on hand today)
  • Craftsy Online Classes On Sale

    Craftsy Online Classes On Sale

    Have you ever wanted to learn something crafty, but don’t have the time? There have been so many classes I’ve wanted to take, to enrich my life, and learn something fun and new. As a mom, though, I can’t always get away for those things, or they cost too much, or I don’t live close enough to anything.

    Recently the local college was having a Reupholstery Class. I so wanted to do that, but we had just moved here, and were still trying to get settled.

    So, I introduce to you, Craftsy!  The online classes for all things crafty.  They have everything from sewing to cooking.  And from what I can tell, they are not just basic skills, they come very specialized to what you want.

    For example, you can take a

    After browsing them for days, I think I’ve finally settled on taking a Vegetable Gardening Class. Should definitely help us with our new garden next spring!

    BLACK FRIDAY to CYBER MONDAY
    Online Sewing Class
  • Foodie Friday – Basic Cookie Mix

    Foodie Friday – Basic Cookie Mix

    Foodie Friday
    Every friday we will share a recipe on our blogs. At the end of the post we encourage you to link up your recipes! Let’s get cooking!
    I was looking for a Peanut Butter Cookie recipe the other day, and finally (out of my stacks and stacks of cookbooks) found one in a book called Deseret Recipes (published by the LDS church).
    To make the Peanut Butter Cookies I had to make a Basic Cookie Mix first.
    Basic Cookie Mix
    9 cups flour
    3 cups powdered dry milk
    3 TBS baking powder
    1 TBS salt
    4 cups shortening
    4 cups sugar
    Stir the first 4 ingredients together. In a large bowl cream the shortening. Gradually add the sugar to the shortening. Once it’s mixed, slowly add the dry ingredients. Blend or use a pastry cutter until it is the texture of cornmeal.
    Store tightly covered at room temperature.  Will last for several weeks.
    Now this will make a lot of cookies! I cut my Basic recipe in half, and still made three different batches of cookies.  Today I’d like to share a recipe using the Basic Cookie Mix, for Cinnamon Cookies. What you thought I’d share the Peanut Butter Cookie recipe? I would, but the baking bug hit me, and out of the 3 types of cookies I made, the Cinnamons were definitely the best!
    Cinnamon Cookies
    2 1/2 cups basic cookie mix
    1 tsp vanilla
    1/2 cup sugar
    1 egg, slightly beaten
    1 1/2 tsp cinnamon
    Blend the basic cookie mix, vanilla, sugar and egg.  Form the batter into balls, any size you like, and roll them in the cinnamon.
    Bake at 375 for 12-15minutes. 

    document.write(‘

  • Menu Plan Monday 12/5

    Menu Plan Monday 12/5

    What’s on the menu this week? Link up or find a ton more great ideas over at Organizing Junkie.
    I felt the need to use some pinterest inspired recipes again, this week (did I mention I think I have a pinterest problem….I might need intervention).
    Monday – Spaghetti. Mark has parent teacher conferences today, so I wanted something simple I wouldn’t have to fight the Princesses to eat. Spaghetti it is!  I thought about doing spaghetti baked in bread but decided against it.
    Tuesday – Toasted Ravioli
    Wednesday – Church potluck for the women. Mark and kids will be on their own, bwahaha!
    Thursday – Hamburger Helper
    Saturday – Lasagna Soup
     Mmmm, these foods have me ready for a great week of cooking!  While we’re on the topic of food, make sure you check out my current giveaways in the left sidebar! You could win coupons for Free Cranberry Naturals, and a Green Giant Steamers Prize Pack that includes a Free coupon as well!
  • Mock Raspberry Jam and Other Ways to Use Green Tomatoes

    Mock Raspberry Jam and Other Ways to Use Green Tomatoes

    The growing season is ending, but you find yourself with an abundance of green tomatoes still! What do you do with them? Make this mock Raspberry Jam of course. This post contains affiliate links and I will be compensated when you click on and make a purchase through them.

    One of my first years gardening as a self-sufficient adult left me with an abundance of green tomatoes. I planted late in the season, and in a corner of the yard that did not receive enough sunlight to ripen the tomatoes.  Not one to waste anything, I was determined to find a way to use these fruits, despite their immature growth. 


    You may find yourself with green tomatoes at the end of the season, not because of any mistake on your part, but rather because you had a plant that continued to produce right up to the first frost. So whatever reason you find yourself with green tomatoes, I’m pleased to tell you that this recipe for Mock Raspberry Jam is a winner – as long as you can mentally get past the tomatoes. 
     
    I first heard this recipe for Mock Raspberry Jam on a Saturday morning garden radio show. Joy at KNRS made this jam sound so much better than fried green tomatoes – my only other option at the time – so I whipped up a batch. 
    Mock Raspberry Jam
    Yields 9
    Write a review
    Print
    Ingredients
    1. 5 cups green tomatoes
    2. 5 cups sugar
    3. 6oz package raspberry jello
    Instructions
    1. Grind Tomatoes in a blender.
    2. Pour tomatoes into a large sauce pan, and add 5 cups sugar.
    3. Boil until sugar is dissolved.
    4. Turn heat to low and cook for 25 minutes, stirring periodically.
    5. Add 6 oz Raspberry jello, and cook for 1 minute.
    6. Pour into sanitized pint jars.
    7. Wipe rims, and place lids and rings on.
    8. Process in a water bath for 30 minutes.
    Adapted from KNRS Garden Show
    Adapted from KNRS Garden Show
    Home Maid Simple https://www.homemaidsimple.com/


    They are so delicious! It tastes just like raspberry jam, and the tomato seeds give the same texture as real raspberry jam. Now to get over my mental block of knowing it was made from tomatoes. 

    More Green Tomato Recipes

    Green Tomato Bread from Instructables

    Green Tomato Relish from Homegrown In the Valley

    Oven Fried Green Tomato Caprese Stacks from Southern Plate

    Fried Green Tomato Pickles from The Country Chic Cottage

    How to Ripen Green Tomatoes from Happy Mothering

    How do you use Green Tomatoes?


  • Fried Apple Peach Pie

    Fried Apple Peach Pie

    It must be the weather, or the closeness to Thanksgiving, but I’ve started craving pies!  I had one problem, I didn’t want to go to the store, but I only had one can of peach pie filling and one can of Fried Apples.  I decided to throw caution out the door (as I often do when I cook) and mix the two together for a Fried Apple Peach Pie. Princess C helped me make the dough while Princess V was at school and Princess R was napping. I love these special moments I get to have with Princess C. 

    I am not going to give you the dough recipe we used, because it was the one part of the pie no one liked, and it was really really hard to work with. Sorry.
    After we got the dough ready Princess R was up and helped me taste the filling.
    She liked it, and then was mad I wouldn’t let her eat it all before cooking it.
    Before baking
    No it doesn’t look pretty, the dough really was very hard to work with.
    Shortly after baking
    There is less than half left this morning! Turns out apples and peach go pretty well together in a pie, who knew?  Ok maybe I’m just slow and this is a common pie, but it was new to us, and we liked it!
    For my filling I just combined Cracker Barrel’s Fried Apples
    and Comstock Wilderness More Fruit Peaches
    Comstock and Wilderness product
    Happy Holidays!
    Don’t forget while you start your holiday baking, to check out the 2011 Rodelle Baking Challenge! Share your baking stories and you could win a years supply of Premium Rodelle Baking ingredients and a KitchenAid mixer!
  • Book Review: Feeding the Dragon

    Feeding the Dragon: A Culinary travelogue through china with recipes

    By Mary Kate Tate and Nate Tate

    My thoughts: I LOVED this book! Looking at the cover and title was good enough for me to want to pick it up. I have a few other cookbooks that are country specific with some history in them, but they were fairly boring to read.  When I Feeding the Dragon arrived in the mail, the cover told me this was going to be different, and it was!

    Mary Kate and Nate take you right to the heart of China! You get to see the real culture, people, and the history that surrounds them.  The photography in the book is also stunning. While reading about the culture, I really felt like I was right there with them!  Of course, I probably would’ve died from feral dogs, while Mary and Nate made an escape, but if I had made it, I’d be carrying a branch with me too!  While reading I felt very connected to the Hakka people.  Their homes are built around a central room used for all types of family gatherings, and they have strong focus on the family. What I really loved, though, is how they competely included Mary Kate and Nate and treated them as more family.  It’s what I want my home to be – a place anyone can come and feel like family. 
    Thank you Mary Kate and Nate for this trip to the heart of China, without having to leave my couch.  You have inspired me to search out the heart of the country when I travel (….if I travel…someday I’ll be a world traveler…you’ll see!).

    I have yet to try any of the recipes from this stunning book, but I have my eye on 4 that will be going on our menu very soon!  Youtiao Fried Dough Stick which apparently are like doughnuts, Farmhouse Omelet a very simple dish, Chicken Lettuce Cups because I love the ones at PF Changs, and Mango Pudding because the name accompanied with the picture is just irresistable!

    While browsing the web, I also came across Mary Kate and Nate’s BLOG! Yeah, I love blogs, so I’m very excited to add their’s to my reading list.  You can purchase their book Feeding the Dragon, through their website or by clicking the picture below!

    *This post contains an affiliate link. Thank you for supporting Home Maid Simple
  • Whole Wheat Banana Mango Bread

    Originally this would’ve been my Tuesday tip, but it’s now thursday. Life gets busy when you’re trying to move!  
    I went late night shopping with my neighbor yesterday.  She shops sales, and pretty much has prices memorized. So she KNOWS what a good deal is.  We left the kids at home with the dads, which really made for a peaceful shopping trip.  Whoa, little ramble there. Back to the point!
    There was a basket of overripe bananas on sale (ok apparently ripe bananas are cheaper elsewhere, but that didn’t stop me).  I love buying overripe bananas! It means instant banana bread, no waiting and hoping no one eats the ripe bananas before I can make the bread.  Now I purposely bought one less banana, because I wanted to experiment! 
    Here is the recipe I created, with my mom’s recipe as a base. See if you can find my cooking tip!

    Whole Wheat Banana Mango Bread
    Ingredients
    – 1 cup shortening
    – 2 cups sugar
    – 4 overripe bananas
    -4 eggs
    – 3.5oz banana mango baby food
    – 3 1/2 cups whole wheat flour
    – not quite 2 tsp baking soda
    -1 tsp salt
    Directions
    1. Mix the first 5 ingredients together.
    2. In a separate bowl mix the last 3 ingredients.
    3. Add the dry to the wet, and mix well
    4. Grease 2 loaf pans. Pour batter in. Bake at 350 F for 75 minutes, or until toothpick inserted comes out clean
    Did you find the tip? It was an ingredient in the wet mixture.  That’s right, baby food!  We have an 11 month old who has decided to stop eating most baby foods.  She much prefers “real” food.  Last fall we stocked up, and I mean stocked up on baby food.  So what in the world was I going to do with all this baby food? Cook with it of course.  It will add some extra nutrients to our food, and works great when missing a simple ingredient (like one banana).  The plus side, I couldn’t taste the mango, but the banana flavor popped out more. 
  • Simplify in the Kitchen with a Bread Maker

    Simplify in the Kitchen with a Bread Maker

    What tools make cooking simpler for you?  Do you have a favorite kitchen gadget you can’t live without?  How about the most useless tool in your kitchen?  Maybe something you like to use, but takes up way too much space?  

    I love the kitchen, it’s probably my favorite room in any given house.  I do not like the kitchen I am in now.  It is small, cramped and makes it hard to get the whole family in there cooking up a good time.  

    2010 brought with it my new favorite kitchen gadget – the Breadmaker.  For Christmas 2009 my mom got me the Breadman Breadmaker.  I thought it was cool, but at the time I still really enjoyed getting my hands in the dough and letting the kids help me make the bread.  So I didn’t use it a whole lot.  Then we moved here…

     
    I still love cooking, and being in the kitchen, it’s just become a lot harder to do the big fun stuff.  
    Enter stage left…..
    My Breadman Bread Maker (affiliate link).  Yes, it takes up one of the few counter spaces I have, but it opened up the time to play with kids, and do more cleaning.  Gosh, I love this thing.  (we loved it so much, we bought mom a bread maker this last Christmas!)
     
    This thing does everything from beginning to end.  Kneading, rising and baking.  But it doesn’t end there.  You can have it just knead the bread, then you make it into rolls, pitas, cinnamon buns and cook in the oven.  Or make some homemade jelly in it!!!
     
    Here’s the latest and greatest from our beloved Bread Maker
    mmmm clover leaf white rolls.  Dinner’s going to be good tonight!!
     
    Don’t tell but two rolls have already gone missing…..

    What Kitchen Tool simplifies your life?