Tag: furniture

  • Outdoor Patio Set Redo – Creating a Work Zone near my kids

    Outdoor Patio Set Redo – Creating a Work Zone near my kids

    When we decided to rent this house before actually seeing it in person, one of the biggest sale points for me was the fenced in backyard and attached deck. The vision was real – a workplace outdoors where I could enjoy the sounds of nature and let the kids play in a safe area that wouldn’t make my heart pump with anxiety.

     
    We moved in on July 1st, and I started looking for a good patio set. We happened across a yard sale one saturday and found this 2 seater set for only $18. I had to double check with the owner that I wasn’t reading the price upside down and he really wanted $81. Nope $18 was correct! There was no way I could leave this behind, it was perfect!
     

    The first step in redoing this set was picking out colors. The whole family came with me to our trusty Walmart, and together we picked out a nice Dark Purple spray paint. There’s an excess of bugs around these parts, so we wanted a fun color, but not one that would attract the bees. After the purple was chosen, I found this pretty damask upholstery fabric on sale too! There was just enough left for our seats. 


    While the paint dried on the chairs and table frame, we got to work on the seat cushions. The original seats were so old, there was no salvageable parts. I picked up precut wood rounds from Menards, and the padding from Walmart.

    How to Reupholster patio seats. 

    What you need:
    Wood Rounds
    1-2inch foam padding
    fabric
    hot glue
    staple gun with staples

    Use the wood rounds to trace a circle on the foam padding. Using a razor blade, or sharp knife, carefully cut around the padding. Lay the padding on back side of fabric. I used a permanent marker to measure straight out and leave dots around the seat. I gave myself a good 2 inches extra fabric to attach to the underside.
    Connect the dots, then cut our the fabric. Place padding on the center of fabric, then wood round on top of the padding. At this point it is great to have a second pair of hands helping out. Really push down on the wood as you pull the fabric around, and attach in place with the hot glue. Now the fabric is attached, give it a second go around with the staple gun. Between the two, bugs and inclement weather should be kept out of the seat.

     
    I now have a fantastic colorful work zone outside! It’s also going to be a great place to relax with friends while the kids run around outside. If you’re ever in the area and want to join me on the patio, come on by!
     
     
    When I’m not using the table, I’ve found the kids enjoying it too. This week they were building bubble castles. My vision has come to life, and is now updated to see many many family memories being made around it. 
     
    Do you have an outdoor space to enjoy?
  • Refreshed Dresser with Trinca-Ferro

    Refreshed Dresser with Trinca-Ferro

    I received product for review. All opinions are my own. 

    When we moved to North Dakota, we had gotten rid of all our furniture. Besides our beds, we had nothing. With how frequently moves happen, it’s usually how we go. There were a few pieces that stuck around for a couple moves, but even those are long gone. One of Mark’s coworkers was kind enough to provide us with some dressers. 

    I fell in love, and knew it would be one of those permanent pieces no matter how often we move. this is an older piece that’s been built well to withstand time. It also gives off a bit of simple elegance that I’m always trying to achieve in our home…or at least in my personal space. 
    wooden knobs make the piece feel unfinished
    There was one aspect of this dresser though I did not like – the knobs. I’d debated painting them, but trying to match the drawers would have been too much of a gamble, and I really didn’t want to repaint the whole thing. I like the light blue quite a bit. 
    Trinca-Ferro Mirror Glass Knobs
    Until I had the perfect fix, I decided to leave it alone. No rush meant I could get exactly what I wanted – and that’s just what I did this weekend!  I found Trinca-Ferro in my inbox one day, promoting their Mirror Glass Knobs, and I knew that’s what my dresser needed. The mirror glass really pulls off the old bu stylish look I love.
    I love how such a simple change like the hardware can make a huge impact. While no one besides myself is going to get to enjoy the beauty of my dresser, it’s going to help change how I look at other furniture updates around here. See, we moved again to Indiana this time…and we got rid of all our furniture again – except of course this dresser, because, you know
    How do you refresh your space?

    Follow Trinca-Ferro


  • 4 Reasons to Invest in Handcrafted Furniture

    4 Reasons to Invest in Handcrafted Furniture

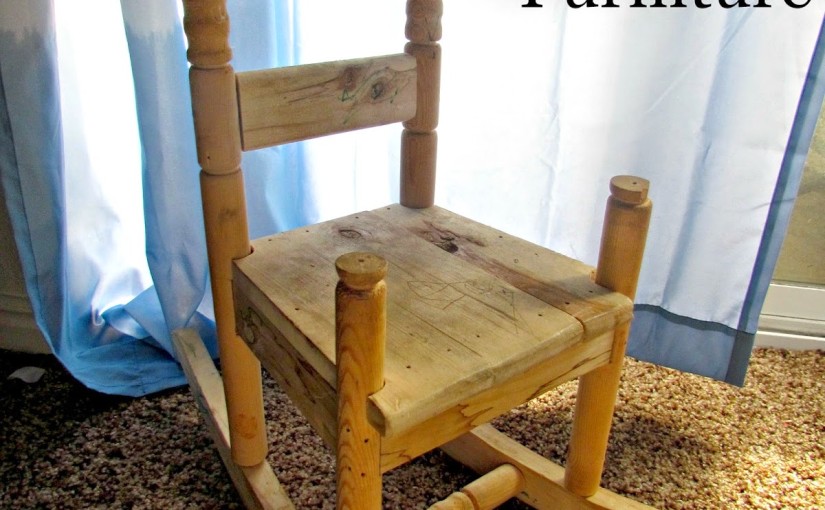
    Do you want a property that looks the same as everyone else, or a home that stands out from the crowd and makes a statement? Furniture is an essential part of your home, but it’s not just about form and function, it should be beautiful as well. Your furniture should make a statement about who you are. When you invest in handcrafted furniture, that’s exactly what you’re doing.

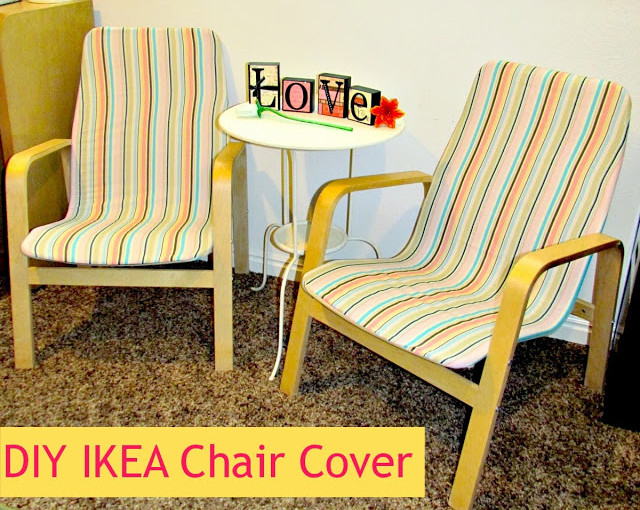
    If you buy your tables, chairs, wardrobes and cabinets from the high street, you’re purchasing items that were made on a furniture production line. There’s still a wide range to choose from, but somehow they all look very similar. You can walk into a friend’s house and identify that their furniture came from Habitat or Ikea. Is it time that you made a real change in your home? Here are just some of the reasons why handcrafted furniture is right for you:
     
    • Turn your furniture into a talking point
    • Enjoy exceptional quality of work
    • Keep traditional crafts alive
    • Cut down your carbon footprint
    Let’s take a look at why handcrafted is so much better than mass produced.

    Let Your Furniture Do the Talking

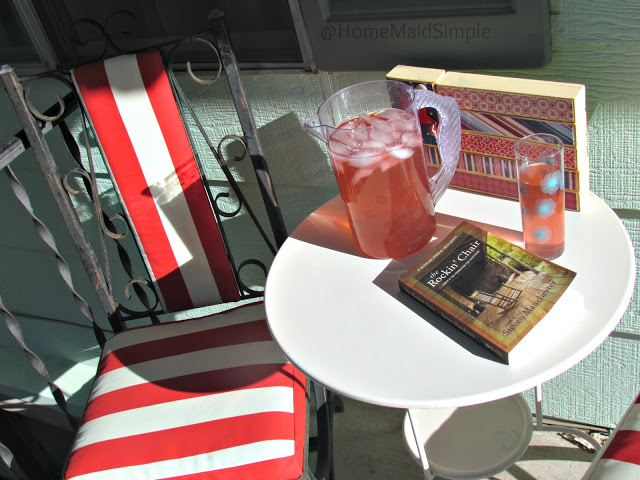
    Do you like to entertain house guests?
    Dinner parties are a great way to share beautiful food, fine wine, and of course, catch up on all the latest news about the community. What happens while you’re spending time in the kitchen? Your guests start to examine your house more closely. The topic of conversation changes from who’s going to marry whom, to how stylish, or not, your home is. When you invest in beautiful handcrafted furniture, you’re instantly getting one up on all your guests. In the nicest possible way, of course. Sit your guests down around a bespoke rosewood dining table, or invite them to take a decanter from your teak drinks cabinet. When the furniture is handcrafted, it stands above everything else.
    Don’t worry about fitting topics to bring up during the evening, your furniture itself will become the talking point of choice. Handcrafted furniture is
    saying something important about you. It’s saying, ‘I enjoy the finer things in life, and through hard work, I’ve reached the point where I can have them.’

    It’s All In the Detail

    Quality of workmanship is everything. Mass produced furniture may look okay, but it doesn’t have the wow factor that artisan
    made furniture has. The fact is that modern furniture manufacturer isn’t about a craftsman who has spent decades honing his craft, it’s about a person
    programming a computer to tell machinery what to do on a repetitive basis. When you buy handcrafted furniture, you’ll be getting a level of detail that you won’t find in retail chain outlets. The materials used will be more durable too. Large scale furniture suppliers are, understandably, looking to reduce costs and maximise their profits. One way they do this is by buying wood in bulk at bargain prices. Artisan furniture makers, however, place quality as the number one priority. They use high-quality natural wood, and this not only gives it a striking appearance, it makes it more durable and less susceptible to knocks and scuffs. Whether you’re buying vintage chairs, or modern hand made tables, you’ll still receive the same exceptional quality that’s stood out through the centuries. It can cost less than you think as well. Find handcrafted pieces at competitive prices on Wayfair ~affiliate link.

    Preserving Skills for Future Generations

    We live in a consumer-driven world, but it’s also becoming less patient. The average consumer wants something right now, and at as cheap a price as possible. It’s for these reasons that mass produced furniture is becoming increasingly predominant, to the detriment of hand made furniture.
    Discerning consumers, however, realize that patience is a virtue and that it’s worth paying just a little more to have an item of true quality. The skills used in the production of handcrafted furniture have been passed down through the generations, for hundreds of years. Traditional methods of wood carving, furniture turning and carpentry can’t be learned purely on the Internet, they have to be absorbed from a master in the trade. If these skills die out, then they can never be learned again. By purchasing handcrafted furniture, you’re helping to preserve these techniques for your children and grandchildren’s generations.

    Make Your Furniture Greener

    The weather is becoming ever more predictable, and we’ve all seen the devastating results this can bring. Climate change is happening right here, right now, and we need to do all we can to slow it down and then reverse the effects. One of the ways we can help is by reducing our carbon footprint. A great way to achieve this is by buying local whenever possible. Another way is by buying handcrafted goods. Because they are made using traditional methods, handmade furniture consumes much less power during production and there is much less waste of natural resources such as wood. Even if you buy handcrafted furniture online, you’ll be doing your bit to create a more stable and sustainable environment.


    About the Author: Paul Moore is a professional writer and blogger, who loves writing on a myriad of topics. He specialises in areas like disability, home improvement, etc.

  • DIY Ikea Chair Recover

    DIY Ikea Chair Recover

    While white is a beautiful color and allows any and everything to match it, it’s not very conducive for a home with many small children. Check out this Ikea chair recover, and find inspiration for recovering your chairs! 

    These Ikea chairs were so much fun to recover. Back in August I asked over on Facebook some opinions on different fabrics I had, and there was a 100% vote for the striped fabric. I was a little nervous, since I’ve never done something with so many curves – all my past recovers have been pretty straight-edged – but I had to give it a try.

    Three years and 4 kids, completely killed the white fabric from the original chair. I assume I thought the white fabric would be OK, because the fabric was removable. I was pretty good at washing the covers, but it didn’t stop them from turning very grey, and pen just doesn’t come out.  Mark suggested I try bleaching them, when I first mentioned my plan to recover them, so I gave it a try, but nothing changed.

    The recover began!  I wish I wrote down the name of these chairs, but Ikea no longer sells this particular style.  They are very similar to the Pello Chair though. From what I can tell the biggest different is the Pello Chair has some padding, while my chairs are just fabric stretched over a metal frame.

    I started the actual sewing process while the two older girls were at school and Prince L took his nap. Princess R enjoyed the time watching her favorite movies and eating snacks. It would have been great if I had a serger for some of the edges, but I had to make do with my sewing machine. If I keep up this sewing spree I’m on I may be able to justify buying one.

    It really was simple to do, and any easy sewer could figure this out. All I did was remove the original cover from the frame, and then carefully undo all the seams. Since I had two chairs, I kept one intact so I could refer to it later on how the seams were put together. Once I had the cover completely taken apart, I traced it out on the new fabric, giving myself an extra 1/2″ for any mistakes, and larger seams. Then I put it all back together.

    I forgot to take an immediate before picture, so this is not the greatest quality, but you can see what the original chairs looked like here in our home. 
     
    Do you like my new chairs? Guess what! I am selling these beauties!  I know I know, why would I go through all the trouble of recovering them, just to sell them. They do look good in our new home. My problem is what you couldn’t see behind the camera….a matching love seat set practically sitting on top of each other.  All in the name of a good picture.
     

    For more Ikea Chair recover check out these links I stumbled across while trying to find the name of my chairs. 


  • Reupholstered Patio Chairs #Tutorial

    Reupholstered Patio Chairs #Tutorial

    Last month I showed you the first reupholstering job I’ve ever done. I was thrilled with how 2 of my 4 Patio chairs turned out. I ran out of that fabric though, and was stuck on what to finish the next 2 chairs in. Since I wasn’t sure I could get the exact same yellow, many of you suggested a print fabric with a little yellow in it.

    I promise I was totally going to take your advice until I actually ended up at the fabric store with Mark in tow.  Since these are patio chairs, we wanted to make sure the fabric would hold up in rough weather. All of the fabric we found with a little yellow had designs that we just were not fond of.  So we went a different direction. I took more pictures this go around as well, so you can see just how easy this project was.

    When I first got the chairs they were covered in this swirly red plastic fabric that was becoming washed out in numerous places. When reupholstering something, you can either just cover what was there, or you can take it completely apart and start from the bones. I decided to start with the bones, but it became obvious the last owners, chose to just cover up the original fabric. A fun, though still outdated orange flower fabric. I believe the cover up was solely because of tears in the original cushions.  I had 2 layers of staples to pry out of this chair!

    Once you have the old fabric removed, you can assess the bare bones. Do you need new padding, new wood?  Although I definitely could have replaced the wood and padding on these chairs, they weren’t that bad. So I left them be. My next step was measuring, and cutting the fabric.

    I added a 1/2 inch to each measurement for a seam allowance. On top of the seam allowance though, you must add extra for around the edges. So the side of the seat cushion received an extra 2 inches in width so I have enough to staple it back to the bottom of the seat. The back cushion I added another 1 1/2 inches to the length for easy stapling to the bottom of the board.

    Onto the sewing!  At this point the kids must have been getting wild, or I must have gotten too into finishing it, because I have no more pictures until the finished product.Sorry I meant to have more. But I’m sure you can figure my directions out from here.

    I used a straight stitch, and 100% Rayon Upholstery thread. The hardest part with the sewing was attaching the edge to the seat cushion. There’s 72 inches of long stiff fabric that needs to go around a square piece of fabric. The corners needed to be just right, so they looked good on the outside as well. I’m still figuring out the best way to do this.  

    Key note here – because the corners of my cushions were rounded, I found (after the yellow chairs were finished) that when sewing around the corners instead of creating a right angle, try curving around them to match the cushion. It will look nicer, and fit better.

    Now that the deconstruction is done, and your new pieces are all sewed together, it’s time to reattach it. Grab your handy staple-gun (oh my goodness friends, the staple gun is my new favorite toy!), and get to work.

    Make sure your fabric is on straight with the cushion and then start with the four corners. Once the corners are done, staple down the edges while pulling the fabric tight. If you have an extra set of hands to  help you grab them!  Then voila!  Enjoy your new chairs.

    Now I can sit in comfort and style, enjoy some lemonade and a good book all while the kids ride bikes,and blow bubbles in the fresh summer air.

  • Reupholstering a Patio Chair

    Reupholstering a Patio Chair

    Awhile back I shared with you my list of DIY projects for the year. One of them was going to be my first ever upholstery project. I was scared of killing these beautiful frames on the chair, but I could not live with the original fabric. 
    Mark thought the chairs were all together ugly, and just wanted me to get rid of them. I couldn’t do that either though. The metal frame, scroll detailing – these were my dream patio chairs that I knew I could never afford new. We got lucky and the previous owner of our home left the beauties behind. 
    The first thing you want to do when reupholstering something, is find out how it was put together. Turns out these chairs were a lot simpler than I imagined. The seat cushion simply sat inside the frame, no screws, nails or glue. The back also was simple with just four 1/2 inch screws holding it in. Although one chair was held together with wooden pegs…
    Next step, figure out the upholstery. A quick examination of the cushion found that the fabric was just stapled along the bottom of the seat. Since you never see the underside of the cushion, it made perfect sense. Using a flat head screwdriver I began prying out the millions of staples, only to discover the red was already a reupholstered job!
    I have to admit, the red definitely looked better than this orange fabric! Even without the rip in it.  Now I had to remove more staples from this layer of fabric, but thankfully this was the original, or at least last layer before the cushion. 
    Once I had the bare cushion to work with, I measured twice before cutting my fabric. We bought this yellow canvas material for some outside cushions years ago, but I never got around to making them. Since the chairs are going to be a permanent outdoors fixture, I wanted the material to be easy to clean, and hold up to harsh weather conditions. It really turned out perfect. The corners were a bit rough to get around, and the seat back was extremely tight pulling on, but in the end, I am very pleased. 
    Unfortunately I only had enough material to recover 2 of the 4 chairs. So my question is – should I find some similar yellow canvas, or something new for the other 2?  
     And by the way – Mark now loves the chairs and is pretty happy I held onto them. His reaction was really the best part for me – a nice pat on the back that even though he may not like all my design and DIY attempts, he does like some! 
  • Rearranging Furniture

    Rearranging Furniture

    If you came around facebook yesterday, you may have seen that I decided to rearrange our furniture. See we….Mark…decided to buy a massively huge desk from some friends. I mean this thing is big! We brought it home, and just tossed it in the family room while we decided where to put it.

    After spending the weekend ignoring it, and using it to pile random bits of stuff on, I knew we needed to make a decision. Mark told me to go ahead and rearrange and he’d be surprised when he came home from work. Surprise surprise! He normally likes a bigger part in these decisions. I was excited to get started, but also knew it was going to take the whole day.

    I thought about taking this picture after I did a general clean up but decided I would feel better seeing exactly how much cleaning and rearranging I did from start to finish. So, here was my challenge – pick up toys, and rearrange literally every piece of furniture in our family room.

    FYI – that’s 17 boxes full of books behind the chair in the corner. Boosh! Moved them all downstairs to the storage room. One of these days we’ll get some bookshelves again.
    Oh, and the desk holding the computer here, yeah it went to the basement as well. I did it, me, by my lonesome. Talk about some muscle building! And score one for me – no holes in the walls, and no broken bones!

    Is the suspense killing you yet? Did you spot the new desk? Up there on the left – that thing weighs a ton, but not nearly as much as the piano hiding behind the chalkboard….

    Alright alright, check it out!

    So what do you think? I personally am loving it! The immense space I have at the desk is just divine. I feel like I can actually work here now.

    Don’t you all worry now, I did wait for Mark to help move the piano. Well, alright I tried to move it on my own, but I couldn’t budge it. So much heavier than the desk.

  • Furniture Make-Overs

    Furniture Make-Overs

    I’ve decided this will be known as the Year of Furniture Make Overs. With the aid of pinterest and of course a new house to decorate, I’ve started seeing ideas for furniture make-overs all over the place. 

    The first one being our Entertainment Center. We got this from friends before they moved to Alaska last year. When we bought a flat screen for Christmas, we no longer had use of this.  I had ideas though. I’ve finally decided on turning it into a Dress-Up Closet for the kids. It will stay so much more organized than the box they are currently in.

     This is my entertainment center
    below is my inspiration
     

    My next project will be an outdoor bench we have. We redid it a few years ago, but it has since warped again. I’d like to remake it this time into an inside bench. Instead of a lift top, I want to remove the front and add baskets.  Something like this –

    And lastly, for now, is a dresser make-over.  I’ve been itching to do this for a few months now to Prince L’s dresser. Only problem was he didn’t have a dresser. Until now that is. Isn’t it beautiful?

    Source: flor.com via Adelina on Pinterest

    Now I just need to get warmer weather so I can start these projects.

  • Thirft Store Find {Wordless Wednesday}

    Thirft Store Find {Wordless Wednesday}

    On Saturday we headed to the thrift store to see if we could find any winter gear for the kids. We’ve got quite a bit of snow, and wanted to go sledding.
    We didn’t find any of the gear we needed (snow pants and boots), but we did walk away with this desk! I’ve been wanting an old school desk for the girls to do homework on, but never had the luck of coming across one. I saw this, and knew I was going to leave with it, and redo it. That was when it was covered in snow. Once I brushed the snow off I found a chalkboard top, and already repainted seat. It was ready to go right inside.
    As you can see, the Princesses really enjoy working at it, and playing around it. I’ve been struggling to get Princess C to do any of the preschool books we bought lately, but now she looks forward to it. Having a special space for her has made all the difference!

    Want to know how much I paid?  $8

  • Tuesday Tip – Cleaning Microfiber Couches

    Tuesday Tip – Cleaning Microfiber Couches

    How to clean a Microfiber couch, or other microfiber furniture

    Yes I know, it’s Wednesday. I haven’t lost complete track of days yet (or have I? calendars are brilliant inventions!).  I spent Monday and Tuesday morning testing out different cleaners on our Microfiber couch, so I could bring you this post. It took longer than I expected, but I got it done, and I’m here to let you in on some awesome tips!

    If your kids are like normal kids, then your furniture probably starts to look something like this before you can even blink

    Pen on Microfiber furniture? No more worries!


    Pen on Microfiber couch? No more worries!
     

    I can’t even believe looking at these pictures that I actually let it get this bad, and that I would actually have company over sitting on these! ahhh, bad housekeeper over here. Well I finally saw past my kids, and realized what had become of my sitting area. So off to work I went. I started with some cleaners I had in my cupboard.

    EcoFresh Deodorizing Cleaner. It didn’t seem to be doing much. So I pulled out my – 1 time purchase from a door to door salesmanOriginal Lavender Advanage The Wonder Cleaner Super Concentrated.  The claim was that it gets grease stains out like magic!  Too bad it doesn’t take pen stains out of microfiber, because that would be a wonder.  Admittedly, it did lighten the pen, it just didn’t come all the way out.
    My next method of attack was removing the covers from the seat cushions. I threw the covers in the wash on Heavy soiled, high spin, warm water.  YES! Ok, again the pen didn’t come out completely, but everything else did, and they look so much better!

    Here is my #1 tip for Microfiber furniture – Buy pieces that have a zipper cover.  I wish the back cushions were removable for the same reason, but I guess I’ll just have to spot clean them.

    After going through the wash here is what my couch now looks like
     
    Isn’t she a beauty? No more dark marks all over it. Absolutely wonderful to sit on! And really the cushion with the pen isn’t nearly as noticeable.
     
    So off to the arm and back cushions I went. I headed to pinterest for ideas.  The one “solution” I saw over and over again was Rubbing Alcohol. You take a white sponge (to avoid discoloration of your couch) and scrub the couch with rubbing alcohol. Again, the alcohol helped lighten the pen marks, but didn’t take them completely away. The rest of the arm looks nicer now though.
     
    #2 Tip when cleaning Microfiber – if you can’t remove the cushions, do not spot treat. You will need to wet the whole cushion to avoid leaving water marks.  It’s more work, but it will be for nothing if you end up with large water marks all over your couch.
     
     
    Good luck and Happy Cleaning!
     
    Have any spring cleaning tips or ideas? I would love to test them out. Please contact me at familyroom2@gmail.com