Tag: kitchen

  • Peanut Butter Munchies Cookie Recipe

    Peanut Butter Munchies Cookie Recipe

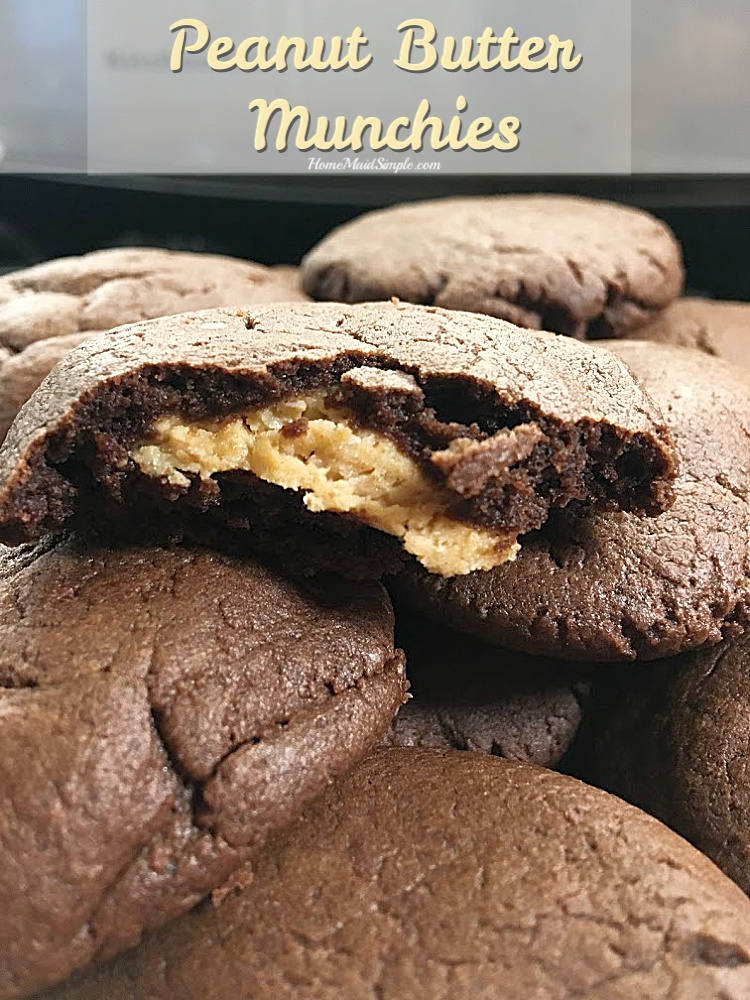
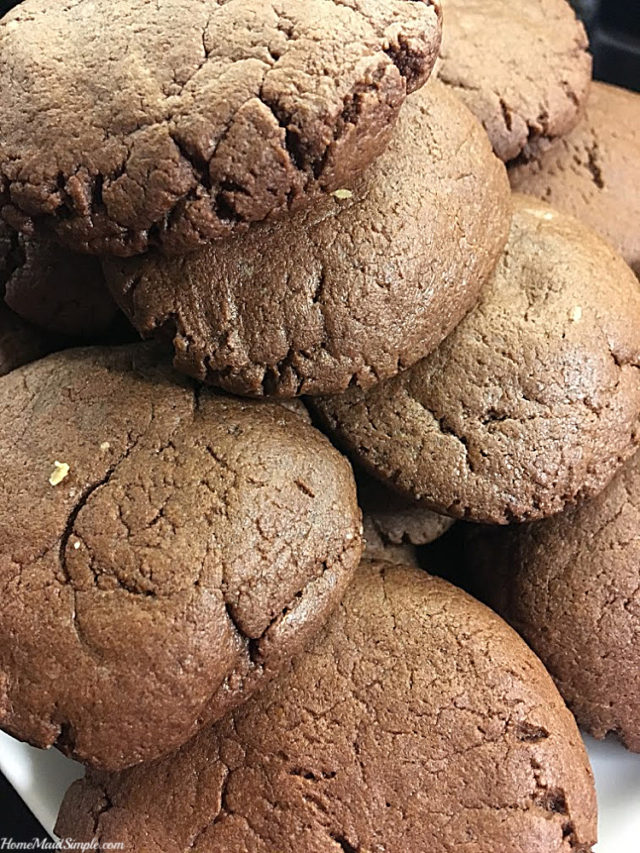
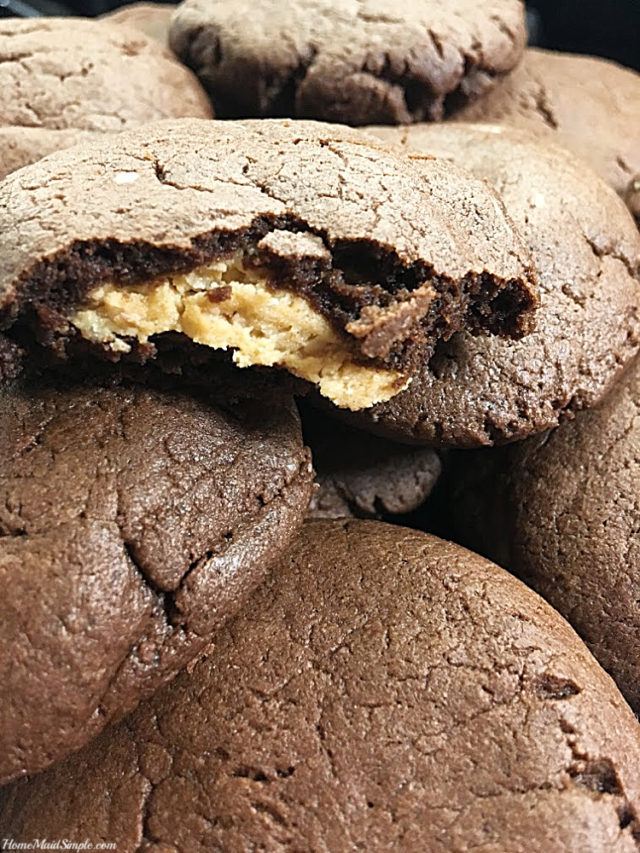
    Chocolate peanut butter cookies filled with peanut butter create Peanut Butter Munchies.

    Chocolate cookie with a Peanut Butter filling - it's a Peanut Butter Munchie
     

    A Peanut Allergy

    Guess what!! A couple weeks ago I took Lincoln in to the allergist to do an oral challenge with Peanut Butter. He had been diagnosed a year ago as having a peanut allergy, along with a few other food allergies. 
     
    As far as we knew though, he had never reacted to peanuts, but just had a strong aversion to them. So when his most recent tests came back inconclusive, the only way to know for sure was to feed him peanuts. 

     
    This is of course done in a controlled environment, at the allergists office, so that were he to have a reaction, immediate care could be given. Lucky for us, we walked out about 3.5 hours later knowing he can eat peanuts just fine – even if he doesn’t actually like them.
     
    The kicker to this new diagnosis (or is it an undiagnosis?) is that he should now eat peanuts a few times a week to keep the peanut allergy from coming back. Unfortunately, he still really does not like peanuts. 
    Peanut Butter Munchies
     

    Trying out Peanut Butter

    I came across this recipe for Peanut Butter Munchies in the blog archives, and thought just maybe I could tempt him with a chocolate cookie that happens to have peanut butter in it. The trick almost worked. He took a bite or two, then looked at me and asked what else was in it. I asked him if he liked it. He said he sort of liked it. So I encouraged him to eat the whole thing before telling him what was inside. 
     
    However, I have 4 other kids, and most can’t hold their tongues. When he again asked me what was inside, his sister chimed in “It’s peanut butter! Isn’t it great!” That was the end of that cookie. He refused to eat the rest of it, claiming he never actually liked it. Awe well, a bite or two is still something, and will hopefully keep any peanut allergy from returning. 
    peanut butter munchies
    In the process, you all get to benefit from prettier pictures of the cookies and a more accessible recipe card! I hope you enjoy these as much as the rest of my family did. The original recipe source is unknown as I had this written down in an old recipe collection. Although, it was copied wrong, so this is my personal take on the original.

    Peanut Butter Munchies

    Print Recipe
    Peanut Butter Munchies Yum
    Delicious chocolate peanut butter cookie with a peanut butter filling
    Peanut Butter Munchies
    Prep Time 10 minutes
    Cook Time 10 minutes
    Servings
    cookies
    Ingredients
    Filling
    Prep Time 10 minutes
    Cook Time 10 minutes
    Servings
    cookies
    Ingredients
    Filling
    Peanut Butter Munchies
    Instructions
    1. Preheat the oven to 350 F.
    2. In a medium bowl, stir together flour, cocoa, and baking soda. Set aside.
    3. In a large mixing bowl, beat butter, granulated sugar, brown sugar, and 1/4 cup Peanut Butter.
    4. Add egg, milk, and vanilla. Beat well.
    5. Add the dry ingredients to the wet, and mix well.
    6. Form dough into balls approximately 1 1/4″ in diameter. Place on a cookie sheet, and set aside.
    7. Combine powdered sugar and 1/2 cup peanut butter. Shape into approximately 3/4″ balls.
    8. Flatten the chocolate balls, place peanut butter ball inside, and fold chocolate ball around it.
    9. Place on an ungreased cookie sheet. Flatten the cookies, and sprinkle with some vanilla sugar for an extra dash of yum.
    10. Bake for 8 minutes. Allow to cool for 1 minute, and then remove from pan to a cooling rack. Enjoy!
    Share this Recipe
  • Everything You Need for Home Canned Pears

    Everything You Need for Home Canned Pears

     
    It’s time to store some fruit for the winter. OK, we’re in the 21st century, but if you’ve never canned anything before, I think you’re missing out. Canned pears are one of my utmost favorite home canned products. This post contains affiliate links and I will be compensated if you click on and make a purchase through them. 
     
    The first time I canned pears on my own was 6 years ago when I ordered 40lbs of Pears from The Pear Guy through our church. I was very excited to be preserving so much fruit for my kids to enjoy just as I did at their age. I had NEVER canned on my own before and was very nervous about it. 
    I still get nervous before starting a canning project, but I’ve done it so often now, it’s just about diving right in. 
     

    Home Canned Pears Tips

    Before starting you’ll want to gather your equipment. If you’re first starting out, it may seem kind of pricey, and not worth the effort, but most of these things you only have to buy once. 
    • 40lbs Pears
    • 7-8 Quart canning jars and lids
    • paring knife
    • water bath canner
    • Jar lifter
    • wide mouth funnel
    • sugar
    • water


    Once you have everything ready, you’ll want to prepare your syrup. I like to use a light syrup because quite frankly I have a sweet tooth. However, you can also can the pears in fruit juice. If you choose the juice method I would stick with 100% Pear Juice.  

    For this many pears, I make a double batch of syrup. Heat 18cups water and 4 1/2 cups sugar on the stove. Depending on your pot, you may need to do this in 2 batches. 

    While the syrup is heating, go ahead and prepare the jars. You’ll want them washed and sanitized. To sanitize my jars, I prefer using the oven. Set it to 250 F. Place the jars and rings – not the rubber lids – in a pan and set in the oven. They need at least 20 minutes in the oven, but you can leave them longer as you prepare the fruit. 

    For home canned pears, sanitize jars and rings in the oven at 250 F for 20 minutes.  

    The prep work is done, and it’s time to get started on the pears. You’ll want to wash, peel, and core your fruit. My favorite way to get the most fruit, is by blanching the pears in boiling water for about 30seconds to 1 minute, then dipping them in an ice bath. The peels come off fairly easily at this point with a paring knife. The downside is that the pears get a bit more soft from the boiling water. So you can always just take a knife and peel and core your pears as if you were going to eat them right then. 

    Once the pears are peeled, and sliced place them in a bowl with some lemon juice to avoid browning. Pick Your Own has some more tips on keeping the fruit from browning while preparing the rest of the fruit. This is the point where it’s also nice to have someone helping. The more hands, the less time the fruit it sitting out and turning brown.  

    Now I dry pack my pears, but you can also hot pack them which is the recommended way.  To dry pack – also known as raw pack – you stuff the cold pears into the hot jars. Once they are full pour in your syrup leaving about a 1/2 inch at the top. Slide a butter knife down the side of the jar and press on the pears to release any trapped air. I’ve always done it this way and never had any issues with spoilage.

    Boil a small pot of water for your canning lids. Once the pears and syrup are in the jar, wipe off the rims with a clean damp cloth. Then you’ll dip the lid into the hot water before placing on the jar. Screw on the rings, finger tight, and prepare to process them. 

    Canned Pears packed in quart should be processed in a water bath canner for 25 minutes. When done, remove the jars from the canner with your nifty jar grabber, and place on a towel to cool. You may start hearing popping sounds – this is the sweet sweet sound of each jar sealing. Give them a day to cool, then press on the lids. If they did not seal there will be a little bubble you can press on. Any unsealed jars should be immediately placed in the fridge and used over the next few days. 

    Correctly sealed jars can be placed in your pantry or food storage and should be used over the next year.  

    Home Canned Pears
    Yields 7
    Enjoy the crisp flavor of pears all year with this easy to follow recipe for canned pears.
    Write a review
    Print
    Ingredients
    1. 40lbs Pears
    2. 18 cups Water
    3. 4 1/2 cups Sugar
    4. 8 quart jars and lids
    5. water bath canner
    Instructions
    1. Preheat oven to 250F.
    2. Place jars and rings (not lids) on a pan, and sanitize in oven for 20 minutes.
    3. Combine water and sugar in a pan over medium heat to dissolve sugar. Turn heat to low and let simmer while you prepare the pears.
    4. Wash, peel, and core pears.
    5. Stuff pears into hot jars. Pour hot syrup over pears, leaving 1/2 inch from the jar rim.
    6. Wipe rims with a clean damp cloth.
    7. Dip lids into boiling water, and then place on jars.
    8. Screw rings on to finger tightness.
    9. Process in a water bath canner for 25 minutes.
    10. Remove to a towel, and let cool for 24 hours.
    11. Store sealed jars in a cool dark place. Unsealed jars should be eaten withint the next few days.
    Home Maid Simple https://www.homemaidsimple.com/

    kids love home canned pears!

    Kids love these! While they will keep for a year in the pantry, my kids usually have them gone within 2 months. 

  • Baked Spinach and Artichoke Dip

    Baked Spinach and Artichoke Dip

    Get your party on this weekend with this recipe for Baked Spinach and Artichoke Dip. So good, you may want to double the recipe. 
     
    This dip is seriously so delicious! I made it for the first time 6 years ago as a review for Carapelli Olive Oil. After that one time, I never found occasion to make it again. I have no idea why! Maybe it was to avoid eating a whole pan by myself, a very real possibility here. With the Super Bowl here now and an invite to watch commercials with family, I decided it was high time to make it again. So of course, I made it not only once this week, but twice.
    Baked Spinach and Artichoke Dip  
    So creamy and cheesy, and full of flavorful artichokes and spinach. The first time I had a Spinach and Artichoke dip was at Olive Garden. Sadly they no longer have that appetizer. This baked Spinach and Artichoke dip will most likely make a frequent appearance around here now. 
    Baked Spinach and Artichoke Dip
    Yields 24
    Write a review
    Print
    Prep Time
    15 min
    Cook Time
    25 min
    Total Time
    40 min
    Prep Time
    15 min
    Cook Time
    25 min
    Total Time
    40 min
    Ingredients
    1. 2 tablespoons Olive Oil
    2. 1/3 cup diced red onion
    3. 1/2 cup mayonnaise
    4. 1/2 cup sour cream
    5. 14oz can artichoke hearts, drained and chopped
    6. 10oz package frozen chopped spinach, thawed and squeezed to drain
    7. 1/2 cup sun dried tomatoes in oil, chopped
    8. 2 cups Colby Jack Cheese
    9. 1/2 cup Parmesan cheese, grated
    10. 1/2 teaspoon garlic powder
    11. Assorted crackers, vegetables, breadsticks or toasted pita bread wedges, for dipping
    Instructions
    1. Preheat oven to 350°F.
    2. In skillet, heat Olive Oil.
    3. Sauté onion in oil until softened, about 3 minutes.
    4. In a large bowl, combine sautéed onions, mayonnaise, sour cream, artichoke hearts, spinach, sun dried tomatoes, cheese, and garlic powder.
    5. Spread mixture in shallow baking dish.
    6. Bake for 20-25 minutes or until mixture is hot and bubbly and the edges are golden brown.
    7. Serve hot with assorted crackers, vegetables, breadsticks or toasted pita bread wedges.
    Adapted from Carapelli
    Adapted from Carapelli
    Home Maid Simple https://www.homemaidsimple.com/

     PIN this Baked Spinach and Artichoke Dip for later!

    Try this Baked Spinach and Artichoke Dip for your next big gathering!


    Don’t like Spinach? Try this Hot Artichoke Dip instead – only 4 ingredients!
  • Home Canned Grape Juice

    Home Canned Grape Juice

     Fall is here, and it’s my favorite time of the year to start putting up produce. Canning fruits are one of the easiest ways to save produce to eat throughout the year. This home canned grape juice is fabulous with a little club soda. This post contains affiliate links and I will be compensated if you click on and purchase through them.

    Home Canned Grape Juice

     
    I had a lot of fun doing this, though it was quite surprising at just how little juice came from all those grapes.  I have a new appreciation for the cost of store-bought juice. Let’s jump right into this tutorial. If you have any questions just leave them in the comment section!
      
    Step 1:  Wash and de-vine your grapes.
     
    Step 2:  I suggest using a Steam Juicer
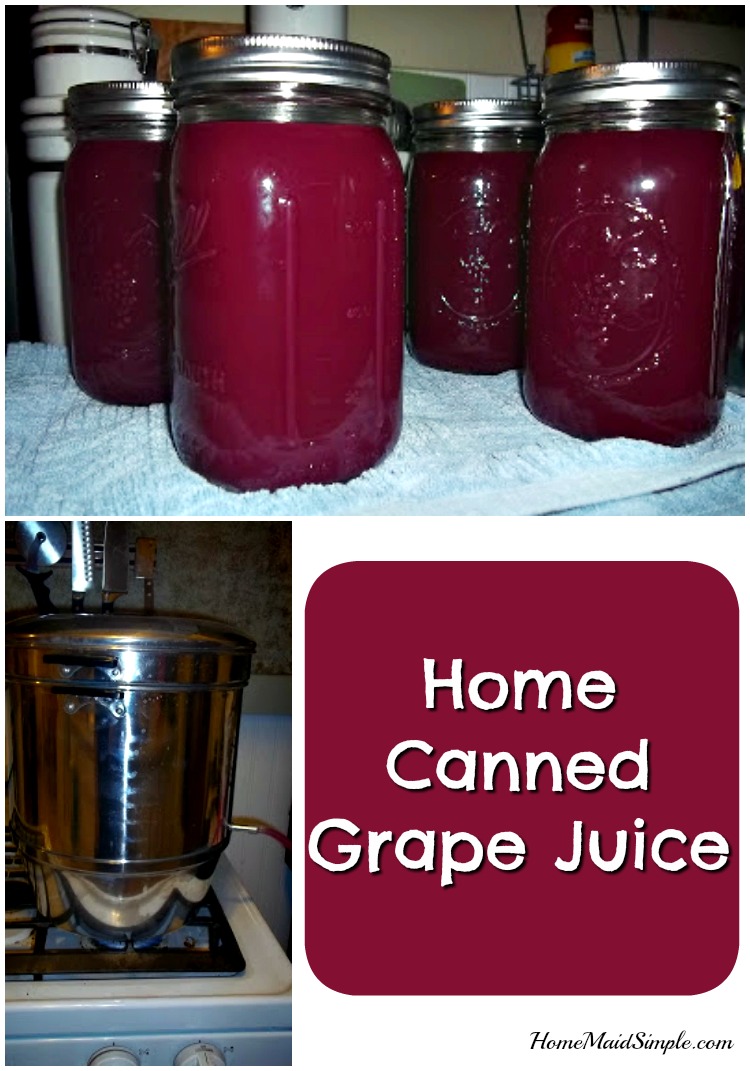
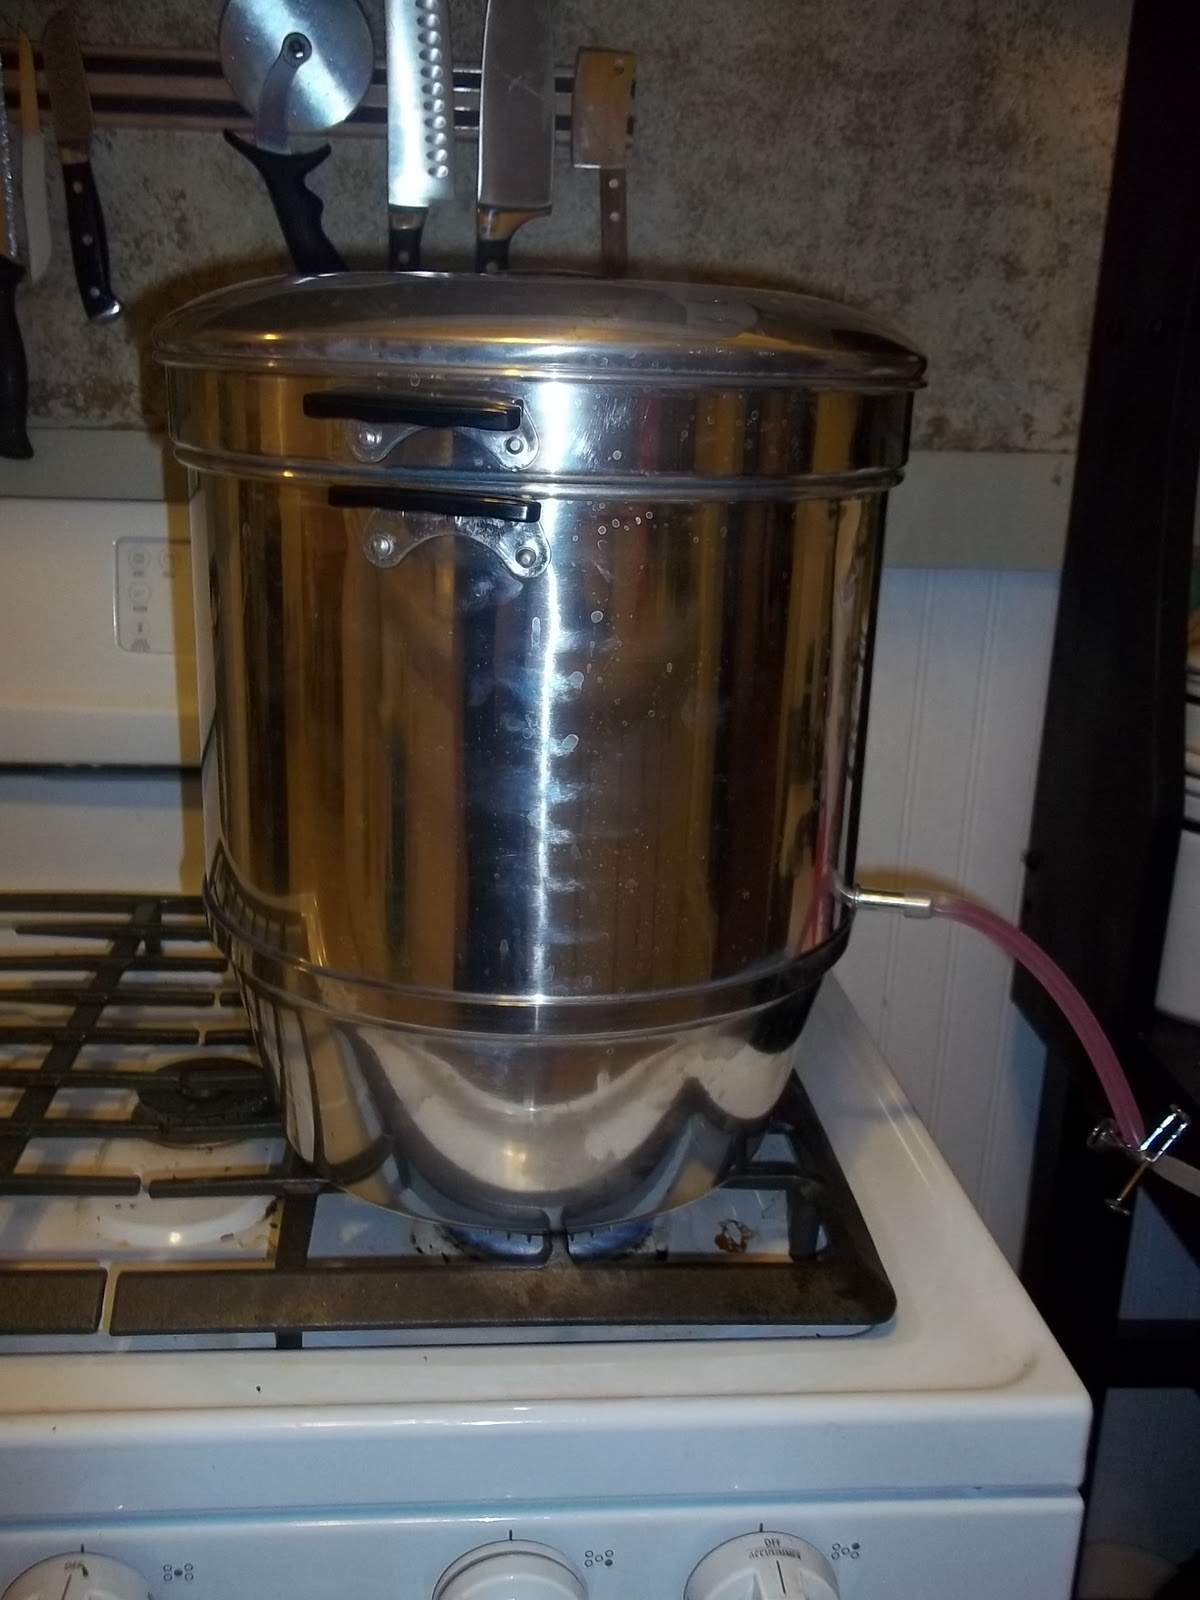
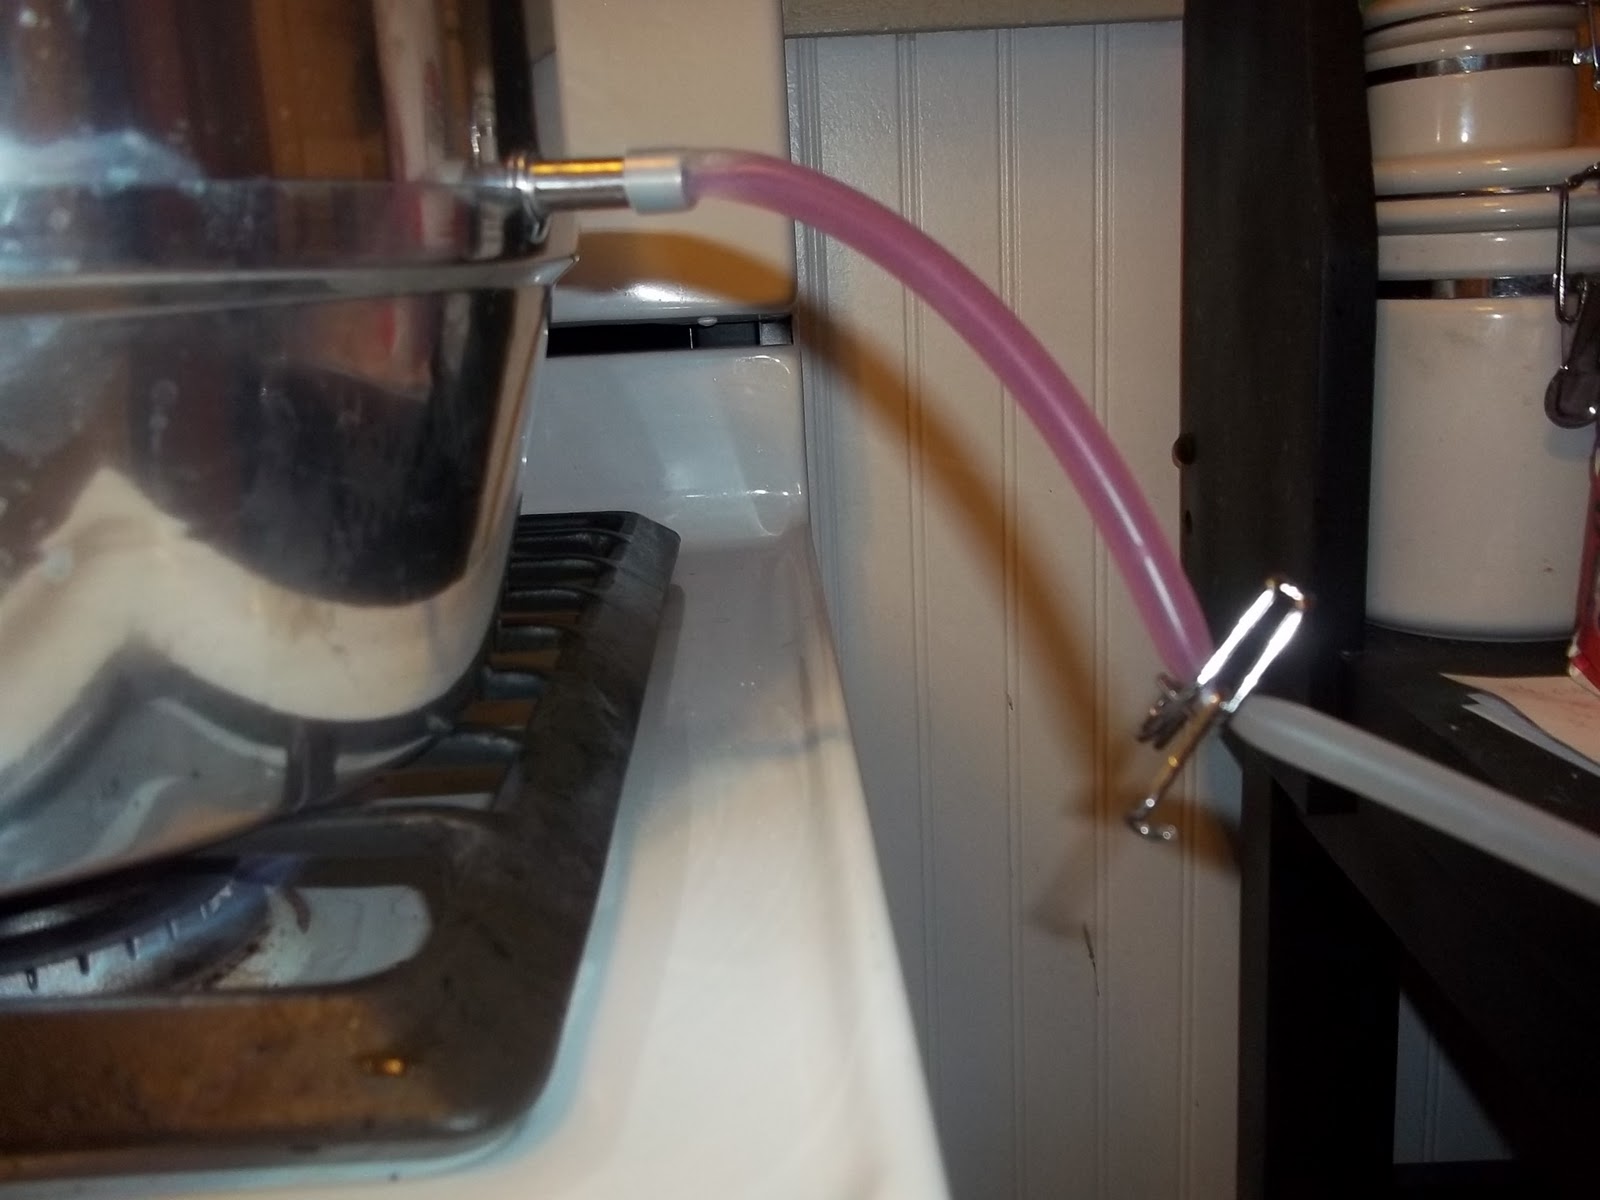
. If you don’t have one, go out and buy one, or borrow one. They are a time saver!!! Follow the directions for your juicer.  If you do not or cannot get a juicer, or you feel like being adventurous, there is a step by step guide HERE for straining the juice from your grapes. I added a little under 1 cup sugar per 3quarts grapes. So I dumped one of my bowls of grapes in, poured on some sugar, then the rest of the grapes, followed by more sugar.
    Step 3: While the grapes are juicing, sterilize your jars. Some people do this in a dishwasher, I did my pear jars in a sink of hot water. BUT I found a new way! You can sterilize the jars and rings in your oven. Do not sterilize the lids with the rubber seal this way. Turn the oven on to 225 degrees Fahrenheit. Place jars and rings on cookie sheets. I used two separate sheets and put the lids and rings on the bottom shelf, and the jars above so there was more room.
     
     
    Step 4: Carefully remove hot jars from the oven and fill with hot juice.
     
     
    Step 5: Process Jars. My mom is so sweet! She was supposed to bring me her water bath canner, and when she showed up she had bought me my very own steam canner instead. So I steam canned my grape juice! There are some differing opinions on how safe steam canning is compared to water-bath canning. Here is my 2 cents – If it were unsafe, you wouldn’t be able to buy steam canners. The fact that the jars sealed tells me no bacteria should be able to get inside. Plus, from my own experience, I think my jars of grape juice came out just as hot or hotter and stayed hotter longer than my jars of pears did in the water bath. 
     
    So have at it! Make some grape juice!  Out of my 6-7 quarts of grapes, I was able to get 4 1/2 quarts of grape juice.  The 1/2 quart I put in the fridge and drank with my breakfast this morning! It was oh so good!  A little on the strong side, so when we do open the other jars, I will either dilute with some water, or club soda depending on who will be enjoying it.  The club soda is a favorite during the holidays.
     
    *Post originally share October 2011. 


  • Spring Clean the Tools that Clean for You

    Spring Clean the Tools that Clean for You

    #SpringtimeCleantime  #CleanFreakClean

    You probably all know how much I love Spring Cleaning. It’s probably one of the topics I talk about most, at least during this time of year. Have you ever thought about Spring Cleaning your appliances? They work hard all year long to clean for you, it’s time to give back and spring clean the tools that clean for you. 

    Spring Clean the tools that clean for you with Lemi Shine. ad

    Get a Lemi Shine Coupon

    I recently came across Lem Shine products and knew I was going to love them. Citric Acid is a fantastic natural cleaner, but I have a hard time cutting up a lemon and using it to clean instead of eating it in say, a nice tall glass of Lemonade. Lemi Shine is powered by 100% natural citric extracts, making their products both effective and safe to use. 

    Lemi Shine products are Clean Freak Approved! ad #CleanFreakClean #SpringTimeCleanTime

    See, in my house, I have a lot of spring cleaning helpers. There’s my kids of course – 4 of them. They are fantastic little cleaners….well, I like to believe they are at least. We’re working on it. For sure they can help with the dishes, so they often get put in charge of rinsing the dishes and filling the dishwasher. They are OK with this chore as long as I let them put in the soap. 

    Clean your dishes with Lemi Shine Detergent. ad #CleanFreakClean #SpringtimeCleantime

    Find Lemi Shine near you

    Truth is, with Lemi Shine products I could put the kids completely in charge of spring cleaning the whole house and I wouldn’t have a single worry. I could sit back with that glass of Lemonade and really enjoy myself! I’m a Mom that leads by example, though, and have a tendency to be a bit of a clean freak when it comes to the deep spring cleaning. I want everything done just right so I can leave it alone until next year. 

    Clean the appliances that clean for you. ad #SpringtimeCleantime #CleanFreakClean

    I get down and gritty with cleaning the grease spots on the undersides of cupboards, the window screens and tracks that have picked up all that winter grime, and it’s the perfect time to make sure my appliances are in tip-top shape. Lemi Shine Dishwasher Cleaner and Disposal Cleaner are my go-to kitchen appliance cleaners. They get in the spots that I can’t reach to make sure my everyday cleaning is actually clean.  

    Have you tried Lemi Shine yet? Tell me about your #SpringtimeCleantime in a comment.

  • Blueberry Cheesecake

    Blueberry Cheesecake

    This post is sponsored. Product was exchanged for an honest review. All thoughts are 100% my own. 

    I LOVE cheesecake. You all knew that by now though I’m sure. It’s the one recipe I make, and make well. When I was given the assignment to bring dessert to Thanksgiving this week, of course Cheesecake was the first thing on the menu! Thanks to a fun blueberry picking outing earlier this year, this quickly became a Blueberry Cheesecake. 

    Blueberry Cheesecake

    When we moved here, I didn’t realize just how much Mark’s family was going to love my cheesecake. While I normally make 2 or 3 a year, I’ve now made about 3 or 4 in the last 5 months! I can’t blame them of course, rather I rejoice. After cutting into the Blueberry Cheesecake last Thursday Mark’s nephew sat and just stared at it – hoping for a second piece, but knowing he had to wait for everyone else to get dessert. 

    While talking with my sister-in-law’s friend who joined us for the Thanksgiving feast,  she told me cheesecake is hard to make – or at least sounds intimidating. I used to think the same thing! Then I started making it, and found it’s really not all that bad. Truth be told, I actually find no-bake cheesecakes to be a little harder to get right. I’ve had some that were more like a pudding then a cake. My baked cheesecakes on the other hand, always turn out.  


    To make cheesecake even easier, I got a new pan from The Love Cooking Company. The Push Pan is similar to a spring form pan, but without the spring. With a silicone lined removable base, taking the cheesecake out of the pan was so simple. You can watch me do it in the slideshow above! Ahh, how cool was that, huh?

    Enjoy this recipe for Blueberry Cheesecake. Make sure to share it with your friends!

    Blueberry Cheesecake
    Serves 8
    Easy Blueberry Cheesecake with a Shortbread crust you can wow your family and friends with
    Write a review
    Print
    Cook Time
    45 min
    Cook Time
    45 min
    Ingredients
    1. Crust
    2. 1 package Shortbread Cookies (or about 16 cookies)
    3. 5 TBS Butter, melted
    4. Cheesecake
    5. 2 packages Cream Cheese
    6. 1 cup Sugar
    7. 2 Eggs
    8. Blueberry Topping
    9. 2 cups Frozen Blueberries
    10. 3 TBS water
    11. 1/4 cup Sugar
    12. 1/2 of 1 lemon, squeezed
    Instructions
    1. Preheat oven to 350 F
    2. Crush the shortbread cookies, and mix with the melted butter. Press down into your pan and up the sides. Set aside.
    3. Mix cream cheese, sugar until smooth. Add eggs, and continue to beat until smooth. Pour on top of the shortbread crust. Bake for 45 minutes.
    4. While Cheesecake is baking, make your blueberry topping. Combine 1 cup blueberries, water, sugar and lemon in a medium saucepan. Cook for about 8 minutes, stirring periodically. Add 2nd cup of blueberries, and cook for another 8-10 minutes.
    5. Let cheesecake cool and top with blueberry topping.
    Notes
    1. Bring cream cheese to room temp to get a smooth cheesecake filling.
    Home Maid Simple https://www.homemaidsimple.com/
    Pin it for later! Blueberry Cheesecake

  • Strawberry Coconut Green Smoothie

    Strawberry Coconut Green Smoothie

    This post is sponsored. I received product for review. All opinions are mine alone.
    Strawberry Coconut Green Smoothie

    Strawberry Coconut Green Smoothie

    Ingredients

    1 cup frozen spinach
    1 can coconut juice
    1 banana
    1-2 cups Strawberries, sliced

    Directions
    1. Begin by placing the Spinach alone in your blender. Pulse it a couple times to chop the spinach up. I’ve found this helps the spinach incorporate better into smoothies without missing chunks of the leafy green. 
    2. Add half the Coconut Juice, puree. 
    3. Add banana and strawberries, blend until well mixed, while slowly adding the rest of the Coconut Juice.
    4. Serve and Enjoy!
    Strawberry Coconut Green Smoothie

    Do you ever go through food phases? I’ve always loved smoothies, but recently have started making them more frequently. I just love how much goodness can be packed into a smoothie, and usually the kids love them as well!

    Mark brought home some Coconut Juice one day, and I immediately though Smoothie! I keep a bag of frozen spinach just for such occasions, and we’ve been buying a lot more fresh fruit. Personally I don’t think you can have a smoothie without a little banana, but the Strawberries are what make this my kids favorite.

    Green Smoothie

    My kids often like to spoon their smoothies out, making huge messes. I was so tired of cleaning up smoothie, that I found these fun Silikids Straw tops. The kids think they’re fun, and I no longer have big messes to clean up. My kids also love that mom lets them blow bubbles in their drink now, because it won’t overflow when they get a little crazy.

    Follow Silikids

    Strawberry Coconut Green Smoothie with Silikids Straw Tops
    How do you get more fruits and veggies in your diet?
  • Hot Artichoke Dip

    Hot Artichoke Dip

     This shop has been compensated by Collective Bias, Inc. and its advertiser. All opinions are mine alone. #MustHaveMayo & #CollectiveBias
     
     
    Are you looking for a last little something to serve this week? I found this 4 ingredient Hot Artichoke Dip using KRAFT Real Mayo Mayonnaise this week, and was so excited! I love artichoke dip, and was quite disappointed when my favorite restaurant took it off their menu. Boo! Recipes I’ve tried in the past are pretty good, but tend to be really complicated. 
    I did NOT need complicated this week. Sure we’re not going anywhere, and we don’t have company visiting, but since I go to school online, and then add in all the holiday hustle and bustle, and the kids being home from school – I don’t have the time for complicated dishes. Thankfully I didn’t have to compromise on taste, because this Hot Artichoke Dip is divine. 


    Hot Artichoke Dip

    Recipe from KRAFT

    Ingredients:
    1 can (14oz) Artichoke hearts, drained and chopped
    1 cup KRAFT Real Mayo Mayonnaise
    1 cup KRAFT Grated Parmesan Cheese
    1 clove garlic, minced
     
    Directions:
    Heat oven to 350 F. 
    Mix ingredients until well blended. 
    Spread into the bottom of a pie dish. 
    Bake 20-25 minutes or until lightly browned. 


    So simple right?! I thought it would be nice to have individual servings as well, so I put some of the mix into my flan dishes and cooked for approximately the same time – just keep an eye on them so you don’t overcook. 
     
    While I was editing these photos, and asking Mark his opinion on some, he turns to me and goes – Is that Mayonnaise? He had already been impressed with the flavors of this dish, but even more so when he realized just how easy and simple the ingredients were. 


    If you’re entertaining a small group, the individual servings add just that extra touch to make your guests feel special. Really, who wouldn’t want a serving pre-made just for them? If your gathering is a bit larger, or even just your family and you want to save on dishes, keep the dip in the pie pan. Either way, it’s going to be a crowd pleaser. My 4-year-old absolutely loved this, and she’s normally wary of trying new foods. 
     
     
    Don’t forget things to serve with this dip! We love it in crusty bread, or with pita chips. You could also try it with veggies and crackers! Make it an appetizer, side dish, or even snack. My family hosts an hors d’oeuvres contest every year, and although I didn’t get to join in this year, next time I’m pretty sure I’ll be entering this recipe. 
     
     
    I found all my ingredients for this recipe at Walmart in the Mayonnaise aisle – nestled in with the other salad dressings and dips. I turned around, and there were the artichoke hearts. A quick step over and I found our grated parmesan. All that was left was garlic over in the produce (or my cupboard, because hello, garlic is a staple!)
     
     
    If you need more inspiration, check out the Cooking Up Good website. It has recipes, sweepstakes, loyalty programs, coupons and more! What will you whip up for the holidays? Let me know in the comments!
     
    Love this recipe? Try our Baked Spinach and Artichoke Dip as well!
     
    Baked Spinach and Artichoke Dip for your Super Bowl party!  
     
  • Proper Dinner Etiquette and Tablescaping

    Proper Dinner Etiquette and Tablescaping

    I got sucked into looking at dinner ware this week with all the after Thanksgiving sales. I’ve always wanted something pretty and festive like my mom’s china, that we only use for special occasions like Thanksgiving and Christmas – similar to this (affiliate link->) Lenox Gold Banded Ivory China Dinner Plate. So that got me thinking about how I’d love to better teach the kids how to properly set a table and be polite when eating.

    See my Nana was an amazing grandma, mother, and proper lady. Despite her living on a farm. Just this summer as we got together with my mom’s family, I recall my uncle telling us how no matter where he goes to eat dinner, he’ll be comfortable because he knows which spoon/fork/cup/plate to be using. She made sure her kids knew proper table manners.

    I recall my mom teaching us the correct way to set a table as a kid as well, and now it is my turn to teach my kids.  Mark and I have often talked about having a periodic Etiquette dinner, with different courses, all the silverware, and fancy dishes. While doing these dinners, we’ll pick an area of etiquette to stress with the kids. These would be things like

    • How to properly set a table
    • Sit up straight
    • Which fork is a salad fork
    • What spoon is used for soup
    • Remember please and thank you
    • The direction we pass food, and the best way to place food on the table. 
    • How to properly hold your silverware
    And the list will go on. I am really excited for these nights, and fingers crossed the kids will be too. We may go so far and let them dress up fancy for our etiquette nights as well!
    Along with our etiquette nights, I am going to play around with tablescaping! This is a fairly new word I’ve heard, but I love it. It’s the art of layering your table so it is pleasing to look at. There is even a book all about it- Tablescapes: Setting the Table with Style by Kimberly Whitman!

    Currently I have a very simple Christmas tablescape, but one I enjoy every day. I made a reversible table runner a few years ago. The green is my favorite side, but the opposite has candy cane stripes that make for a fun party. My blocks I made during a Relief Society Super Saturday (women in my church get together and craft all Saturday long), and help remind me the reason we celebrate this season. The gold vases I picked up at Ikea. I love that I don’t have to put anything in them for them to still add a simple beauty to the table. Then I tossed on the Christmas tree for more of a bright and contrasting color.

    Will you be having any fancy dinners this Holiday season, or do you keep it casual?
  • Be #CartonSmart this Holiday Season

    Be #CartonSmart this Holiday Season

    This is a Sponsored post written by me on behalf of Carton Smart. All opinions are 100% mine.

    #CartonSmart Thanksgiving Stuffing

    What’s on your Thanksgiving table? 

    Green Bean Casseole, Sweet Potatoes, Cranberry Jelly, Stuffing,Turkey, Pie

    What’s really in those ingredients though?

    Preservatives. sweeteners, flavoring, dyes. Things that aren’t really that great for our bodies, and make us crave more. 

    This Thanksgiving, I’m trying to simplify our meal, and enjoy more natural preservative free foods, while also cutting back on our waste. The holidays are big cooking and bakeing seasons for people all over the country, and in turn it adds a lot of waste to our landfills.  I was pretty excited to find Pacific Foods Tetra Pak cartons.

     photo d1d52bb8-c150-4f19-9a7c-b8c9ab3c8df3_zpsac6b75dd.jpg

    Have you ever opened a can, and then placed the leftovers in the fridge in the can? I have, and the taste after is awful! The Tetra Pak cartons are resealable, and because it’s a carton instead of a can, they won’t leak metal flavoring into the food.

     photo 795e421d-1ec8-414e-b1b8-dde8f5f23ded_zps62983f0a.jpg

    Become Carton Smart this Thanksgiving and exchange your cans for cartons.  Just look at all these reasons on why you should make the switch.

     photo 1898ca76-3272-4baf-a8df-07abf60e15e3_zps1bf425e9.jpg

    When you read the list of ingredients on Pacific Foods cartons you’ll find a complete list of foods you know. For example in this Cranberry Sauce you will find cranberries, cane sugar, and water.  For more of a boost, it is also all organic!

     photo 62adf36b-e1dc-4d93-98c1-aa80d97a468d_zps600d562e.jpg

    I hope that with these few exchanges to our regular feast, we will all still have energy after eating, and not go into a food coma.   Follow #CartonSmart on Pinterest for more ideas on how to be simplify your meals this holiday season..

    Tweet @CartonSmart to share how you plan on being #CartonSmart this Holiday Season!

    Check back later for how I used the Pumpkin Puree and Chicken Stock in some traditional Thanksgiving dishes. You’re going to love them!!


    Visit Sponsor's Site