Tag: Recipe

  • Peppermint Cheesecake Sugar Cookie Cups

    Peppermint Cheesecake Sugar Cookie Cups

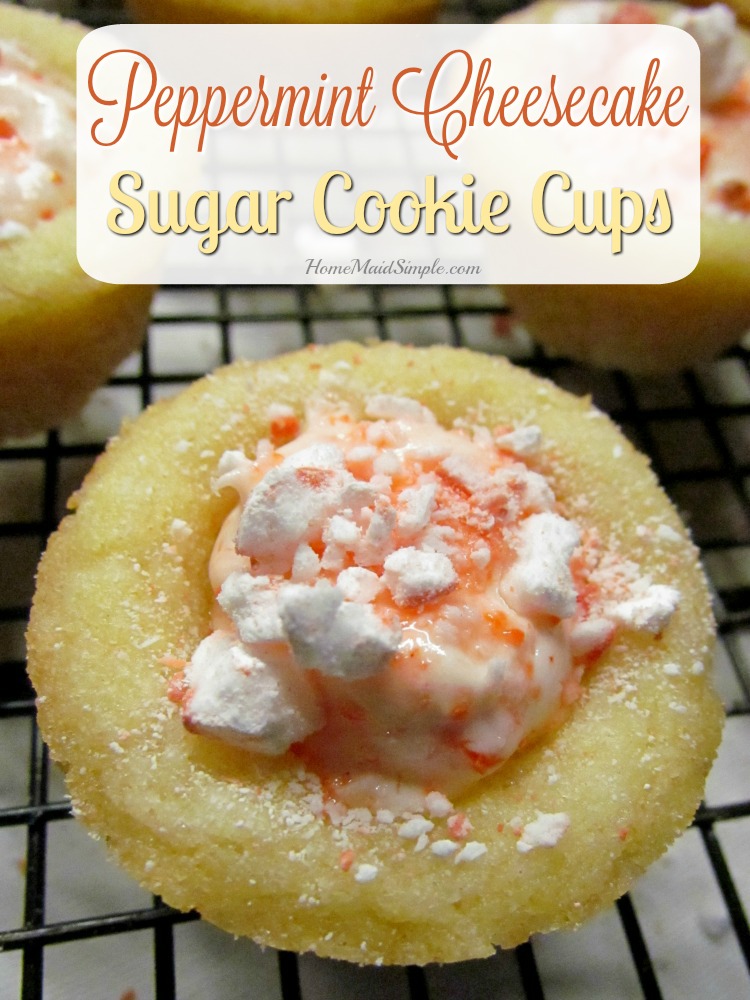
    Sugar cookies, cheesecake, and a delicious hint of Peppermint – what could be better than combining them all into a Peppermint Cheesecake Sugar cookie cup? That’s what I thought too. 

    peppermint Cheesecake Cookie Cups

    When Minerva Dairy reached out to me and asked if I had a fantastic cookie recipe to share, I had to think about it. I make cookies. Often from a recipe I’ve pulled somewhere else, but I do make them. Then I remembered about a year ago I took my favorite sugar cookie recipe and formed them into these little cookie cups, and filled them with cheesecake. The kids and adults went crazy for them, and couldn’t stop sneaking cookies when no one was looking. 

    With the holidays upon us, I couldn’t help but recreate them again only this time using peppermint as the flavor to usher in the holidays. It helped that my neighbor also gifted me some mint extract she was no longer going to use, and I had also just picked up a large bucket of soft mints to fill the candy jar. 

    Peppermint Cheesecake Sugar Cookie Cups

    When making these cookies, the most difficult part is getting the cookie to smoosh down in the center to form the cup. I’m sure there are many tools in your kitchen you could find to fit perfectly, but in my kitchen, it’s the handle of my lemon juicer. Dip it in powdered sugar then begin smooshing. It will most likely take a couple of dips to get through the whole pan, but you’ll end up with beautiful cookie cups. 

    Easily make cookie cups in a mini muffin pan

    Check out more cookie recipes in Minerva’s Great Cookie Exchange and vote for your favorite! One voter will win a years supply of Minerva’s Amish Roll Butter. That means you don’t even have to do the work of making the cookies, you just have to go vote! 

    Peppermint Cheesecake Sugar Cookie Cups
    Sugar cookies formed into a cup, filled with a Peppermint Cheesecake are perfect for the holiday season.
    Write a review
    Print
    Ingredients
    1. 1 bag Sugar Cookie Mix
    2. 1 egg
    3. 1/2 cup butter, softened
    4. 8oz cream cheese, softened
    5. 1TBS whipping cream
    6. 3TBS Sugar
    7. 1tsp Lemon Juice
    8. 1/4 tsp Mint extract
    9. 1/4 cup crushed Peppermints
    Instructions
    1. Preheat oven to 350 F.
    2. In a medium bowl, combine sugar cookie mix, egg, and butter.
    3. Form dough into 1inch balls, and place in a greased mini muffin pan.
    4. Using the back of a spoon, or other rounded object, smoosh dough down to create cups.
    5. Bake for 8-10 minutes, or until edges begin to lightly brown.
    6. Cool in the pan for 20 minutes, then remove from pan and finish cooling on a cooling rack.
    7. In a medium mixing bowl combine cream cheese, cream, sugar, lemon juice and mint extract.
    8. Fold in crushed peppermints.
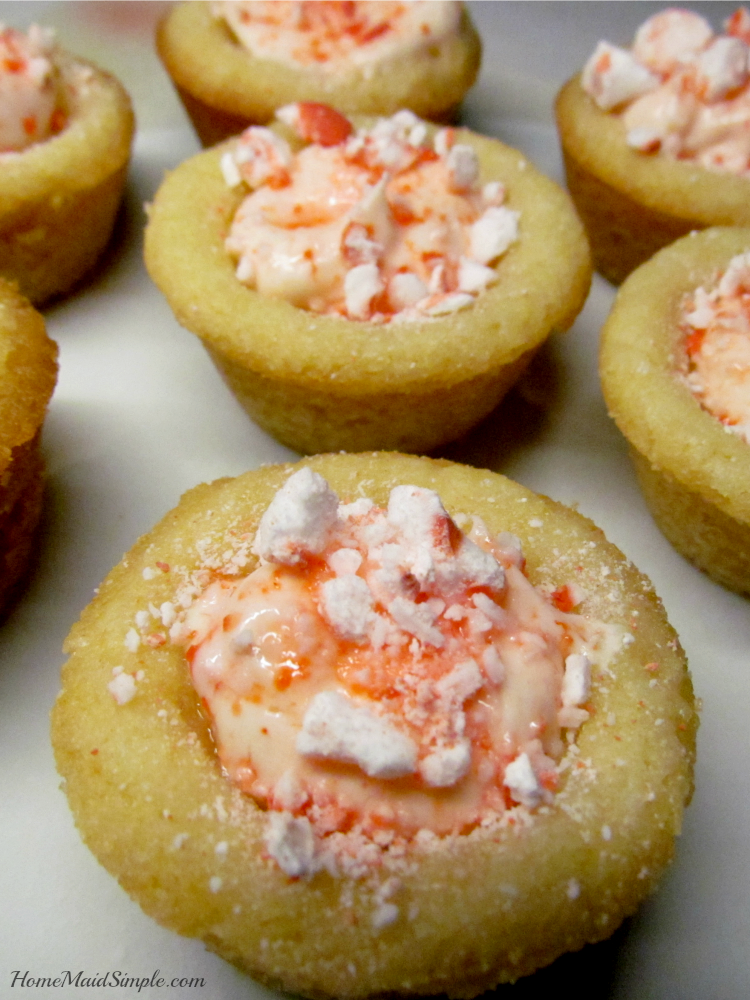
    9. Fill cooled cookies with cheesecake mixture.
    10. Top with extra crushed peppermints and enjoy
    Home Maid Simple https://www.homemaidsimple.com/
    A big thanks to Minerva Dairy for inviting me to join in their Great Cookie Exchange!


  • Cranberry Wassail Recipe

    Cranberry Wassail Recipe

     The snow hasn’t fallen yet, but the temperature has. When the weather starts dipping, that’s when I pull out this Cranberry Wassail. Full of flavor and soothing to the soul, you’ll make this for all your holiday gatherings.
     
     
    Almost 5 years ago I wrote this post after it had been featured in Old Orchard’s newsletter. I had submitted it to a contest they were running, and it won! Back then I had no idea how to style my photos, and let’s just say, no one was interested in a pot of liquid and fruit. So I finally decided it was time to update with some nicer photos of one of my favorite wintertime beverages.
     
    The first time I made wassail I followed a recipe that had me juicing 10+ Oranges, some lemons, and then boiling it forever. It was delicious, but oh so much work. Cranberry Wassail was created with both ease and flavor in mind. 
     
    This Cranberry Wassail is super easy to make.
    It must have been a few years since I last made this particular wassail because when Mark came home his reaction was one of delight. He’s not a big fan of hot beverages like myself, but he does love cranberries. His eyes totally lit up as he walked in the house, breathed in the scent of simmering fruit and spices, and then drank a healthy mug of it.  
    Cranberry Wassail
    Spiced Cranberry Juice warmed will warm your soul
    Write a review
    Print
    Ingredients
    1. 64 oz Old Orchard Cranberry Naturals Original
    2. 6 oz Old Orchard Frozen Apple Concentrate
    3. 1 Gala Apple, peeled, cored and sliced
    4. 1 Orange, juiced
    5. 1 Orange, sliced
    6. 2 Cinnamon sticks
    7. 1/2 tsp Allspice
    Instructions
    1. In a large pot, mix all ingredients together. Bring to a boil.
    2. Once boiling, let simmer about 20 minutes.
    3. Serve warm.
    4. Slow Cooker
    5. Mix all ingredients in a slow cooker. Turn on high for at least 1 hour. Then keep warm to serve.
    Home Maid Simple https://www.homemaidsimple.com/
    Now if you want, you can strain the cooked fruit and spices out, but in our house we kind of find it fun to have these pieces of fruit floating in our wassail. The allspice berries not so much, but they are easy to spoon out, as well as the cinnamon sticks. We then garnish the Cranberry Wassail with a few frozen cranberries – it helps cool the drink down for little kids – and an orange slice on the side of the cup. 

     PIN ME! Save this recipe for Cranberry Wassail Cranberry Wassail is the perfect warm beverage all winter long. Serve it at holiday gatherings, or just to warm up.


  • Chocolate Pumpkin Fudge Bundt Cake with Pumpkin Glaze

    Chocolate Pumpkin Fudge Bundt Cake with Pumpkin Glaze

    It’s all about the pumpkins this season. If you have a family party to go to coming up, this Chocolate Pumpkin Fudge Bundt Cake would be the perfect dessert to bring. Covered in a Pumpkin Glaze, you’ll please every pumpkin spice lover out there. 

    Chocolate Pumpkin Fudge Bundt Cake Related: 40+ Pumpkin Recipes, Crafts, and Party Ideas

    In this house, we’re a little mixed on the pumpkin spice craze. Mark loves a good pumpkin cake, but I could easily go without this seemingly favorite fall treat. I’m perfectly OK adding pumpkin to other delicious treats, though. Desserts like Chocolate Pumpkin Fudge Bundt Cake. 

    Now, I really had no reason to make a cake this week, other then I hadn’t baked much for a while. The kids have probably been feeling a tad deprived of their after-school treats as I usually sent them to the kitchen for a cup of water or a handful of carrots. The situation needed to be rectified. 

    Chocolate Pumpkin Fudge Bundt Cake Recipe Related: Carmelized Pumpkin Cheesecake

    Mark had the day off, so we decided it would be a good day to carve pumpkins after school with the kids and enjoy some Chocolate Pumpkin Fudge Bundt Cake. In Mark’s words “It is good, delicious, delectable, a perfect combination.”

    I originally thought I’d frost the cake with an orange frosting, but as I got going decided a Pumpkin Glaze would enhance the flavors more. Of course, an orange frosting would allow for a fun jack o’lantern fall look, you really ought to try the pumpkin glaze. All it takes are 2 simple ingredients! Some powdered sugar and Torani Pumpkin Pie sauce. 

    pumpkin-bundt-slice

    Chocolate Pumpkin Fudge Bundt Cake with Pumpkin Glaze
    Serves 8
    A delicious medley of fudgy chocolate and pumpkin covered in a Pumpkin Glaze
    Write a review
    Print
    Prep Time
    15 min
    Cook Time
    40 min
    Total Time
    55 min
    Prep Time
    15 min
    Cook Time
    40 min
    Total Time
    55 min
    Ingredients
    1. 2 cups Flour
    2. 1 3/4 cups Sugar
    3. 1 tsp Baking Powder
    4. 3/4 tsp Baking Soda
    5. 1/4 tsp salt
    6. 1 1/3 cup Water
    7. 1/2 cup Lard
    8. 1 tsp Vanilla Extract
    9. 1/2 cup Pumpkin Pie Mix
    10. 2.5 oz Semi Sweet Baking Chocolate, melted
    11. Pumpkin Glaze
    12. 1 1/4 cup Powdered Sugar
    13. 10 TBS Torani Pumpkin Pie Spice Sauce
    Instructions
    1. Preheat oven to 350 F.
    2. Mix flour, sugar, baking powder, baking soda, and salt in a bowl.
    3. Add water, lard, and vanilla extract. Mix until well combined.
    4. Add in pumpkin and melted chocolate. Continue mixing until full combined.
    5. Grease bundt pan.
    6. Pour cake mix into pan, and bake for 40-45 minutes until knife inserted in center comes out clean.
    7. Cool.
    8. For Pumpkin Glaze
    9. Whisk together powdered sugar and pumpkin sauce until desired consistency. Pour over cooled bundt cake.
    Adapted from Better Homes and Gardens New Cook Book
    Adapted from Better Homes and Gardens New Cook Book
    Home Maid Simple https://www.homemaidsimple.com/
    If you truly love pumpkin, you may want to whip up some of this Creamy Pumpkin Hot Cocoa to go with your Chocolate Pumpkin Fudge Bundt Cake. 

    Chocolate Pumpkin Fudge Bundt Cake with Pumpkin Glaze recipe


  • Easy Apple Crisp Recipe

    Easy Apple Crisp Recipe

    Fall is here, and I can’t help myself! I have to get apples and bake with them. It’s the one thing on my fall bucket list every year. Enjoy this easy Apple Crisp recipe to kick off your fall bucket list. 

    Start your fall bucket list with a check mark by this easy apple crisp recipe.

    While my in-laws were visiting, we’ve had plenty of late night family gatherings. Since we almost always do these at my brother in laws home, I figured I could at least contribute to the night and bring a yummy dessert. Apples were on my mind, and I know it’s a fruit all my kids and niece and nephews will eat – so an apple crisp made perfect sense. 

    Apple crisp that is finger licking good!

    There was not a bite left over of this delicious apple dessert. If you ask my niece it was pan-licking good! She almost followed me out the door trying to get one last taste of the already devoured apple crisp. This apple crisp I think was a bit creamier than normal apple crisp with the addition of evaporated milk to the mix instead of regular milk. But why don’t you make it and let me know!


    Easy Apple Crisp
    Serves 14
    Easy pan licking good Apple Crisp. Taste fall in your mouth.
    Write a review
    Print
    For the topping
    1. 1 cup flour
    2. 1 cup old fashioned oats
    3. 1/2 cup SPLENDA Brown Sugar Mix
    4. 1 tsp baking powder
    5. 1 tsp ground cinnamon
    6. dash of salt
    7. 2/3 cup salted butter, cut into small bits
    For the Apple Filling
    1. 5 large Granny Smith apples, sliced
    2. 6 Tbsp saltd butter, melted
    3. 4 Tbsp flour
    4. A squirt of Lime juice
    5. 4 Tbsp evaporated milk
    6. 1 tsp vanilla extract
    7. 1/2 cup brown sugar
    8. 1 tsp ground cinnamon
    Instructions
    1. Preheat the oven to 375 F
    2. Combine flour, oats, SPLENDA, baking powder, cinnamon, and salt in a medium bowl. Refrigerate.
    3. In a large bowl, mix melted butter, flour, lime, evaporated milk, vanilla, brown sugar, and cinnamon until well combined.
    4. Toss apple slices in mixture to coat.
    5. Spread in a 9X13 pan.
    6. Crumble oat topping over the apple mix.
    7. Bake for 33 minutes. Remove and allow to cool
    Adapted from Tastes Better From Scratch
    Home Maid Simple https://www.homemaidsimple.com/
    Next up on the bucket list – apple picking with the kids! It’s another fall must do for me, followed swiftly by a drive to see the beauty of the fall leaves changing colors. I don’t know about the rest of you, but I find this season to be a bit magical.

    What’s on your fall bucket list?

    Check out this post on the many health benefits of apples. I knew there was a good reason to like this fruit!

  • Pork and Egg Hash

    Pork and Egg Hash

    Yesterday was pi-day – did anyone eat some pie?  I thought it would be fun to make some mini pies with the girls, and then share the recipe here. Sadly, they didn’t turn out so great, so I’ll refrain from sharing it this week. A little tweaking, though, and I think I’ll have a new dessert to share with you.
     
    Instead, try this one pot dish of Pork and Egg Hash! 

    I’ve been going through my Taste of Home magazines, trying to pare them down a bit. It’s not often I find a keeper, but this one I’ve already made at least once a week for a month. We love it! Pork and Egg Hash can be made with any of your favorite meat, we just have preferred it with pork.Oh, did I ever tell you about my pan?  It was a Christmas present from Mark, and I just love it!  BEST PAN E.V.E.R.  It’s huge, with nice tall sides, but not tall enough to make it a pot. Oh I just love this thing.  It’s so pretty. 

    Pork and Egg Hash
    Serves 4
    One pot meal makes this Pork and Egg Hash a family favorite
    Write a review
    Print
    Ingredients
    1. 4 slices bacon
    2. 1/2 onion, chopped
    3. 1 lb bulk pork sausage*
    4. 2 potatoes, peeled and cubed
    5. 1 TBS vegetable oil
    6. 1/2 cup frozen peas
    7. 1/2 cup frozen corn
    8. salt and pepper to taste
    9. 4 eggs
    Instructions
    1. In a large skillet, cook bacon until crispy.
    2. Remove from pan and let drain on paper towels.
    3. Saute the onion in the bacon drippings until tender.
    4. Add the sausage, potatoes, and oil. Cover and cook on medium heat until sausage is cooked through, and potatoes are tender.
    5. Add the peas, corn, salt and pepper.
    6. Make 4 wells in the hash, and add an egg into each.
    7. Cover and cook for 10 minutes, or until eggs are firm
    8. While the hash is cooking, crumble the bacon.
    9. Top hash with crumbled bacon and serve.
    Notes
    1. Also good with chicken and beef in place of the pork sausage.
    Adapted from Taste of Home
    Adapted from Taste of Home
    Home Maid Simple https://www.homemaidsimple.com/
     
     
    Thank you for visiting Foodie Friday! Don’t forget to visit my co-host Diane at Simple Living and Eating.
     
    ~FEATURES~
     
    Italian Breakfast Strata - Love Bakes Good Cakes
    from Love Bakes Good Cakes
    I’ve been looking for new breakfast ideas, and this looks great!


    from Half Baked Harvest
    I don’t think I can say anything here. Just yummy looking at it.
     
    lucky leprechaun cookie bark - Page 451
    from Your Home Based Mom
    St. Patty’s Day is almost here. This would be a fun treat to make with kids.
     

    document.write(‘

  • Cherry Jelly

    Cherry Jelly

    In honor of Utah’s Pioneer Day, I wanted to share this extremely SIMPLE recipe for Cherry Jelly with you today. If you’ve never heard of Pioneer Day, it’s a good bet you don’t live in Utah and you’re not a Mormon. I happen to be both but have only ever celebrated since moving back to Utah. We have parades, races, and fireworks. It’s like a second 4th of July here. This post contains affiliate links that will compensate me when you click through and make a purchase. 
    Home Canned Cherry Jelly. Spread it on toast, or pour it over your Sunday Roast. However you serve it, you'll love having this stocked in your pantry.
     
    Why? Because we’re celebrating our ancestry. A large part of Mormon history and the history of Utah are the pioneers who crossed the plains in covered wagons and handcarts. It was a hard and arduous journey, but one they did in pursuit of religious freedom.
     
    #canning #selfreliance

    What does Pioneer Day have to do with Cherry Jelly you ask? Well, the majority of my ancestors came across the plains, some losing their lives before they ever got to Utah, while many made the full trek. They were hard workers and self-reliant. In honor of them, this past month I’ve spent a lot of time at my mom’s picking, pitting, juicing and canning tart cherries. It’s hard work! But so very rewarding in the end. 

    I may not face the same trials as my ancestors crossing the plains, but I can learn from their hard work and resilience how to be a better person, and provide nutritious food for my family.

    #canning #selfreliance

    Cherry Jelly


    Cherry Jelly
    Write a review
    Print
    Ingredients
    1. 4 cups Cherry Juice
    2. 3 cups Sugar
    Instructions
    1. Bring the cherry juice to a rolling boil.
    2. Add Sugar. Bring back to a rolling boil, and time 5 minutes.
    3. Turn down to medium/low heat and simmer.
    4. To test if jelly is done, dip a metal spoon into the jelly, and let it slide off. When the jelly drips off the spoon in one drip, it’s ready to can.
    5. This can take 25-30 minutes, but don’t let it burn!
    6. Ladle the jelly into sanitized pint sized canning jars.
    7. Spoon off the foam, wipe down the rims, and can.
    To can
    1. Boil a small pan of water, and dip the canning lids and rings in for a few seconds.
    2. Use tongs and place on jars filled with jelly.
    3. Tighten rings and let sit.
    4. Leave on your counter until you hear popping noises. This is the jars sealing themselves.
    5. No need to water bath your jelly!!
    Home Maid Simple https://www.homemaidsimple.com/


  • Chocolate Covered Strawberry Rhubarb Bundt Cake

    Chocolate Covered Strawberry Rhubarb Bundt Cake

    Add the flavors of spring to this decadent Chocolate Covered Strawberry Rhubarb Bundt Cake. With a secret ingredient, this cake goes from good to amazing! This post contains affiliate links and I will be compensated if you click on and purchase through them.

    Chocolate Covered Strawberry Rhubarb Bundt Cake

    It all started when our Relief Society celebrated it’s 174th birthday back in March. As a committee, we decided to serve up bundt cakes. I thought for sure I was going to be in trouble because years ago I threw out my bundt pan because no matter what I did the cake always stuck inside. I agreed to make a cake, though and left with a few pointers for getting the whole cake out. 

    Chocolate covered Strawberry Rhubarb Bundt Cake

    First, I hit up Pinterest and found this recipe for White Chocolate Raspberry Bundt Cake at Baked in Arizona. I couldn’t pass it up! Next, I had to find a new bundt pan
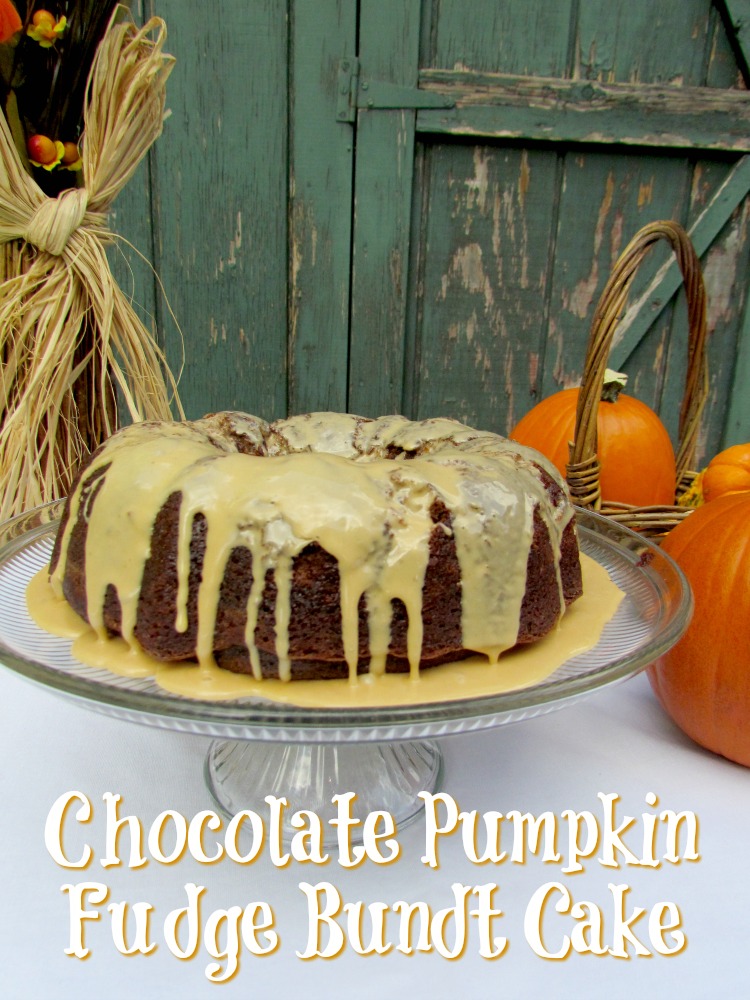
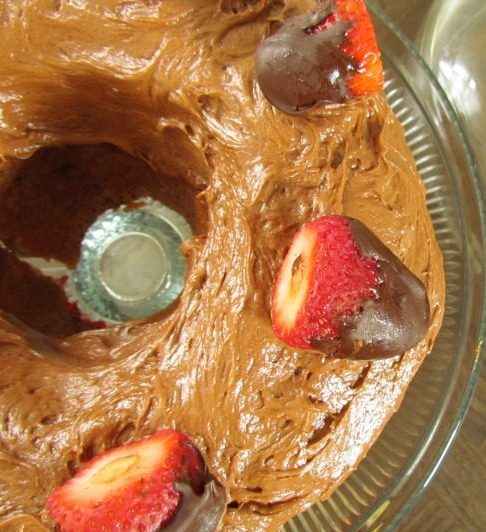
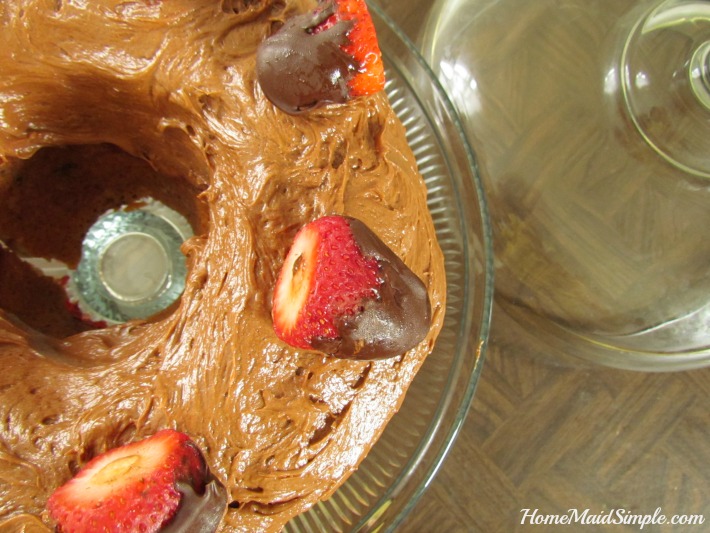
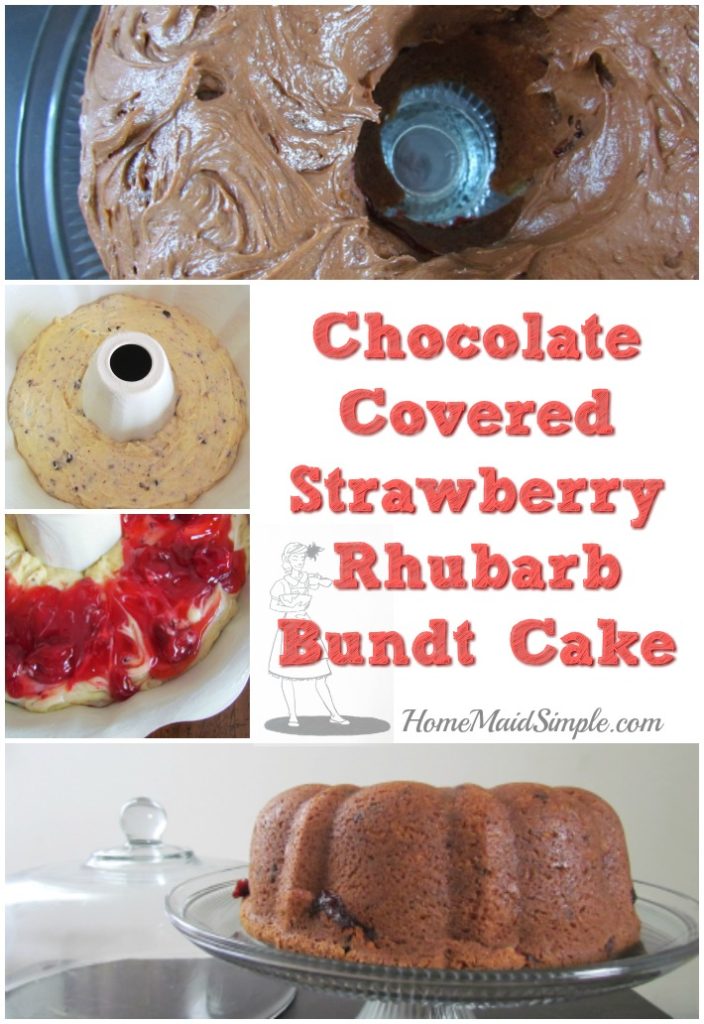
. We were browsing birthday gifts for Mark at Kroger one day, when would you believe it – Bundt pans were on a BOGO free sale! Someone knew I needed to make a bundt cake, and they must have known you’d like a chance at winning one too! So make sure you scroll down after the recipe and grab your entries to this giveaway!

    Chocolate Covered Strawberry Rhubarb Bundt Cake

    When I flipped that cake over and it actually came out I most definitely did a happy dance and squealed like a little girl. Who knew you had to let the cake completely cool first? OK, that’s not all I did but hang on for the next tip. First, I have to tell you about this Chocolate Covered Strawberry Rhubarb Bundt Cake. After we enjoyed the White Chocolate Raspberry Cake, my sister in law turns to me and says “Too bad you couldn’t make it a cheesecake bundt cake”. 

    Oh, she knows me so well! That got my wheels turning, and thanks to a not-so-secret ingredient, that’s exactly what this Strawberry Rhubarb Bundt Cake is! Well, at least as close as you can probably get to making a cheesecake in a bundt pan. The secret? Cheesecake flavored pudding!

    Cake Decorating Supplies

    2 Tips for Removing a Bundt Cake from the pan successfully

    1. You must let it cool completely! I always thought just until it’s warm was good enough. NOPE! Let that cake sit for a few hours until it’s completely cool to the touch. Time to learn a little patience. 
    2. Mix 1 TBS vegetable oil, 1 TBS shortening, and 1 TBS flour. Using a pastry brush, brush the mixture all over the pan, taking special care to get in all the grooves. I’ve tried finding where I got this tip from, and the video seems to have disappeared. This has worked like a charm, and so much better than greasing and flouring.

    Chocolate Covered Strawberry Rhubarb Bundt Cake
    A decadent bundt cake filled with the flavors of spring and covered in chocolate
    Write a review
    Print
    Ingredients
    1. 1 box Vanilla Cake Mix
    2. 2 3.4oz boxes Cheesecake Flavored Pudding Mix
    3. 4 large eggs
    4. 1/2 cup Water
    5. 1/2 cup Oil
    6. 12oz bag semi-sweet chocolate chips, separated
    7. 21 oz can Strawberry/Rhubarb pie filling
    8. 4oz cream cheese
    9. 2 TBS butter
    10. 1 cup powdered sugar
    11. 1 tsp chocolate exrtract
    12. 6-8 strawberries
    Instructions
    1. Preheat oven to 325° F.
    2. Mix together cake mix, pudding mix, eggs, water, and oil. Set aside.
    3. Chop 1 cup of chocolate chips. Mix into the cake batter.
    4. Pour 1/3 batter into bundt pan.
    5. Layer 1/2 the pie filling.
    6. Repeat until cake batter and pie filling are all in pan.
    7. Bake for 1 hour 15 minutes.
    8. Melt 1/2 cup chocolate chips in the microwave. Set aside to cool.
    9. Beat cream cheese, butter, powdered sugar, and chocolate extract until smooth.
    10. Add melted chocolate and beat until smooth.
    11. Set aside.
    12. Melt the last 1/2 cup of chocolate chips. Dip whole strawberries in and set aside to cool and harden.
    13. When cake is done, top with frosting, and chocolate covered strawberries. Enjoy
    Notes
    1. Grease bundt pan with a mixture of 1:1:1 mixture of oil, shortening, and flour. Let cake cool completely before removing from pan.
    Adapted from Baked in Arizona
    Adapted from Baked in Arizona
    Home Maid Simple https://www.homemaidsimple.com/
    Decadent Chocolate Covered Strawberry Rhubarb Bundt Cake


    Giveaway

    Since I can’t physically send you this delicious Strawberry Rhubarb Bundt Cake, I’ll be sending one of you a brand new bundt pan so you can make it yourself! 

    Giveaway open to US 18+ Ends  5/31/16


  • Orange Sorbet Pots of Gold

    Orange Sorbet Pots of Gold

    Originally posted March 16, 2012
    Recipe and photos updated
     
    Celebrate St Patricks with delicious Pots of Gold made from Orange Sorbet and orange peel cups. Top with a rainbow for a real treat the kids love.
    Turn Orange Sorbet into individual pots of gold for St Patricks Day
    Tomorrow is St Patricks Day! Growing up it was never a huge holiday around our house. My mom would make green eggs and ham, and if we felt like it, we would wear green. Having the last name Greene, though, we usually got away with telling people we always wore the color.  Since having kids, though, I’ve really gotten into celebrating even the smallest of holidays – my college roommate also absolutely adores St Pat’s day, so it grew on me.
      Follow the rainbow to a delicious pot of gold Orange Sorbet
    When I originally made these 4 years ago for my baby shower I used little green cups and didn’t take any photos. While recently going through old posts and trying to clean up the site for a better reader experience I came across it. Perfect timing! The kids were thrilled to come home from school yesterday to these little pots of gold. Scatter the snack tray with Chocolate Gold Coins, and the kids really had a blast!
     
    Orange Sorbet
    Follow the rainbow to these pots of gold. Orange Sorbet served in orange cups make a delicious spring treat
    Write a review
    Print
    Ingredients
    1. 1 cup water
    2. 1/2 cup sugar
    3. 2 cups fresh orange juice
    Instructions
    1. Mix the water and sugar in a pot on the stove. Simmer for 15 minutes to make a sugar water. Remove from heat and let it cool.
    2. Add the orange juice, and mix well.
    3. Chill for about 1 hour in the fridge.
    4. Now, if you have an ice cream maker you can use that per the instructions for your machine.
    5. If you don’t have an ice cream maker, just pop your mixture in the freezer. Every 30 minutes or so, give it a good stir. After about 2-3 hours it should be a pretty good frozen state for serving.
    Adapted from The Idea Room
    Adapted from The Idea Room
    Home Maid Simple https://www.homemaidsimple.com/


    To turn this Orange Sorbet into little pots of gold for the Leprechauns, serve it up in half an orange peel. Top it off with some Rainbow Candy.

    Need more St Patricks decor? Make this easy Coffee Filter Wreath!

    St Patricks Coffee Filter Wreath

  • The Ultimate Sandwich + Brownberry® Giveaway

    The Ultimate Sandwich + Brownberry® Giveaway

    Brownberry® provided me with coupons and a gift card to share my thoughts on the Brownberry® products with you! All opinions are my honest thoughts.

    Make the ultimate sandwich with Brownberry® Whole Grains 100% Whole Wheat Bread

    Mark loves it when I ask him if I can make a sandwich, and what he would like in it. Knowing full well he doesn’t usually care for whole wheat bread, I often offer to make his sandwich just to sneak a better bread into his meal. Shh, don’t tell my secret!

    Last week was Mark’s birthday so I, of course, offered to make his ultimate sandwich. The fillings change depending on his mood, so I had to get a list of what his preferred sandwich would be. He only had a few specific request. There must be avocado, lots of meat, and some muenster cheese. 

    Brownberry® Whole Grains 100% Whole Wheat Bread

    The perfect sandwich starts with the perfect bread. Back when I shared my favorite sandwiches, I discovered Oroweat bread. Moving to Indiana I thought I wouldn’t be able to get Oroweat bread anymore, but it just goes by a different name here in the midwest – Brownberry®. The company recently reformulated the recipe for their Whole Grain 100% Whole Wheat Bread to contain 23 grams of whole grains, 100 calories, and 3 grams of fiber per slice!

    Check out the new Brownberry® Whole Grains 100% Whole Wheat bread

    To make Mark’s ultimate sandwich, and keep it on the healthier side, this is what I did. 

    Ultimate Sandwich
    Make the ultimate sandwich with Brownberry® Whole Grain 100% Whole Wheat Bread
    Write a review
    Print
    Ingredients
    1. 2 slices Brownberry® Whole Grains 100% Whole Wheat Bread
    2. 1-2 tsp mayonnaise
    3. 2 slices Chicken
    4. 2 slices smoked Ham
    5. 2 slices Muenster Cheese
    6. 2 slices Cheddar Cheese
    7. Red Leaf Lettuce
    8. 1 Roma Tomato sliced thickly
    9. 1/2 Avocado
    10. Salt and Pepper
    Instructions
    1. Spread mayonnaise on 1 side of each slice of bread.
    2. Layer chicken and ham on 1 slice of bread. Sprinkle with salt and pepper.
    3. Add cheeses, lettuce, and tomato. Sprinkle with salt and pepper again.
    4. Top with Avocado and last slice of bread.
    Home Maid Simple https://www.homemaidsimple.com/

    According to Mark, this was the best sandwich he’s ever had. I give credit to Brownberry® for making a whole wheat bread that Mark will eat and truly enjoy.

    This is my husbands ultimate Sandwich! He even loved it on Brownberry® Whole Grain 100% Whole Wheat Bread

    GIVEAWAY

    1 reader will win (3) coupons for $5 Off Brownberry® Whole Grain 100% Whole Wheat bread. Open to US residents 18+.

    Ends 3/16/16

    Oroweat® if you’re in the west, Arnold® in the east 


    a Rafflecopter giveaway


  • Chalupa Salad

    Chalupa Salad

    Recipe originally published 8/9/2013
    Photos and text have been updated
     

    Growing up my family ate a dish we called Chalupa. It was always a favorite for us kids because it meant everyone got a little something they liked. Whether it was the rice – blech – olives, tomato sauce, cheese, or chips, we all had something we would eat. As a mother of 4 semi picky children, I finally understood why my mom loved to make this dinner. 

    Chalupa Salad

    Chalupa Salad is the perfect meal to sneak in veggies, and use up leftover rice. This is what we called Chalupa. It wasn’t until I was an adult that I learned Chalupa was more like a burrito, not a salad. The main difference between my Chalupa, and yours, would be the base. Instead of a fried corn tortilla, we use corn chips. From there the fillings, or in our case the toppings, are all pretty similar. Stack rice, lettuce, tomatoes, beans, olives, sour cream, and cheese. 

    Our last big change is the sauce. While traditional chalupa adds salsa, in my family we topped our Chalupa salad with tomato sauce. I promise it is delicious and a real treat your family will love! Granted they may just pick out the chips, or eat the cheese, but usually, the mix of the cheese, sauce, and chips has the kids trying a little of it all. 

    Chalupa Salad
    Traditional Chalupa deconstructed and layered in a Salad with only 2 simple changes.
    Write a review
    Print
    Ingredients
    1. 1 bag Corn Chips
    2. 3 Cups Cooked Rice
    3. Chopped Lettuce
    4. Canned Black Beans
    5. Olives
    6. Sour Cream
    7. Tomato Sauce
    8. Shredded Cheddar Cheese
    9. Sour Cream
    Instructions
    1. Prep ingredients. Warm up rice and tomato sauce if need be. Chop lettuce and tomatoes. Drain beans.
    2. On individual serving plates, layer Corn Chips, Rice, beans, vegetables, tomato sauce, sour cream and cheese.
    3. Serve and enjoy.
    Notes
    1. Amounts really depend on your family. If your family likes olives, you’ll want more, don’t like beans, use less.
    Home Maid Simple https://www.homemaidsimple.com/
     
    When I first shared this recipe with you, I added chopped Zucchini, because we had a plethora of zucchini from our garden that year. That is the beauty of Chalupa – you can add whatever your family enjoys, or use up leftovers of all kinds!

    Enjoyed this recipe? I think you’ll like this Taco Salad too!

    Taco Salad in Homemade Tortilla Bowls