Tag: baking

  • Peanut Butter No-Bake Cookies

    Peanut Butter No-Bake Cookies

    Whether it’s the middle of summer, or you just don’t feel like pre-heating your oven, these Peanut Butter No-Bake Cookies are a crowd pleaser every single time. This post contains affiliate links and I will be compensated if you click through and make a purchase.
     
    These are Mark’s absolute favorite cookies! He often asks me if we have any oats so he can whip up a batch.  I once bought a 20lb bucket of quick cooking oats so the answer could always be yes. Now, I just add more oats when the bucket starts to get low.
     
    These were very commonplace in my childhood, and now they get to be a part of my kids’ memories too. Granted, with a recent diagnosis of a nut allergy (both tree nuts and peanuts), Lincoln skips enjoying these with us, but to make it up for it I always make sure to have another treat on hand for him. Or sometimes I’ll even make our Peanut Free No-Bakes just for him.
     
    For other tasty variations, try exchanging the Peanut Butter for your favorite sandwich spread. We love them with Nocciolata, Nutella, Almond Butter, and more! There’s really not a wrong way to eat these cookies. 


    No Bake Cookies
     
     
    Peanut Butter No-Bake Cookies
    When the weather’s too hot to turn on the oven, but you’re craving cookies – make these peanut butter no-bake cookies
    Write a review
    Print
    Ingredients
    1. 1/2 cup Butter
    2. 1/2 cup Milk
    3. 2 cups Sugar, divided
    4. 3 cups Oats, quick cooking
    5. 1/2 cup peanut butter
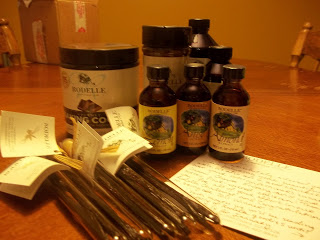
    6. 1 tsp Vanilla extract
    7. 1/4 cup Cocoa
    8. 1 cup Coconut (optional)
    Instructions
    1. In a large pot, melt the butter.
    2. Once the butter is melted stir in the milk.
    3. In a small bowl, combine cocoa and 1 cup sugar.
    4. Add sugar/cocoa mixture along with the rest of the sugar to the pan with the milk/butter mixture.
    5. Bring to a full rolling boil. Let boil for 1 minute.
    6. Remove from heat.
    7. Stir in the vanilla and peanut butter.
    8. Stir in the oats and coconut.
    9. Drop mixture by spoonful onto wax paper.
    10. Cool and serve.
    Home Maid Simple https://www.homemaidsimple.com/
     
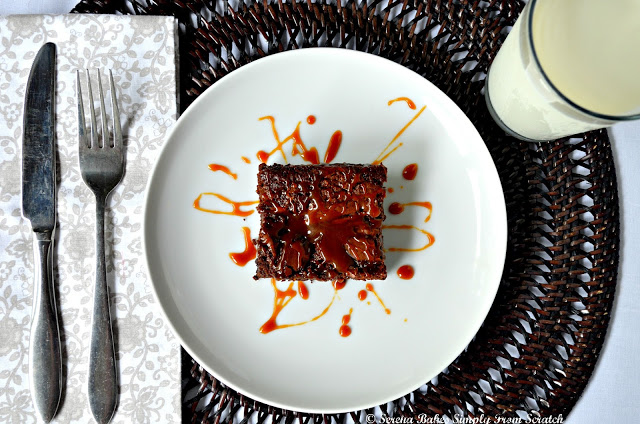
    Enjoy! These go great with a large glass of cool milk. Don’t tell, but I’ve eaten about 4 of these just while typing up this post.


    ~FEATURES~
     
    From Now Things are Cookin’, a perfect bbq side Macaroni Salad
     
     
    Life {Made} Simple shared a soup, good even during the summer – Loaded Potato Soup
    (I know Mark will be wanting this one soon!)
     
    Finally, lighten things up this summer, and cool down with Watermelon-Lavender Sorbet from Farm Flavor
    post update 11/2017
  • Birthday Bash {Giveaway}

    Birthday Bash {Giveaway}

    Today is my 26th birthday.

    I had big plans for today.

    They pretty much all fell through. 

    Isn’t that how it always happens?  I wanted to do a lot of baking with the kids today, but once I got everything ready, I realized I didn’t have enough sugar.  Not even for one simple recipe. I would have run to the store when I made this discovery, but baby Prince was already down for his nap. I have the motto, Let a sleeping baby sleep.  So I waited. As I sat down to write this post baby Prince woke up.  So I am feeding him while writing…how’s that for some multi-tasking?

    Once he’s done eating here we’ll head to the store for some sugar, and I think some Wendy’s for lunch. My special birthday treat to the kids (and because who wants to do that kind of cooking on their birthday?  not me!). 

    As soon as we get back home we’ll get to some baking.

    Yummy yummy! My birthday treat to me
    Strawberry Rhubarb Jam anyone? I really enjoy canning, so I’m making time for it today!
    Jam slathered on a scone, yum!

    I was then going to make a Chicken Cordon Bleu Stromboli, but Mark’s brother and his family are still in town, so we decided to get together with them for a little barbeque. 
    Until my plans got changed (and really it’s not a bad thing, I enjoy spending the day with family), the morning was going pretty good. I got up and did my morning scripture reading with baby Prince. Then I took a quick nap on the floor next to him. When the Princesses got up we had cereal and a tropical smoothie (not my best, but it was decent). I also snuck in a pilates work out, and got the laundry going.  While I gave Prince his morning feeding I also read some more from The Gatekeeper: Book 2 in the Marenon Chronicles (my new FAVORITE book series!). 
    Now what would a birthday bask be without some presents?  Do you remember my PenFactory Review?  I got these awesome tote bags, and I am giving one away today! But I don’t want to give you an empty bag. So one lucky reader will get a tote bag with a book to read: Shaman Friend Enemy by M Terry Green.
    How do you enter this giveaway?  Easy Peasy! Just leave me a birthday comment 🙂
    Giveaway is open to US and Canada residents. A winner will be chosen Saturday June 9th by random.org
  • Foodie Friday – Rodelle baking

    Foodie Friday – Rodelle baking

    At the beginning of the year I found I was a grand prize winner of the Rodelle baking challenge. For the rest of the year I wil be receiving a box of Rodelle goodies each month. I got my January box last weekend. I was so giddy with excitement, Mark just rolled his eyes at me. Really he’s just waiting for the KitchenAid that was also a part of the prize.

    Why yes, that is a hand written letter to me! Rodelle has really impressed me with their commitment to families, baking, and making memories!

    Oh so many goodies, and just in time for a week of valentines and birthday baking!  Today I’m going to share a chili recipe I found.  It is scrumptious, and has CHOCOLATE in it!  Now one of the big things I do when cooking, is substitute. I often forget an ingredient at the store, or just feel a little lazy, so I improvise. I did that with this Chili recipe. You can see the original recipe at Sweet Country Life

    Sweet Country Chili
    1 lb ground beef
    28 oz can baked beans
    1 can chili
    1 can black beans
    2 cans tomato sauce plus enough water to make 1 quart
    2 TBS brown sugar
    chili powder
    paprika
    cumin
    onion powder
    garlic powder
    1 TBS cocoa powder
    Brown the beef in a large pot. Add the rest of the ingredients. On the spices, I added to my tastes. I use small amounts of chili powder since I am feeding 3 little kids. And I may have added a touch more of the cocoa powder 🙂  Simmer for 30 minutes.  And Voila! You’ve got a tasty chili that even the kids will enjoy! It’s been a few days since I made this, and I’m still eating it for leftovers, it’s that good!
    I’d love to see what you’re cooking up in the kitchen!  Link up and hop around

    document.write(‘

  • Foodie Friday – Basic Cookie Mix

    Foodie Friday – Basic Cookie Mix

    Foodie Friday
    Every friday we will share a recipe on our blogs. At the end of the post we encourage you to link up your recipes! Let’s get cooking!
    I was looking for a Peanut Butter Cookie recipe the other day, and finally (out of my stacks and stacks of cookbooks) found one in a book called Deseret Recipes (published by the LDS church).
    To make the Peanut Butter Cookies I had to make a Basic Cookie Mix first.
    Basic Cookie Mix
    9 cups flour
    3 cups powdered dry milk
    3 TBS baking powder
    1 TBS salt
    4 cups shortening
    4 cups sugar
    Stir the first 4 ingredients together. In a large bowl cream the shortening. Gradually add the sugar to the shortening. Once it’s mixed, slowly add the dry ingredients. Blend or use a pastry cutter until it is the texture of cornmeal.
    Store tightly covered at room temperature.  Will last for several weeks.
    Now this will make a lot of cookies! I cut my Basic recipe in half, and still made three different batches of cookies.  Today I’d like to share a recipe using the Basic Cookie Mix, for Cinnamon Cookies. What you thought I’d share the Peanut Butter Cookie recipe? I would, but the baking bug hit me, and out of the 3 types of cookies I made, the Cinnamons were definitely the best!
    Cinnamon Cookies
    2 1/2 cups basic cookie mix
    1 tsp vanilla
    1/2 cup sugar
    1 egg, slightly beaten
    1 1/2 tsp cinnamon
    Blend the basic cookie mix, vanilla, sugar and egg.  Form the batter into balls, any size you like, and roll them in the cinnamon.
    Bake at 375 for 12-15minutes. 

    document.write(‘

  • Menu Plan Monday 12/12

    Menu Plan Monday 12/12

    What’s on your menu this week? 
    I know I don’t always follow my menu’s, but sitting down at the beginning of the week to plan everything out, really makes dinner time more pleasasnt (even if it’s not what was planned).
    Monday – Tuna Helper
    Tuesday – Salsa Chicken over rice
    Wednesday – Cheesy Potato Soup in Bread Bowls
    Thursday – eating out
    Friday – Dijon Chicken Noodle Toss
    Saturday – leftovers
    I’ll probably be doing a lot of baking this week as well. I need to figure out what to take our neighbors when we go caroling, and I’m in the mood to have some sweets around the house too.
    Yesterday I kicked off my sweet tooth by baking these delicious Strawberry Cheesecake Santa Hats with the Princesses
    Strawberry Cheesecake Santa Hats
    Ingredients
    8oz cream cheese
    4 TBS powdered sugar
    1 tsp vanilla extract
    vanilla wafers
    1 pound strawberries
    Directions
    Mix the first 3 ingredients together until well blended.  Wash the strawberries. Cut off their tops, and hollow a little out of the inside (for extra cheesey goodness!).  Arrange the wafers on a plate, and pipe some frosting around the edge. Then pipe some frosting inside the strawberries, and stick to a wafer. Add a little frosting to make a pom pom hat.  Then enjoy!!
    I got this idea from this site. 
    Oh and I’ve added a little Christmas decoration to my kitchen as well. While out visiting teaching this morning, one of the sisters gave me this present. I absolutely love it, and am thinking of making some more for every season and holiday!
  • Tuesday Tips – The Amazing Bread Slice

    Welcome to Tuesday Tips!
    Have you ever taken a good hard look at your bread? Wonder what you can do with it other than eat it? No? Or do you throw away the heel because no one in your family likes it, especially the kids?
    Ok, I know kind of random questions there, I mean who really wonders what they can do with food besides eat it. Bread is pretty amazing though!
    For instance, if I place a slice of bread in a container of brown sugar, my brown sugar will stay soft! I hate going to use brown sugar (especially during this baking season) and find that I have to pull out a pick ax to get a few grains. 
    While browsing pinterest I came across another way to use a slice of bread!

    If you bake a cake the night before you want to use it, and leave it on the counter overnight. You probably worry about it going stale. If you just put a slice of bread on top of it, it will keep the staleness away.  Apparently it works on muffins and cupcakes too, but I’m guessing you’d need to use a couple slices to cover a whole batch of those.
    I haven’t tried this yet, but I just bought some round cake pans from pampered chef, so a cake is in our near future. The science behind it though, makes perfect sense to me. The cake, like the brown sugar, draws on the moisture from the bread. I don’t recommend eating the bread after using it for these tips, as it will be stale! It would probably make some great French Toast though!
     
    link up your tips with Confessions of a Frugal Mind

  • Meal Plan Monday 11/28

    Meal Plan Monday 11/28

    Monday – Chicken and Stuffing. This may change though, since Mark isn’t feeling too great today
    Tuesday – Tuna Helper
    Wednesday – Bean and Cheese Burritos
    Thursday – Soup and hot cocoa. Perfect mood setting for putting up our Christmas decor!
    Friday – Church Christmas Party. I’m taking some form of potatoes
    Saturday – leftovers

    Last week, I did hardly any cooking, since we were out of town for Thanksgiving. I did however, make some fun treats inspired by Pinterest!

    (this was the first pie to go!)
  • Tuesday Tips – Plastic pie lids

    It’s time for another Tuesday Tip! I’m thrilled to have found Tip Junkies Tip Me Tuesday to link up with! So if you’re visiting from Tip Junkie, thanks for stopping by! 
    Tip Junkie handmade projects

    I’ve been wanting to get this tip out to you guys for awhile, but somehow everytime Tuesday popped around, I kept forgetting. I blame it on my scrambled pregnancy brain.
    I personally, love french toast! I would eat it for breakfast every morning, if I could. My biggest struggle with making French toast, is finding the right sized bowl, to soak the bread in. All my bowls curved too soon, or were enormously huge.  I remember my mom using pie tins growing up. They really are the perfect size. I just don’t own any pie tins (I do have a deep dish stone pie plate).  I love those premade graham cracker pie crusts though, and around the holidays, I have an abundance of them. One year, I tried using the empty foil pie tin for my french toast, only to realize a little too late, when I cut the pie, I also cut little holes in the foil. 
    This year, it dawned on me though! The pies come with a plastic lid! Normally, I open the pie shell, toss the plastic lid, and usually have no leftover pie. This year, I had some leftover pie, and so I had kept the lid. And then, voila! I realized it was the right size (obviously since it’s the same size as the pie tin itself) for French Toast! 
    So this year, don’t throw those plastic pie lids away during your holiday baking. Hold on to them, and you’ve got instant French Toast soaking bowls. If you make a lot of pies, like me, you could even dispose after each use, saving the washing time. Or you could continue to use forever (which is what I’ll be doing).


    Now go enjoy some pie and French toast! Together if you really feel like it.  I might add here, that apple pie spice makes a great substitution for cinnamon when making French Toast!

    I’m also linking up over at

  • Apple Pie Spice Muffins

    Pinterest has become my new friend lately. I’ve been using it a for awhile, but I caught the baking bug, and pinterest just adds fuel to my fire. Check out these yummy looking and sounding French Toast Muffins!

    My only problem was, I forgot I ran out of cinnamon! Now that should be a staple in every pantry, but I keep forgetting it at the store. So I went through my spices, and pulled out the Apple Pie Spice! It really was good! I think I would’ve preferred cinnamon, but the Princesses gobbled these all up before lunch!  Definitely a hit.

  • Take the Rodelle Challenge

    Take the Rodelle Challenge

    Have you heard the buzz? Rodelle has a challenge going on right now to find the Best, Worst or Funniest Baking moments you’ve shared with your family and friends!  Head over to the Rodelle Facebook page to share your memories! Who knows, you could be 1 of 3 Grand Prize Winners.  What do the winners get, a Years Supply of Premium Rodelle Baking Goods and a KitchenAid!!!  Share stories, pictures and videos right on their wall.

    Rodelle sent me some vanilla beans to try out. I have never worked with vanilla beans before, so I’ll be making some memories this week as I try them out, and make some yummy goodies with my kids. I love this time of year when the baking begins and I get to share the memories with my kids, and the goodies with our friends.  I searched pinterest and found these yummy looking treats to make using vanilla beans:

    Vanilla Bean Sugar Cookies

    Vanilla Bean Buttercream Frosting

    Vanilla Bean Scones!!

    Vanilla Bean Cheesecake Bars

    I’ll be back later this week with at least one of these recipes and how it turned out!!! 

    Don’t forget to visit Rodelle’s Facebook Page and take the Rodelle Challenge!  You have until December 25th to enter those stories, pictures and videos!

    *This post was sponsored by Rodelle. I received Rodelle Premium Vanilla Beans in exchange to write about the Rodelle Challenge. All opinions and ideas are my own.