Tag: diy

  • DIY Clarinet Lamp

    DIY Clarinet Lamp

    Music lovers will love this tutorial for a DIY Clarinet Lamp. Make a matching pair to really stick out in your music room. This post contains affiliate links and I will receive compensation if you click on and make a purchase. 
     
    Last summer Mark took an old Clarinet we had and mounted it on some particle board, then threaded a lamp cord through it. He left it as is, and as much as I loved the idea, I kept telling myself I would update the lamp to look a bit nicer. 
     
    Finally this month, I made the time. Finding the right lampshade was half the battle, but once that was found, I knew that not only would this be a Clarinet Lamp…it would also be a stage for some little Musicians we’ve had laying around the house.
     
     
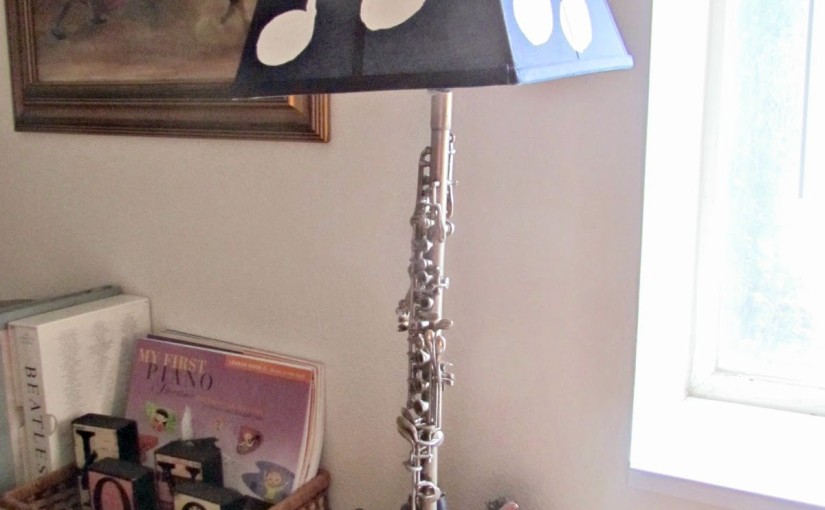
    We went through a number of lampshades before finding the right one. I believe this one above was #2. It was just a little too small for the overall feel though. I couldn’t wait for the right lampshade before I started updating it, so out came some paint, and I gave that base a new look. 


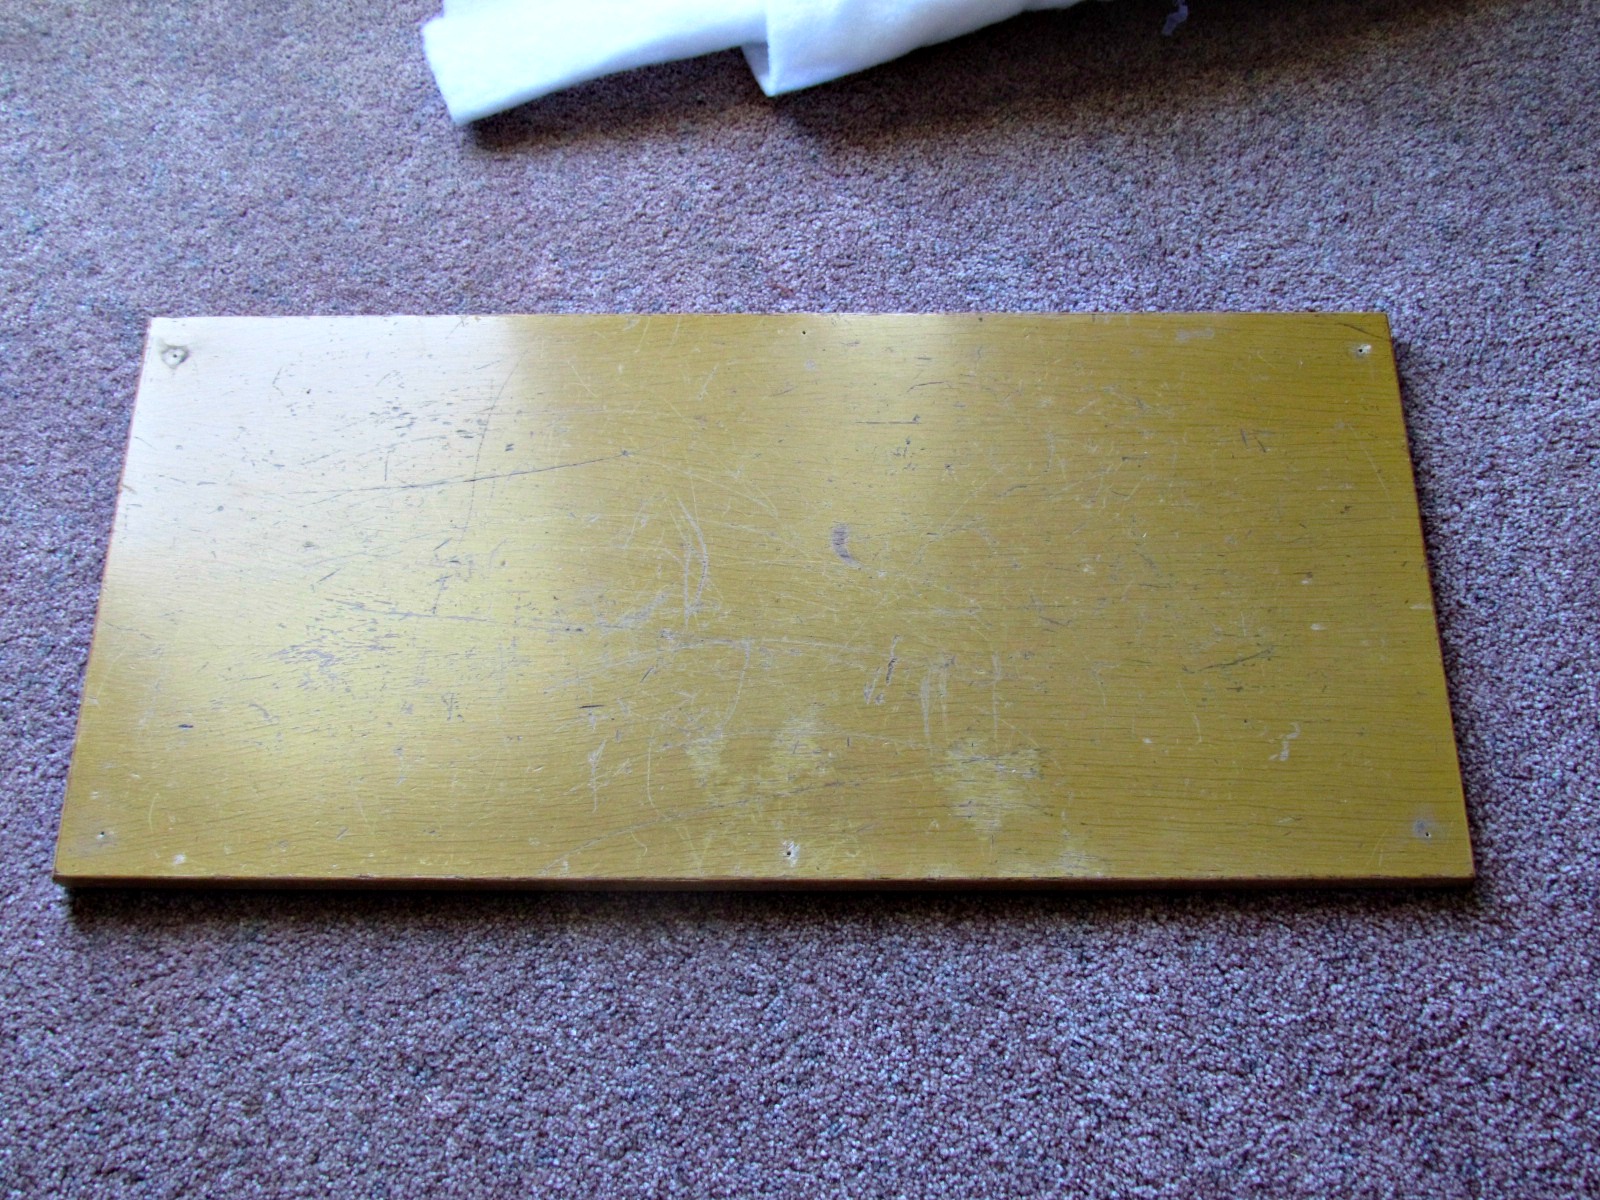
    I was worried about the particle board showing through, and taking in too much paint, so I gave it 3 coats before calling it good. I’m still debating putting a chalkboard layer over it – what do you think??
     
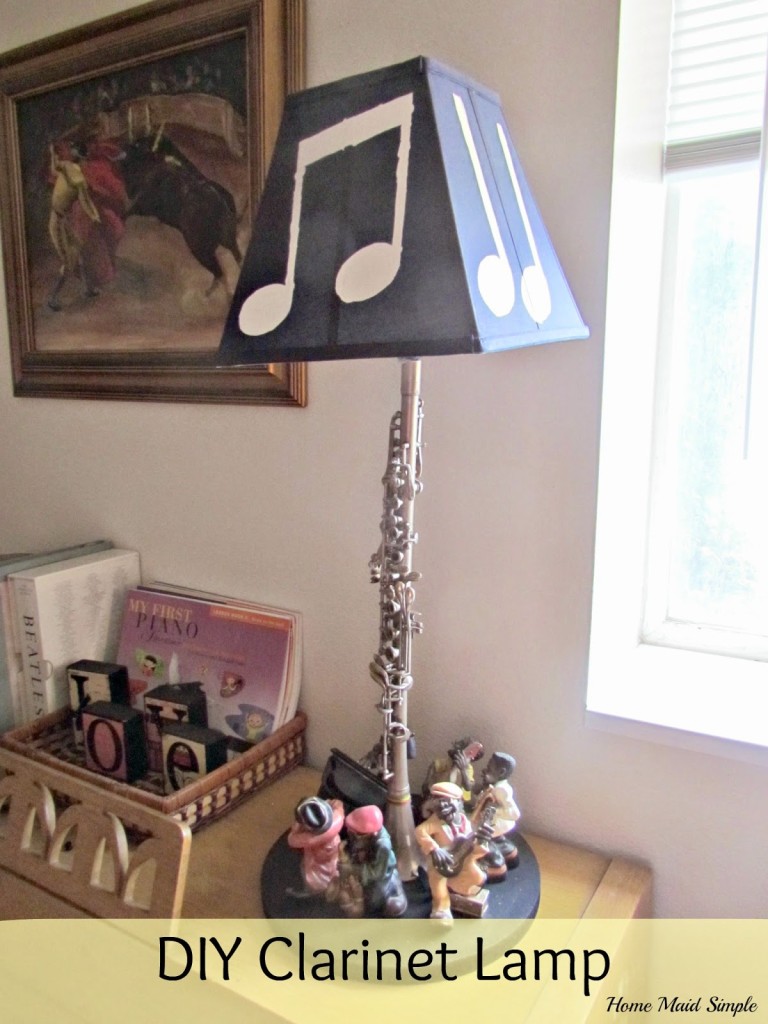
    I went back to our local thrift store to see if I could find a better shade, and this time, they had it! A nice square, to offset all the circles going on, and that’s when it hit, that this was going to be a stage. 
     
     
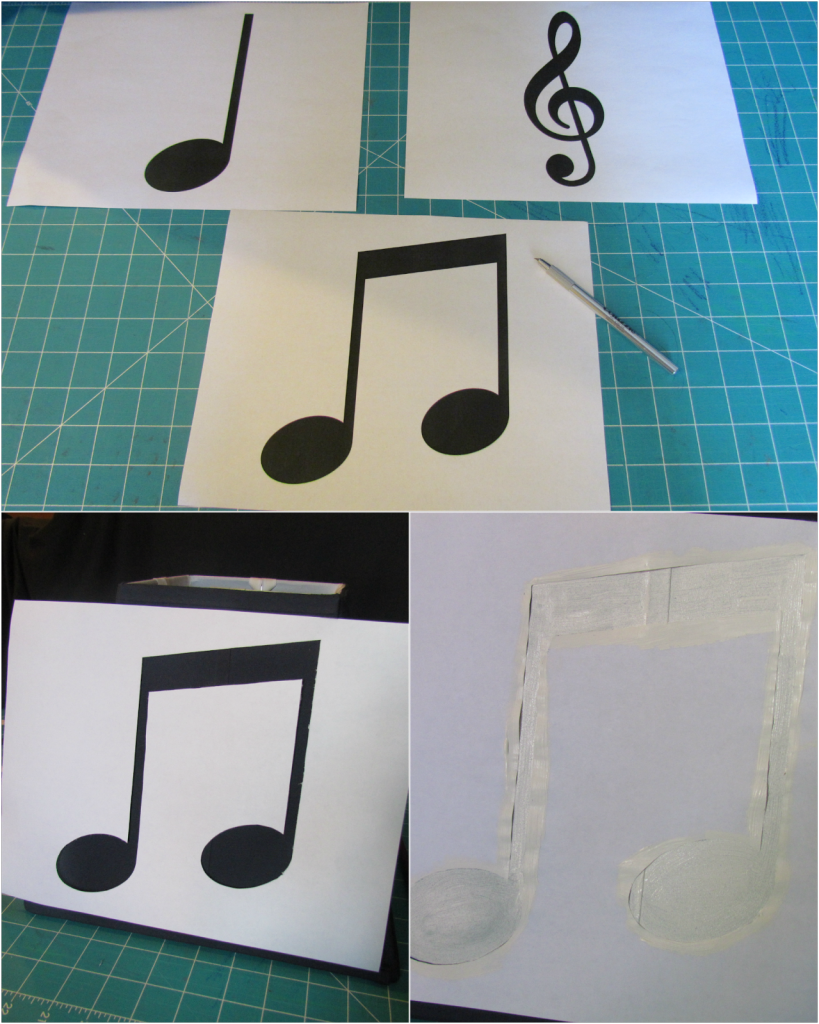
    Some stencils quickly made using Picmonkey, a razor, and some white paint, made a simple, anyone can do it, musical shade. I used scrapbook glue dots to hold the stencil on the shade. 
     
     
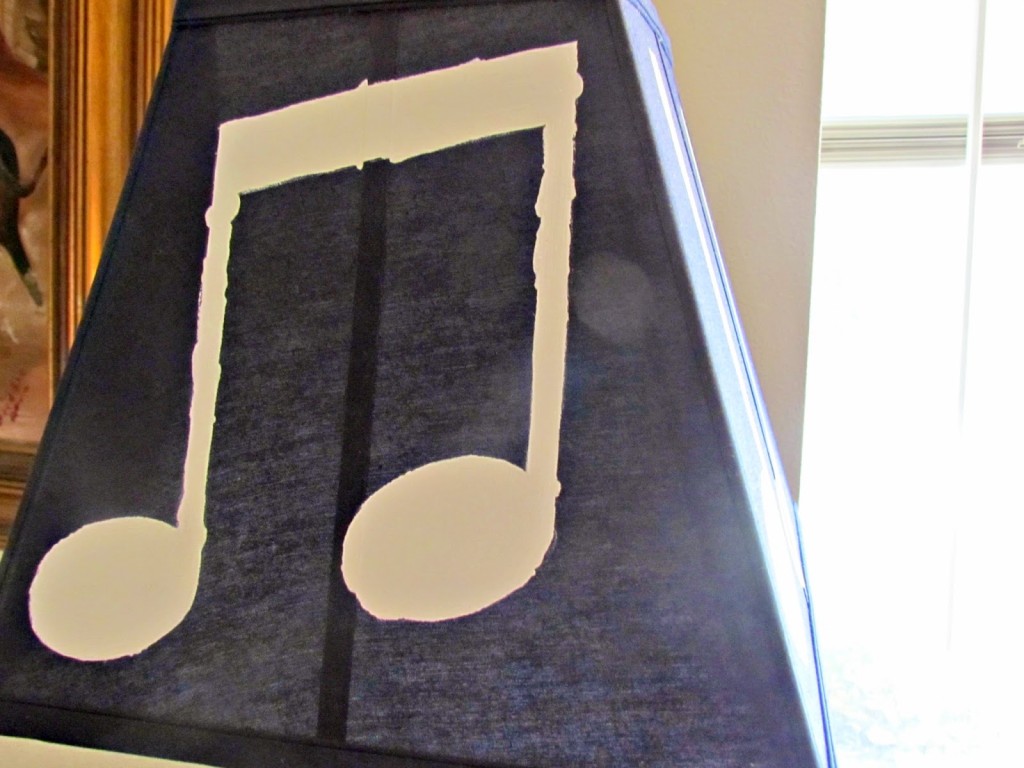
    There are obviously some extra bumps of paint, but I think it just adds a nice rough look to the shade. Plus, from far away, you can’t even tell. 
     
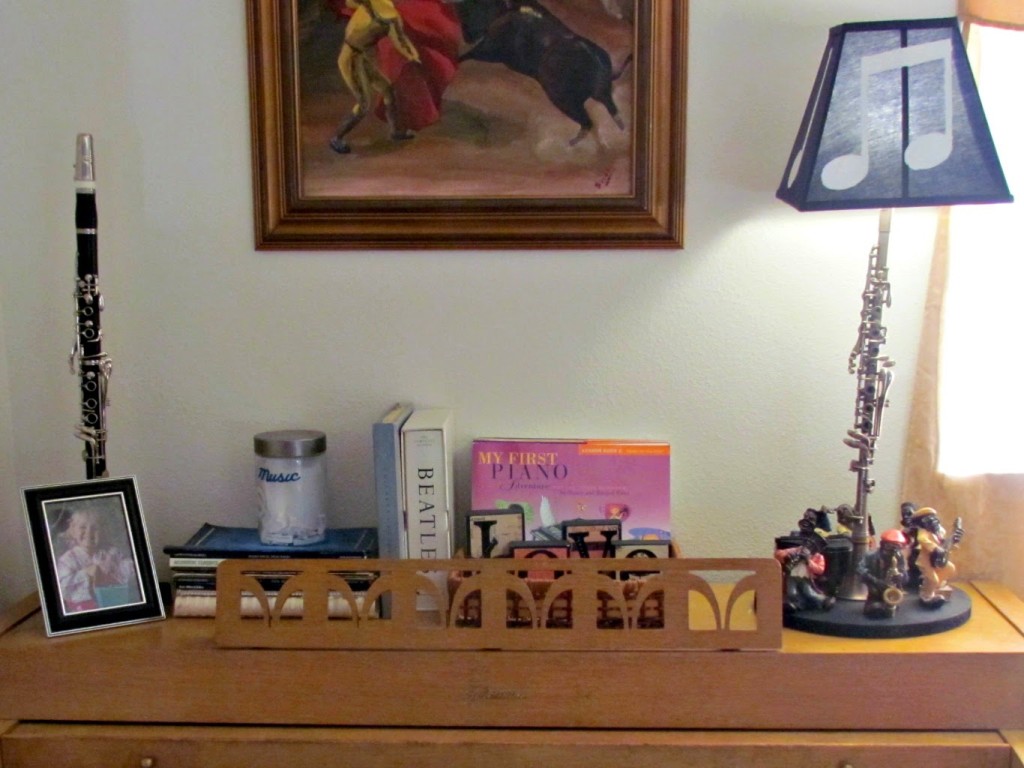
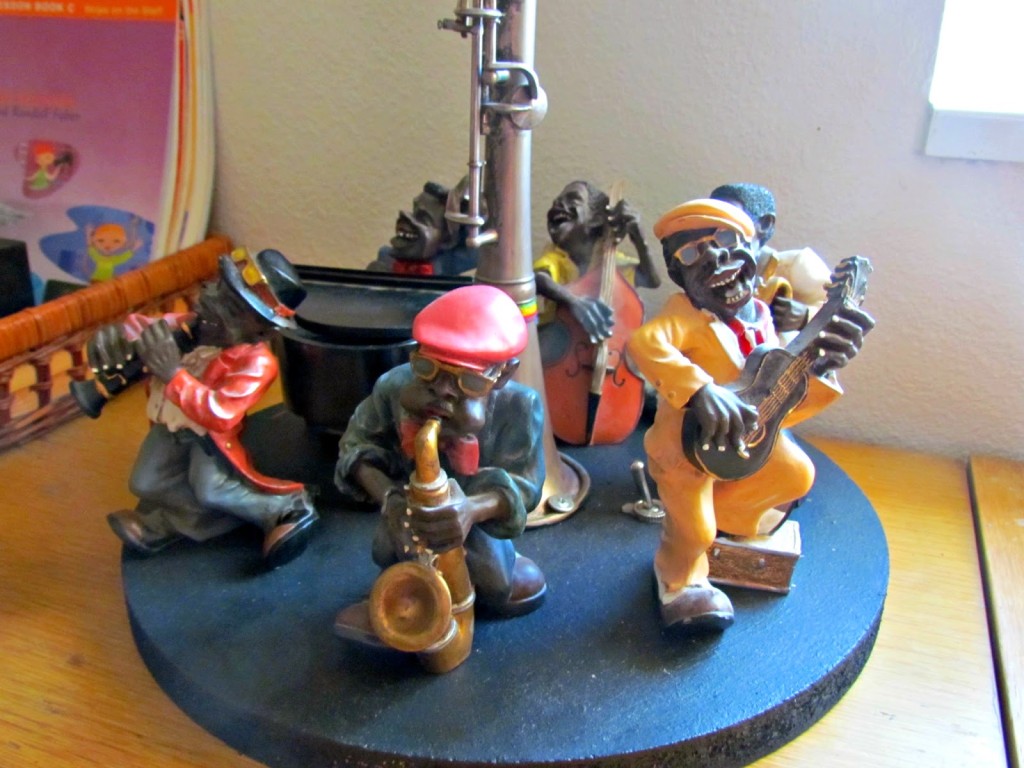
    Time for the final touch, the little Musicians – aren’t these just awesome?!


    DIY Clarinet Lamp 

    What you’ll need: 
    • Old Clarinet
    • Screws
    • Circular particle board base
    • black paint
    • lampshade
    • light bulbs – I prefer GE LED Bulbs
    • lamp kit
    Drill a hole through the center of the base. Carve out a section for the lamp cord to lay safely under the base. Paint your base black…or any color you prefer.  Thread your lamp wire through the clarinet, and the base. Attach the clarinet to the base using 2-3 screws. Add a light bulb, and shade. Plug in, and enjoy some musical ambiance. 


  • DIY Steampunk Hats

    DIY Steampunk Hats

    Around the beginning of October we got a Wedding Announcement for my friend and old college roommate. It was one of the most unique announcements/invites I’ve ever seen. With an I spy game scattered around it, and a link to a website that had more information on the reception.

    Steampunk. The theme was steampunk, and they were asking all their guests to come dressed up. Oh I was so excited! Mark has been getting into Anime shows that feature some Steampunk the last few years, and I love any reason to make something crafty. So we headed to Hobby Lobby and picked up a couple supplies. 
    Top hats, girly hats, gears, clocks, keys and compasses.  I wasn’t entirely sure what the final product was going to look like, so I played around with some different set ups, before making it permanent. The top hat for Prince L was definitely going to be the easiest to put together, so I started there. 
    I had an old clock that the kids had ripped the hands off of. It had a cool frame, so I had tossed it into my craft bucket (finally glad I held onto some junk). I pulled the clock out, opened up the back, and took out the whole gear works. A few of the gears started falling off though, so I had to super glue them in, but it didn’t really need to work. 
    Once I had the gears set into the hat, I added a compass dangling from the gears. Later, and not pictured, Mark had the brilliant idea to add some ribbon around the rim of the hat. We used some 3 inch gold/brown ribbon that really brought this piece together. 
    Now it was onto the girls hats. We picked up some Princess style dresses from the local thrift store, in hopes they would mostly fit into the steampunk theme. I used the colors of the dresses to create a more tailored theme for the hats. 
    After a lot of pinterest browsing I knew I needed to start the hats with some fabric flowers. There are a lot of tutorials out there on how to make these flowers, I used this one from Just Another Hang Up
    Hot glue the flowers onto your hat, and then add the different components you would like. This is how ours turned out
    – Red Riding Hood: red flowers, key to grandma’s house and some gears. 
    – Belle: yellow flowers, clock, and gears.
    – Tiana: green flowers, a metal frog, and gears.
    Once all the components were glued on, I added the ribbon to fit around the heads. This I also just hot glued onto the edges of the hat. The holes in the hat helped get the glue onto both sides of the hat, so it really stuck well. 
    Finally I had to come up with something for me to wear. I had the clock face left from that broken clock, but it had no hands. I remedied that by using some model plane paint (something we just had laying around the house). I removed the gear casing to add some ribbon, and then placed the gear casing back on to hold the ribbon in place. 
    This my friends, is my new favorite dress up!  Check out my earrings too! Those were extremely easy to make as well. While at Hobby Lobby I picked up some earring clips, and the string of gears. A little pliers work to unhook the gears, and re-hook them to the earring clip, and voila – new earrings!  Your welcome. 
    So yes obviously, this was also our Halloween Costumes, but we had a fun time at the wedding reception and seeing all the other Steampunk outfits. Congrats ChaRlie on your wedding!!
    Have you ever been to a themed wedding? 

    linked up to these Great Parties!

  • DIY Tomato Cage Ghost

    DIY Tomato Cage Ghost

    Halloween is coming, and the spooky decor is starting to show up on porches. Make this DIY Tomato Cage Ghost with three simple items – 2 you may already have on hand! This post contains affiliate links and I will be compensated when you click on and make a purchase. 

    Do you love my DIY Tomato Cage Ghost Witch?  I truly thought I was being original when I came up with this idea. Then a fellow blogger posted some Halloween projects, and what is included – none other than tomato cage ghosts!  Well, I was still going to be original because I put mine together a bit differently than the others I looked at.

     
    It’s really quite simple to make your own Tomato Cage Ghost. We headed out and bought a tomato cage for $1.99, and a foam head form (hobby lobby) for $5.99. I already had a pile of white fabric in my stash, and a metal hanger in our closet. So this project cost me a total of about $8. Not too shabby for a lasting Halloween decoration. 
     
     
    You’ll start your ghost by attaching the foam head to the prongs on the tomato cage. My original idea actually used a foam ball, but the cost was similar, and we thought a head shape might give it a more ghostly look.  
     
    Now you’re ready to cut and attach the fabric.  You’ll want to cut one piece approximately 3 1/2 feet by 3 feet.  Once you have that main piece, the rest you can cut into 2-3″ strips, and varying lengths. The strips you will now attach to the middle rung on the tomato cage. 


     Fill the rung tightly, and try to tie the knots from both sides, so they overlap more diversely. Mine ended up facing the same way at first, which made for a less chaotic and looking ghost.
     
    Time to attach the hanger! This will help create “arms” for your ghost. Twist the hanging end so it stick straight up, and then maneuver it into the middle of the foam head. Like so….
     
     
    You’re ready for the finishing touch. Remember the large piece of white fabric we set aside? Drape it over the head of your ghost. I used some black thread to tie it on around the bottom of the head. I wrapped it a couple times for a strong hold. The thread is thin enough that it’s not all that noticeable and gives your ghost a little more shape. 
     
    Use a permanent marker, or paint, to add some long spooky eyes and voila!  Prince L has had a blast running up to the ghost trying to knock it down, while saying “Ooooo ooooo”


    The ghost is just how it started out though. Shortly after placing our ghost on the porch for all to see, I thought it needed a little extra…and thus the Ghost Witch was born. Can you think of anything more scary than a dead witch come back as a ghost?  


  • DIY Ikea Chair Recover

    DIY Ikea Chair Recover

    While white is a beautiful color and allows any and everything to match it, it’s not very conducive for a home with many small children. Check out this Ikea chair recover, and find inspiration for recovering your chairs! 

    These Ikea chairs were so much fun to recover. Back in August I asked over on Facebook some opinions on different fabrics I had, and there was a 100% vote for the striped fabric. I was a little nervous, since I’ve never done something with so many curves – all my past recovers have been pretty straight-edged – but I had to give it a try.

    Three years and 4 kids, completely killed the white fabric from the original chair. I assume I thought the white fabric would be OK, because the fabric was removable. I was pretty good at washing the covers, but it didn’t stop them from turning very grey, and pen just doesn’t come out.  Mark suggested I try bleaching them, when I first mentioned my plan to recover them, so I gave it a try, but nothing changed.

    The recover began!  I wish I wrote down the name of these chairs, but Ikea no longer sells this particular style.  They are very similar to the Pello Chair though. From what I can tell the biggest different is the Pello Chair has some padding, while my chairs are just fabric stretched over a metal frame.

    I started the actual sewing process while the two older girls were at school and Prince L took his nap. Princess R enjoyed the time watching her favorite movies and eating snacks. It would have been great if I had a serger for some of the edges, but I had to make do with my sewing machine. If I keep up this sewing spree I’m on I may be able to justify buying one.

    It really was simple to do, and any easy sewer could figure this out. All I did was remove the original cover from the frame, and then carefully undo all the seams. Since I had two chairs, I kept one intact so I could refer to it later on how the seams were put together. Once I had the cover completely taken apart, I traced it out on the new fabric, giving myself an extra 1/2″ for any mistakes, and larger seams. Then I put it all back together.

    I forgot to take an immediate before picture, so this is not the greatest quality, but you can see what the original chairs looked like here in our home. 
     
    Do you like my new chairs? Guess what! I am selling these beauties!  I know I know, why would I go through all the trouble of recovering them, just to sell them. They do look good in our new home. My problem is what you couldn’t see behind the camera….a matching love seat set practically sitting on top of each other.  All in the name of a good picture.
     

    For more Ikea Chair recover check out these links I stumbled across while trying to find the name of my chairs. 


  • Lighting the Stairway

    Lighting the Stairway

    While trying to maximize our home’s appeal to potential buyers while still saving money, we decided to change up the lighting in our stairway.

    stairway lighting Before and After
    The biggest problem I found with the original lighting, was that it had no cover, and at one point while going down the stairs you’d be staring straight into it.  Not the most comfortable thing. Mark believes at one point there was a large mirror in front of it that would light up.  I can see it, but there was no mirror now. 
    So we decided it needed to be changed. We didn’t want to spend money though, especially since we had the perfect light in the front room.
    See that hanging light. It really didn’t fit in the front room, but that’s where it was when we bought the house, and it is the only light in the front room. It plugged into the wall with the light switch wired to it as well. The problem here was it only lit the one side of the room, and the shelf was in the way of the chain. 
    Mark’s brilliant mind saw this as the perfect stairway light. With the nice long chain on it, Mark only had to do a small bit of electrical and wiring work to wire it directly into the wall, in the same place the old stair light was attached, but now the light hung from the ceiling instead of directly in our eyes. 
    And in case you’d like to comment on it, yes the walls are carpeted in the staircase. Gosh I love the 70’s!  Do you realize how many fingerprints I don’t have to clean in this area because of the carpet? 

  • Piano Bench Makeover

    Piano Bench Makeover

    After I reupholstered our patio chairs, I got antsy to keep going. Who knew upholstery could be so easy, and fun. I admit, there may have been a slight feeling of ecstasy every time I used the staple gun, but I think the joy mostly came from creating something beautiful for my home.

    Sorry I couldn’t help myself. Normally I like the suspense – show you the ugly before first, and then BAM awesome cool After – but I just love how this turned out.  Alright, let’s take a look at the piano bench when we first bought it (used by the way).


    As you can see this fabric is not faded – no it is more towards the blackened side, gross! Plus all the corners and edges were fraying pretty bad. I’m sure it was a pretty fabric at one point, but it was time to move on.

    The following fabric we found at IKEA (and trust me, moving from 2 hours away to 10 minutes away, just may become a financial problem!) Originally I was going to make it into curtains for Mark’s band room. That project was continually put off, and now that he no longer teaches band, I had all this cool fabric, and nothing to do with it….or did I?

    Awesome right?  Now if you’d like to reupholster your piano bench, here’s a quick step by step guide for you.

    1. Remove top of seat from the bench legs
    2. Remove all current fabric and cushioning.
    3. Measure and cut new fabric and quilt batting
    4. Iron the new fabric. No one wants creases in their pretty bench. 
    5. Lay batting on top of bench seat. Add the fabric and adjust to desired area. Make sure you have enough on all sides to wrap around the bottom of the seat. 
    6. Carefully without moving the fabric and batting around, flip your seat over. 
    7. Fold fabric once under itself to create a nice clean edge. 
    8. Grab your staple gun and attach the fabric. 
    Got it?  Now you’re all ready to go tackle your own piano bench right?  I actually debated not recovering the bench when I saw how nice the wood seat was, but then I would have had to add some wood putty and stain, and have you ever sat on an uncushioned piano bench? So I stuck with the plan and got this covered.
    Are you ready for it?  The new and improved – and much loved – Piano Bench Makeover!!
    You can find me joining these Fun Parties!
    *This is NOT a sponsored post. I have no affiliation with IKEA besides my love of shopping there. No compensation was given for this post or the mention of any product used.*
  • DIY sneak peek and Menu Plan

    DIY sneak peek and Menu Plan

    I’ve got some pretty sweet kids, I tell you. This morning they came running to me with a bunch of flowers

    “For you Mommy! We forgot to pick them for Mothers Day.”

    I have no idea what kind of flowers these are. I originally thought they were weeds and had pulled half of them out around our big tree. Before I got back out to the rest though, they started blooming these pretty flowers. Any flower experts want to tell me their name, and if they are indeed just a pretty weed? 
    I’ve got a lot going on this week, so I hope you’re all ready for it!  I’m kicking off a week of Fathers Day gift Ideas tomorrow, and behind the scenes will be working on a couple more DIY projects for future sharing. On top of it all, we’re still working our tail ends off on the Master Suite Remodel
     Menu Plan Week of 6/10
    Monday – Beef Enchiladas
    Tuesday – Spaghetti and Corn on the Cob
    Wednesday – Sandwiches
    Thursday – Tallerino Casserole
    Friday – Curry Chicken
    Saturday – Leftovers
    Sunday – Cranberry Pork Roast
    MPM-Summer
  • Tips and Ideas for DIY Home Improvement #GuestPost

    Tips and Ideas for DIY Home Improvement #GuestPost

    It’s been a few years and a lot of ideas plus actual DIY’ing going on for Mark and I. The following article was submitted to me, and I wanted to share with you. Danielle has some great tips for improving your home on a budget.

    Tips and ideas for DIY Home Improvement

    Depending on the rooms that you are renovating, there are many ways you can update and improve your home without breaking the budget. Doing it yourself will save you your hard earned cash and create a home that is truly your own; one that is distinctively your style.

    The first thing you have to decide on is the look and feel that you want for your improved home. Modern chic, cottage cosy or traditional, the style will impact on the colors you choose to paint with, what fixtures you use and the furniture you choose. 

    A tropical aqua paint gave inexpensive wood cabinetry an appealing, authentic look in this Key West, Florida, kitchen.
    image courtesy of my home ideas

    For bedrooms, Avoid big blank walls; it will make a room feel under-scale and empty. Fill a large wall with an extra-large piece of artwork. If your bedroom doesn’t get a lot of natural light, don’t cover up the windows with heavy treatments. Consider sheer curtains to help keep the room bright. Your nightstands don’t have to match. If you prefer a feminine style and your partner likes a more masculine look, choose different ones. Add high-style artwork to your walls with wall decals. You can buy geometric shapes or even nature-inspired wall decals, like whimsical trees, fun silhouettes of chandeliers or even dogs. Your local hardware store, such as Sunlite Mitre 10, will have a lot of these options so when you decide to renovate, you can get everything you need in one place.


    (function(d){
    var f = d.getElementsByTagName(‘SCRIPT’)[0], p = d.createElement(‘SCRIPT’);
    p.type = ‘text/javascript’;
    p.async = true;
    p.src = ‘//assets.pinterest.com/js/pinit.js’;
    f.parentNode.insertBefore(p, f);
    }(document));

    Unique Nightstands
    image courtesy of HomeGoods

    For the dining room consider using candles instead of pure overhead lighting. Try introducing a subtle scent into the main area of the house to welcome guests and your family after a hard day at work. Instead of buying a whole new dining setting, try reupholstering your beloved dining chairs.


    Bathrooms are often overlooked as renovating them can be quite expensive, but there are some affordable ways to improve your outdated bathroom. Try changing the mirrors to a different shape or changing the light bulb and fixture to something more subtle and inviting. Match up bath mats and rails to create a modern or classic look. You don’t have to pull out the bath to create a new feel.

    Author Bio:
    Danielle Mcann is a copywriter working with SunliteMitre10. When Danielle’s not writing content she enjoys swimming, shopping and taking her Golden Retriever dogs for a walk

  • Reupholstering a Patio Chair

    Reupholstering a Patio Chair

    Awhile back I shared with you my list of DIY projects for the year. One of them was going to be my first ever upholstery project. I was scared of killing these beautiful frames on the chair, but I could not live with the original fabric. 
    Mark thought the chairs were all together ugly, and just wanted me to get rid of them. I couldn’t do that either though. The metal frame, scroll detailing – these were my dream patio chairs that I knew I could never afford new. We got lucky and the previous owner of our home left the beauties behind. 
    The first thing you want to do when reupholstering something, is find out how it was put together. Turns out these chairs were a lot simpler than I imagined. The seat cushion simply sat inside the frame, no screws, nails or glue. The back also was simple with just four 1/2 inch screws holding it in. Although one chair was held together with wooden pegs…
    Next step, figure out the upholstery. A quick examination of the cushion found that the fabric was just stapled along the bottom of the seat. Since you never see the underside of the cushion, it made perfect sense. Using a flat head screwdriver I began prying out the millions of staples, only to discover the red was already a reupholstered job!
    I have to admit, the red definitely looked better than this orange fabric! Even without the rip in it.  Now I had to remove more staples from this layer of fabric, but thankfully this was the original, or at least last layer before the cushion. 
    Once I had the bare cushion to work with, I measured twice before cutting my fabric. We bought this yellow canvas material for some outside cushions years ago, but I never got around to making them. Since the chairs are going to be a permanent outdoors fixture, I wanted the material to be easy to clean, and hold up to harsh weather conditions. It really turned out perfect. The corners were a bit rough to get around, and the seat back was extremely tight pulling on, but in the end, I am very pleased. 
    Unfortunately I only had enough material to recover 2 of the 4 chairs. So my question is – should I find some similar yellow canvas, or something new for the other 2?  
     And by the way – Mark now loves the chairs and is pretty happy I held onto them. His reaction was really the best part for me – a nice pat on the back that even though he may not like all my design and DIY attempts, he does like some! 
  • DIY Repurposed Roller Shade: Instant Kitchen Facelift

    DIY Repurposed Roller Shade: Instant Kitchen Facelift

    If you look really closely at the left side of my shade here, you’ll see a speck. It’s no ordinary speck. That my dear readers is a squashed mosquito. Very flat too. I have no idea how long this bug was a part of the kitchen decor, but upon buying this home I knew it needed to go.
    I LOVED the roller shade though. Personally I think they are the best kinds of blinds because it eliminates dangerous cords, and they are extremely easy to pull up and down.  I digress though.  Let me tell you how I turned this into that for an easy DIY Kitchen Facelift.


    I’ll try and break down into easy steps for you – but please leave a comment or email if you have any questions.

    Measure – You’ll want to start by doing a lot of measuring. First measure the height of your window, and how far you want the shade to reach down. Then you’ll want to unroll the current shade and measure the width.  Next you’ll pick out your fabric and measure. Give yourself a 1 1/2 inch seam allowance on the sides, and a few inches on the bottom.

    Cut –  Cut out your fabric.  Next you’ll want to roll your shade onto a cutting mat on the floor. Anchor the roller so it doesn’t get in your way while you do this. Measure from the very top of the shade down to where you want the shade to end, and then give yourself another 1-2 inches (just for good measure). 
    DO NOT do what I do, and just cut off the bottom. First make sure you’re shade is straight both up and down and side to side. Then go ahead and cut off any extra of the current shade (my shade reached almost to the kitchen floor. I didn’t need that much, and I wanted to get rid of the smooshed bug).


    Iron, Fold, Pin, Hem – Go ahead and leave the old shade for a bit now. Take your piece of fabric and measure out the seam allowance. Fold at the 1 1/2 inch mark, and iron it down. This will create an easy line to follow for a finished hem. After ironing the seam, unfold it. Now you will fold the edge back in, but just so it lies on the ironed crease. Fold over again, and you have a nice finished edge.  You only need to do this on the 2 sides and the bottom. The top can be left a raw edge. Pin the folds as you go. In the corners, turn the bottom edge in at a 45 degree angle to get a more clean and professional look – just make sure the pin goes through both edges to hold it in place.

    Now you’re ready to hem it up. You’ll be sewing blindly. Just make sure you know where your 3/4 edge is on your machine, and you’ll be good to go. For my Husqvarna Viking, that put my fabric right on the edge of the presser foot.

    Position Fabric and Glue it on – You are almost done! With your roller anchored still, position your fabric on to the front of the shade (you would hate to hang it up, and realize you put the pretty fabric on the wrong side, wouldn’t you?).

    The side edges will go right up against the side of the old shade. Only the bottom will fold under to the other side. Once you have the fabric positioned, make sure it’s laying out flat. You’ll see why a little further down…

    Start with the top edge and using fabric glue, glue the edge down. Let it dry before moving down the rest of the shade. If you want, and I think if I ever do this again I will do this, use a sponge brush and smear fabric glue across the rest of the old shade. Lay down your new fabric and press flat. Let dry.
    Or do what I did do, and just glue the edges…

    Once the front if completely dry, flip your shade over, and turn the bottom edge over. Glue down.

     
    Reattach the original, or add a new pull ring for easy up and down action.
     
    Voila You’re Done!
    Unless of course you made the mistake I did, and you now have a bubble of fabric after rolling the shade up.
     
    If this happens to you, find a coordinating fabric and add a decorative strip to cover it up. Just use the fabric glue sparingly here, or you will end up with some spots (DOH!)
    
     
    I hope you found the tutorial helpful. If you have any questions on this tutorial please leave a comment or send me an email.
     
    I would love to have you join me on Facebook and Twitter, where I frequently talk about other home designs, and share photos of in progress projects.