Category: cleaning

  • Summer Car Care Kit and DIY Air Filter Change

    Summer Car Care Kit and DIY Air Filter Change

    This shop has been compensated by Collective Bias, Inc. and its advertiser. All opinions are mine alone. #SummerCarCare #CollectiveBias

    Summer is coming, and with it a couple of fun trips planned. Make sure your car is in tip-top shape with this checklist and Car Care Kit.
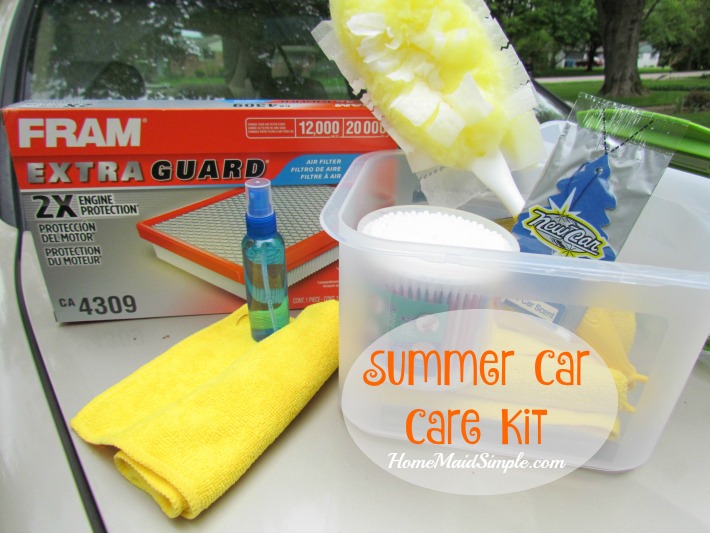
    Get ready for travel with this Summer Car Care Kit. #summercarcare ad This summer we’ve already got a number of trips planned, but the one I’m looking forward to the most is just Mark and I headed to Chicago for SoFabU On the Road. It’s going to be a blast and a half! The only problem is, we’ll be leaving my car for my mom to use with the kids, and taking his car. So what’s the problem, Adelina? Well, Mark practically lives in his car with the hours he works, and it’s gotten to be a bit of a mess. 
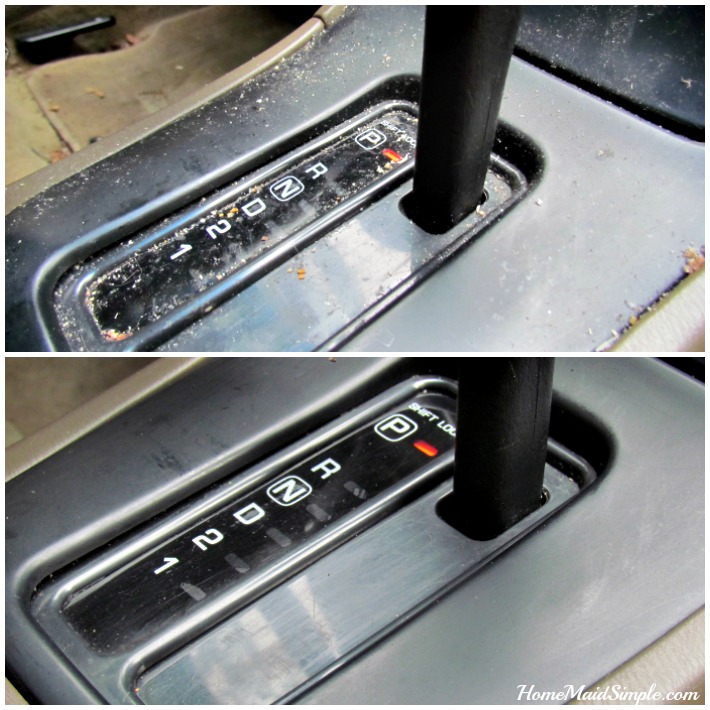
    Clean our the car for a summer of fun! #summercarcare #ad With Fathers Day around the corner, and our trip shortly after that, I thought I’d be a nice wife and do a little car care for him. I started by putting together a car care kit, and then replacing the air filter.

    The kit is small and fits nicely in his car, and will maybe remind him to clean up at least once a week. Here’s what I put inside –

    • Microfiber Towels
    • Q-tips
    • Duster
    • Air Fresheners
    • Ammonia/water spray

    For a decent car detailing, this is all you need!  Fill a spray bottle with 1:1 Ammonia and Water. Use the q-tips to clean in small crevices around the car, and the microfiber to wipe down larger surfaces. You can also use this mix on the windshield and windows for a clear driving experience. Don’t forget to hang an air freshener to keep that new car smell. 

    Keep the new car smell with this Summer Car Care Checklist #summercarcare #ad After you clean the inside of the car, don’t forget under the hood! There are a few simple things you can do at home, to keep your car running smoothly, and changing the air filter is one of the easiest. I prefer the FRAM filters, for the air and my oil.  Clean air in the engine keeps his car running smooth, and is really the engine’s first line of defense.

    First, locate the air filter container in your car. Refer to your car’s owner manual if you need help finding this. Open the filter box, and remove the old filter. 
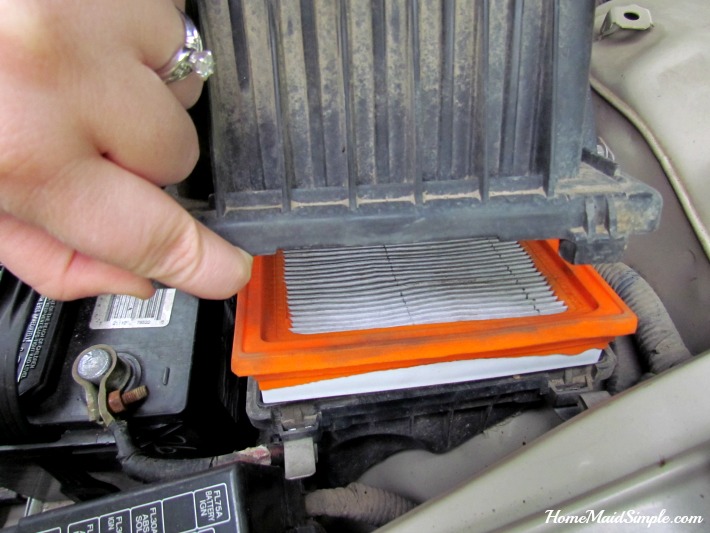
    Replace air filter for a clean drive #summercarcare #ad The filter on Mark’s car is a simple latch, so I didn’t need any special tools. On my car, it’s held down with screws. Either way, you don’t need any expensive or weird tools to complete this, and it hardly takes 5 minutes to complete. Once you have the old filter out, replace with a new FRAM air filter from Walmart. 
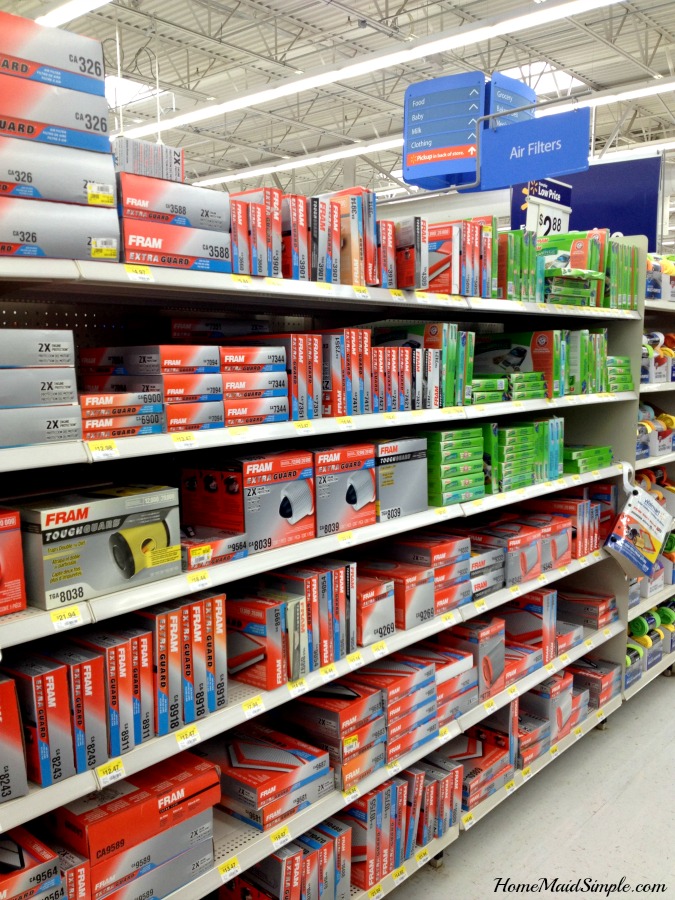
    Find FRAM Air Filters at Walmart #SummerCarCare #ad The trickiest part of this whole process for me, was getting the air filter box closed again. In mark’s car, it’s in a tight spot, so I kept pushing the filter out one side while trying to close it. Don’t get discouraged, though! Just make sure you watch all sides, so your filter is properly contained before securing the filter container.
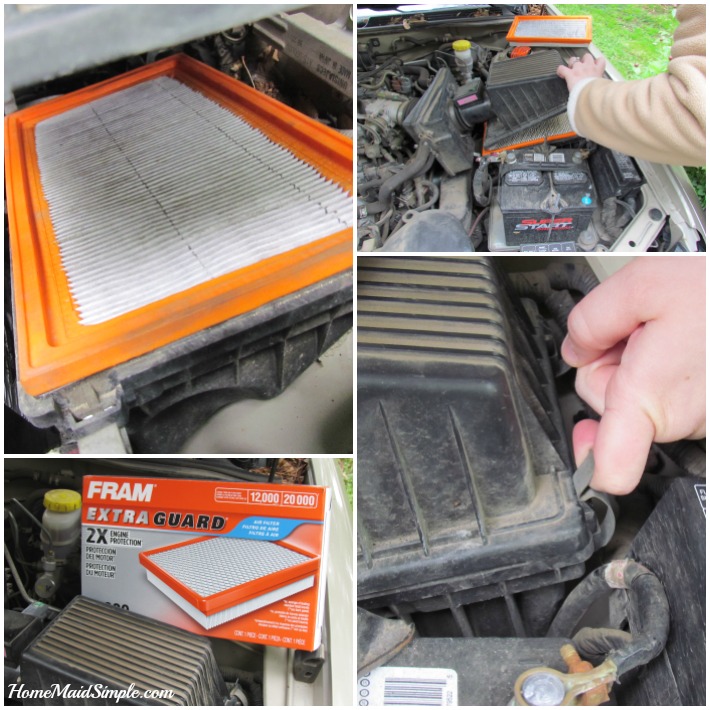
    DIY Car Air Filter Change #summercarcare #ad Having a clean air filter will improve your car’s performance overall through better horsepower, and increased acceleration which I know Mark will love! Similarly to how I can now love sitting in his car because the inside is clean too! 

    You’re almost ready for a summer trip now! Before you go, make sure to check the oil, and get the kids involved with a car wash. Finally, you are ready to hit the road in a clean car, from inside to out. I can’t wait to hit up Chicago with Mark now!
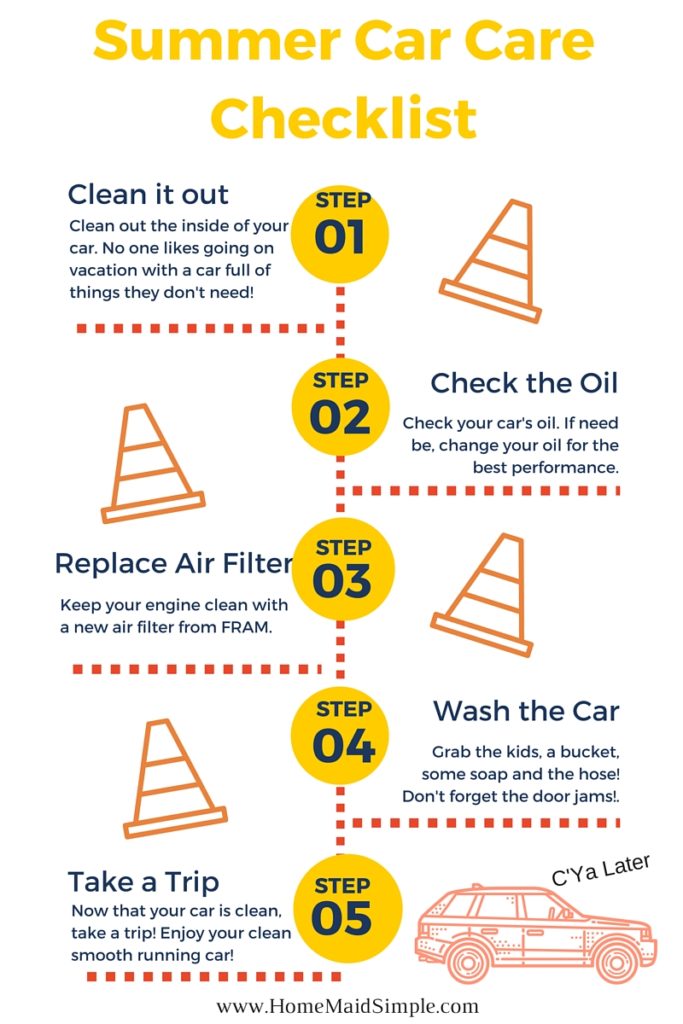
    Printable Summer Car Care Checklist #Summercarcare #ad

    **Right Click to Download and Print this Checklist**
    Where are you headed this summer? Check out these other Summer Car Care tips before you go!

  • Spring Clean the Tools that Clean for You

    Spring Clean the Tools that Clean for You

    #SpringtimeCleantime  #CleanFreakClean

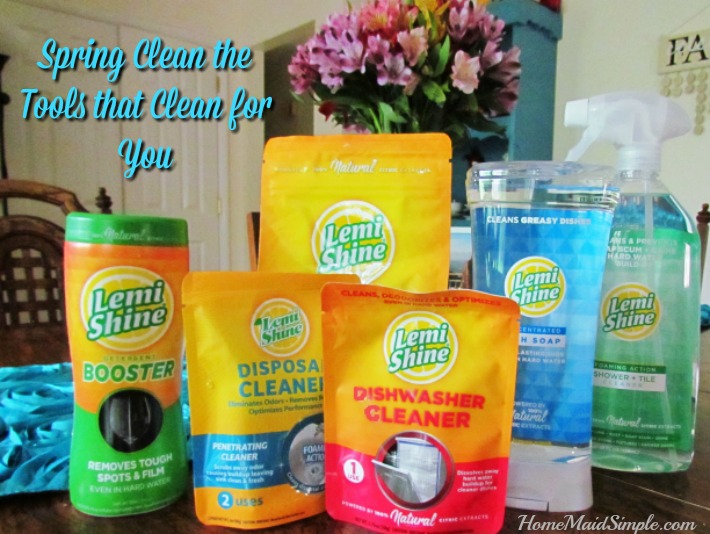
    You probably all know how much I love Spring Cleaning. It’s probably one of the topics I talk about most, at least during this time of year. Have you ever thought about Spring Cleaning your appliances? They work hard all year long to clean for you, it’s time to give back and spring clean the tools that clean for you. 

    Spring Clean the tools that clean for you with Lemi Shine. ad

    Get a Lemi Shine Coupon

    I recently came across Lem Shine products and knew I was going to love them. Citric Acid is a fantastic natural cleaner, but I have a hard time cutting up a lemon and using it to clean instead of eating it in say, a nice tall glass of Lemonade. Lemi Shine is powered by 100% natural citric extracts, making their products both effective and safe to use. 

    Lemi Shine products are Clean Freak Approved! ad #CleanFreakClean #SpringTimeCleanTime

    See, in my house, I have a lot of spring cleaning helpers. There’s my kids of course – 4 of them. They are fantastic little cleaners….well, I like to believe they are at least. We’re working on it. For sure they can help with the dishes, so they often get put in charge of rinsing the dishes and filling the dishwasher. They are OK with this chore as long as I let them put in the soap. 

    Clean your dishes with Lemi Shine Detergent. ad #CleanFreakClean #SpringtimeCleantime

    Find Lemi Shine near you

    Truth is, with Lemi Shine products I could put the kids completely in charge of spring cleaning the whole house and I wouldn’t have a single worry. I could sit back with that glass of Lemonade and really enjoy myself! I’m a Mom that leads by example, though, and have a tendency to be a bit of a clean freak when it comes to the deep spring cleaning. I want everything done just right so I can leave it alone until next year. 

    Clean the appliances that clean for you. ad #SpringtimeCleantime #CleanFreakClean

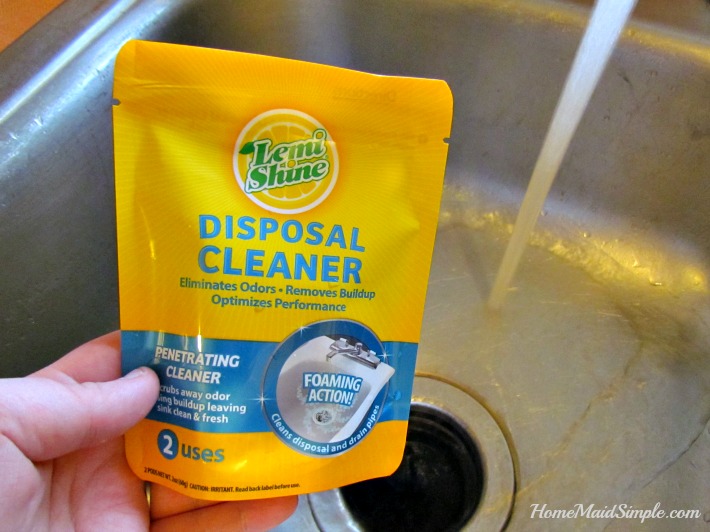
    I get down and gritty with cleaning the grease spots on the undersides of cupboards, the window screens and tracks that have picked up all that winter grime, and it’s the perfect time to make sure my appliances are in tip-top shape. Lemi Shine Dishwasher Cleaner and Disposal Cleaner are my go-to kitchen appliance cleaners. They get in the spots that I can’t reach to make sure my everyday cleaning is actually clean.  

    Have you tried Lemi Shine yet? Tell me about your #SpringtimeCleantime in a comment.

  • Spring Clean your Closet

    Spring Clean your Closet

    Spring is here, and in this home it means spring cleaning of all kinds! Today I want to talk about spring cleaning your closet.

    I’ve been slowly working my way through Marie Kondo’s The life-changing Magic of Tidying UpOne of the key messages I’ve taken from it, is that things we own should spark joy. If it doesn’t bring us joy, and it doesn’t serve a useful purpose, we should get rid of it!
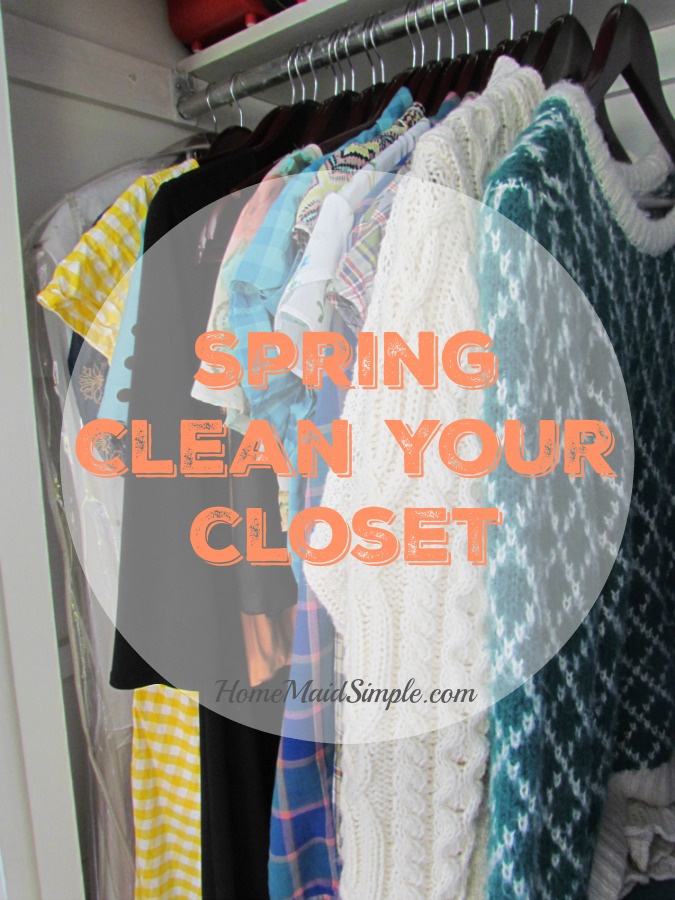
    I decided the best place for me to start applying this would be my closet. It wasn’t quite spring, but the weather around here has been pretty nice. So the windows came open, and I started pulling all my clothes out and stacking them on the bed. Unlike a lot of people I know, I don’t really own a lot of clothes already, but the ones I do own were not sparking joy. Very little joy was sparked when opening my drawers actually. 

    Awesome tips to help spring clean your closet.

    Spring Clean Your Closet

    Wash everything. 

    Start by washing everything! The worst thing to do when spring cleaning anything is doing it in shifts. You don’t want to go through your clothes and then add items back in that you haven’t had a chance to go through. I know it’s easy to say you’ll just do it as you wash them, but I’ve been there, done that. It doesn’t work nearly as effectively. 

    Pull it all out. 

    Once everything is clean, pull it all out! Lay it on your bed, couch, middle of the floor – as long as it’s clean – so you can see it all. Go ahead and grab your shoes as well! You know you’ve got some you don’t really love. 

    One at a time. 

    Don’t worry about sorting the clothes into tops, bottoms, dresses, jackets, socks, etc. Just dive right in! Pick up one item. Hold it up. Inspect every inch of it. Try it on if you need. Then ask – does this spark joy? Does it make you feel like you, the real you when you wear it? Does it fit? Are you holding on to it for memory sake, or because maybe one day it might fit again? 

    Separate.

    After asking yourself all these questions, you have one last question to make. Do I keep it, or get rid of it? Then separate it into it’s respective pile. Have a box or bag handy so the “get rid of” pile, as we call it here, can be taken out as soon as you are done. The more it hangs around the house, the more likely you’ll have a hard time really letting go of it. 

    Clean out your closet with ThredUP

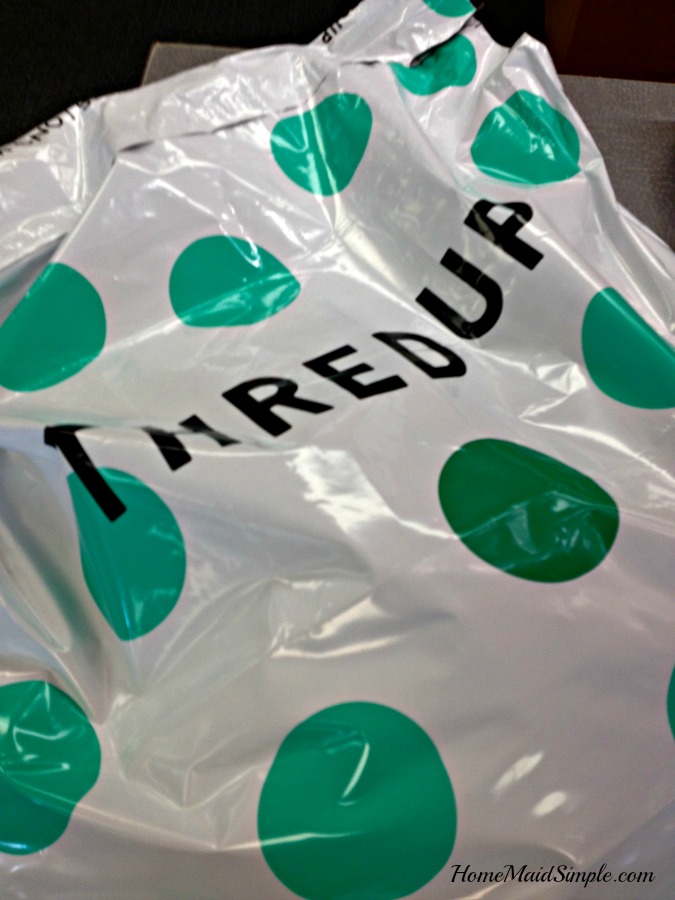
    I had ordered a Clean-Out Bag from ThredUP, so once I was done I nicely folded my clothes, placed them inside the bag, and sent them off to ThredUP. Out of about 20 items I sent, they were able to resell 4. Not too shabby, and I knew that would probably be the case. What I love is that the rest of the clothes I sent will be given to textile recycling companies so nothing will end up in landfills. 

    Try ThredUP on me! Sign up and get an automatic $10 to spend! It will also give me $10 to spend, so you know, help a girl that’s lacking in cute clothes out. 

    Now that your closet is cleaned out, you can buy a few new pieces that DO spark joy! What will you buy? Are you inspired by the flowers in bloom, or does you closet contain more neutrals?


    This post is part of a blog hop from Blogs & Business: Moms Who Do It All. Check out some of the other awesome blogs participating:

    Daily Momtivity | The Art of Better Blogging | The Jessie K | Fighting for Fitness | Building Butterflies | Forty by Forty Fitness | A Kreative Whim | Women Winning Online | Hometown Betty | Champagne and Cheerios | B is for Bookworm | Aileen Cooks | A Cotton Kandi Life | Beyond Mommying | Home Maid Simple | Tot Tot Goose | Thrifty Guardian | Diary of a New Mommy | Mrs and Momma | Blue Eyed Babies | The Little Tourist | From Designer to Diapers | Mommy, Memories and Mouse Ears | Redmond Kids | Cheer and Cherry

  • 5 Places You Wouldn’t Expect to be Vacuuming #EurekaPower #shop

    5 Places You Wouldn’t Expect to be Vacuuming #EurekaPower #shop

    I am a member of the Collective Bias® Social Fabric® Community. This shop has been compensated as part of a social shopper amplification for #CollectiveBias and its advertiser. #EurekaPower
    5 new places to use your Vacuum #EurekaPower #shop #cbias


    When Mark and I first got married, I was pretty good at vacuuming once a week, whether it visibly needed it or not. As adults we kept our floors clean from most crumbs and spills, and since we spent most of our days at work and school, there just weren’t a lot of messes to clean up 
     
    Then we had kids. 
     
    I kid you not, kids are messy. Even if they have a desire for clean things, they just seem to spread crumbs everywhere. I don’t like to stereotype, but it really wasn’t too bad – if you don’t count our flour escapade – until we had a boy. That or it’s our small living space that seems to have made things extra messy – I’m pretty sure I can attribute the food everywhere to the little Prince though. 
     
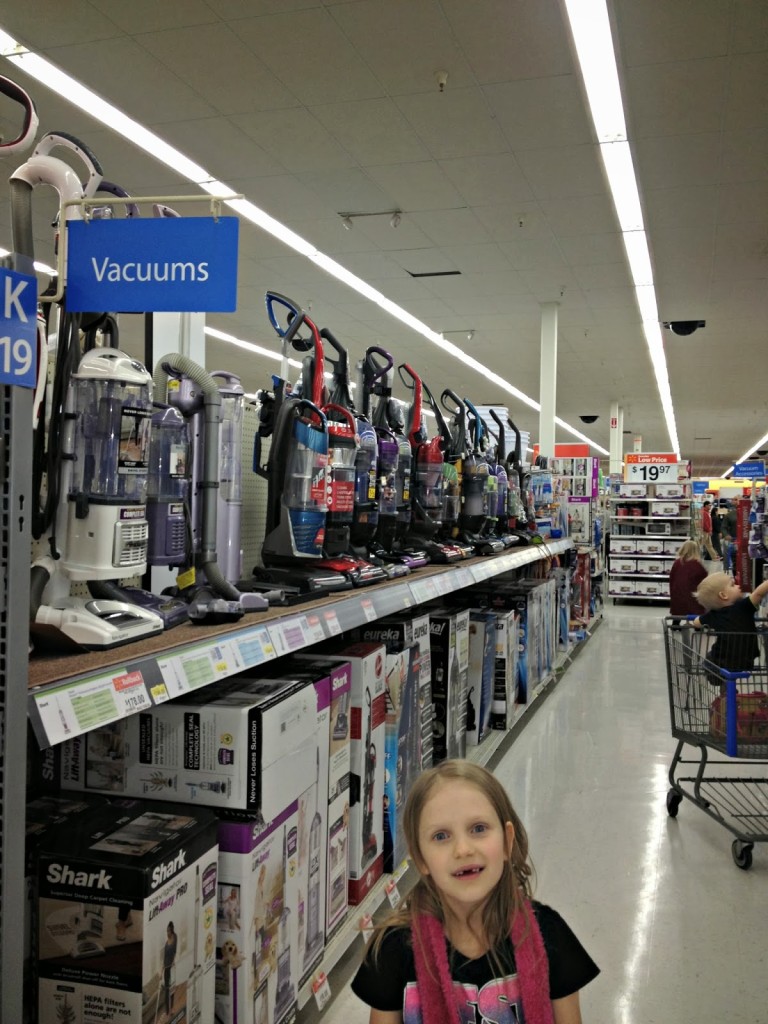
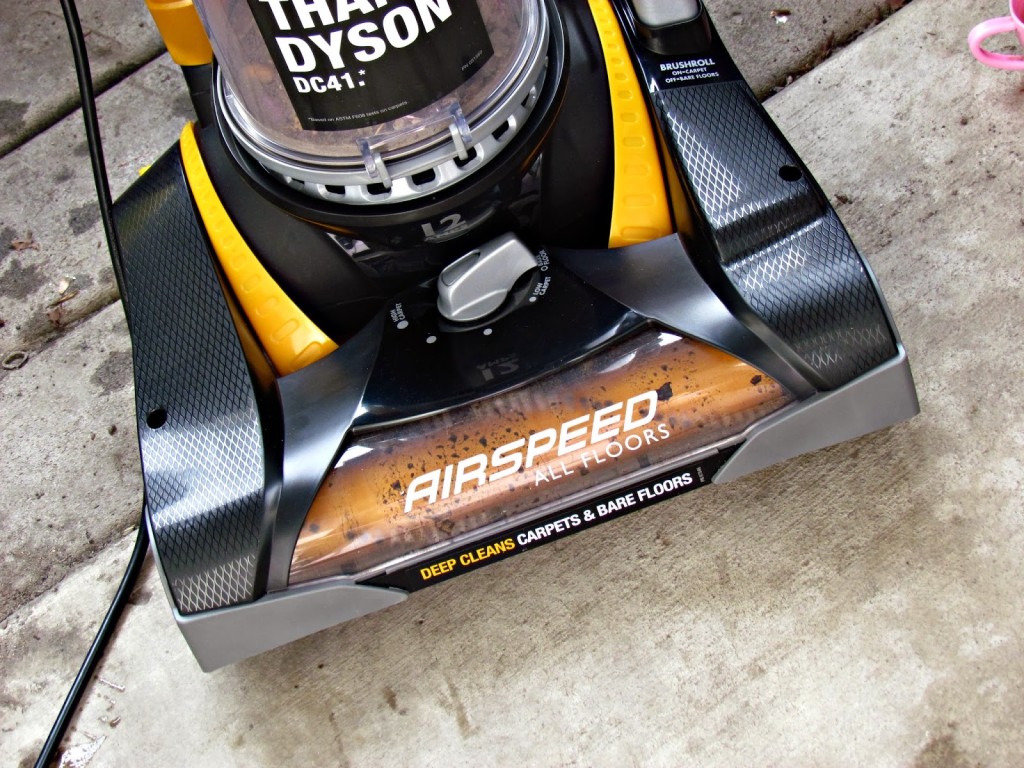
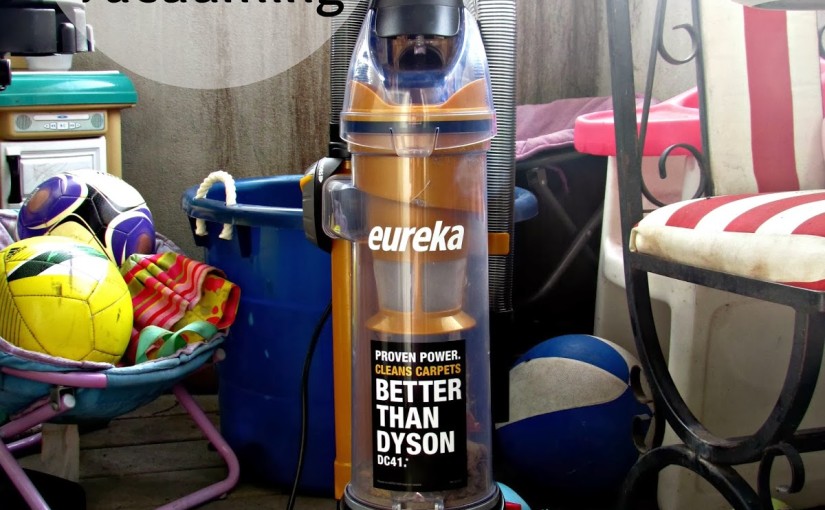
    I finally decided I needed a vacuum that could help me clean everyday, instead of once a week. Something lightweight, but with enough power to clean every nook and cranny in the house. I headed out to Walmart to purchase the Eureka AirSpeed All Floors one night at 7pm, the only sane time to take 4 kids alone to look at vacuums.
    Vacuum buying at Walmart #EurekaPower #cbias #shop
     
    Once we had the vacuum at home I could not wait to start using it. It had every feature I wanted plus some!

    • Lightweight. It even has a carrying handle on the back that our previous model did not have. 
    • Less bulky. The canister is slimmer, making it easier to push around, and store inconspicuously in our small apartment.
    • Multi-surface. Comes with all your regular vacuum attachments, plus the added feature of turning off the floor brush for bare floors.

    Now don’t shake your head at me, but do you realize just how awesome vacuums are, and all the places they can clean if you have the right kind?   

     
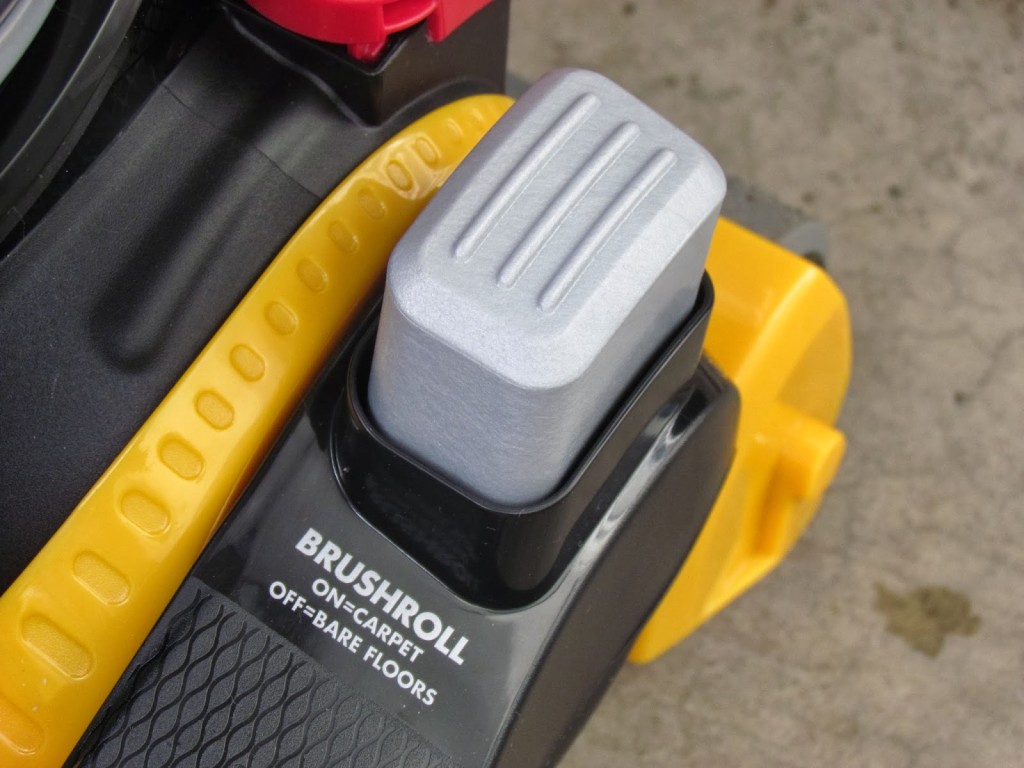
    Kitchen – This might be a place you already use your vacuum. Of course it makes sense if you’ve got carpet in your kitchen – but you all know how I feel about that! – if you’ve got tile or linoleum or even hard wood floor, a vacuum might not be your first go to tool for cleaning. If you want to vacuum your hard floors without ruining them, look for a vacuum that can turn off the brush and has a bare floor setting. By turning the brush off you’ll take away the chance of scratching your floors, or just spreading the crumbs around.  
     
    Vacuum Brush turns off! #EurekaPower #shop #cbias


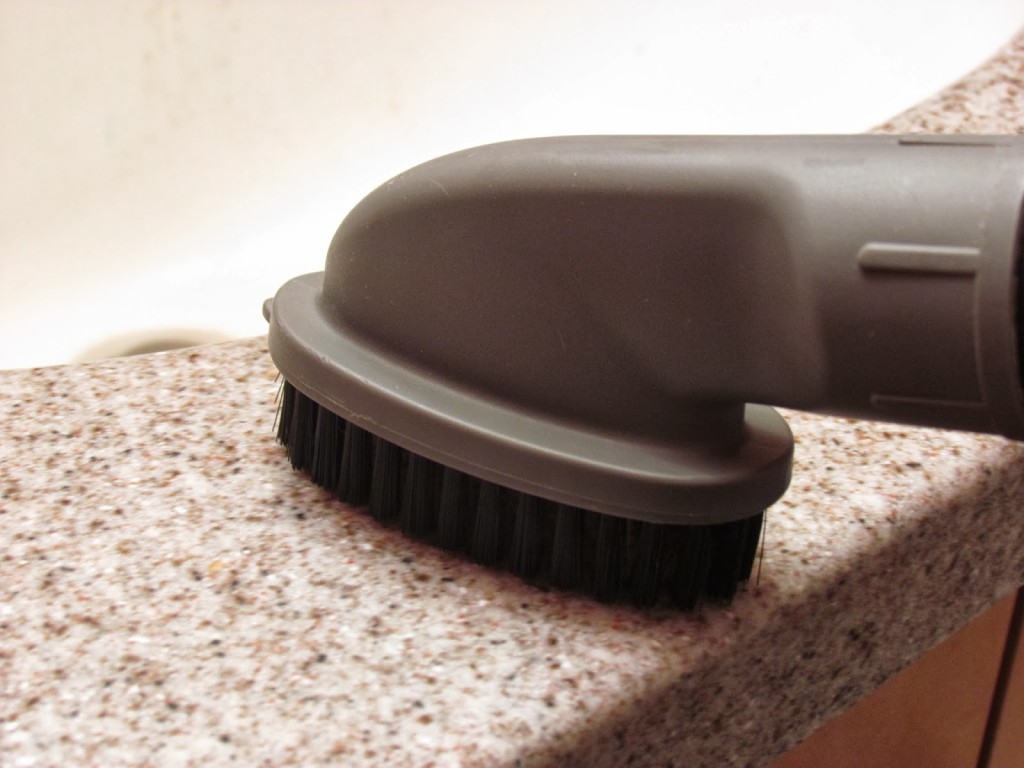
    Bathroom – I was talking to my sister recently, who does not own a vacuum and neither do her roommates – crazy kids – and asked her if there was one place she’d use a vacuum where would it be? Her response – to get all the hair out of the bathroom. YES! Oh so yes! With 3 girls, our bathroom gets covered effectively in hair, and bits of toilet paper, and yes…more spit out food because hey mom won’t yell at me if she can’t see me doing it… Since the vacuum will be sitting in one spot on what we’ll assume is a hard surface, you’ll want to turn the brush off while you use the hose for the counter tops. You don’t want to wear a hole through the floor from a constant pounding (which I may or may not have experience with)


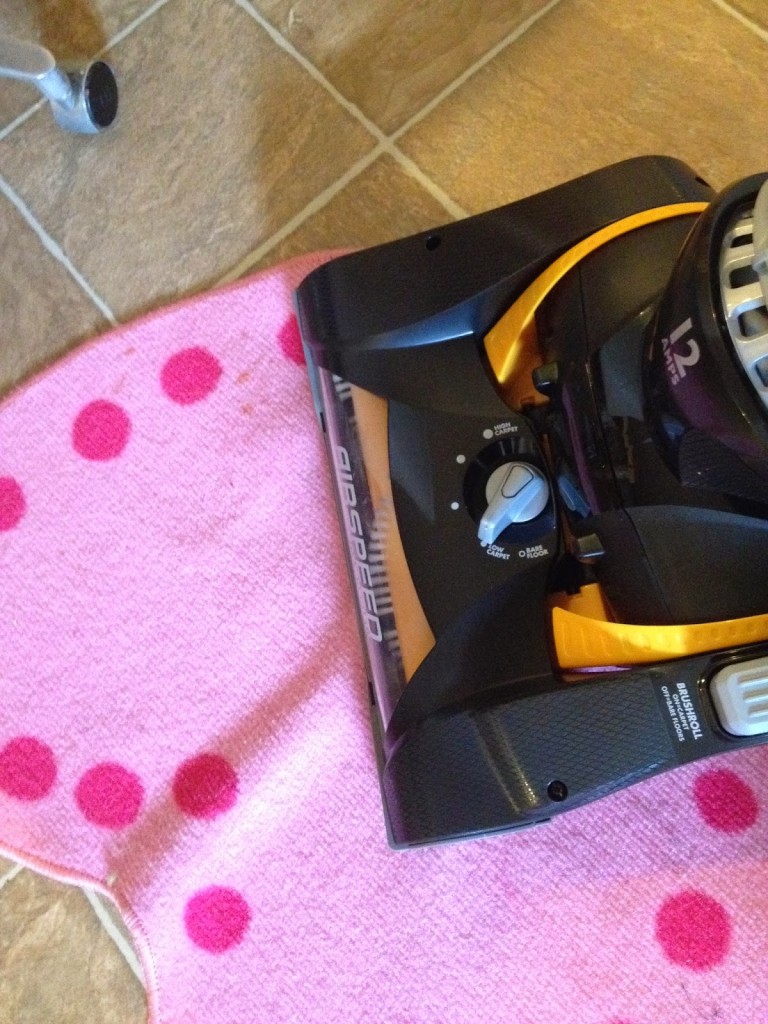
    Multi-Surface – My absolute favorite feature of the Eureka AirSpeed All Floors is that I can vacuum across two surfaces at one time.  Normally you want to avoid different surface seams,  but when you have multi-surfaces in your home, it’s hard to avoid those, while still keeping them clean. One good example would be area rugs. My poor rugs have turned up corners from vacuum brushes pulling them in as I try to get them clean. With the ability to turn off the brush, I no longer have that concern. 
    Multi Surface Vacuuming #EurekaPower #cbias #shop
     
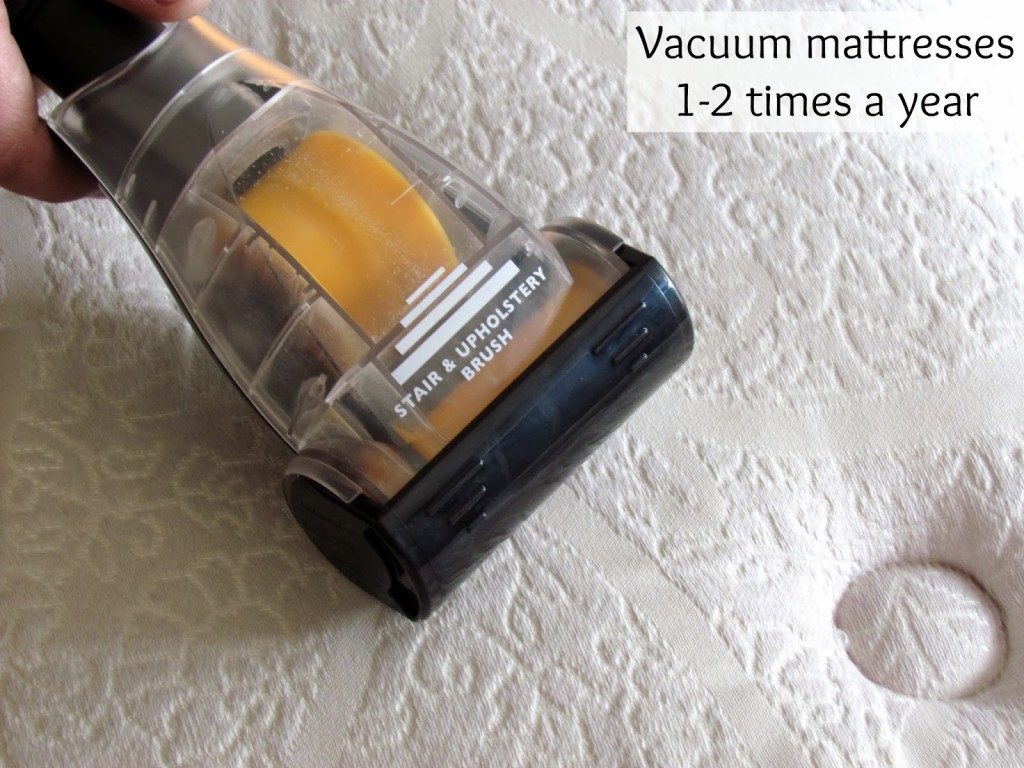
    Furniture and Mattresses – We all know to look for spare change in the couch, but if money can fall down there, so can everything else. The hose attachment is great for cushions that can’t be removed, while the stair and upholstery brush is perfect for the cushions themselves. These same tools are great for your bed mattresses as well. You should clean your mattresses at least once, if not twice a year. I like to periodically pour baking soda on the mattresses, let it sit for a couple hours and then vacuum it off. Truly my best friend on the vacuum is the stair and upholstery brush. The suction from the AirSpeed assures me it’s giving the mattress a nice deep cleaning as well.
    Clean mattresses 1-2 times a year #shop #EurekaPower #cbias


    Concrete – No I am not kidding you!  I know there is someone out there with a concrete basement, probably working on making it a place for the kids to play. It’s probably not an area you worry about cleaning frequently, but when you do, a broom just kicks up the dust. With the AirSpeed All Floors I was able to vacuum our concrete patio, and wow! I can’t sweep out there very well because we’re in the basement, and then there’s all these cracks where it changes from concrete to wood planks. The kids love playing out there, but I hate how dirty it is. I’ll be honest this was a total experiment – but it was one that worked!  Disclaimer: Do not use your house vacuum on wet surfaces! Use a wet vac for any water messes. 

    Vacuum your concrete floors #EurekaPower #shop #cbias


    Ceiling Fixtures (BONUS! in case you were counting)There once was a time I looked up and decided my ceiling fan needed a serious dusting. Not wanting to spread the dust onto the floor, I thought to myself “Adelina, why not try the vacuum hose?” So I did just that. Albeit slightly difficult with this cutie turning it off, it worked amazingly well. 


    The only thing that would have made this first attempt easier was if I had a longer hose on that vacuum. The Eureka AirSpeed All Floors has a total reach of 39 feet. The hose itself making up 12 of those. When you add on the attachments, you’ve got a nice reach going on. We no longer have any ceiling fans, but now I’m dreaming of spring cleaning our recessed lighting all with a vacuum.

    Where would YOU use your vacuum?
  • Tips for Kids Sharing a Bedroom

    Tips for Kids Sharing a Bedroom

    Not every home has the space for kids to have their own bedroom. If you’re one of those families, check out these tips for kids sharing a bedroom in this guest article from Nicole at Confident FoundationThis post contains affiliate links, and I will receive compensation if you make a purchase after clicking on these links. 

    How to Successfully Have Kids Share a Small Room  
    These days it might seem that having a room all to themselves is a right of passage for kids just as soon as they are born, or at least as soon as they get old enough to ask for one. There are many advantages to having children share a room, however, even when you have to tackle challenges like having a boy and girl together or fitting everything into a small space. Here are the best tips to make the most of a small, shared room to maximize the potential and minimize the bumps! 


    Store and Organize Vertically 

    In small rooms, floor space is especially tight, and if you’re needing to fit in two beds it becomes even more so. Of course, there’s always the old standby of the bunk bed that you can turn to, but often when children share a room they’re too young to be sleeping in a bunk. How to Successfully Have Kids Share a Small Room

    One of the best ways to store and organize vertically is by utilizing bookshelves for far more than books. Bookshelves can be used to store toys, books, games, and with the purchase of a few baskets even essentials like diapers and clothes! You’ll be amazed at how much more clean and open the room feels if you add in a few large book cases. Far better than huge toy boxes, with shelves things are easy to see and access, making it much more likely that they will actually get used. Be sure to secure them to the wall with brackets, not just straps, in order to ensure the safety of your little monkeys! You might also consider having a small step stool in the room to help them reach high shelves, rather than climbing on the case itself. Another option is to secure many different shelves to the wall at different heights. 

    Take Full Advantage of Closets

    When it comes to children’s clothing when you hang them up they are considerably shorter than adults and leave a lot of empty space underneath. Be sure you’re taking full advantage of this space by also thinking vertically in the closet! There are a couple of different ways you can do this–for example:

      How to Successfully Have Kids Share a Small Room

    In my son’s closet, I again took advantage of shelving options by adding in a small case and storage bin. On the side of the storage bin are sacks with all their blocks. This is a great place to store things like games, puzzles, doodle pads, and more! Since in my daughter’s closet I don’t have as much empty vertical space I turned to boxes. Using two empty cardboard boxes we did a few different craft projects and created a dress up clothes and dress up accessories trunk. It keeps all the tutus out of the way most of the time, and gives me an easy way to haul them out into whatever room I want when it’s dress up time!

      How to Successfully Have Kids Share a Small Room

    Maximize Your Space Options 

    When you’re considering how to tackle storage for clothing take stock of what you have available. If you have large closets and one dresser, hang all the clothes that you possibly can. If you have the opposite hang only clothes that would get wrinkled easily. Store all the rest in drawers or on shelves.For the clothes that you have in drawers and baskets, roll them — don’t fold them! You might have learned this trick for traveling but it works just as well for everyday life too! It’s amazing how many more size 4T pants you can fit into a drawer when they’re rolled rather than folded and piled on top of each other.

      How to Successfully Have Kids Share a Small Room  

    Store extra blankets, out of season clothes, and clothes that are too large for the moment underneath beds.

    Less Really is More

    When you have little space to work with embrace simplicity. It’s far too easy to allow the room to become overly cluttered and chaotic feeling. Box up any toys that aren’t currently being used and loved. Set a reminder in your calendar to swap them out in 6 months. Teach your children of keeping only things that they loved and enjoy. Each time you rotate toys help them pick out any they would like to donate or sell. This also applies for books–although it might be hard to think you could have too many books they can quickly overtake a room. You can always take advantage of your local library to continually have fresh books in your home without it eating up all your space. 

    Let Them Express Themselves 

    Let each child have at least one “wall” for themselves. On it you can hang decor they like or that fits their personality. Although gender-neutral colors work best when you have a boy and girl together, they can still use their favorite things without it clashing. For example, walls themed with flowers are a nice offset to Planes, Trains, and Automobiles. The most important thing is to let them have a space they feel is all their own–and less about making it to the cover of Better Homes and Gardens. 
     
    About the author:

    Nicole Elliott is the girl behind Confident Foundation (previously  Wyoming Girl turned…) where she blogs about Organizing in Small Spaces, Parenting, Recipes, Travel, Beauty, and whatever else tickles her fancy that day! She has moved cross country 6 times in the past 8 years and her two children have successfully shared a variety of small rooms since her son was born in 2010.


  • Healthy Child Healthy World with Seventh Generation

    Healthy Child Healthy World with Seventh Generation

    *Last week I had the opportunity to speak with representatives from Seventh Generation, Healthy Child Healthy World, and The Motherhood. Compensation was given. All opinions are 100% my own*

    I just have to share this video with you all. It brought back a lot of memories of my childhood before making me realize just how different the world has become for our children.


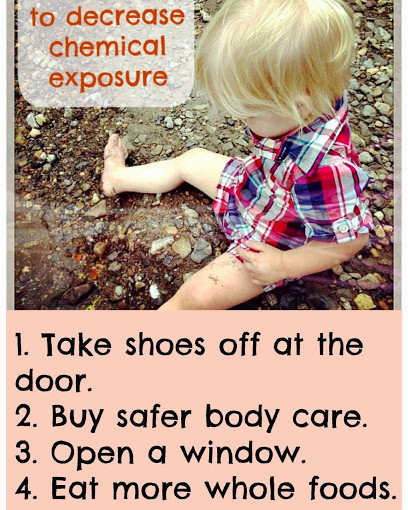
    Staggering, isn’t it? I remember going out and running through our wooded backyard without a care in the world. I often went outside without shoes on, and it was OK!  
     
    What really got me thinking, though, and really re-evaluating the everyday products I buy and use in our home was this next stat –

    In the European Union 1,328 chemicals have been banned from use in personal care items. Only 11 have been banned OR restricted in the US.

    Isn’t that crazy?  At first you might think, those Europeans just like to restrict things, they’re overly cautious. But really let’s think about it. Surely with a 1,317 difference, there’s got to be some more substance to it.

    I know I’ve shared multiple “green” cleaning products with you in the past, but truth be told, my absolute favorite cleaner is Hot Soapy water. I find it just does the best job, and it truly is the safest to use around the kids.

    I found a few more of these studies to be quite interesting and thought you’d like to look over them yourselves –

    • In a study of 10 minority newborns, more than 232 chemicals were found in the umbilical cords! Did you get that? Our babies are being exposed to hundreds of chemicals before they’re even out of the womb. Scary
    • In a study of 10 children’s face paints, all 10 tested positive for lead. Hello! You have to sign forms when buying an old house to make sure you’re aware that lead could be in the walls, but hey, let’s go paint some lead on our kids face. Sounds about right to me.
    • Studies have found flame retardant, Bisphenol-A, and other environmental chemicals in breast milk  Great, breast is best right? but how much are we losing that with the addition of chemicals into our lives. 
    • Consumer Product Safety Commission has recalled children’s toys and jewelry for high lead content. Shouldn’t we test this before we buy it? Before we expose our family to potentially dangerous chemicals?
    Knowledge is power right? I hope that this knowledge will inspire you to take action as well. 
     
     
    These are some great things you can do in your home, but if you’d like to get involved on a larger scale, I encourage you to reach out to your local Senators and urge them to pass the Chemical Safety Improvement Act.
     
    Did you know that the law regulating chemical use in our everyday products has not been updated in over 35 years?!  Seriously, I think that’s a bit long. We live in a constantly changing, and growing world, not to look at something so crucial as the way we use chemicals. 
     
    You can follow this link for more information on this Act and how to contact your state Senator. 
     
     
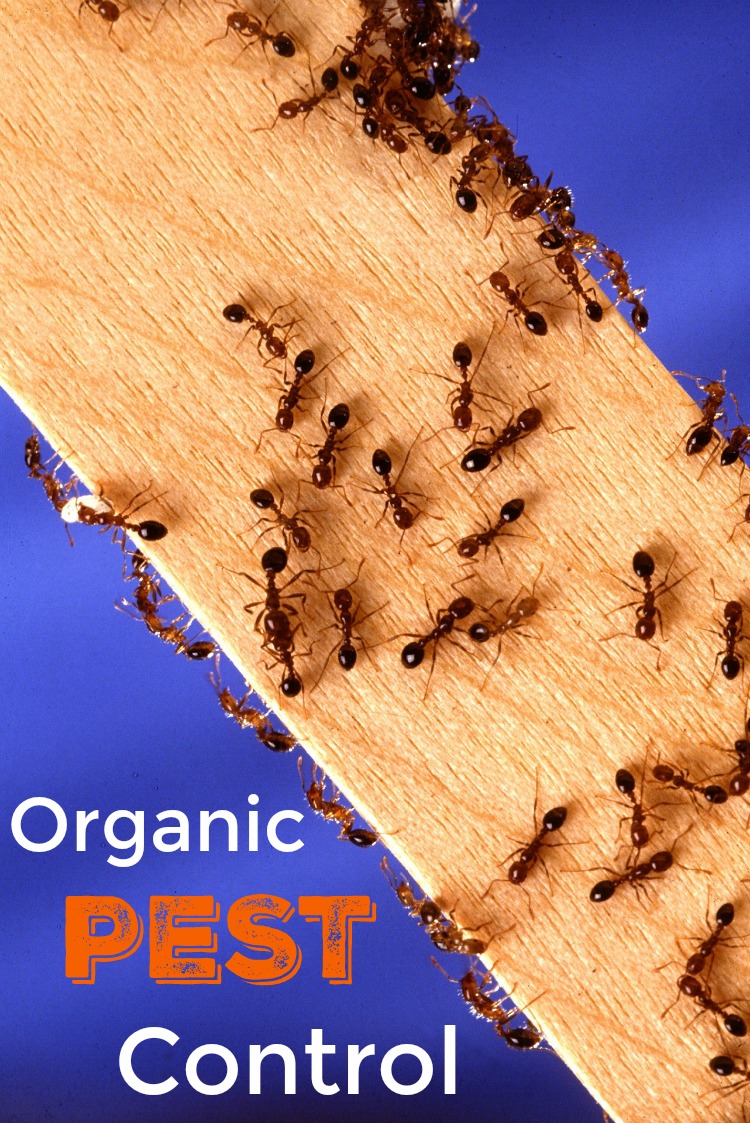
  • Organic Pest Control: A Guide for Protecting Your Home and Family This Summer

    Organic Pest Control: A Guide for Protecting Your Home and Family This Summer

    When people think of residential pest control, they often think of exterminators and their toxins. What some don’t realize is that many natural pest control options are available that are safer and more effective than the point-and-spray methods that promise quick fixes (but no long-term results). As you work through your spring and summer cleaning list, incorporate the organic pest control tips that you learn.
     
     
    What is Organic Pest Control?
     
    Residential pest control that’s considered organic or green uses Integrated Pest Management (IPM) techniques. Instead of using dangerous chemicals to repel pests or a generic pesticide to kill them, natural pest control experts:
    • Learn about the behaviors of the pests.
    • Locate nests, remove them and/or block a pest’s access to them.
    • Change the habitat in which the pests live to make them more unfriendly.
    • Use preventive techniques to prevent an infestation or re-infestation.
    • Educate others about pests and prevention.
    In lieu of harsh chemicals, IPM is all about using the most-effective techniques that pose the least risks to humans, animals and the environment. If an expert ever does need to use a chemical application, it’s only as a last resort. He chooses the chemical based on the type of pest and makes sure that
    it’s the least toxic option available.
     
    The Benefits of Natural Pest Control
     
    • Chemical control: Natural pest control doesn’t need dangerous chemicals to be effective.
    • Environmentally friendly: The use of fewer chemicals prevents toxic runoff that can affect your property, the groundwater and the local watershed.
    • Safer for the family: When you use organic pest control, it’s safer for the kids to play outside. Pesticides with toxins can pose numerous health hazards to children, like developmental delays or conditions like attention deficit disorder.
    • Safer for pets: Every year, thousands of pets die from accidental poisonings (like after eating slug bait, for example). Because natural pest control calls for the use of chemicals as a last resort, it’s safer for your pets to be outside.
    • Effective prevention: One of the big goals of IPM is prevention. It’s simpler and less expensive to prevent an infestation than it is to control one. When there is an infestation, implementing preventive techniques will prevent a re-infestation.
    Natural Residential Pest Control Tips
     
    During the summer, fleas, ticks, mites, mosquitoes, ants and flies tend to make an appearance. The good news is that you don’t have to be an expert to practice pest control at your house. Keep following your spring cleaning and regular cleaning checklist, and add the following tips:
    Tame Clutter
    Messes look like heaven to pests because they offer food, materials for a nest or a place to call home. Tackle the piles that you’ve put off for months. Recycle the stacks of paper that you don’t need. Store your seasonal clothes inside plastic boxes with lids instead of cardboard boxes.
    Clean
    Regularly dust, vacuum and clean non-carpeted floors. Pests, like cockroaches, can live off dust particles and crumbs, so this basic cleaning task eliminates a source of food.
    While you’re at it, don’t forget to wash your pets. Bathing and/or brushing your pet can help knock off pests that have hitched a ride in its fur.
    Eliminate Sources of Food
    Homes offer pests a variety of food sources and knowing what they are can help you restrict a pest’s access to them. The following is a list of food sources and solutions:
    • Tables and counter tops: Don’t leave food out in the open.
    • Kitchen sink: Avoid leaving dirty dishes in the sink overnight.
    • Floors, tables and counter tops: Immediately clean crumbs and spills.
    • Garbage cans: Dispose of food waste in outdoor garbage cans instead of under the kitchen sink. Always use the lid on the outdoor trash cans.
    • Pantry and cupboards: Store food that comes with wrappers made of paper or thin plastic, like chips, in hard plastic or glass containers with lids. The same goes for food items in thin cardboard boxes, like cereal. 
    • The garden: Don’t let produce over-ripen or rot.
    • Pet food: Put away pet food after your animal companion eats.
    Landscape Care
     
    Normal landscape care goes a long way toward preventing pests, so weed, mow the lawn and clean debris regularly. Trim back bushes around your home and cut back tree limbs that overhang the roof. Keep your gutters clean and eliminate all sources of standing water. If you have a pool or spa, keep it covered when it’s not in use. Keep the water in a birdbath fresh.
     

    Home Maintenance
     
    Immediately fix leaky pipes. Regularly inspect the exterior of your home for cracks and holes so you can fill them with caulk or putty. If you like to have the windows or doors open during the summer, replace or repair any torn or broken window and door screens.
     
    Residential pest control is a task that’s simple to incorporate into your regular cleaning routine. If you have a pest infestation in your home, or think that you do, don’t hesitate to call a pest control expert that uses natural techniques. 
     
    Looking to prevent pests during the winter? Watch this.


    Author Bio: This post was contributed by Jen McCauley, the marketing director of Western Exterminator. Western Exterminator is a leading integrated pest management company in Western Washington and Oregon that offers green pest control solutions and advice for both residential and commercial customers.
  • Spring Cleaning Day 1 – Kitchen

    Spring Cleaning Day 1 – Kitchen

     Welcome to Day 1 of the Spring Cleaning Challenge!

     Your mission, should you choose to accept it, is to Deep Clean the Kitchen.
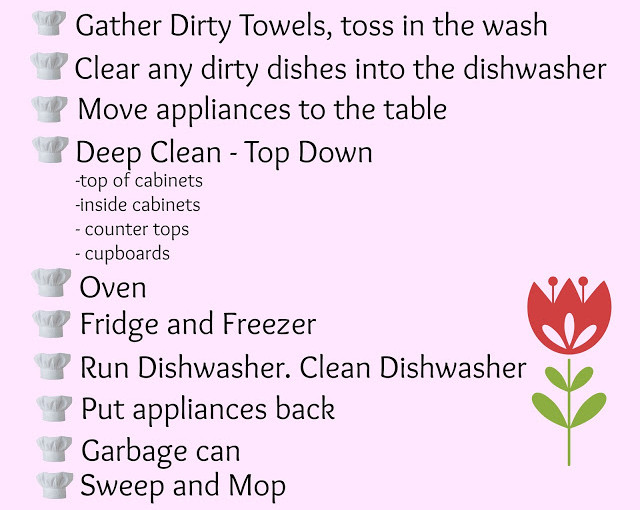
    Begin by printing off this checklist.
     

    Before I can ever get to Deep Cleaning, I have to do the surface cleaning. Any towels and dishrags I toss in the washer, then I take all the dirty dishes (you know there are always some dirty dishes), and either hand wash, or stick them in the dishwasher.

    Then clean off your table. You’ll use it for storage while you deep clean the rest of the kitchen. Move any appliances you keep on the counters to the table. Next is the real deep cleaning.

    Cabinets and Cupboards
    I suggest a ladder or tall step stool. Or if your kids are tall enough they can stand on the counters. Start with the very top of your cabinets. Of course if you’re lucky enough, your cabinets reach to the ceiling and there is no space up there to clean. If you’re like me, though, you’ve got some cleaning to do!  From there, you want to move down the cabinets. Start with one cabinet, and move everything out to the table, or another side of the counters. Start with the top shelf and wipe down, moving any crumbs from the top to the bottom. Finish one cabinet, and move to the next.  Once the cabinets are finished, wipe down the countertops and the walls behind them. Finally move to the cupboards. Do the same thing, pull everything out, wipe down top to bottom. Finish off the cabinets and cupboards by wiping down the doors.
    Before putting items back in the cupboards and cabinets – check expiration dates.  Toss out any bad food. This is also a great time to go through your Tupperware. Any lids without bottoms toss. Bottoms without lids can be tossed or re-purposed for organization in the pantry.

    Along with the counter tops, clean off the top of the stove. If you have a glass top, a product like Affresh Stove Cleaner is amazing! It’s made specifically for glass top stoves and cleans them beautifully!

    The Oven
    Now that the brunt of the work is done and the top of the stove is clean, go for the oven. If you have a self-cleaning option I suggest using it. Open up all the windows and turn your heaters down as well. It’s going to get hot!

    In a disposable bowl, pour 1 cup of ammonia. Set it in the oven and let sit all day long (or overnight).  Then wipe the grime away. For hard burned on food, you can also try baking soda and vinegar. It’s an easy, safe way to clean (and works on virtually everything).

    Fridge and Freezer
    Now the fun part! Again let’s work top to bottom.  Start with the freezer. If you have a deep freeze or second freezer somewhere, move everything from your kitchen freezer to that one. If you don’t have that option – work fast.  Take everything out of the freezer, and set on the counter. Don’t bother going through it at this point.  Once everything is out, use some hot – very hot- soapy water to wipe the inside down. 
    Once it’s wiped down begin putting the food back in.  As you do this, check for expiration dates, and freezer burn.  Toss anything out that is bad. 
    Then move onto the fridge.  Once the food is out, wipe down the shelves.  Remove the cooler drawers and give them a good scrub. Don’t forget to wipe out the bottom of the fridge before putting the drawers back in. 
    Next get a strong person or two, and move the fridge and oven from the wall. Sweep and mop behind them. Behind these two large appliances are some of your biggest fire hazards!  Don’t skip them!

    Now, make tonight leftover night.  You want to start spring off with a fresh fridge full of fresh food.

    Dishwasher
    Now that you’ve emptied a bunch of dishes, you may have a full dishwasher. Run it! Once your dishwasher is empty of clean dishes, run another cycle with a cleaner. Since it’s deep cleaning time, I suggest using something like Affresh Dishwasher Cleaner.
    Now that the counters and dirty dishes are all taken care of, move all the appliances back to the counter. Wipe them down as you go. My appliances tend to get pretty dirty on the outside, but don’t always get a good cleaning.

    Floor and Garbage
    We’re at the end of the day. Take out the trash, wipe down the inside and outside of the garbage can. Put in a new bag.
    Last thing to do is clean the floor. Move out chairs, table, microwave stand – anything that moves. Sweep and mop.  My favorite way to mop is on my hands and knees, with a bucket of hot soapy water.  I add 1 capful of ammonia to 2 gallons of hot water.  On my knees, I can see every spot, reach every corner, and really get spotless.

    You Did It!
     

    I’m also going to suggest at this point, using paper products the rest of the week. We’ve got a lot more Spring Cleaning to do, and keeping the kitchen looking nice will keep your motivation up through it all.

  • Stop Moldy Toilets

    Stop Moldy Toilets

    *Stop moldy toilets contains affiliate links. When you click through and purchase I receive a small compensation at no extra cost to you.*
     
    Suffering with moldy toilets? Suffer no longer, because I just found the best product to use, and I’m sharing my knowledge with you.
      Stop Moldy Toilets
     
    About a week after moving into our rental, I noticed mold was starting to grow inside the toilet bowl. I grabbed the scrub brush and tried to clean it out. For the next couple days, I found myself scrubbing that toilet bowl. It was so gross! It didn’t matter how often I scrubbed it, the mold was growing faster than I could keep up with.
     
    YUCK!
     
    One morning, I woke up and told Mark I was going to get that toilet cleaned by the end of the day no matter what it took. Turns out, he had the same thought (yes I have an awesome husband).
     
    Mark’s solution was a bit more educational than mine. He deduced that there must be something like calcium deposits in our toilet. So he grabbed Lime-A-Way and poured it into the toilet tank.  That way, every time we flushed, we’d get a coating of Lime-A-Way in the bowl. 

    Ok I thought, that might work, however, I still needed to scrub the new layer of mold off. I took my trusty Comet, and scrub brush, and headed to the bathroom. The Lime-A-Way had already been at work! One coating of Comet and the mold came right off.

    I kept my eye on the toilet the next couple days, waiting for the mold to come back, but it never did!! 
     

    Thank you Lime-A-Way!! 

    Two weeks later, a small patch of mold was returning, so I added a couple more squirts of Lime-A-Way to the tank, scrubbed the inside of the bowl, and our toilet was clean again.
     

    Stop Moldy Toilets

    If you are having a mold problem as bad as mine, I suggest calling a plumber as well as using the Lime-A-Way and Comet. There is very possibly something else going on to cause such a large mold build up. Since we were renting, we chose to stick with cleaning it ourselves until the landlord chose to hire a professional.


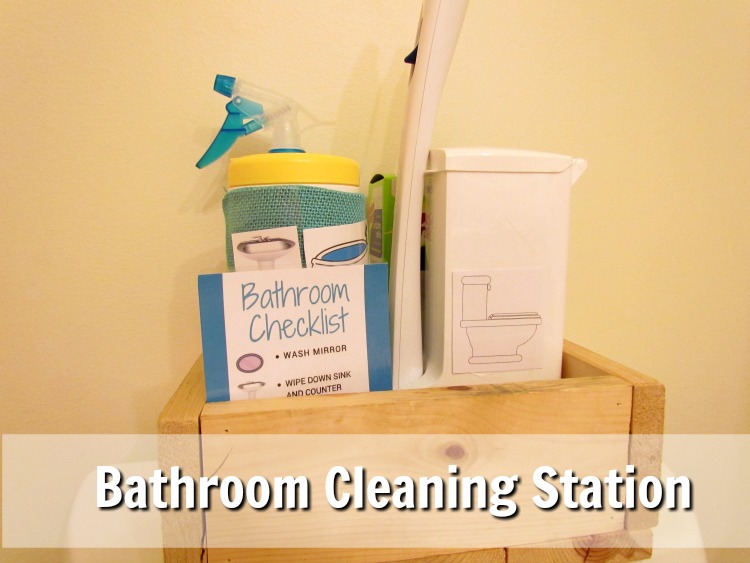
    Looking for MORE Bathroom Cleaning Tips? Check out this Bathroom Cleaning Station

    Bathroom Cleaning Station

  • Tuesday Tip – Cleaning Microfiber Couches

    Tuesday Tip – Cleaning Microfiber Couches

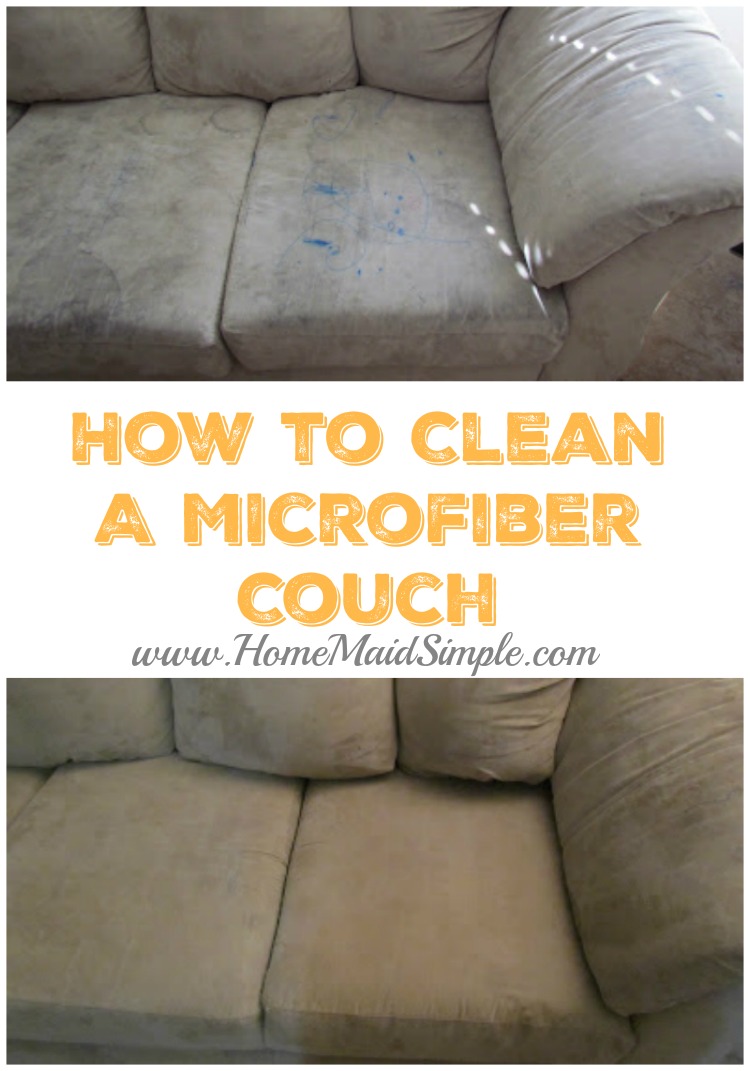
    How to clean a Microfiber couch, or other microfiber furniture

    Yes I know, it’s Wednesday. I haven’t lost complete track of days yet (or have I? calendars are brilliant inventions!).  I spent Monday and Tuesday morning testing out different cleaners on our Microfiber couch, so I could bring you this post. It took longer than I expected, but I got it done, and I’m here to let you in on some awesome tips!

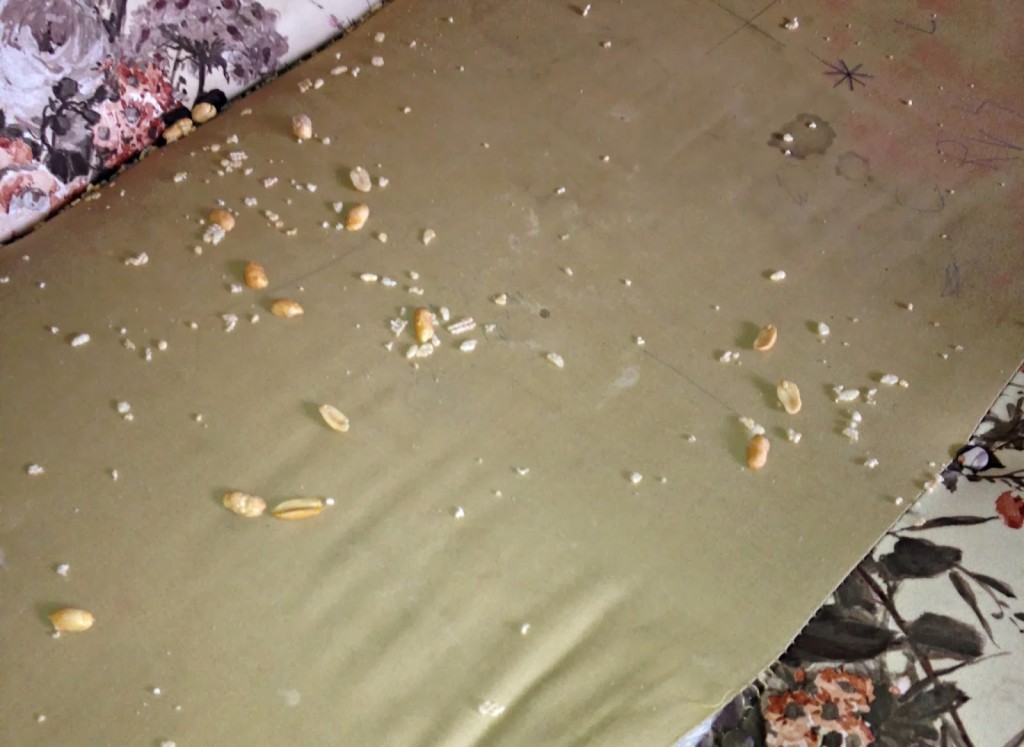
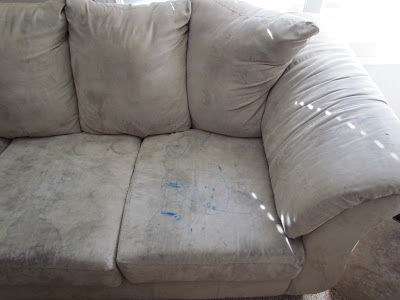
    If your kids are like normal kids, then your furniture probably starts to look something like this before you can even blink

    Pen on Microfiber furniture? No more worries!


    Pen on Microfiber couch? No more worries!
     

    I can’t even believe looking at these pictures that I actually let it get this bad, and that I would actually have company over sitting on these! ahhh, bad housekeeper over here. Well I finally saw past my kids, and realized what had become of my sitting area. So off to work I went. I started with some cleaners I had in my cupboard.

    EcoFresh Deodorizing Cleaner. It didn’t seem to be doing much. So I pulled out my – 1 time purchase from a door to door salesmanOriginal Lavender Advanage The Wonder Cleaner Super Concentrated.  The claim was that it gets grease stains out like magic!  Too bad it doesn’t take pen stains out of microfiber, because that would be a wonder.  Admittedly, it did lighten the pen, it just didn’t come all the way out.
    My next method of attack was removing the covers from the seat cushions. I threw the covers in the wash on Heavy soiled, high spin, warm water.  YES! Ok, again the pen didn’t come out completely, but everything else did, and they look so much better!

    Here is my #1 tip for Microfiber furniture – Buy pieces that have a zipper cover.  I wish the back cushions were removable for the same reason, but I guess I’ll just have to spot clean them.

    After going through the wash here is what my couch now looks like
     
    Isn’t she a beauty? No more dark marks all over it. Absolutely wonderful to sit on! And really the cushion with the pen isn’t nearly as noticeable.
     
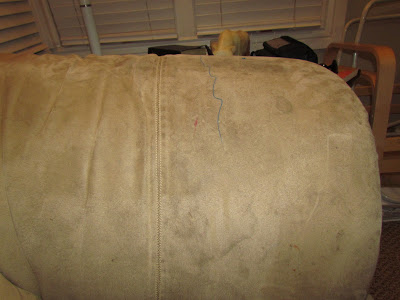
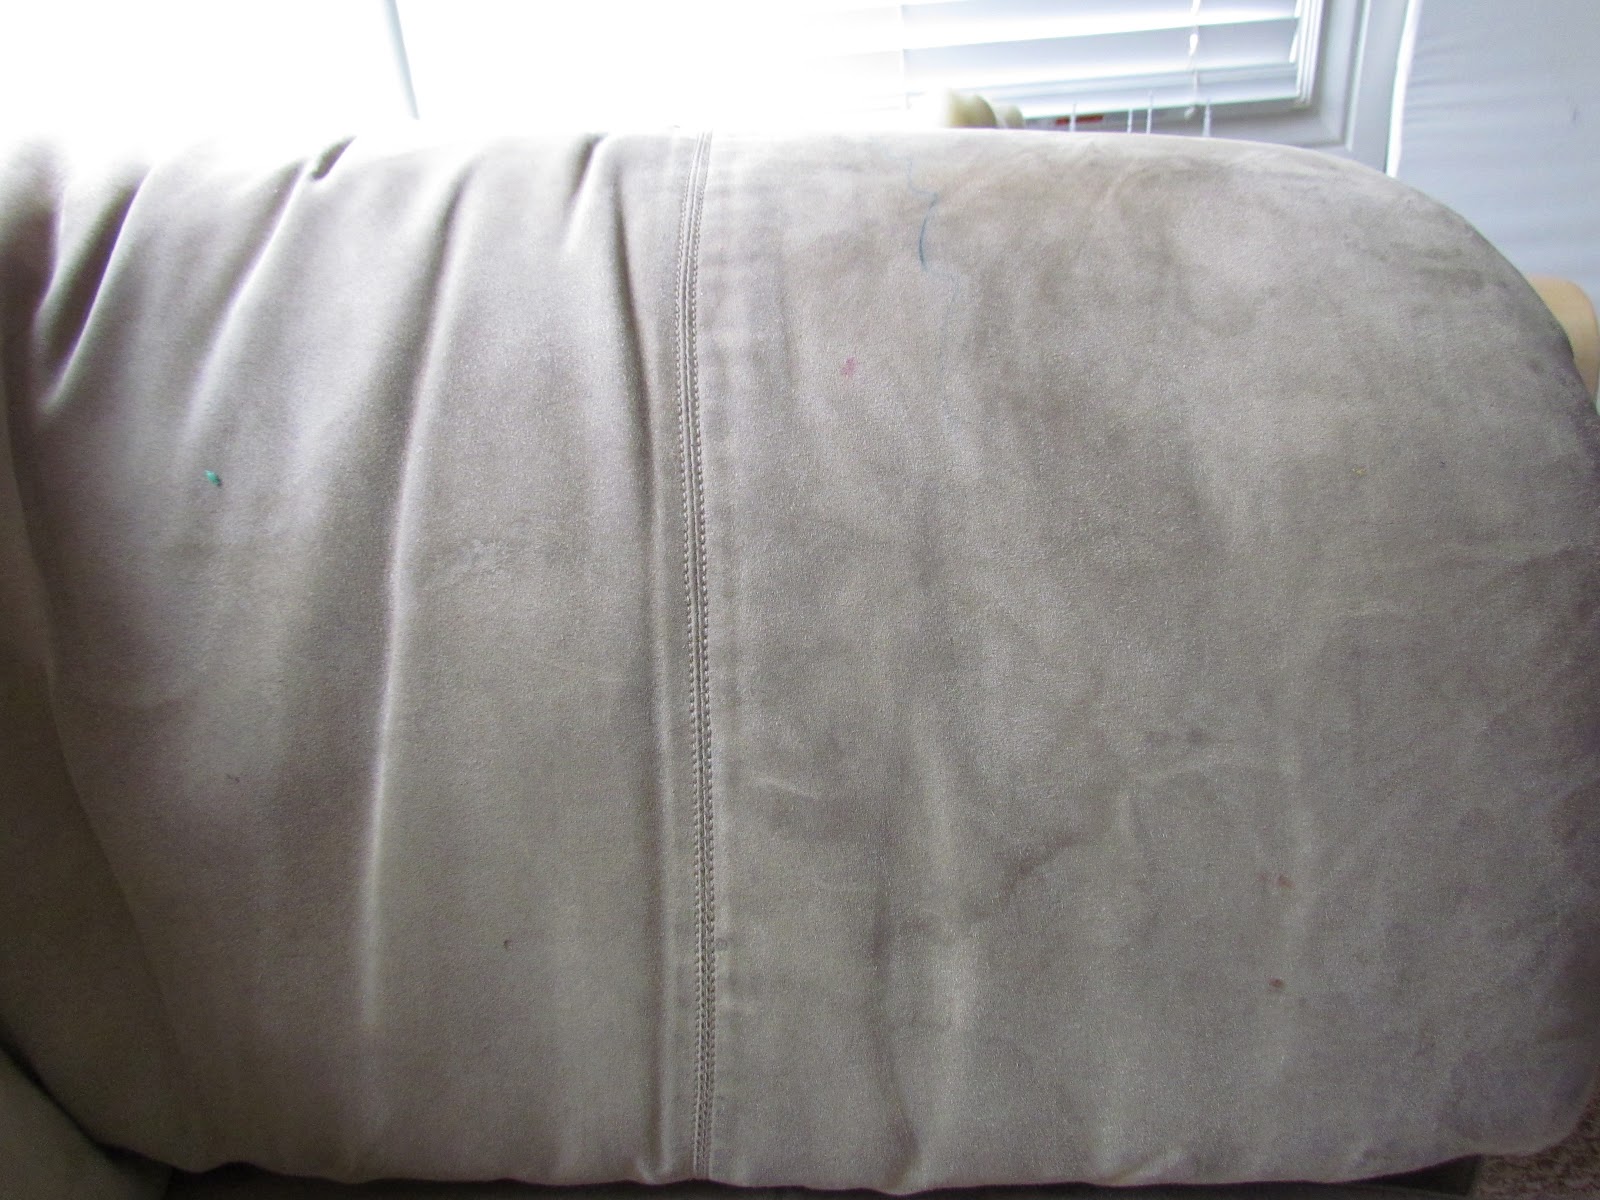
    So off to the arm and back cushions I went. I headed to pinterest for ideas.  The one “solution” I saw over and over again was Rubbing Alcohol. You take a white sponge (to avoid discoloration of your couch) and scrub the couch with rubbing alcohol. Again, the alcohol helped lighten the pen marks, but didn’t take them completely away. The rest of the arm looks nicer now though.
     
    #2 Tip when cleaning Microfiber – if you can’t remove the cushions, do not spot treat. You will need to wet the whole cushion to avoid leaving water marks.  It’s more work, but it will be for nothing if you end up with large water marks all over your couch.
     
     
    Good luck and Happy Cleaning!
     
    Have any spring cleaning tips or ideas? I would love to test them out. Please contact me at familyroom2@gmail.com