Category: Home

  • Saving Money with LED Power #LEDSavings #shop

    Saving Money with LED Power #LEDSavings #shop

    I am a member of the Collective Bias® Social Fabric® Community. This shop has been compensated as part of a social shopper amplification for #CollectiveBias and its advertiser. #LEDSavings


    Ever since my brother told me he’s moving his family to Belgium this summer, I’ve been determined to make a trip back East to see them before they go. I’ve been racking my brain for ways to cut our monthly costs back. I thought I had done everything I could, without starving my family (I promise we eat a nice balanced diet) when I came across LED power
     
    LED Energy Smart bulbs #LEDSavings #shop #cbias
     
     
    LED lighting has been around for awhile, but they aren’t cheap upfront, and it’s not something I’ve seen or noticed in a lot of homes. Since I was unfamiliar with it, I wasn’t so sure the initial cost would really save us money. I’m one who won’t buy a store membership just to get a little savings – so buying a single LED powered bulb for what I would normally get 2 or more bulbs for wasn’t too convincing at first.
     
     
    That would be like judging a book by it’s cover though, so I did some more research into what kind of savings I would get by purchasing the LED light bulb. Check out the types of savings I found – not just for me, but the environment as well!
    Infographic sources – GE Energy Consumption calculator
     
    15X Longer than incandescent Bulbs!!! Let’s look at that one a little bit closer  – I buy incandescent bulbs for around $3-$5/bulb. One GE LED Energy Smart is on average $10/bulb but can get up to $15 for a regular indoor bulb. To buy one LED I’m spending 3X the money up front. However, if I buy the incandescent, it’s going to burn out a lot sooner than the LED – 15x sooner actually. Let’s do a quick life cycle cost analysis shall we?
     
    $5×15 = $75
    or
    $15×1 = $15
     
    You all see what I did there right? Over the lifetime of 1 LED bulb I’m saving $60 in bulb replacement costs. That would equal to filling up with gas once. Alright, I’m feeling a little more sold on my upfront costs so I bought a couple at my Walmart to try out.
     
    LED lights in Paint and Hardware at Walmart #LEDSavings #shop #cbias
     
    Now what’s this about the trees?  You can head over to GE’s website and input the number and style of bulb you are replacing in your home and it does a couple calculations for you. I’m a tree lover, and that number just astounded me! I decided to start with just replacing the 4 bulbs I bought, and see what kind of savings I was going to get. 
     
    Energy Savings Calculator #LEDSavings #shop #cbias
     

    With just 4 bulbs replaced I’m lowering our energy bill by $20/year, and reducing the co2 as if I planted over 3 million acres of trees! The savings would cover almost 1 full bill in the summer, leaving me a little extra for our trip back east.Later I input enough bulbs to replace all the lights in my home which is where the 15 million acres of trees comes from on the infograph above, but my yearly savings also jumped up to just over $80. That’s a good winter’s energy bill completely eliminated, and in two years will have more than covered the initial cost of all the bulbs. 

    LED lights reduce co2 #LEDSavings #shop #cbias
     

    Finally, did you see the savings cost on a typical household energy bill? Pretty impressive. I’d love to lower my yearly costs to only $26! Put that other $238 in my pocket. What I love about this, besides just the monetary savings, is that the LED lights are designed to improve lighting performance, while also eliminating the wasted heat.Ever turn off a light and try to change the bulb? CFL’s get hot quick! While playing around with the LED and CFL’s, I found I could leave the LED on longer, and remove it immediately after turning off the light, while the CFL after just a few seconds got way too hot to touch. Disclaimer: please please always do a quick touch to any lightbulb before grabbing hold so you don’t burn yourself. The bottoms of the LED lights do get hot.  

    LED lights are Thermal Conscious #LEDSavings #shop #cbias
     Grab this tutorial for a Clarinet Lamp
     
    So remember how I said I wanted to head back east this summer, but I didn’t know what else I could cut from our budget? Look what the GE LED Energy Smart lightbulbs just saved me – 
    $60 in bulb replacement costs
    $80 from my energy bill (but can be up to $238 for the average household)
    That gives me an extra $140 to spend on our vacation – we could actually get a nice hotel for that!
     
    What would you do with the savings from a GE LED Energy Smart bulb?
     
    For more Savings info, and to keep up with GE Lighting Follow them on
     
    Sarah Mock from How I Pinch a Penny put together this amazing video on the GE LED lights that is just FAB! Watch the video to see how she is saving
     
  • Joy in the Home

    Joy in the Home

    A couple weeks ago I was feeling on top of the world. There was just this high optimism for life and everything in it. As I got into bed one night, the word hit me

    JOY

    I was feeling an immense amount of Joy, and for no particular reason other than I am healthy, I have 4 healthy kids, a wonderful husband, extended family that is amazing, a roof over our head and food in the cupboards. 
     
    Can life really be any more simple than those things?  Those are the things that truly bring us joy.  So I decided I wanted to display this Joy in my home. I knew I wouldn’t always be feeling so upbeat, but if I could create a constant reminder for myself to have Joy, then the down days wouldn’t have to be so bad. 
     
    I had this idea to create a sign that read JOY, and then next to it have some of my favorite family pictures displayed. Before I even had a chance to come up with my own design, I found myself at a workshop with Steffany and Melanie from the blog Find it Make it Love it. I was so thrilled when the craft they shared fit into my JOY vision.


    So of course, I picked up all my supplies right after the workshop and set to work making their IKEA candle dish turned picture frame. Once I had the kids at school, and Prince L sleeping it was just me and Princess R. I set her to work with a new tracing book we bought, and I got started on my crafting. Picking a picture of each of the kids was extremely difficult! Either they were too close to their face, or too far away. I finally had my decisions, though.I did my cut outs slightly different, only because I’m very visual, and don’t trust myself completely – so I used the scrap from the circle cut out to trace my pictures.

    Princess R was pretty distraught when I cut off Prince L’s feet, and she started taking off with all the pictures of her. I guess she was worried I was going to ruin all the pretty pictures. Once it was all done though, she thought they were pretty nice.

    The large candle dish turned chalkboard was perfect for my new word – JOY. Mark kindly jumped in here and added his artistic talents to the sign. Just another little joy found in spending time with my husband.

    Everything has a meaning on his design, but at the moment all I can remember is the stars represent our 4 children and our biggest joy. He’s got such talent.

    Once we had these hung above the desk, I realized just what a mess I had allowed this space to become. So not only did doing something crafty add a nice touch to our wall, it also spurred me to get some extra cleaning done, booyah!  I feel I can be much more productive in this space now instead of feeling overwhelmed.


    What brings you JOY? 
  • A trip to Ikea

    A trip to Ikea

    *This post may contain affiliate links. Thanks for supporting Home Maid Simple!*


    Last Saturday I decided to head to Ikea. Mark had to work like every Saturday, so I invited my sister to tag along. It was their BYOF – bring your own friend – day after all. I was really looking forward to some workshops with other bloggers, and getting some much-needed items for the kids bedroom.

    Specifically, on my list was a new laundry basket. I finally had enough of their little 1 ft by 1 1/2 ft basket overflowing after one day.  Before going to Ikea, I checked out some hampers on Wayfair, but I just wasn’t sure without seeing them in person.

    Most expensive laundry hamper
     
    Plus any hamper that has a price tag like this one had better wash and dry my clothes as well! 
     
    It took us way too long to get out of the house, but we finally made it to Ikea around lunch time. So we started by grabbing some absolutely delicious lunch. The kids enjoyed some chicken strips and fries, my sister ordered beef ribs that looked amazing, and I had the Atlantic Saithe.
     
    We were hoping to make it to the cooking demo after lunch but it took us a little longer to eat than we planned, and then we got distracted trying to find the workshops. 
     
     
    I seriously loved this room set up…but definitely not with all the white and small kids.
     
    OK so we finally made it to the workshops in time to see Melanie and Steffany from Find It, Make It, Love It.  From the papers description I wasn’t expecting the craft to be something I would necessarily want – birthday calendar and candle plate picture frames. BUT I was seriously wrong. 
     
     
    Just look at those picture frames!  This turned out to be exactly what I was looking for for a photo project I’m working on – post on that sometime next week. These gals are so cute, and are full of so much creativity I wish I had!  
     
    After we finished up these super simple craft tutorials, we headed over to the next workshop with Autumn from It’s Always Autumn.  I didn’t get a great picture during this one, but I did learn some great tips from her. Especially on the props part. I was easily able to translate a lot of what she was saying for photo’s of people to my food photography. I just don’t need quite as much space when I’m working with food. In fact, if you saw the Oscar Eggs Benedict yesterday, the plate that’s on I bought while at Ikea…and it’s actually a candle dish!
     
    Finally we made it out of the workshops and displays – does anyone else get lost in Ikea? – and headed downstairs to the purchasing area. We picked up a number of things, including the candle dishes for the pictures and a new bath mat, before finding the laundry baskets. YAY for awesome laundry baskets!  
     
    Don’t act so surprised, I get excited over weird things like laundry baskets. Things that make my life simpler, my families life simpler, and our house more manageable are cause for joy and excitement. I mean just look at the difference between these two.
    Now normally I will not spend money on something for the home that I can get at a fraction of the cost if I sacrifice look. This time I decided to sacrifice cost and get something a bit nicer. Not only did it make a difference in the dirty clothes being an eye sore, but it set the tone for the rest of the girls closet. 
     
     
    The kids have been playing with their toys, and PUTTING THEM AWAY ever since I got the laundry basket and reorganized their closet. They can reach their toys to get them out and put them away. It’s been 5 days, and their room has taken a total of 5 minutes each night to clean up. A huge difference from our normal hour of whining and hiding messes under the bed. 
     
    Like my new laundry hamper?  Ikea’s BRANAS Laundry Basket for $39.99.
    Don’t live near an Ikea? I found a very similar Wicker Basket on Wayfair. It’s a set of 2 and only $51.99.
  • 5 Places You Wouldn’t Expect to be Vacuuming #EurekaPower #shop

    5 Places You Wouldn’t Expect to be Vacuuming #EurekaPower #shop

    I am a member of the Collective Bias® Social Fabric® Community. This shop has been compensated as part of a social shopper amplification for #CollectiveBias and its advertiser. #EurekaPower
    5 new places to use your Vacuum #EurekaPower #shop #cbias


    When Mark and I first got married, I was pretty good at vacuuming once a week, whether it visibly needed it or not. As adults we kept our floors clean from most crumbs and spills, and since we spent most of our days at work and school, there just weren’t a lot of messes to clean up 
     
    Then we had kids. 
     
    I kid you not, kids are messy. Even if they have a desire for clean things, they just seem to spread crumbs everywhere. I don’t like to stereotype, but it really wasn’t too bad – if you don’t count our flour escapade – until we had a boy. That or it’s our small living space that seems to have made things extra messy – I’m pretty sure I can attribute the food everywhere to the little Prince though. 
     
    I finally decided I needed a vacuum that could help me clean everyday, instead of once a week. Something lightweight, but with enough power to clean every nook and cranny in the house. I headed out to Walmart to purchase the Eureka AirSpeed All Floors one night at 7pm, the only sane time to take 4 kids alone to look at vacuums.
    Vacuum buying at Walmart #EurekaPower #cbias #shop
     
    Once we had the vacuum at home I could not wait to start using it. It had every feature I wanted plus some!

    • Lightweight. It even has a carrying handle on the back that our previous model did not have. 
    • Less bulky. The canister is slimmer, making it easier to push around, and store inconspicuously in our small apartment.
    • Multi-surface. Comes with all your regular vacuum attachments, plus the added feature of turning off the floor brush for bare floors.

    Now don’t shake your head at me, but do you realize just how awesome vacuums are, and all the places they can clean if you have the right kind?   

     
    Kitchen – This might be a place you already use your vacuum. Of course it makes sense if you’ve got carpet in your kitchen – but you all know how I feel about that! – if you’ve got tile or linoleum or even hard wood floor, a vacuum might not be your first go to tool for cleaning. If you want to vacuum your hard floors without ruining them, look for a vacuum that can turn off the brush and has a bare floor setting. By turning the brush off you’ll take away the chance of scratching your floors, or just spreading the crumbs around.  
     
    Vacuum Brush turns off! #EurekaPower #shop #cbias


    Bathroom – I was talking to my sister recently, who does not own a vacuum and neither do her roommates – crazy kids – and asked her if there was one place she’d use a vacuum where would it be? Her response – to get all the hair out of the bathroom. YES! Oh so yes! With 3 girls, our bathroom gets covered effectively in hair, and bits of toilet paper, and yes…more spit out food because hey mom won’t yell at me if she can’t see me doing it… Since the vacuum will be sitting in one spot on what we’ll assume is a hard surface, you’ll want to turn the brush off while you use the hose for the counter tops. You don’t want to wear a hole through the floor from a constant pounding (which I may or may not have experience with)


    Multi-Surface – My absolute favorite feature of the Eureka AirSpeed All Floors is that I can vacuum across two surfaces at one time.  Normally you want to avoid different surface seams,  but when you have multi-surfaces in your home, it’s hard to avoid those, while still keeping them clean. One good example would be area rugs. My poor rugs have turned up corners from vacuum brushes pulling them in as I try to get them clean. With the ability to turn off the brush, I no longer have that concern. 
    Multi Surface Vacuuming #EurekaPower #cbias #shop
     
    Furniture and Mattresses – We all know to look for spare change in the couch, but if money can fall down there, so can everything else. The hose attachment is great for cushions that can’t be removed, while the stair and upholstery brush is perfect for the cushions themselves. These same tools are great for your bed mattresses as well. You should clean your mattresses at least once, if not twice a year. I like to periodically pour baking soda on the mattresses, let it sit for a couple hours and then vacuum it off. Truly my best friend on the vacuum is the stair and upholstery brush. The suction from the AirSpeed assures me it’s giving the mattress a nice deep cleaning as well.
    Clean mattresses 1-2 times a year #shop #EurekaPower #cbias


    Concrete – No I am not kidding you!  I know there is someone out there with a concrete basement, probably working on making it a place for the kids to play. It’s probably not an area you worry about cleaning frequently, but when you do, a broom just kicks up the dust. With the AirSpeed All Floors I was able to vacuum our concrete patio, and wow! I can’t sweep out there very well because we’re in the basement, and then there’s all these cracks where it changes from concrete to wood planks. The kids love playing out there, but I hate how dirty it is. I’ll be honest this was a total experiment – but it was one that worked!  Disclaimer: Do not use your house vacuum on wet surfaces! Use a wet vac for any water messes. 

    Vacuum your concrete floors #EurekaPower #shop #cbias


    Ceiling Fixtures (BONUS! in case you were counting)There once was a time I looked up and decided my ceiling fan needed a serious dusting. Not wanting to spread the dust onto the floor, I thought to myself “Adelina, why not try the vacuum hose?” So I did just that. Albeit slightly difficult with this cutie turning it off, it worked amazingly well. 


    The only thing that would have made this first attempt easier was if I had a longer hose on that vacuum. The Eureka AirSpeed All Floors has a total reach of 39 feet. The hose itself making up 12 of those. When you add on the attachments, you’ve got a nice reach going on. We no longer have any ceiling fans, but now I’m dreaming of spring cleaning our recessed lighting all with a vacuum.

    Where would YOU use your vacuum?
  • Tips for Kids Sharing a Bedroom

    Tips for Kids Sharing a Bedroom

    Not every home has the space for kids to have their own bedroom. If you’re one of those families, check out these tips for kids sharing a bedroom in this guest article from Nicole at Confident FoundationThis post contains affiliate links, and I will receive compensation if you make a purchase after clicking on these links. 

    How to Successfully Have Kids Share a Small Room  
    These days it might seem that having a room all to themselves is a right of passage for kids just as soon as they are born, or at least as soon as they get old enough to ask for one. There are many advantages to having children share a room, however, even when you have to tackle challenges like having a boy and girl together or fitting everything into a small space. Here are the best tips to make the most of a small, shared room to maximize the potential and minimize the bumps! 


    Store and Organize Vertically 

    In small rooms, floor space is especially tight, and if you’re needing to fit in two beds it becomes even more so. Of course, there’s always the old standby of the bunk bed that you can turn to, but often when children share a room they’re too young to be sleeping in a bunk. How to Successfully Have Kids Share a Small Room

    One of the best ways to store and organize vertically is by utilizing bookshelves for far more than books. Bookshelves can be used to store toys, books, games, and with the purchase of a few baskets even essentials like diapers and clothes! You’ll be amazed at how much more clean and open the room feels if you add in a few large book cases. Far better than huge toy boxes, with shelves things are easy to see and access, making it much more likely that they will actually get used. Be sure to secure them to the wall with brackets, not just straps, in order to ensure the safety of your little monkeys! You might also consider having a small step stool in the room to help them reach high shelves, rather than climbing on the case itself. Another option is to secure many different shelves to the wall at different heights. 

    Take Full Advantage of Closets

    When it comes to children’s clothing when you hang them up they are considerably shorter than adults and leave a lot of empty space underneath. Be sure you’re taking full advantage of this space by also thinking vertically in the closet! There are a couple of different ways you can do this–for example:

      How to Successfully Have Kids Share a Small Room

    In my son’s closet, I again took advantage of shelving options by adding in a small case and storage bin. On the side of the storage bin are sacks with all their blocks. This is a great place to store things like games, puzzles, doodle pads, and more! Since in my daughter’s closet I don’t have as much empty vertical space I turned to boxes. Using two empty cardboard boxes we did a few different craft projects and created a dress up clothes and dress up accessories trunk. It keeps all the tutus out of the way most of the time, and gives me an easy way to haul them out into whatever room I want when it’s dress up time!

      How to Successfully Have Kids Share a Small Room

    Maximize Your Space Options 

    When you’re considering how to tackle storage for clothing take stock of what you have available. If you have large closets and one dresser, hang all the clothes that you possibly can. If you have the opposite hang only clothes that would get wrinkled easily. Store all the rest in drawers or on shelves.For the clothes that you have in drawers and baskets, roll them — don’t fold them! You might have learned this trick for traveling but it works just as well for everyday life too! It’s amazing how many more size 4T pants you can fit into a drawer when they’re rolled rather than folded and piled on top of each other.

      How to Successfully Have Kids Share a Small Room  

    Store extra blankets, out of season clothes, and clothes that are too large for the moment underneath beds.

    Less Really is More

    When you have little space to work with embrace simplicity. It’s far too easy to allow the room to become overly cluttered and chaotic feeling. Box up any toys that aren’t currently being used and loved. Set a reminder in your calendar to swap them out in 6 months. Teach your children of keeping only things that they loved and enjoy. Each time you rotate toys help them pick out any they would like to donate or sell. This also applies for books–although it might be hard to think you could have too many books they can quickly overtake a room. You can always take advantage of your local library to continually have fresh books in your home without it eating up all your space. 

    Let Them Express Themselves 

    Let each child have at least one “wall” for themselves. On it you can hang decor they like or that fits their personality. Although gender-neutral colors work best when you have a boy and girl together, they can still use their favorite things without it clashing. For example, walls themed with flowers are a nice offset to Planes, Trains, and Automobiles. The most important thing is to let them have a space they feel is all their own–and less about making it to the cover of Better Homes and Gardens. 
     
    About the author:

    Nicole Elliott is the girl behind Confident Foundation (previously  Wyoming Girl turned…) where she blogs about Organizing in Small Spaces, Parenting, Recipes, Travel, Beauty, and whatever else tickles her fancy that day! She has moved cross country 6 times in the past 8 years and her two children have successfully shared a variety of small rooms since her son was born in 2010.


  • Tips for Personalizing a Teens Room

    Tips for Personalizing a Teens Room

    Hi!  I’m Lisa from Shine Your Light, where I blog about home improvements, food and family life.  Thank you Adelina for having me over here today!

    My kids are growing at the speed of light and I suddenly find myself the mother of two teenagers and a tween.  They each have such distinct personalities and since we moved to our current home three years ago I’ve had fun creating spaces for them that are functional and also reflective of them.  I am a huge believer in the power of paint to completely change the feel of a room, and to breathe new life into old things, and in decorating the kids’ rooms I am always looking for ways to repurpose what we already have.

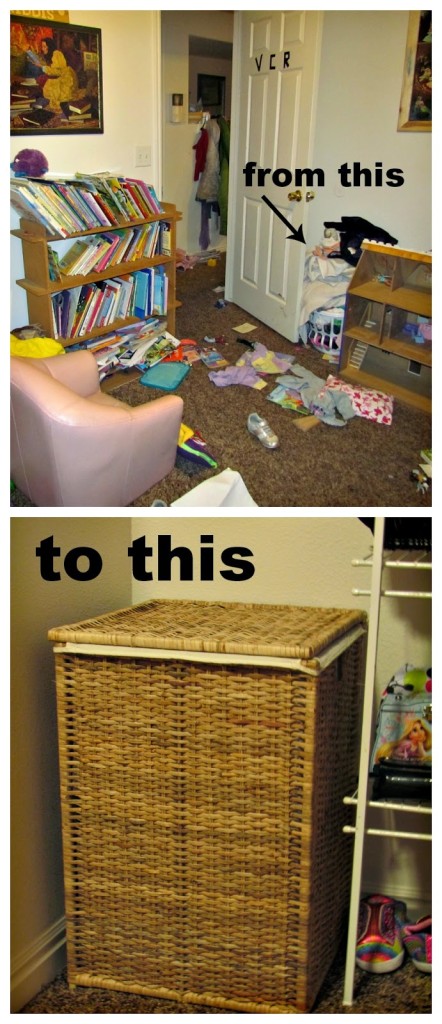
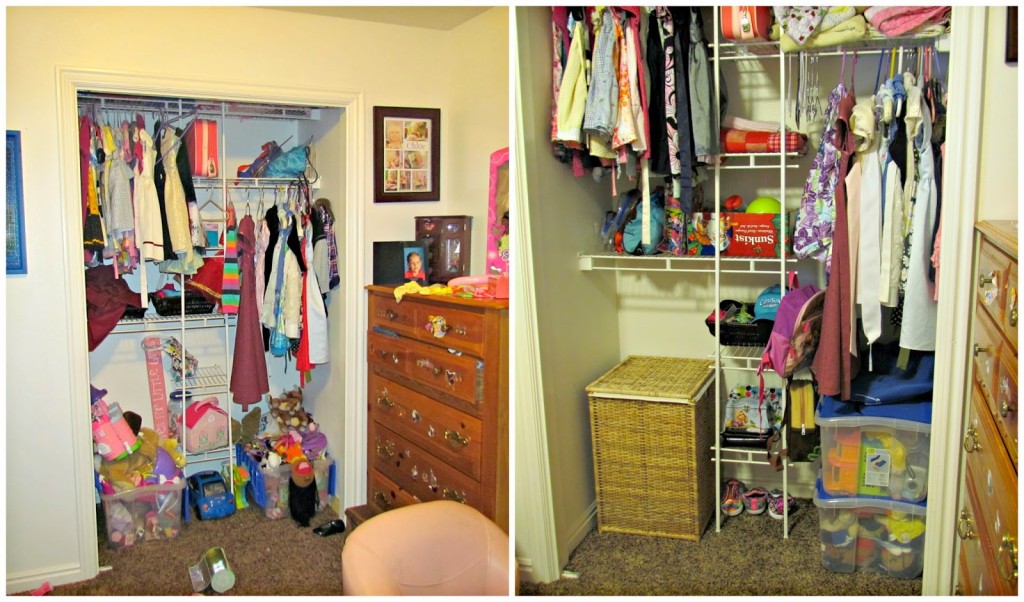
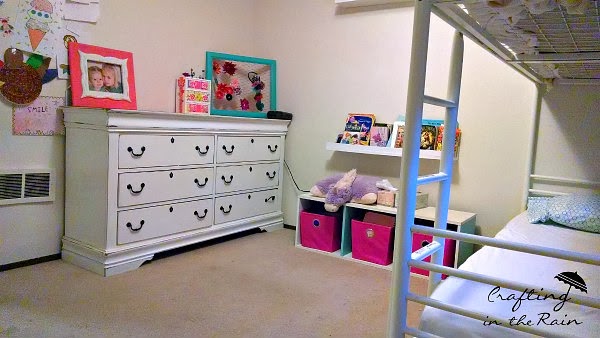
    My daughter Hannah is like her mother – she loves to create and make a big mess.  When she’s working on a school project the glue, glitter, markers, scrapbook paper and every other art supply in the house are spread far and wide.  Likewise with her clothes and shoes – she is very visual and likes to see how this pair of jeans would look with that shirt – some days it looks like a tornado made a quick entry and exit through her room before 7am.  This girl needs all the help she can get to keep her space organized. When we pulled her room together I kept in mind how she works and gave her lots of open storage space for clothes and art supplies by taking the doors off her closet.

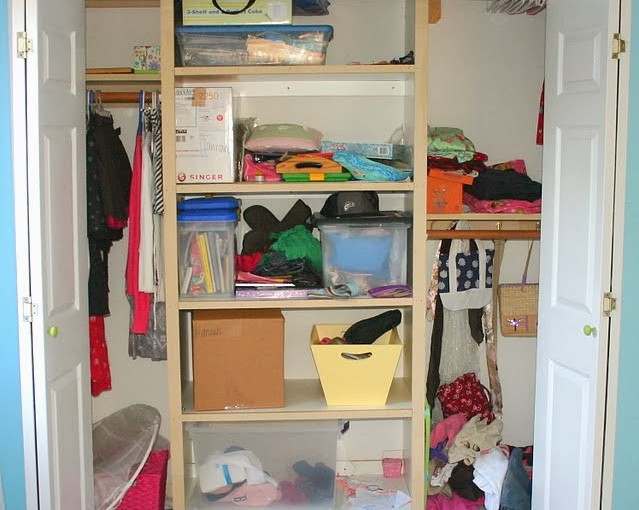
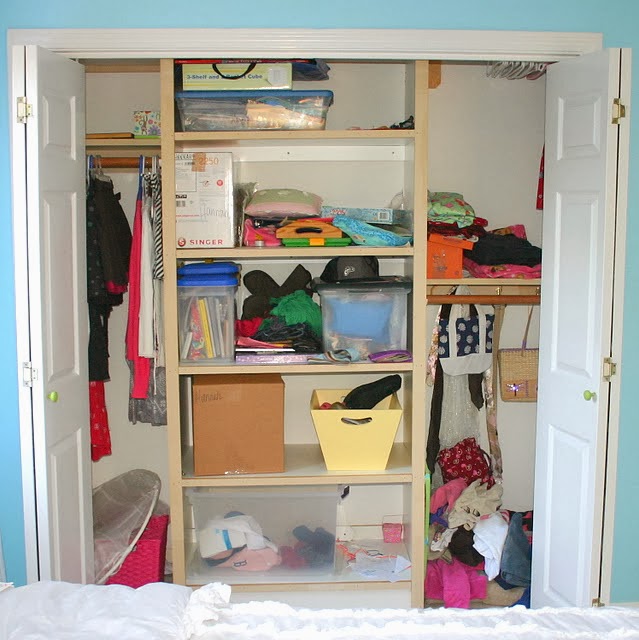
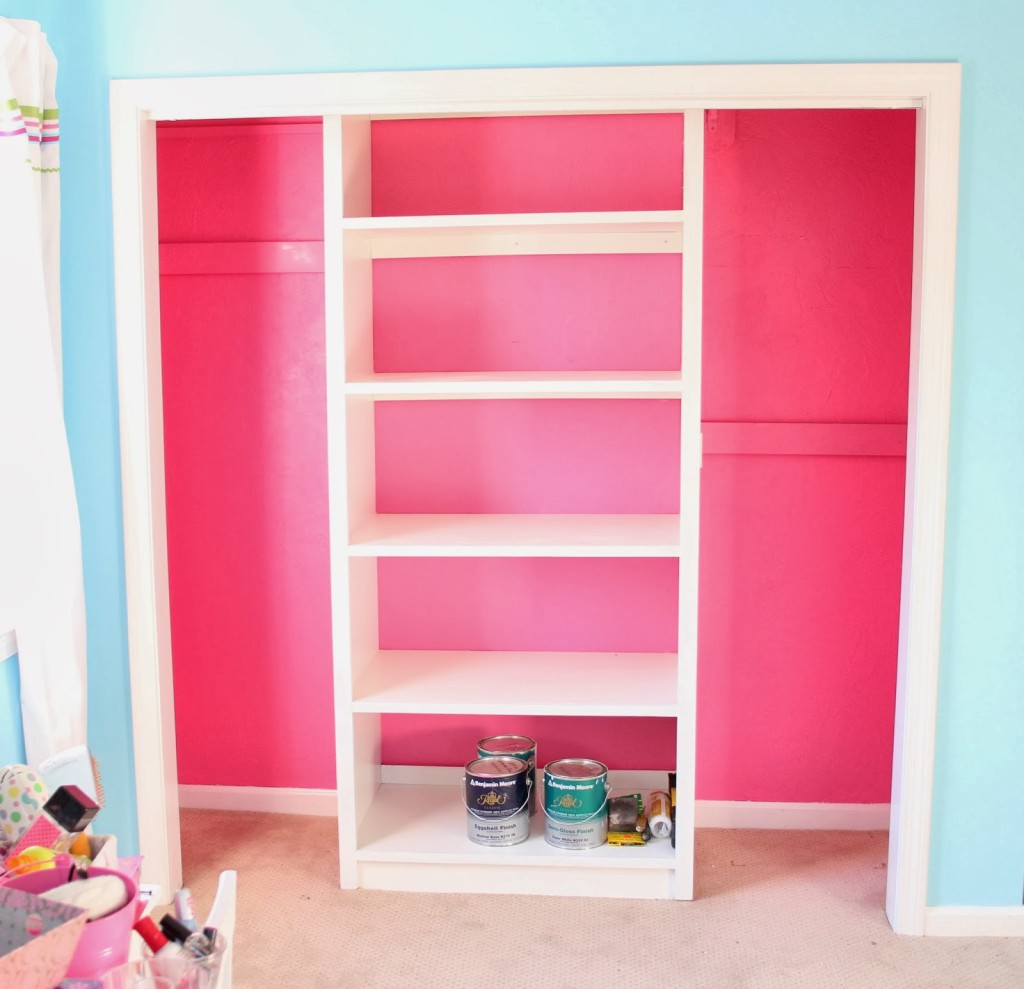
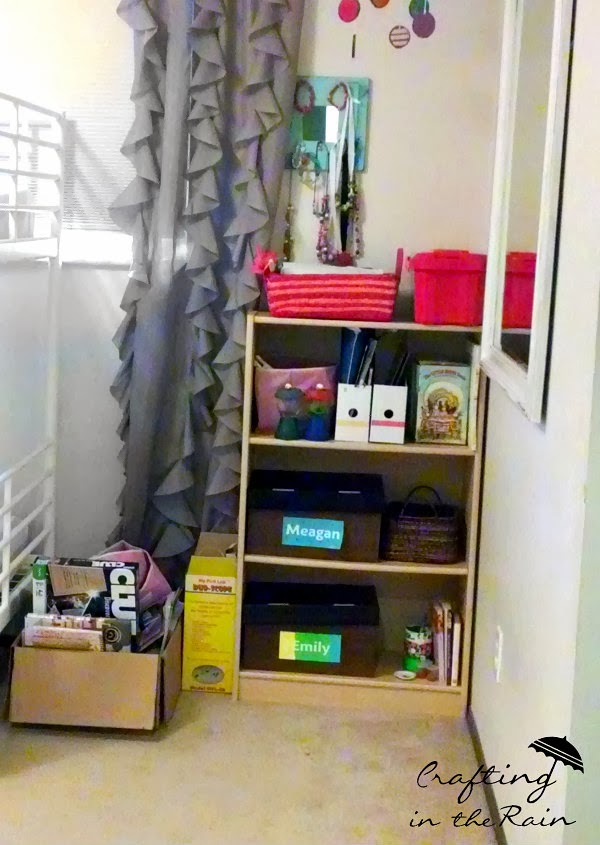
    Our house needed a lot of cosmetic love but one huge bonus were these built in shelves the previous owners installed.  Tons of potential to keep a messy marvin more organized!

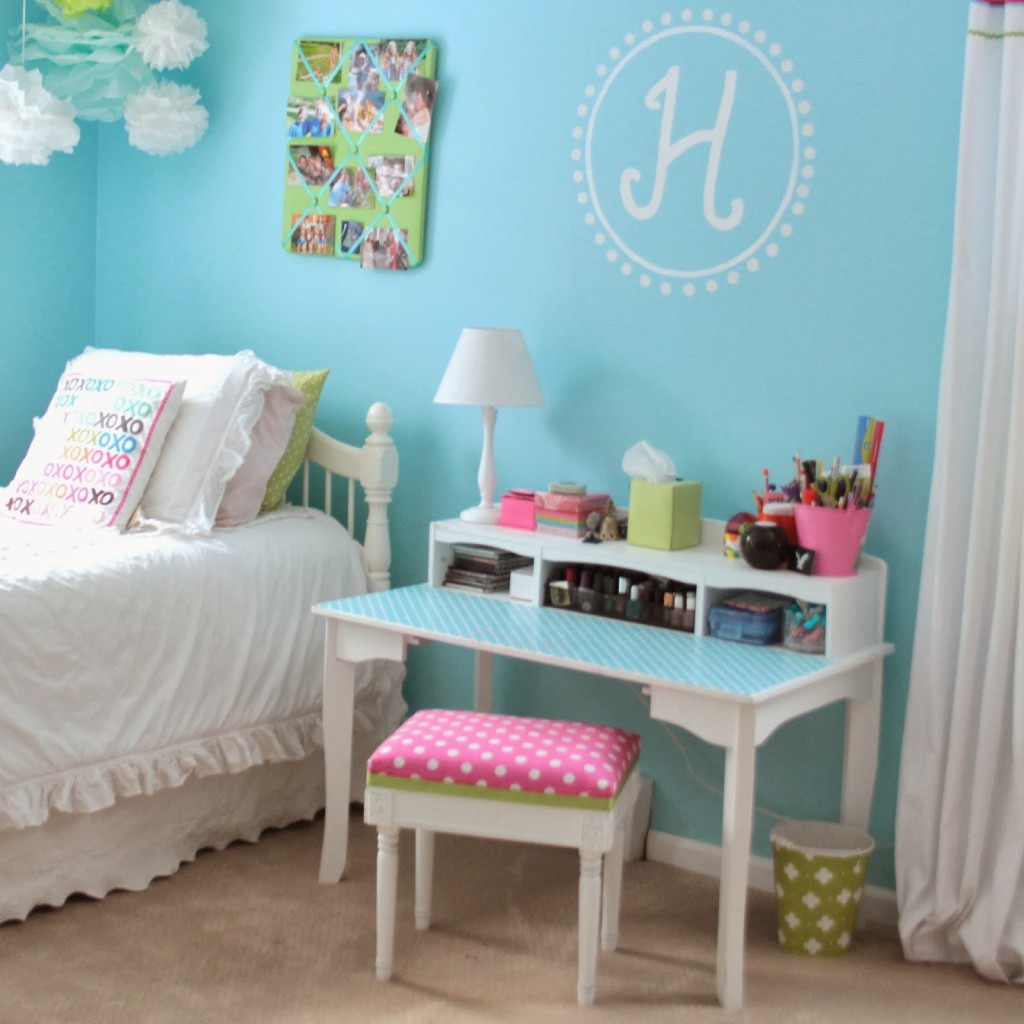
    We had already chosen the room color from our one splurge for the room – a throw pillow from PB Teen that I bought on sale a few years back.  There are so many fun colors in it and Hannah decided she liked that turquoise blue for the walls.

    When it came time to spruce up the closet, I showed Hannah a few paint colors for the inside and let her decide.

    The hot pink was a little shocking at first, but seriously, how could a kid be in a bad mood in this room?

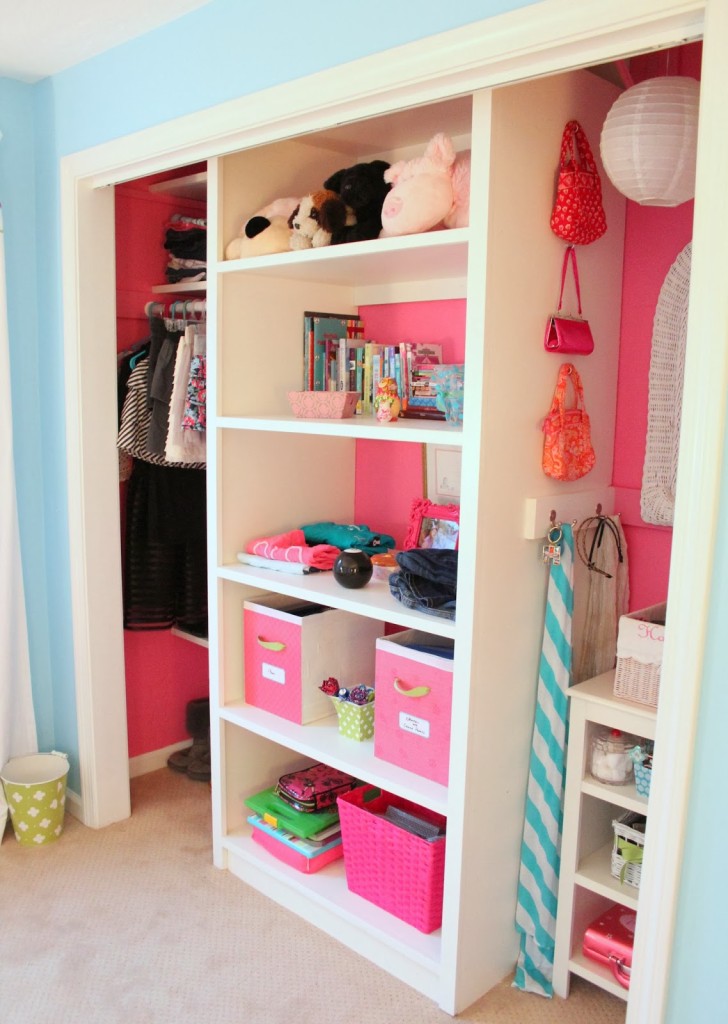
    Once we filled it up the hot pink-ness wasn’t so dramatic!  The open shelving provides tons of space for art and craft supplies.  The boxes on the second shelf are just cardboard boxes that I covered with scrapbook paper, and threaded a ribbon through the side for a handle.

     
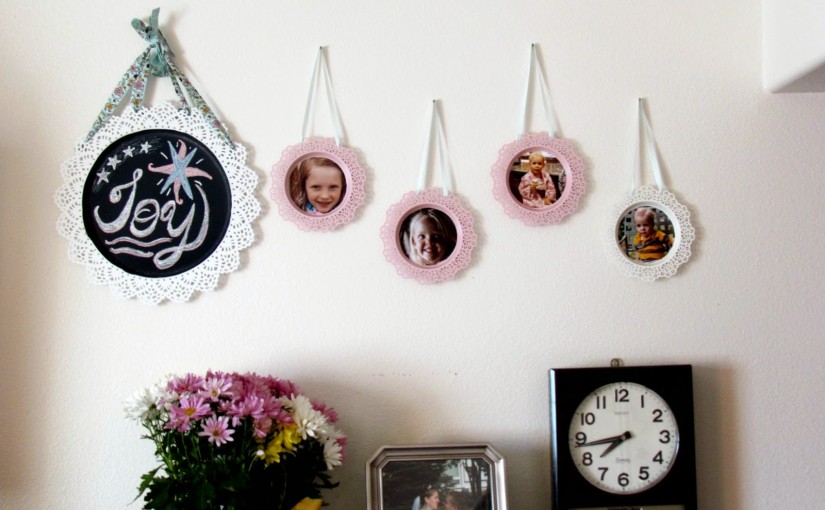
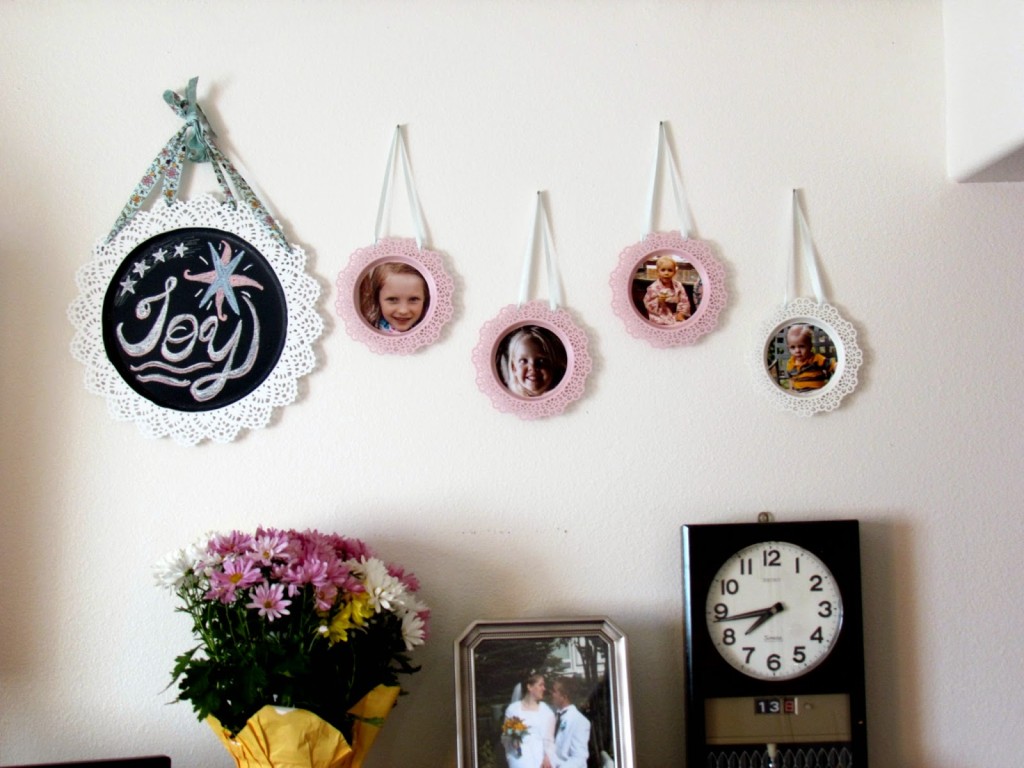
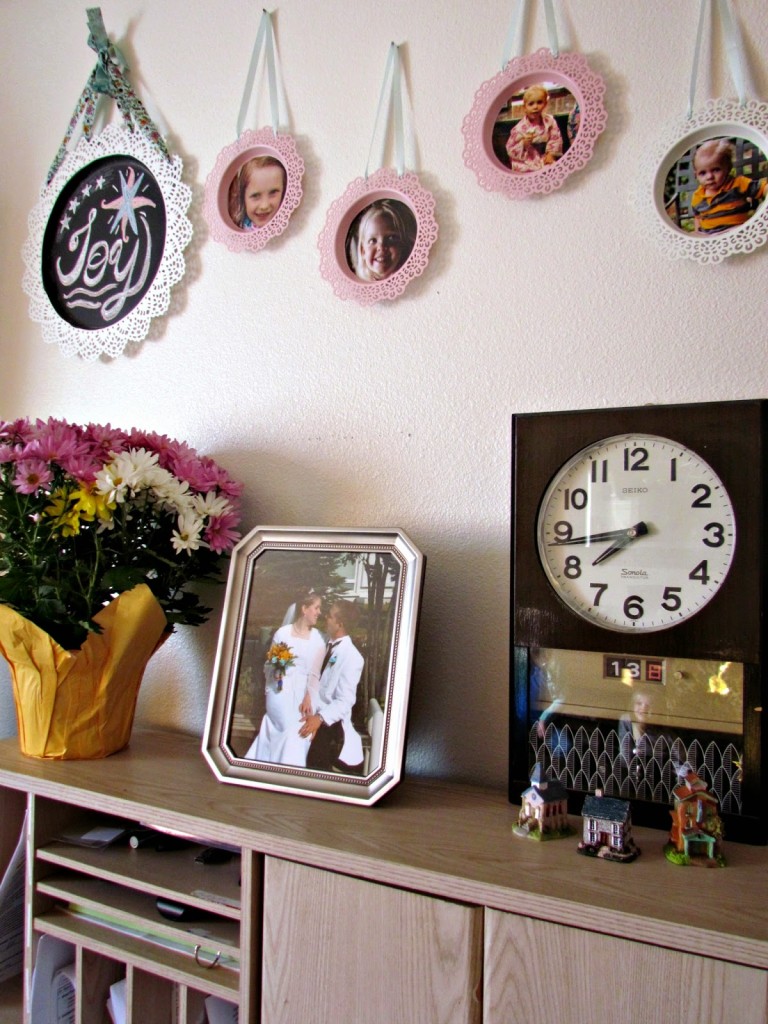
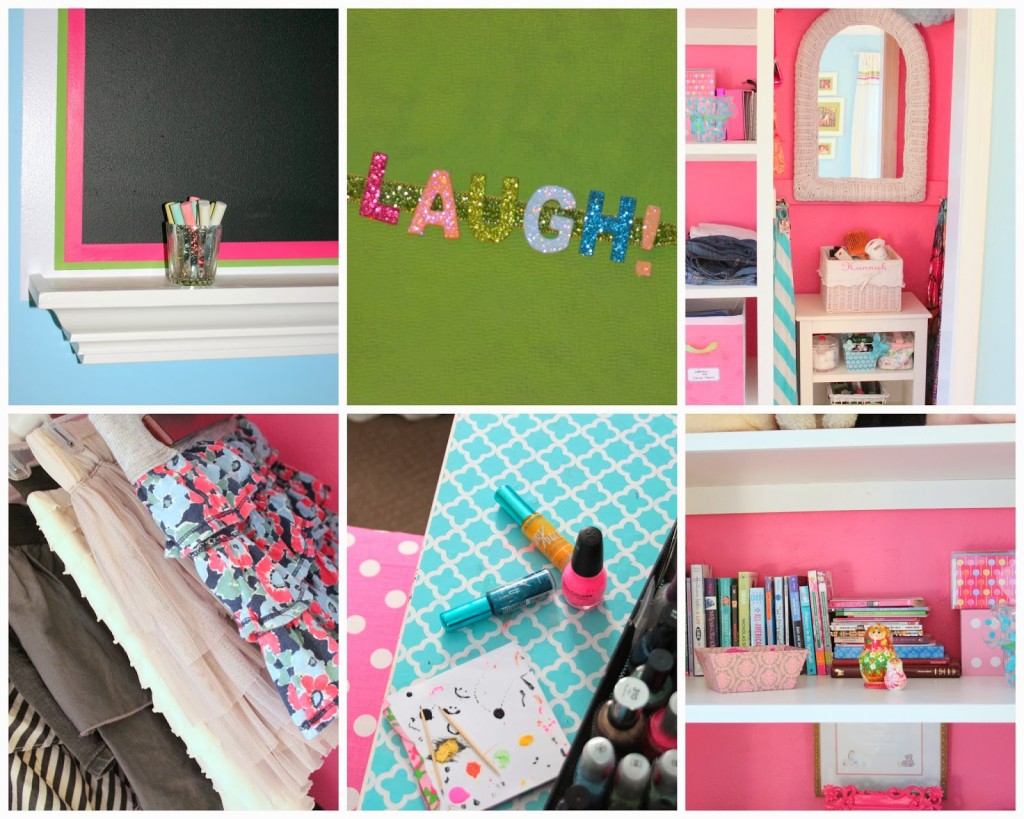
    I spray painted white just about anything I could find to store all her “things” in.  One of Hannah’s favorite parts of her room is a big chalkboard that I painted a border around, and then added a little shelf at the bottom to hold chalk and catch the dust.  Her friends write on it every time they come over and it never gets old.  
     
    Hannah’s room doesn’t always look this tidy, but it’s easier to clean up a room and put things away when there is a place for everything right in front of you.  Hannah and her friends spend a lot of time in this space, doing their homework together, braiding hair, doing nail art, having sleepovers.  I love that they hang out here!


    Hannah will be in high school next year (I can hardly believe it!) and we have been talking about ways to make her room a little more “mature”.  I’m on the hunt at thrift stores and Craigslist to find a cheap office chair I can makeover into something like this – wouldn’t that be fun?


    Over the course of my 15 years of motherhood, in 4 different houses along the way, I have learned a few tricks for creating a space that is both functional and fun for kids.
     
    1// Let your child have a few choices.  Give them a few paint colors to choose from that you can live with too.  
    2//  Keep the curtains and comforter/bedspread neutral and you can get years out of them, even as your child grows and their tastes change.  Hannah’s comforter is from Target and is still going strong after being bleached countless times!  Her white curtains are also from Target.  We added ribbon to them with a hot glue gun, which will be easy to remove in the future.
    3//  If your child wants some kind of theme for their room like Spiderman or Tinkerbelle and you are theme-resistant, buy sheets and a pillowcase with the theme on them.  The room won’t scream “theme” but the child will be so happy!
    4//  Provide plenty of storage that is easily accessible.  Even a 2 year old can learn to put their socks or toys in a basket, and a 15 year old boy is more inclined to put his football uniform on a shelf marked football.  🙂
     
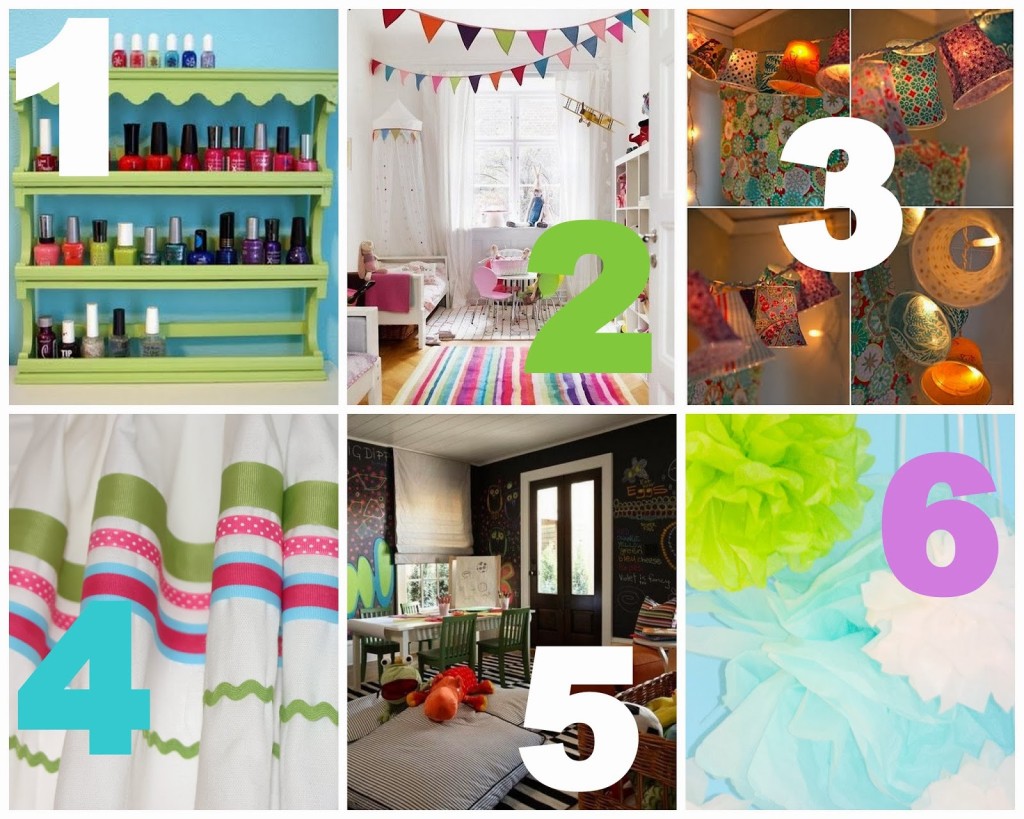
    Here are some other ideas for creating a cheerful and happy kids’ space:
    1//Spice rack repurposed as nail polish storage at Sweet Caroline.  2//Make a colorful banner to cheer up a space/ image source unknown.  3//Use Christmas lights to make a fun light garland, from Rebecca’s DIY. 4// Change up plain curtain panels with ribbon. 5// What’s more fun than your mom letting you write all over the walls? /image found here.  6// Tissue paper pom poms are inexpensive and easy to make! 
     
    Thanks so much to Adelina for inviting me to talk about kids’ spaces with you today, it’s been so much fun!

  • Tips for an Inexpensive Kids Bedroom

    Tips for an Inexpensive Kids Bedroom

    Grab these quick actionable tips for an inexpensive kids bedroom. This post contains affiliate links and I will be compensated if you click through and make a purchase. 

    Hey everyone, I’m Steph from Crafting in the Rain, and I think it’s so fun that Adelina has asked me here to share my girls’ room with you! 


    I almost feel like I should give you a couple of disclosures before I jump in here.  What I’m going to show you is not a high end, designer bedroom shopped from a catalog.  It’s also not a knock-off, DIY, cheaper version of previously mentioned $$ bedroom.  I have my fair share of complaints about the room even…(eventually we want to scrape ceilings, replace carpet and baseboards, paint everything, and I wish it was bigger)  


    BUT, I feel like this can be a very useful post because I’m going to show you how we are using the space the best we can, and with cheap or free storage solutions that anyone should be able to come up with.  Additionally, these pics were all taken with my phone because by the time I thought about getting out my real camera, the girls had come home from school and it didn’t look quite as good anymore 😉

    Ok, here we go.


    Storage solution 1: Boxes, boxes, boxes

    In the girls’ room we have boxes from Ikea, magazine file boxes, random cardboard boxes that have been decorated with colored Duck Tape, shoe boxes, and a few plastic boxes. When possible, use boxes with lids so they can be stacked. 

    What they hold: small toys, craft supplies, “treasures,” school papers, jewelry

    Storage solution 2: Wall mounted bookshelves

    Use as much vertical space as possible in a small room (I’d like larger shelves here soon) I made these bookshelves a few years ago when I first started blogging, so the pictures aren’t great, but here’s where I posted about them. The bunk was also against this wall, so the placement isn’t ideal now.

    What they hold: Books that the girls are currently reading, journals.


    Storage solution 3: Bookcase 

    There are two bookcases in the room…one at the end of the bed, and one turned on its side under the wall shelves.  At the end of the bed, most of the before mentioned boxes hang out. The sideways one has 3 baskets in it that hold the majority of the girls’ books.  The baskets keep the books more contained than just trying to line them up next to each other.

    What they hold: Boxes, books

    Storage solution 4: Use under bed space

    Remember having to clean your room as a kid, and you’d get busted for just shoving stuff under your bed?  I say set your kids up for success and use that space!  There are several options too…you can build your own wood boxes with wheels, buy plastic under-bed tubs, or take cardboard boxes and cut them down shorter so they fit!

    What they hold: Littlest Pet Shop, Barbies, houses and cars that go with them.

    And in case you’re interested, here is the tutorial for the ruffle curtains.

    So thanks for having me Adelina!  I hope I’ve given you all some good suggestions for taming kids’ rooms. What are your tips for keeping kids’ rooms organized?


  • 4 Smart Ways to Make Your Design Classy with Wrought Iron

    4 Smart Ways to Make Your Design Classy with Wrought Iron

    Many of us are always looking for a way to spruce up our homes with innovative decorating ideas and unique interior design elements. But sometimes it is tricky to tell if a trend is classic or just a passing fad that will soon make the interior seem outdated. Today’s trends range from hipster to bohemian chic to vintage styles.
     
    A good way to incorporate current trends in a sustainable way is to look for materials that prove timeless and can be used in a variety of decor styles. One popular but classic element is wrought iron. The clean and decorative look of iron can be added to your interior in numerous ways. As blacksmithing rapidly expands as a valued craft, handmade iron pieces are highly sought after to use in both exterior and interior decorating.  If you are looking for a long term, lasting design feature, here are some ways to implement wrought iron into your home.
     

    Make Iron Your Focal Piece

    When it comes to design, adding whimsical touches that reflect your personality and taste is important since you are the one who ultimately sees your decor everyday. Allow your creativity to come out and play with design features that are unique but beautiful. Consider different spiral staircases to showcase your wrought iron design or choose a wrought iron focal piece by the front door that doubles as a coat rack.
     

    Lighting

    Changing out your light features for new wrought iron pieces is a great way to class up your home. Have fun finding a wrought iron chandelier that utilizes faux candles for light, or hang lanterns and sconces on the wall. Decorate with wrought iron candlesticks for a spin on a traditional classic. With lighting fixtures and candle holders, you can range from a serious statement piece to a simple touch of this classic element.
     

    In the Dining Room

    Wrought iron furniture can bring a subtly industrial look to your room’s design. Coffee tables that are wrought iron with a glass table top surface or an iron table with a granite slab attached can both be unique ways to incorporate the look of black iron which matches almost any style. Different from traditional wood, wrought iron can be used in conjunction with wood for an alternative spin in your dining room.
     

    Wrought Iron Accents

    Accent pieces like wrought iron clocks, door handles, fireplace details or ornate wall pieces such as mirrors add eye catching detail to high-visibility areas. Simple iron pulls on cabinet doors can beautiful a kitchen, bath or bedroom. Doorknobs add a distinct style against wood. Using wrought iron for cabinetry hardware or as door hinges and locks enhances the appearance of natural wood without dominating the room’s over all design.
     
    When it comes to decorating your home, think outside of the box using different materials to improve your home’s style. You might even fall so in love with wrought iron that you’ll start using it everywhere. 
     
    Author Bio
    Jessica Socheski is a freelance writer who loves researching home remodeling projects and finding new ways to decorate. You can connect with her on Google+
  • 14 Crafty Ways to Reuse Pie Pans

    14 Crafty Ways to Reuse Pie Pans

    The holidays bring my favorite dessert – pie! What do you do when you find yourself with a stack of pie pans though? These 14 ideas are sure to inspire you to reuse pie pans in a myriad of ways. 


    Thanksgiving is upon is! Family, football, Macy’s Parade, and Food. Lots of Food. Which will usually equate to lots of trash as well. Styrofoam cups, paper plates, cans, napkins, and pie pans. So many pie pans!

    Did you know about 50 million pumpkin pies are eaten at Thanksgiving? (source)  That is a lot of pumpkin pie, and I highly doubt that even half of those are made at home in a reusable pie plate. Add to that fact, that some people out there just don’t like Pumpkin pie – raising my hand – so then we’ve got apple pie, cherry pie, strawberry rhubarb pie, and my personal favorite cheesecake!
     
    I’ve talked recently about how we can reduce our waste by buying products in cartons, but what are we going to do with these pie pans?  Lucky for you, I’ve been brainstorming, and have a pretty awesome list to reuse pie pans. 
     

    14 Crafty ways to Reuse Pie Pans after Thanksgiving 


    Garden Stones.
    Fill with cement, and add sparkly things like bead
    s for a bright garden stone. These make great Grandparent gifts too. 

    Bake more pies.  I think this is pretty obvious. Also a great way to make pies for neighbors or potlucks without worrying about getting your dish back. 

    Kids Crafts. Things like a bird feeder, addition to a costume (think tin man), a mask, Frisbee, boat, the uses are endless here. 

    Sensory Play.  Have you seen sensory play pins? Something like this Frozen Sensory bin could easily be recreated in a pie tin. 

    Pet Bowls for on the go. Keep one or two in the car, for travelling with pets. Fill with water for a quick drink on the go

    Make a Veggie Basket for the grill. (Source)

    Store leftovers.  If you get the tins with the lids, save those lids and use the tin and lid to store leftovers, or to keep your husbands dinner warm if he has a late night (or wife if she’s the one working)

    Husbands lunchbox. Again hang onto the lids, and send your spouse to work with a meal in a tin. 

    Recreate Cafe Rio favorites at home. If you’ve never been to Cafe Rio, this might not make sense. You get a huge burrito, with beans and rice on the side, all served in what looks similar to a pie pan, but with higher sides. Save some money and recreate these favorites at home. I suggest trying this Cafe Rio Sweet Pork

    Recycle. If you’d rather not keep them around the house, then please recycle them. Give them to a crafty friend, or put in your recycling bin

    Christmas Ornaments.  I found this fun idea over on Thrifty Fun.  It would be easy to recreate with kids.   

    Aluminum ornament made from a pie pan

    Key and wallet Holder.  This one is so simple. Just set the pan on your counter, and request everyone leave their wallet, keys, sunglasses, and other pocket junk in the tin. It will keep your counters looking cleaner, and no one will lose their keys. 

    Screw holder in the garage. Attach multiple magnets to the back of the pie pan. Hang on your garage wall. Whenever you have a loose screw, or nail, or bolt, with no place to put it, toss it into the pan, and it will stick to the magnets. Great garage storage idea from Mark!

    French toast.  This is a tip I actually shared a few years ago, and what inspired me to think further outside the box. I use pie tins (make sure they have no holes) and their lids to soak my french toast in before cooking it up. They can be washed and reused over and over and over again. 

    How will you reuse pie pans this year?


  • Giving Thanks is More than a Holiday

    Giving Thanks is More than a Holiday

    While browsing my Facebook newsfeed this morning I came across this video. It so perfectly summed up how I feel about gratitude and also gave me more to think about. I hope that I live my life in a way that when I’m old and grey I continue to have these same feelings of gratitude for my life.

     
    There were a few parts of this that especially spoke to me

    Giving Thanks isn’t a Holiday. It’s how happy people live

    We never had much money to speak of, but I never felt poor.


    This is linked up to Creative K Kids Thankful Thursdays
    Creative K Kids